
Threading the Heddle Made Easy!
I love weaving. And I love efficiency! Here’s a little trick I learned and pass onto students in my classes. The first time I taught it, they thought it was magical. I hope that you find it useful too!
After you have your warp all wound up and you are ready to thread the heddle, try this:
I love weaving. And I love efficiency! Here’s a little trick I learned and pass onto students in my classes. The first time I taught it, they thought it was magical. I hope that you find it useful too!
After you have your warp all wound up and you are ready to thread the heddle, try this:
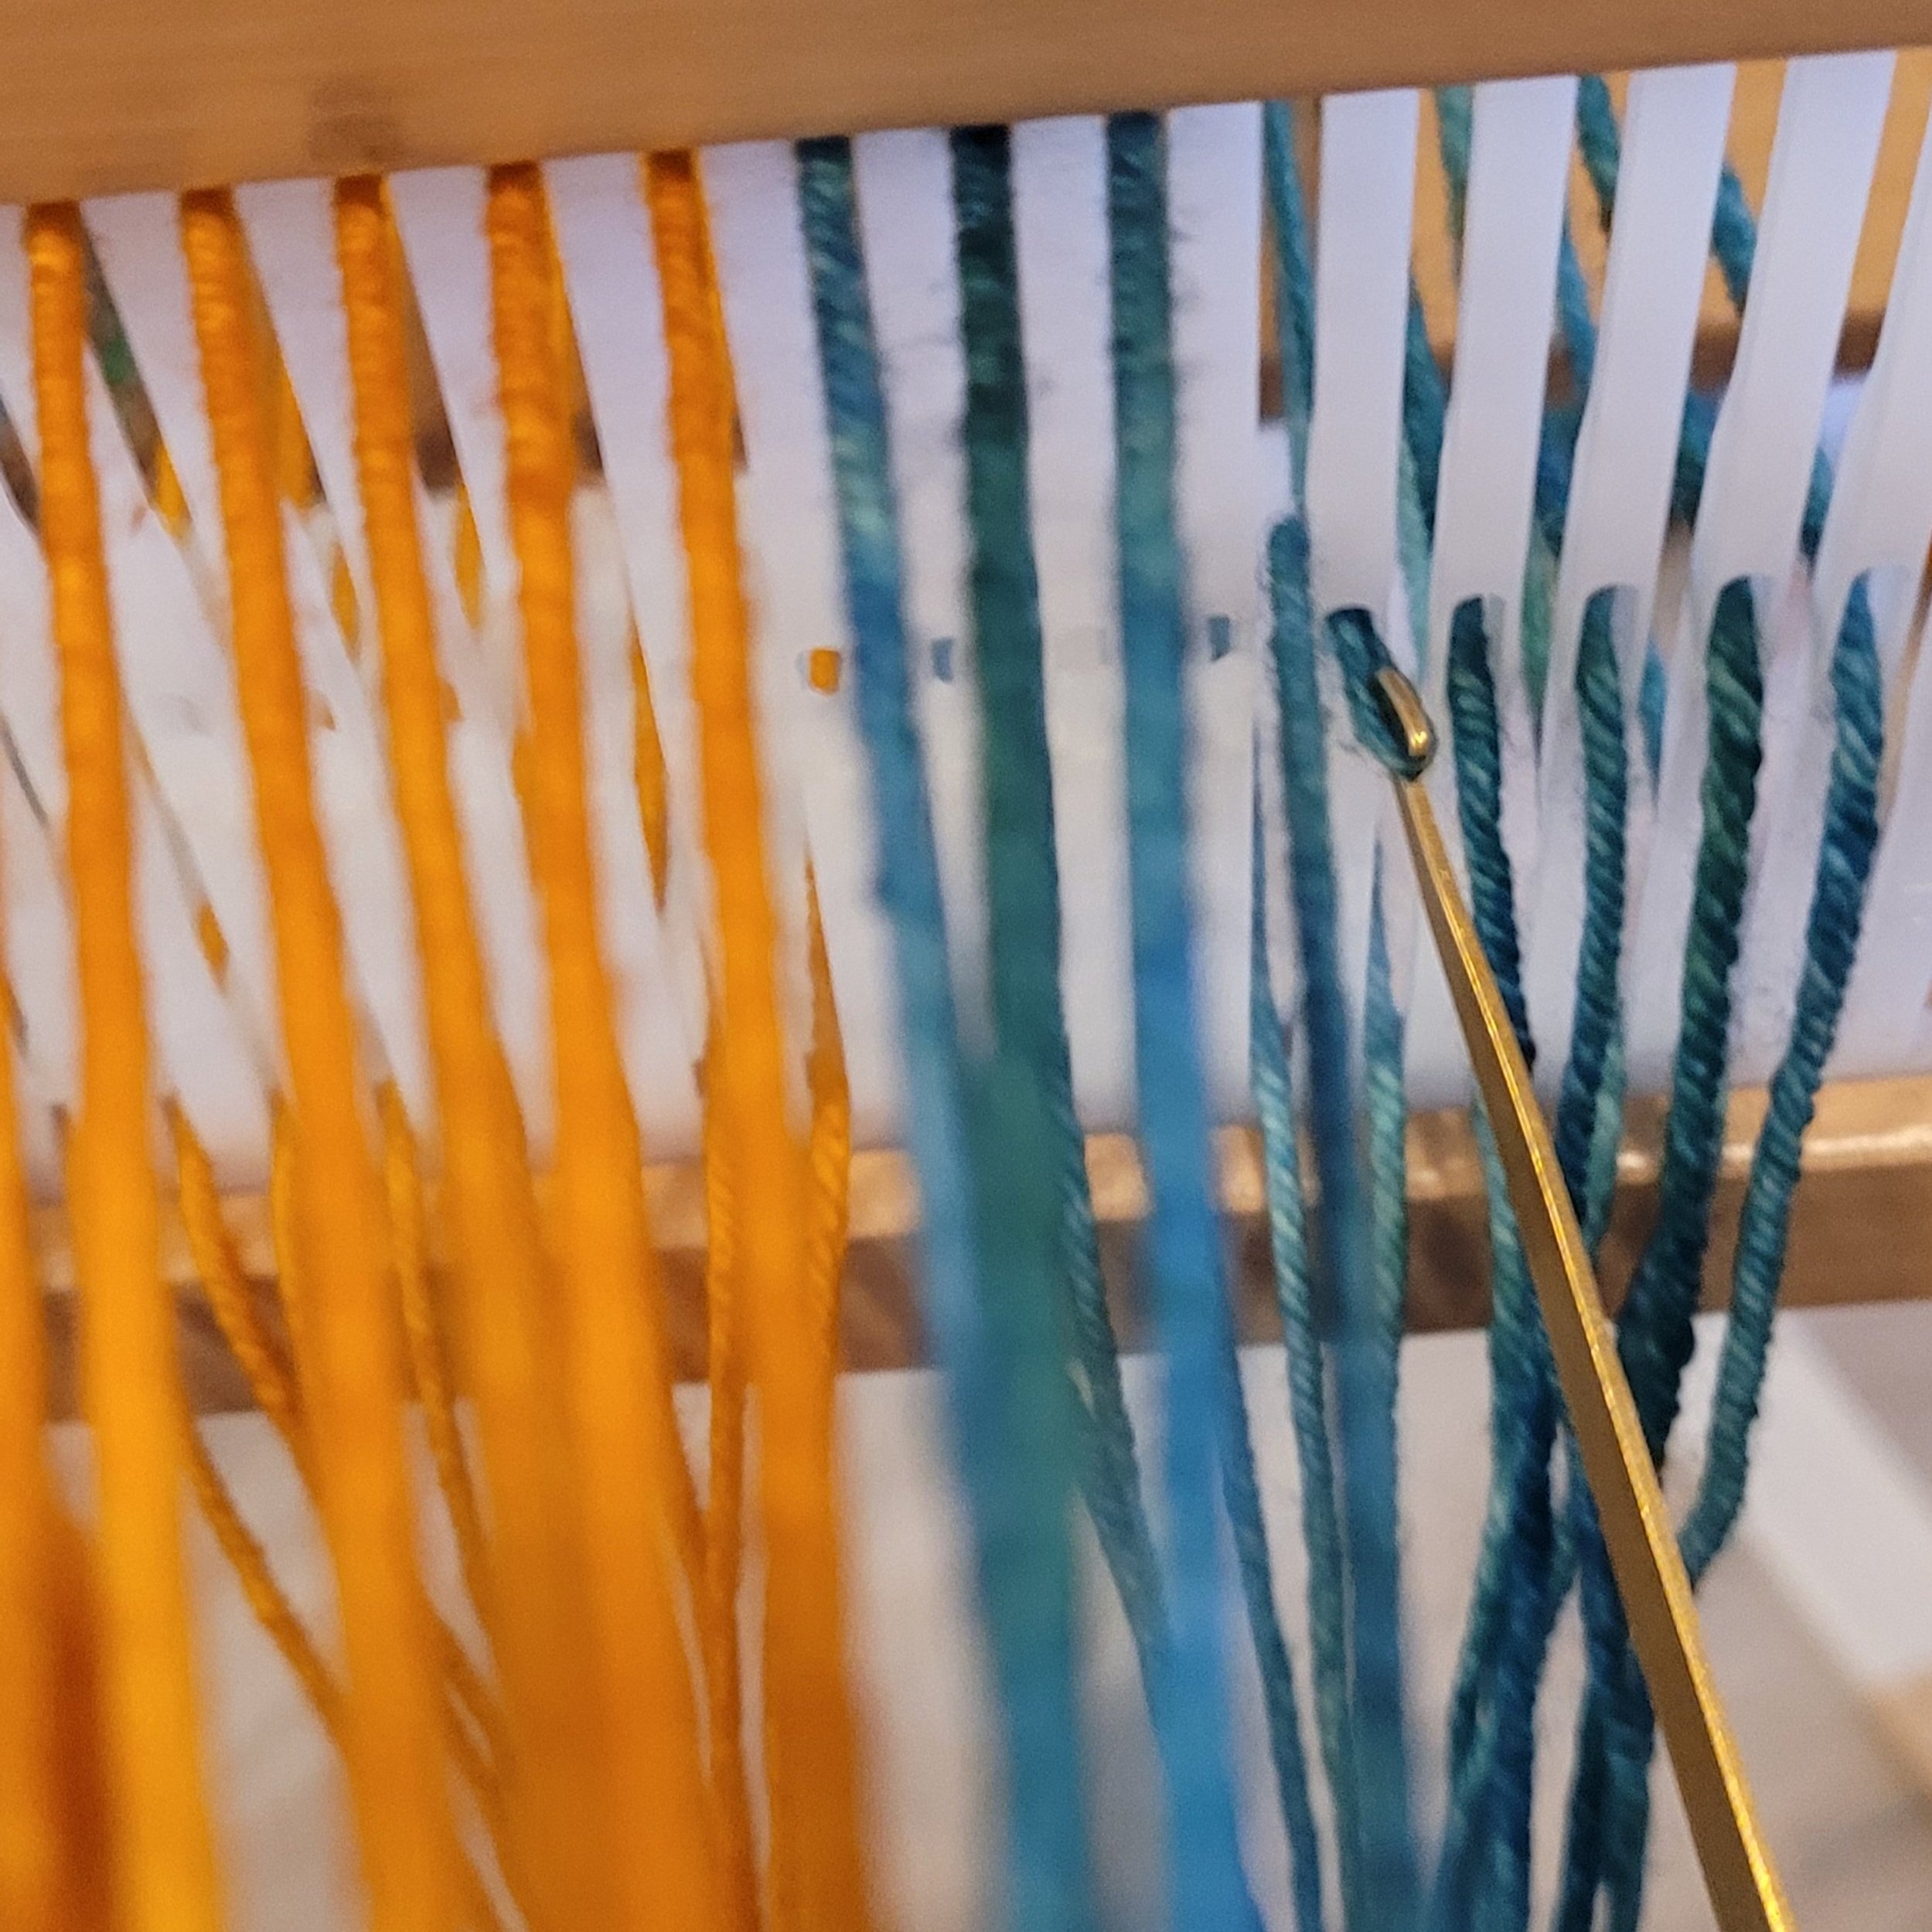
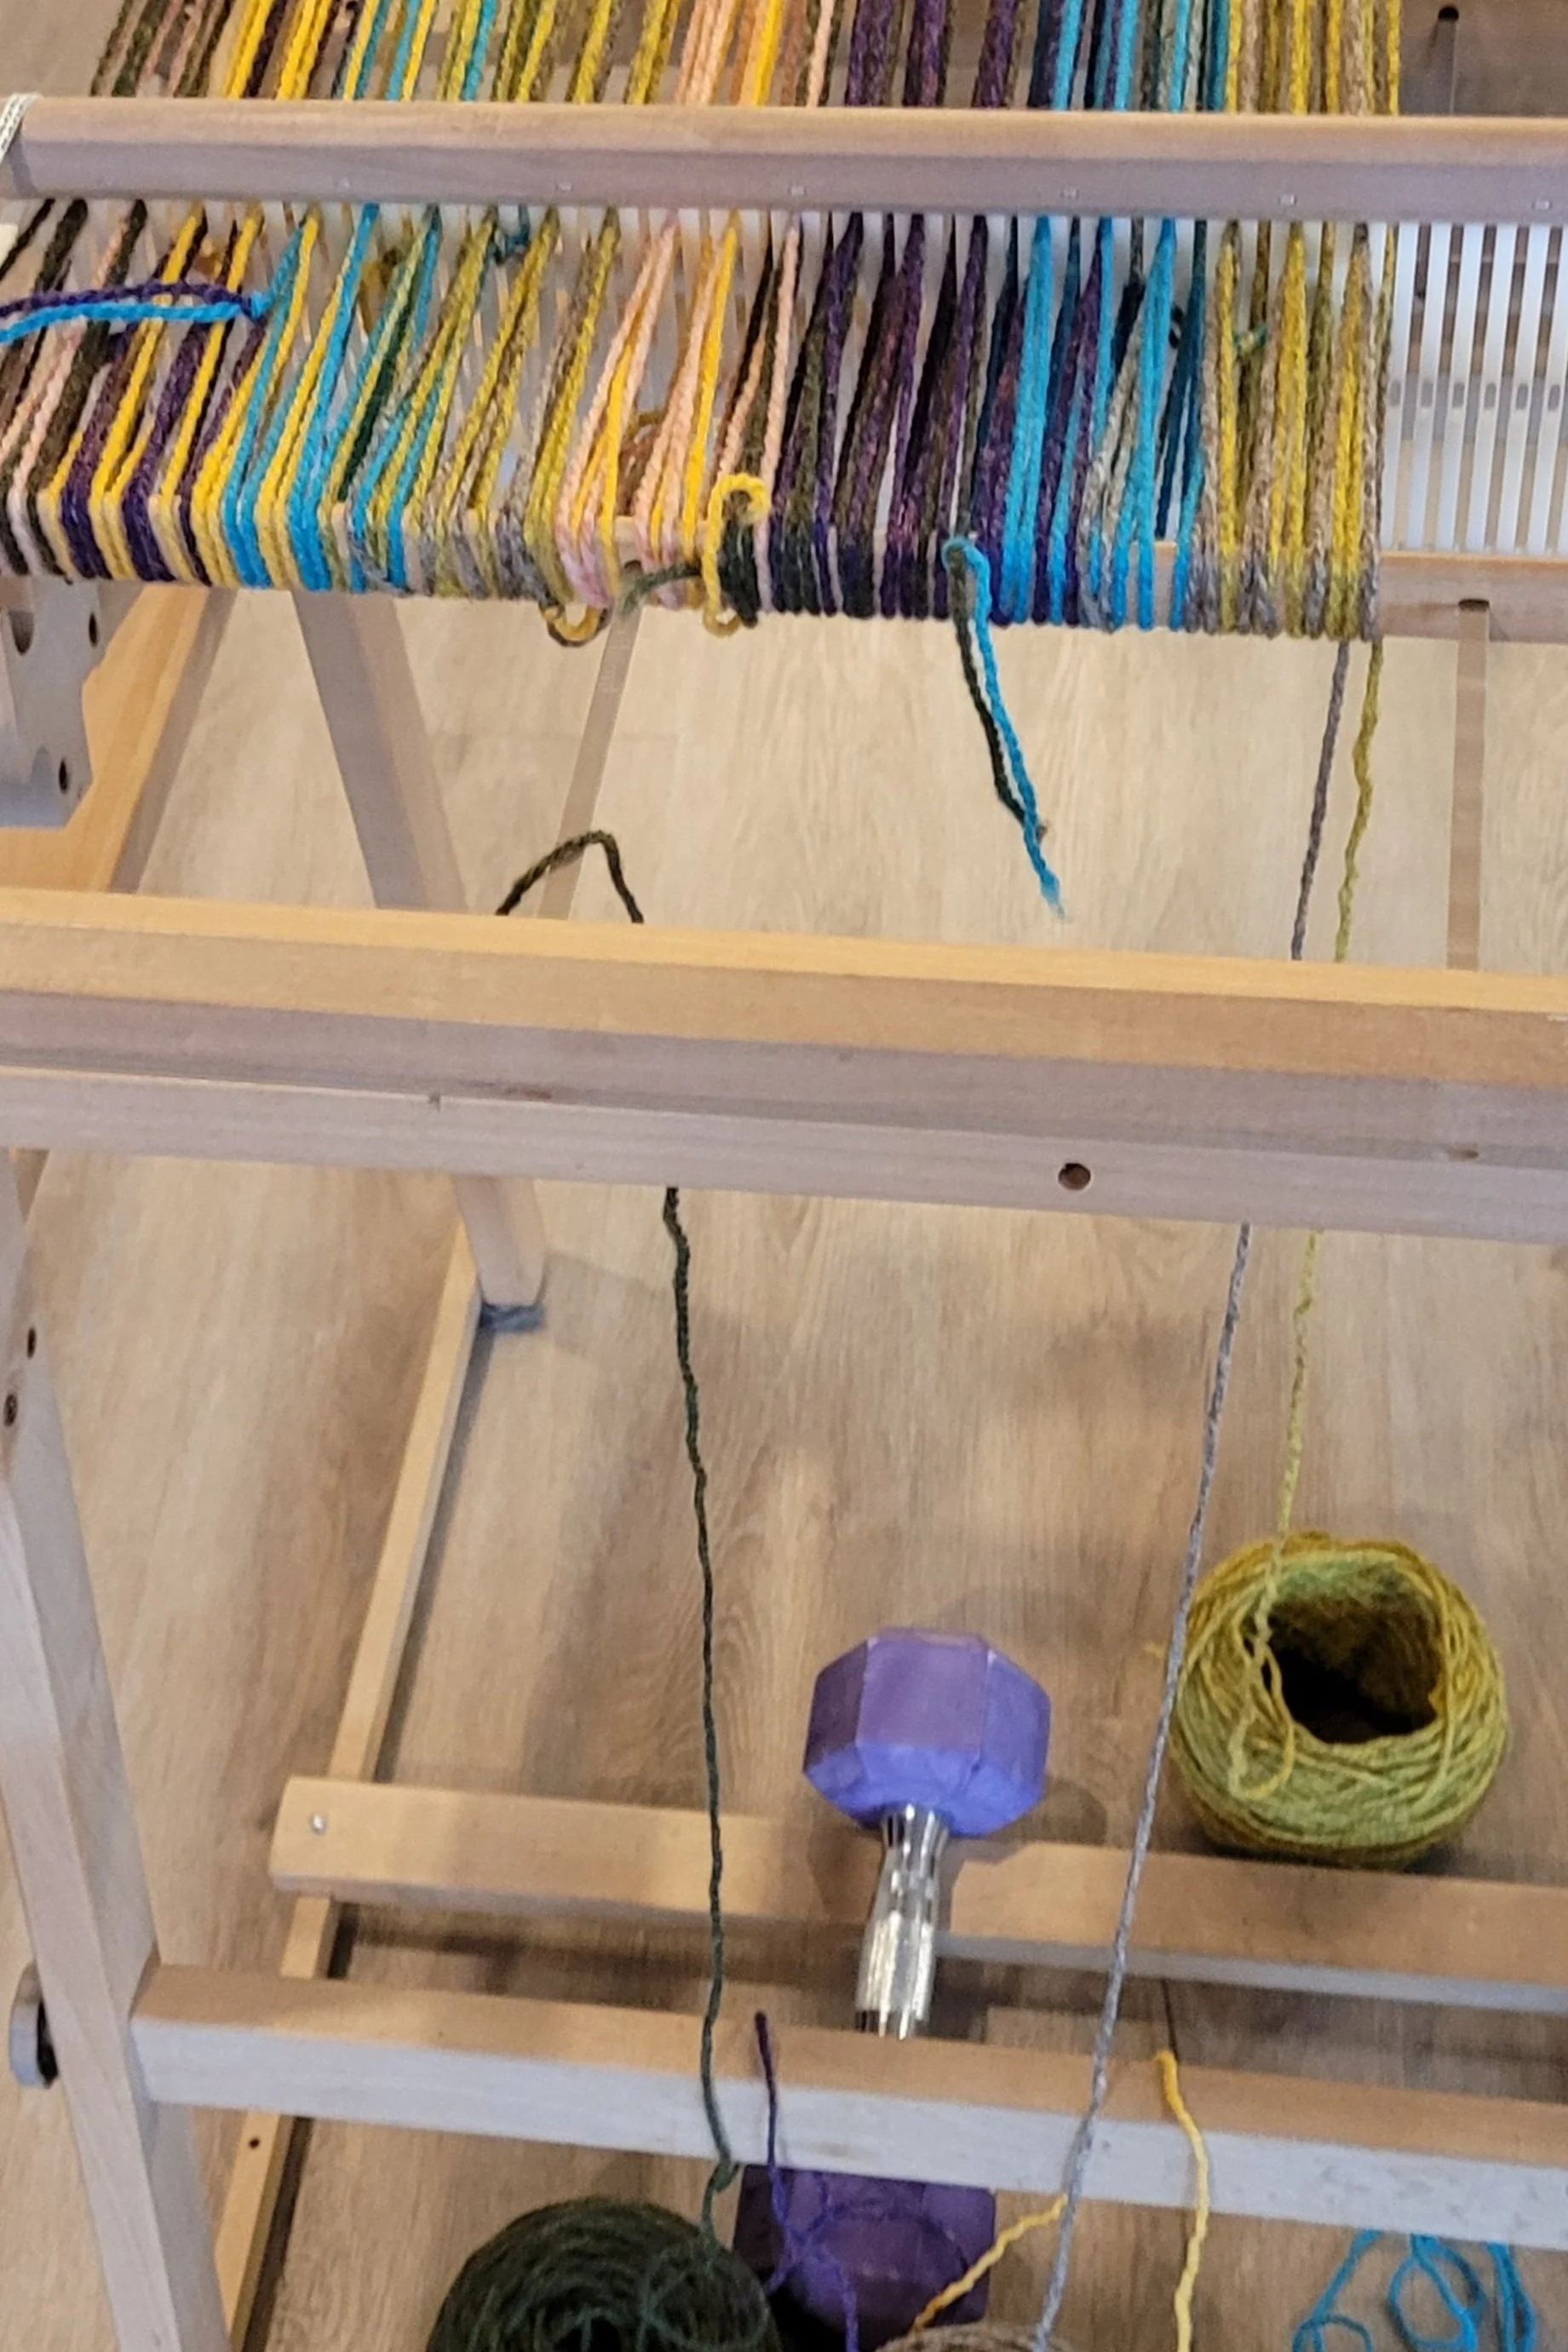
Gather up a handful of ends (it doesn’t matter how many, I’ll gather up a few inches worth).
Holding the ends, pull them out so there is a little tension on them. Using your threading hook, slip the hook under 1 end of each pair. I promise that this gets easier as you practice…and it’s worth slowing down now to be faster later!
Lift up the ends that are on top of the hook and drop the remaining ends. Grab the ends on the hook and hold onto them. These are the ends that you will thread through the holes.
4. Raise up the ends in your hand to the top of the slots. Slip the threading hook through the desired hole. Lower the ends in your hand, hook the warp end you want and pull it through the hole. Repeat across the loom. As you lower the ends, the outer-most end should naturally fall right on the hook for easy hooking. Be sure to tie a slip knot when you are done your bundle so if the reed falls your warp will not fall out!
Weaving isn’t about speed (though I do like efficiency), but I’m pretty convinced that if you give this method a fair try, you will find that it is easier. That it’s also faster is just a side benefit!
Here’s a video.
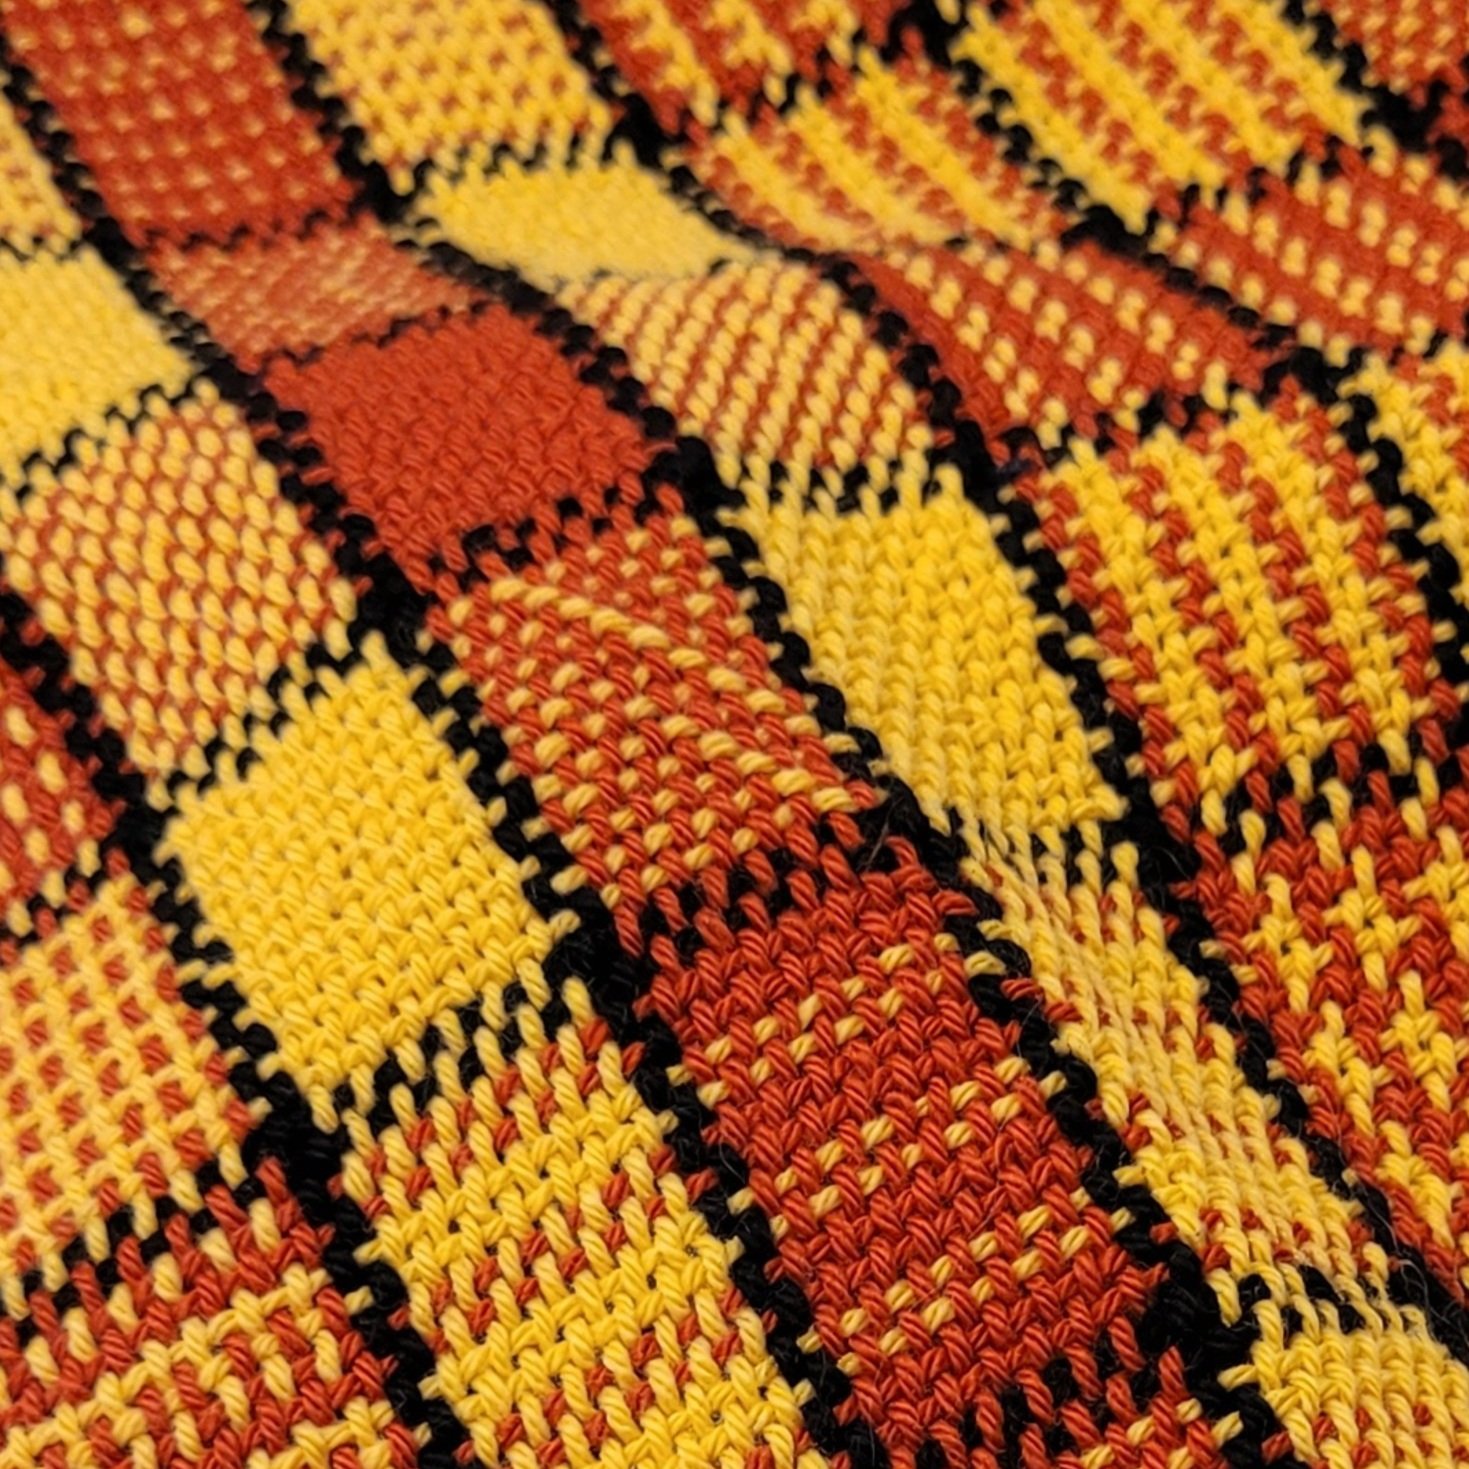
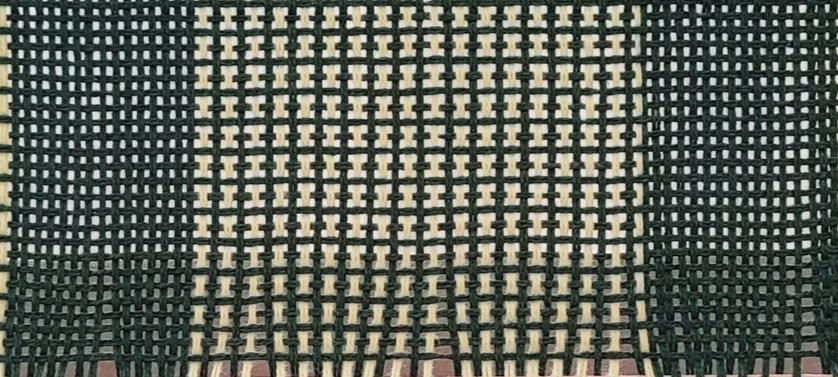
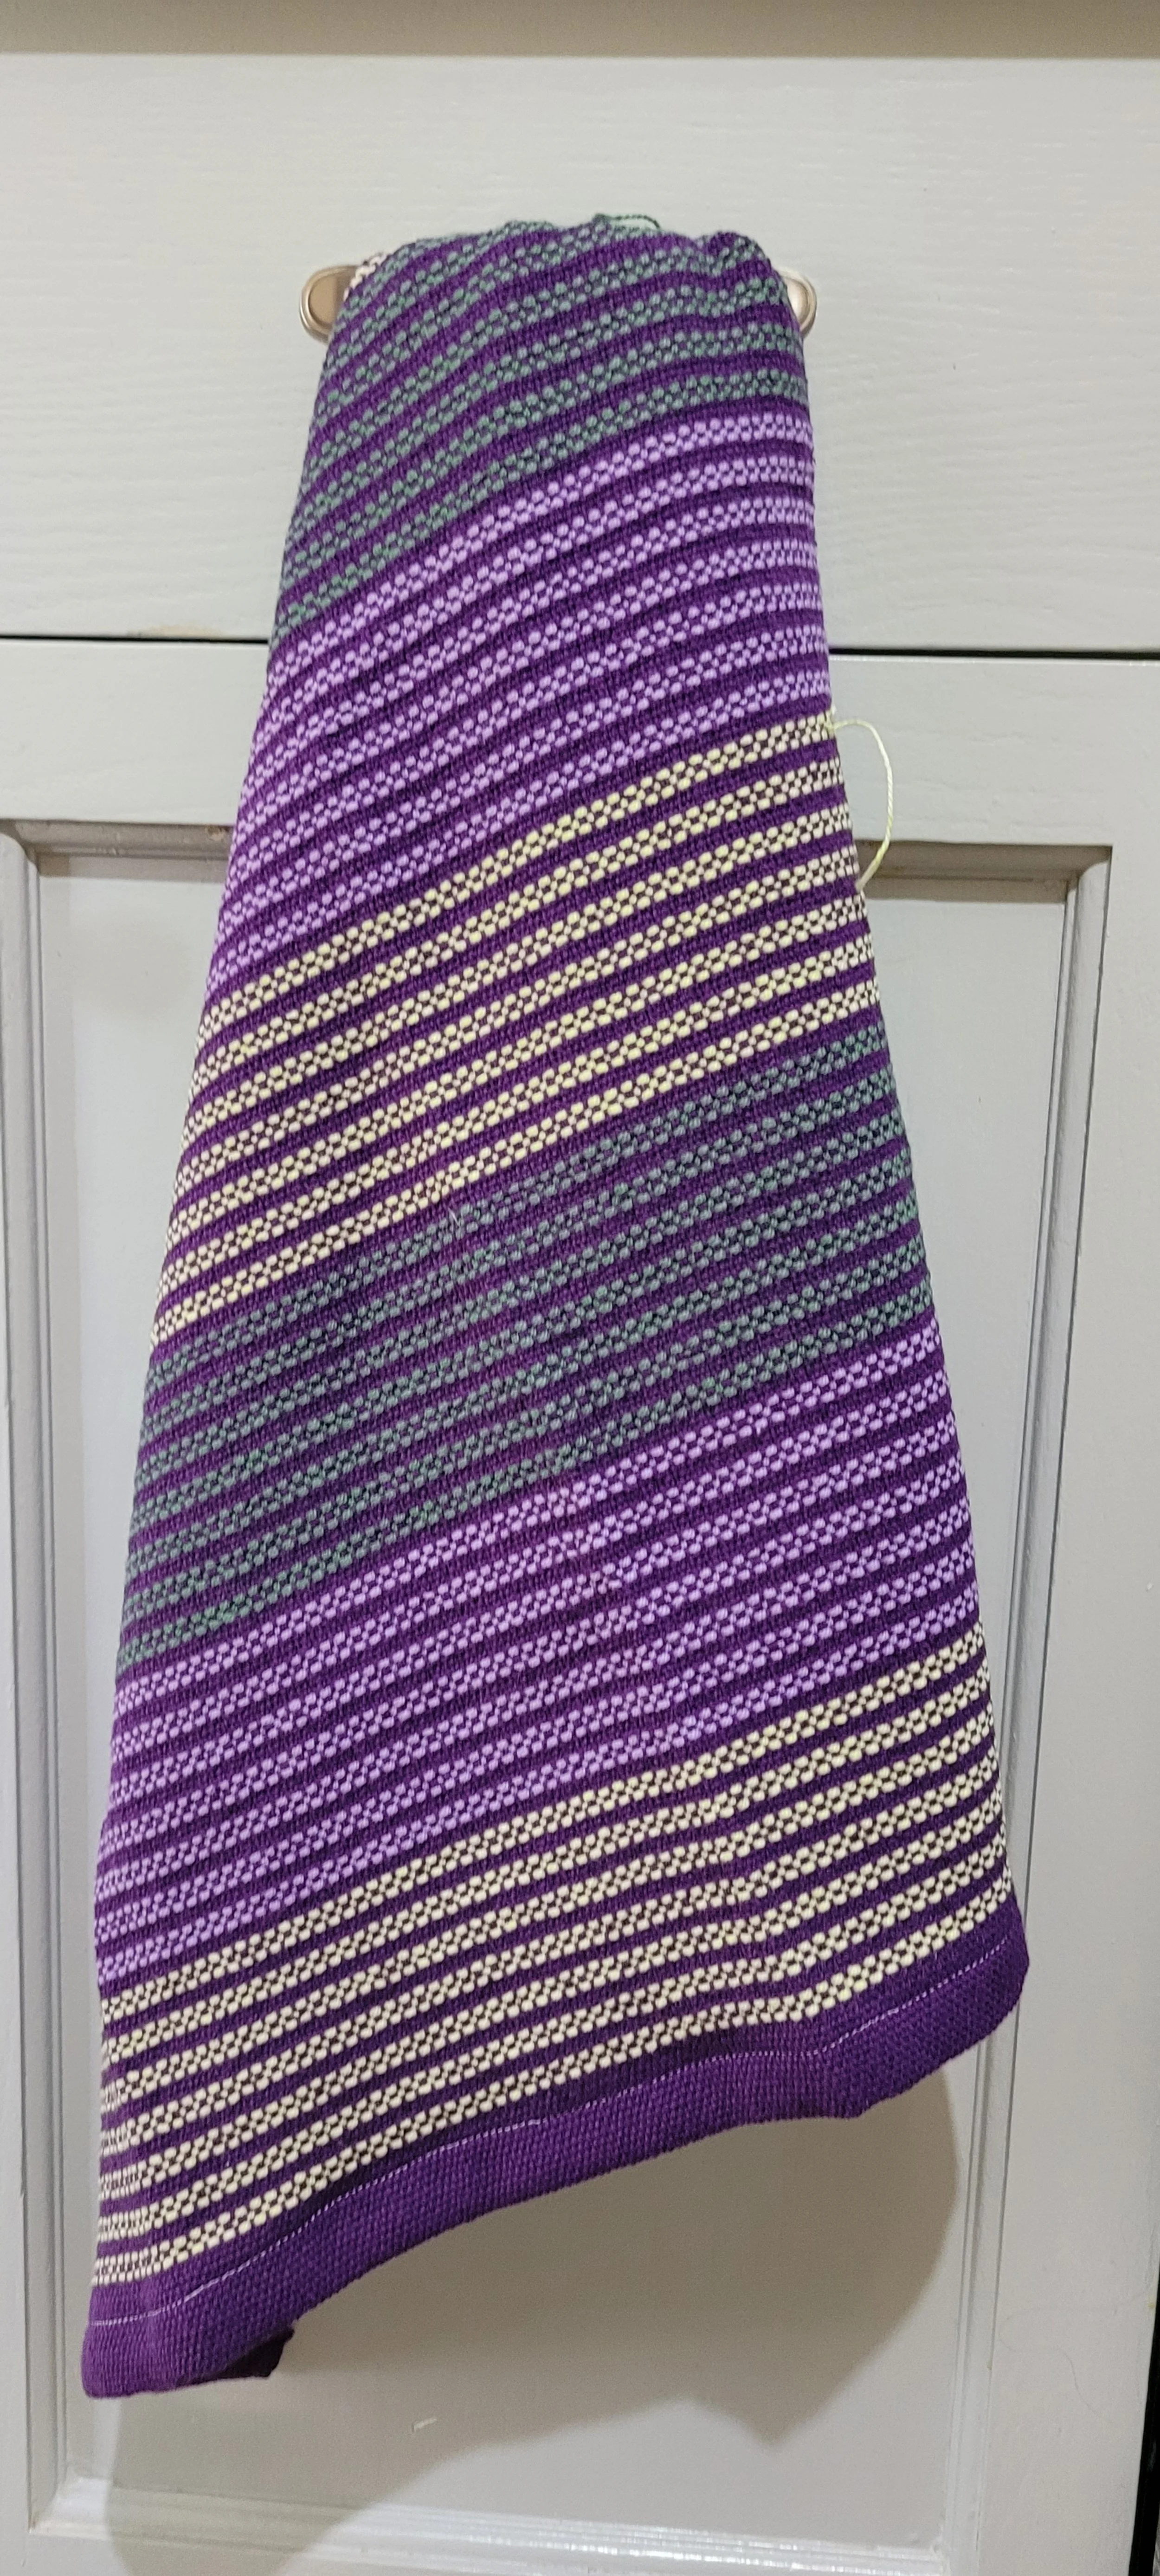
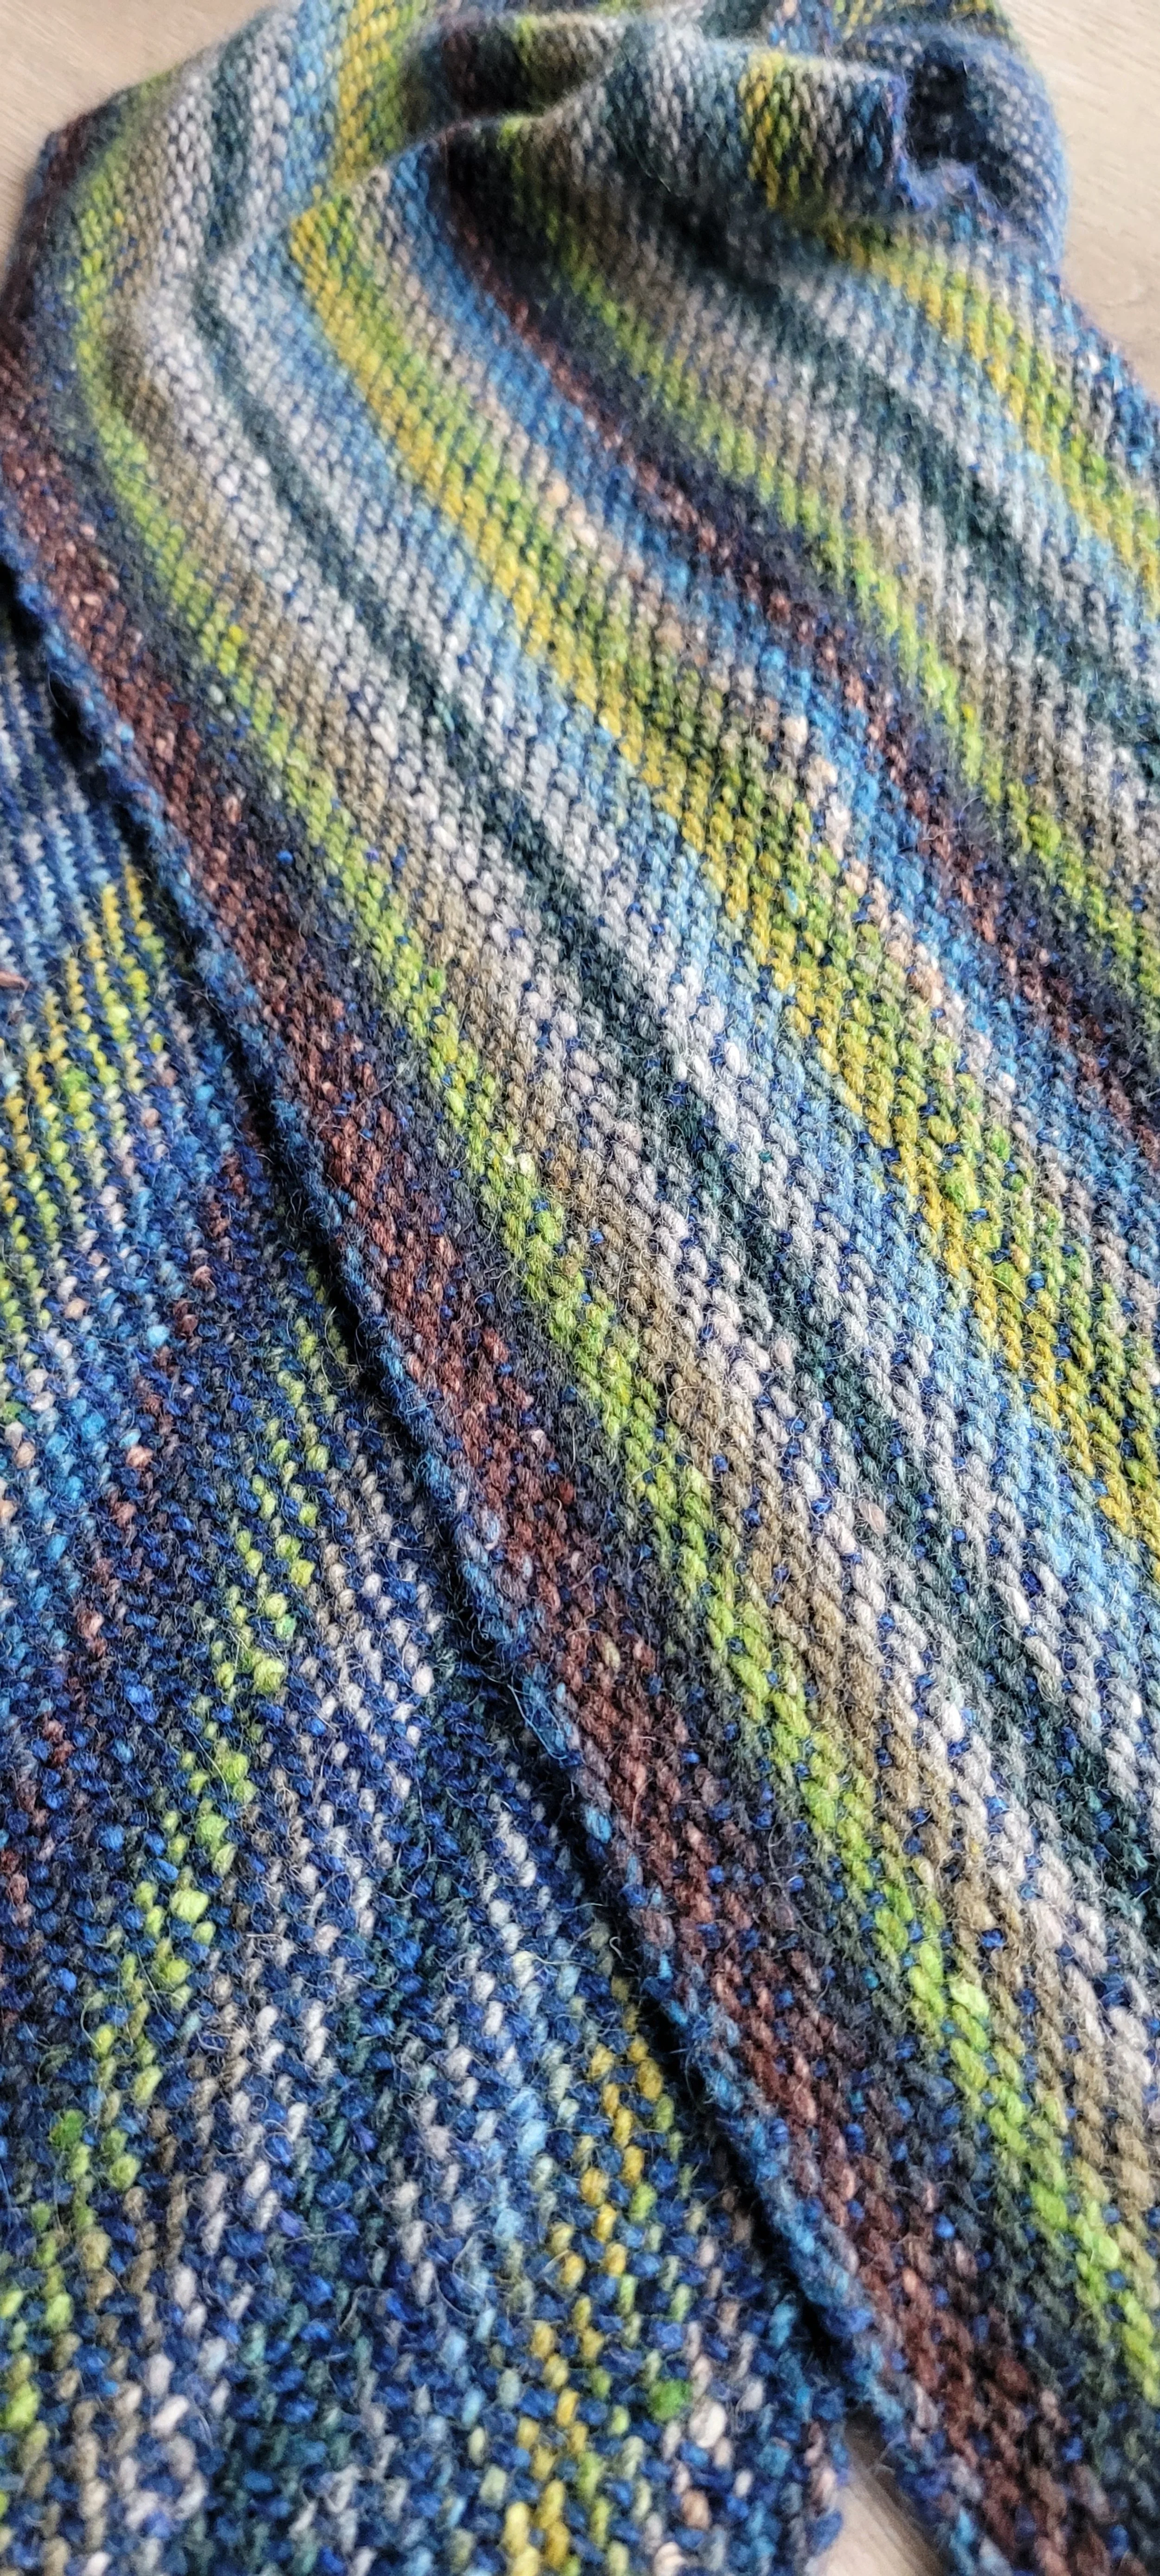
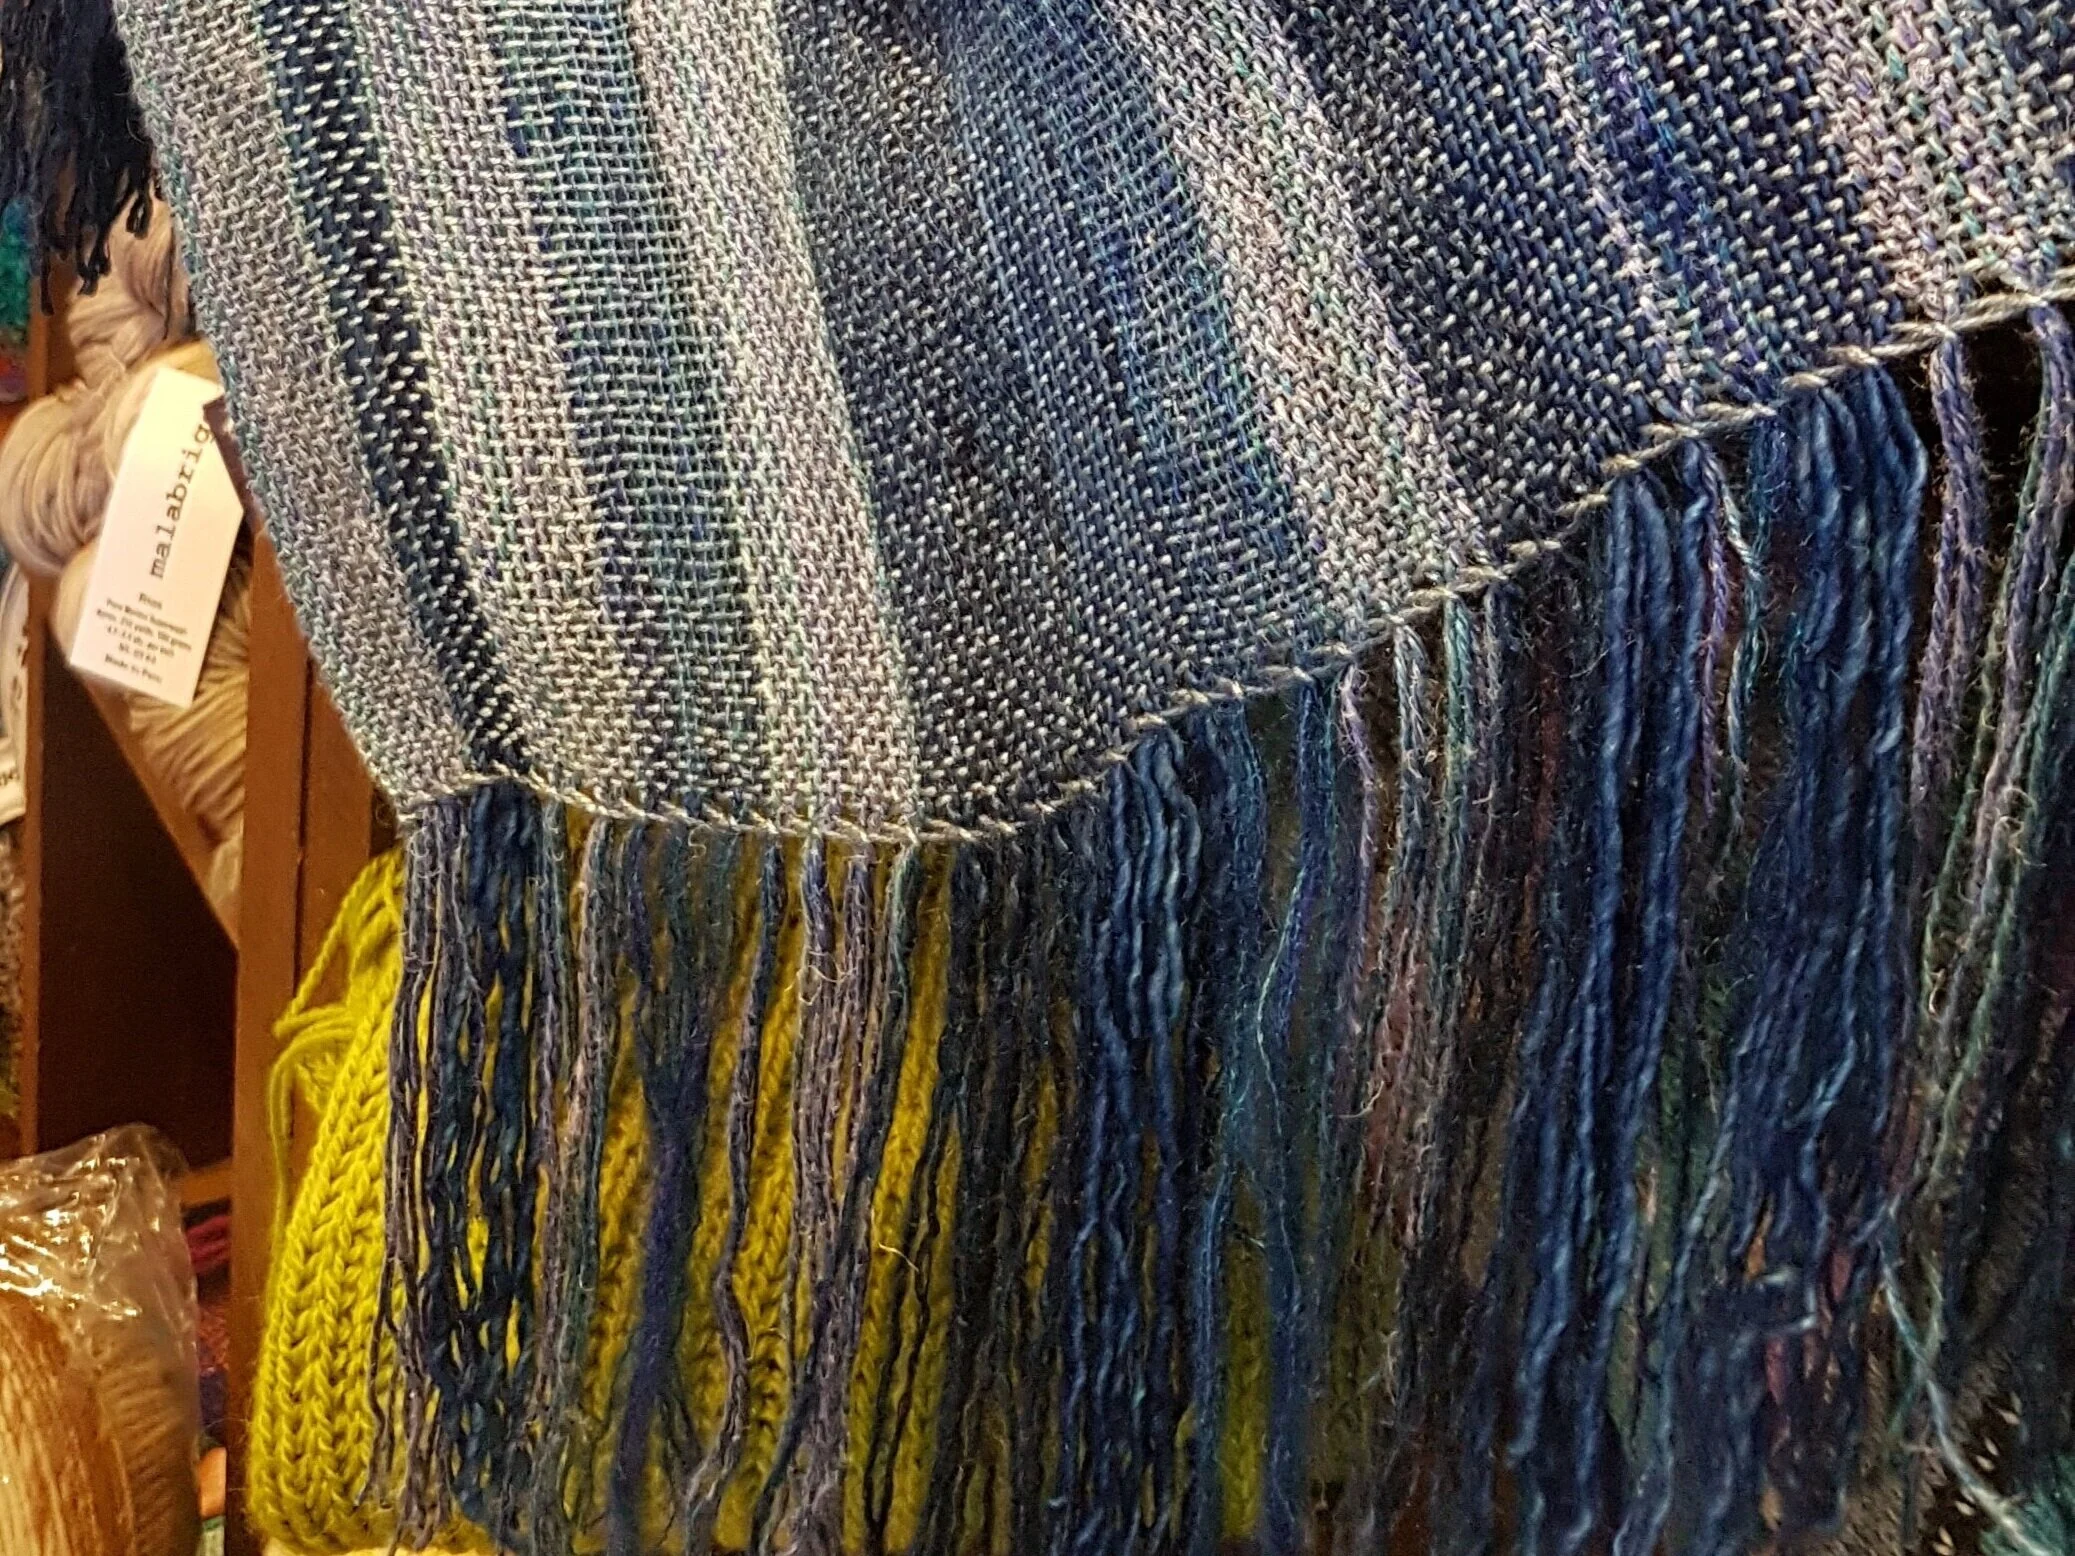
Ready to hone your skills with some practice projects? Here are a couple of patterns perfect for your practice sessions. From left to right: The Tranquility Wrap, My First Scarf and Crossroads Tea Towel.
Happy Weaving!

Why is my Weaving Crooked?
Have you ever been weaving away and suddenly you realize that your weaving is crooked? That one side is way higher than the other? Maybe that happens to you a lot, or maybe on just certain types of projects. For me, this is most likely to happen when I’m working with really fine yarn. Today we’re going to look at possible reasons this happens, how to prevent it, and how to fix it if it does happen.
Have you ever been weaving away and suddenly you realize that your weaving is crooked? That one side is way higher than the other? Maybe that happens to you a lot, or maybe on just certain types of projects. For me, this is most likely to happen when I’m working with really fine yarn. Today we’re going to look at possible reasons this happens, how to prevent it, and how to fix it if it does happen.
If you are in Facebook rigid heddle weaving groups looking for solutions, the most common response is tension. *Maybe* the issue is tension. I’ve rarely found this to be the issue for me; though I strongly recommend spending a little extra time learning to warp and wind well. (If your weaving is smiling or frowning, that IS a tension issue.)
I found the answer browsing through comments on floor loom pages. There, the solution is first to make sure your loom is square and second, check your body.
Make sure your loom is square: since you have a rigid heddle, it is hard for it to get out of square…it does not take the beating (see what I did there) that a floor loom does. However, it’s good to go over your loom regularly and make sure all the screws are tight.
Check your body: this is likely where the problem starts. We each have a dominant side. For most it is likely your right side. That side is stronger and might press just a little harder than the left. This will cause the right side to be lower while the left side is higher. I have three solutions.
a) Make sure you are sitting square to the loom and centered in the middle;
b) Move the dominant hand (the hand on the side that is lower) slightly closer to the middle of the reed. Even an inch can make a difference. This changes how you press putting less pressure on the dominant side;
c) If a and b don’t work, move your body slightly to to the higher side…again, just an inch can make a difference.
3. Once you have checked and adjusted as per #1 and #2, pay attention to your reed. I often see weavers pull the heddle forward and have it tilted toward the front of the loom. I recommend tilting the reed toward the back of the loom. When the reed is tilted back, you can see exactly what is going on at the fell line (where the new weft meets the woven work) allowing you to place the weft precisely where you want it. Your eye should do a quick run from side to side to make sure the weft is square. I eyeball it with the cross bar under my loom. Others suggest lining it up with lines you have drawn on your loom. Gently press the weft into place with a single, gentle (like a kiss) movement. If possible, try to refrain from a double or triple beating. Three beats means three chances to press harder on one side!
4. Check your work regularly…as you train your eyes, they will learn to catch the slant as soon as it happens! I can see when it is 1/16” off. (I think my students dread when I do a double-take walking by their work!)

There, four ways to prevent the slant from happening! But what if the slant is there? If you’ve caught it early, less than a quarter inch, pay particular attention to the reed. Press slightly harder on the raised side and less hard on the lower side until everything is even again. It won’t be perfect but it will even out in the wet finishing. If it’s between a quarter and a half inch, use a pin to move the threads to even things out. If it’s more than a half inch you should probably unweave until things are even again.
Happy Weaving!
More On Pick-Up Sticks
I’ve already written a blog covering pick-up sticks, you can read it here. Since writing this blog though, I have learned so much more! So today we’re going to look at combining plain weave and pick-up patterns.
I’ve already written a blog covering pick-up sticks, you can read it here. Since writing this blog though, I have learned so much more! So today we’re going to look at combining plain weave and pick-up patterns.
Combining plain weave with weft floats is easy, just insert the stick and away you go! But adding in warp floats can cause some issues. I did learn how to add plain weave borders to waffle weave, but it was a bit cumbersome. Here’s a video. For a while I was stuck with this and adding waffle weave (or any warp floats) combined with plain weave was too complicated to attempt. Then, as happens when an idea is percolating in your mind for a few months (or in this case, years), the solution just came to me. Two pick-up sticks!
Normally, pick-up sticks are inserted with the heddle in the down-shed and the pick-up stick will go over some ends, but will mostly sit in the shed. If, however, the pick-up stick sits mostly on top of the warp, warp floats are easy! Placed correctly, 2 pick-up sticks can be inserted and used without removing them. One stick will be used to create the weft floats, the other creates the warp floats.

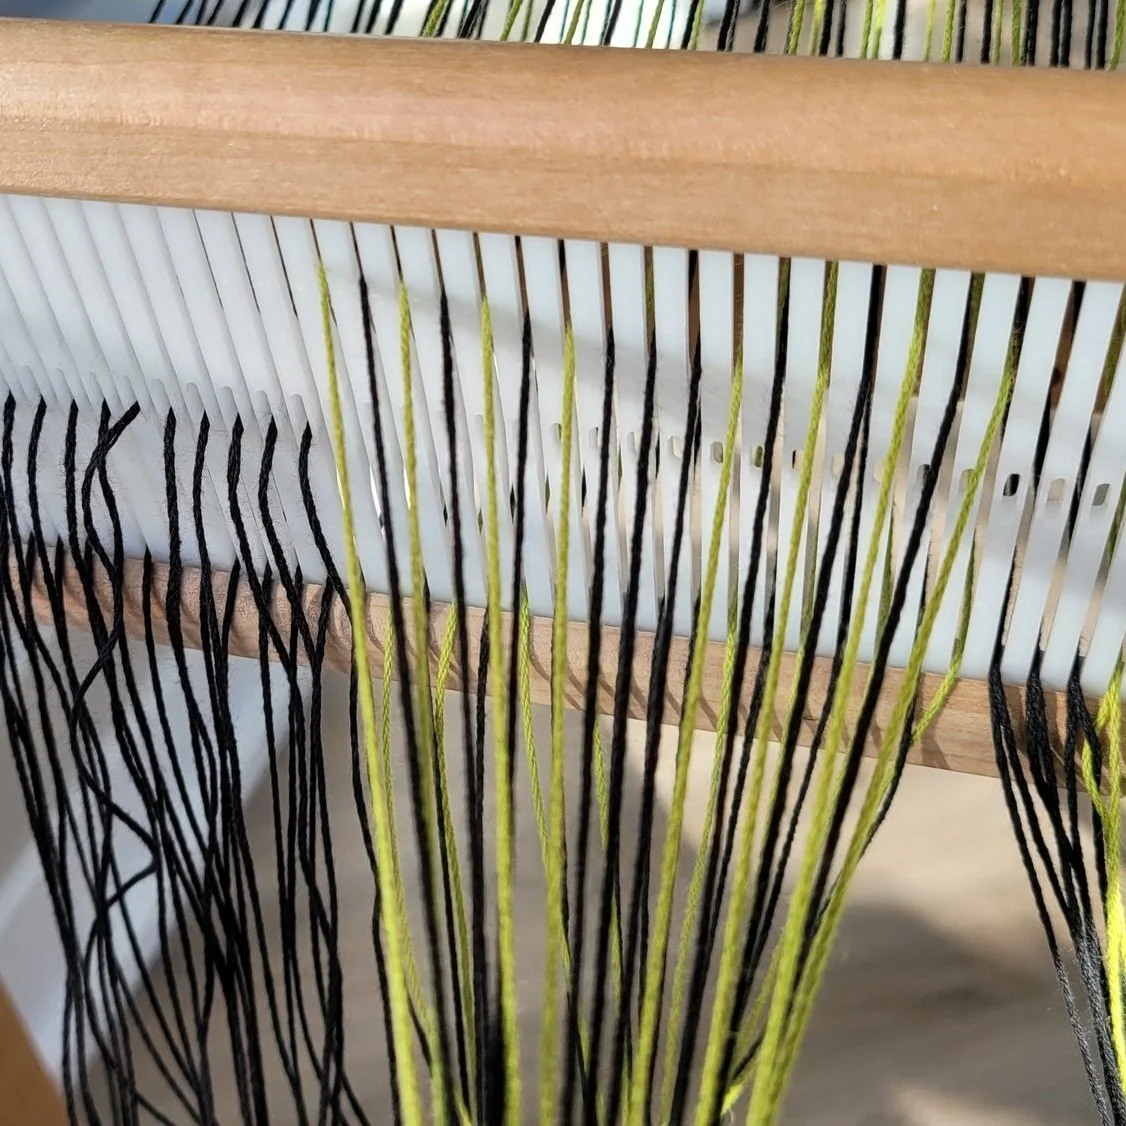
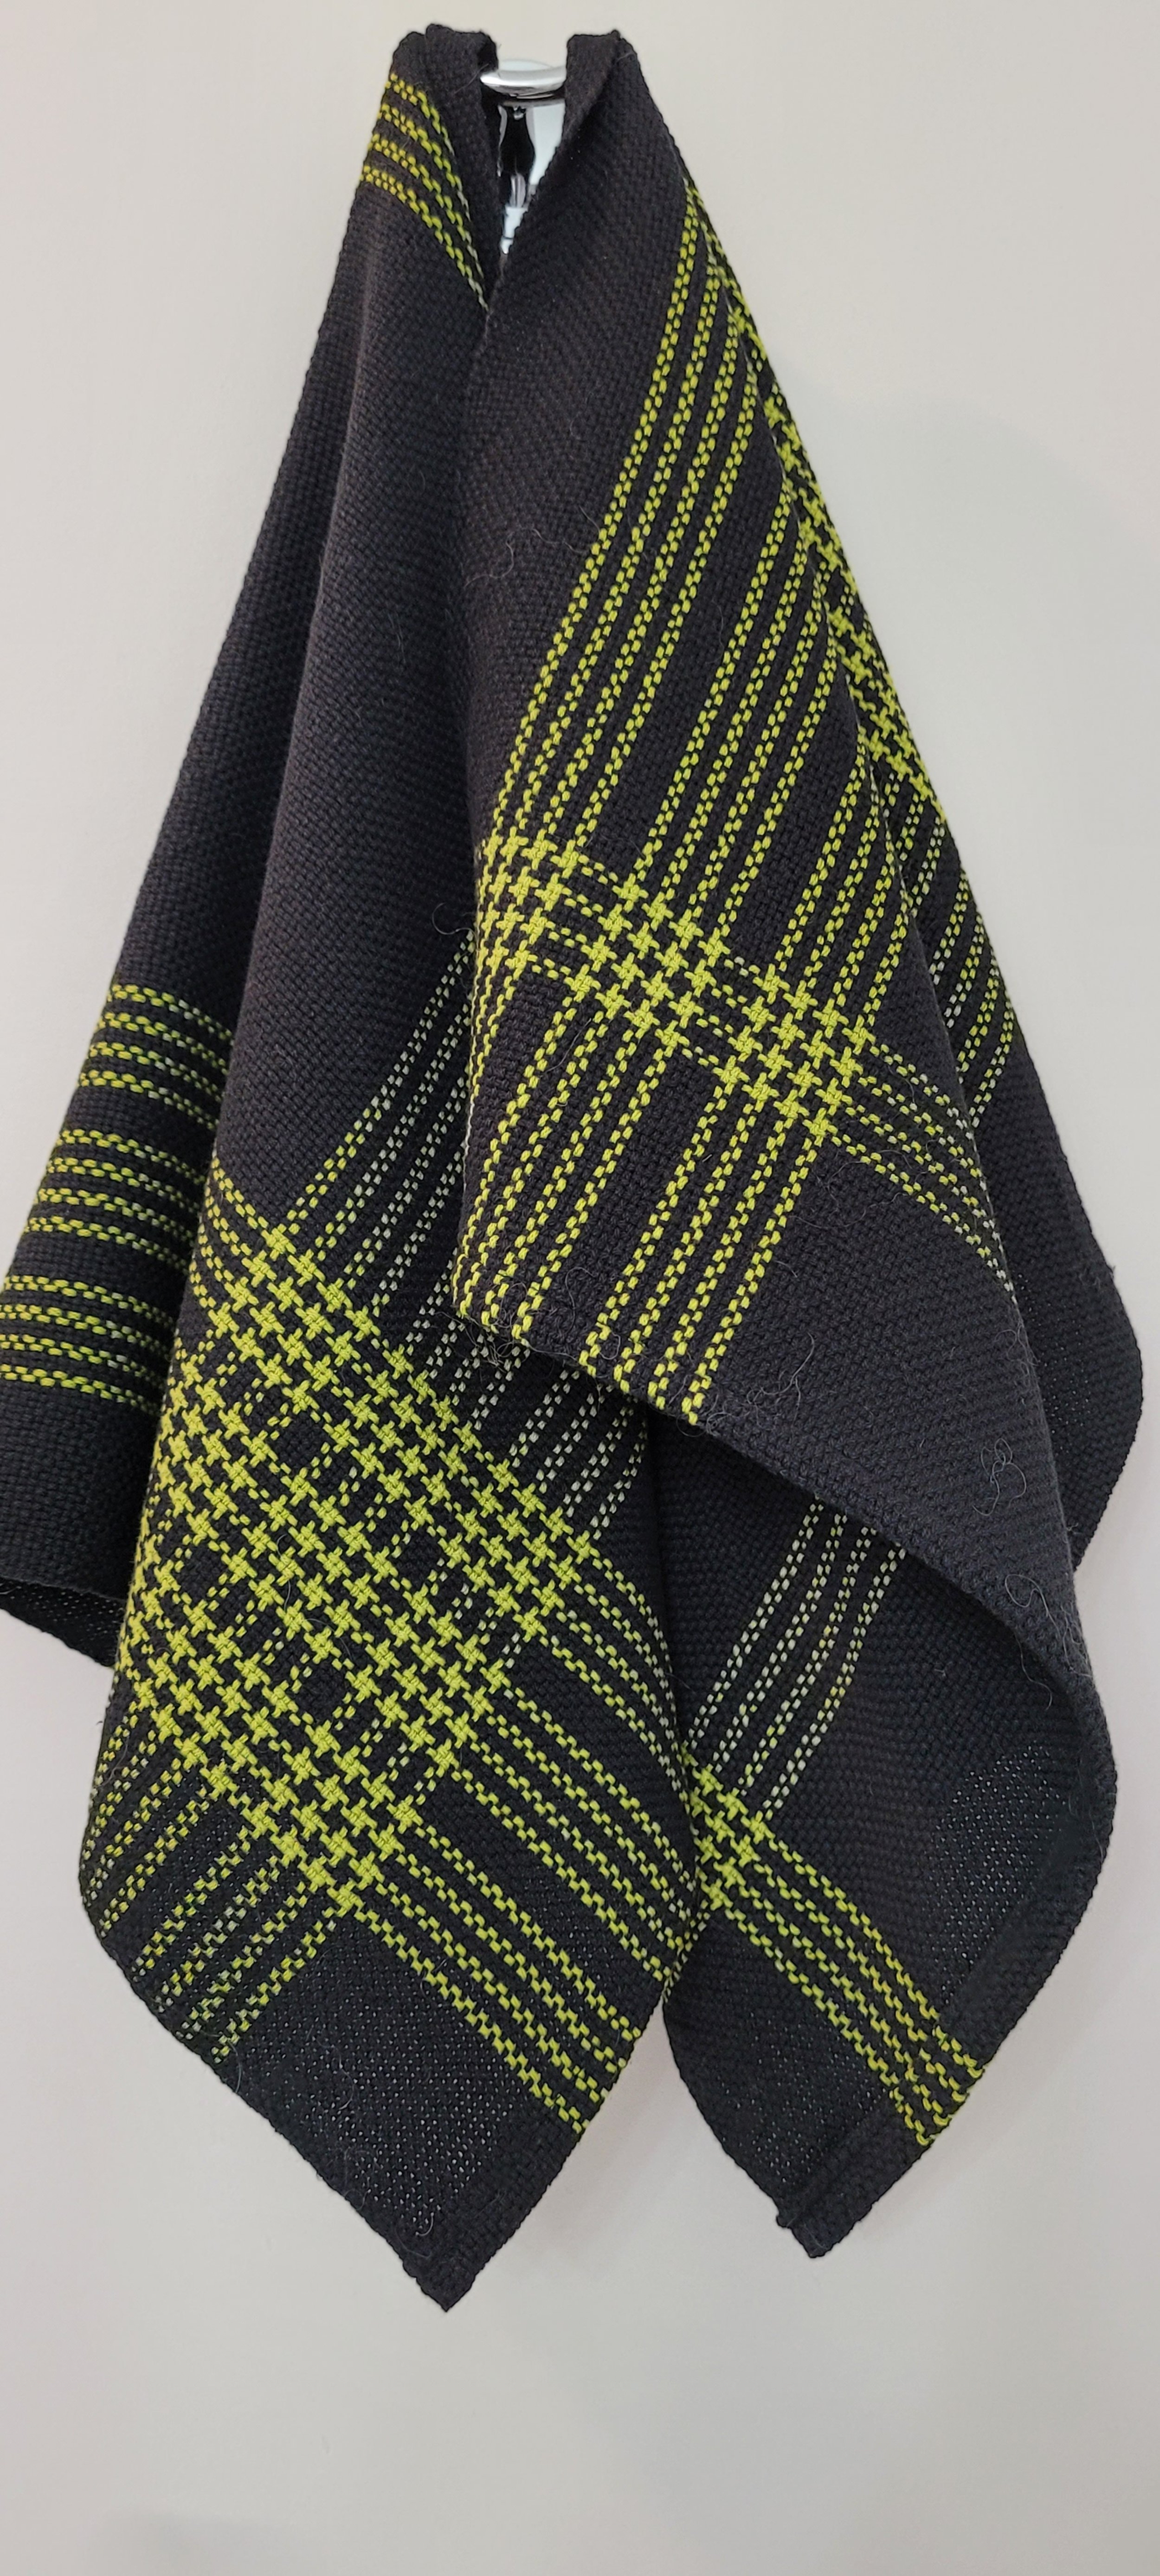
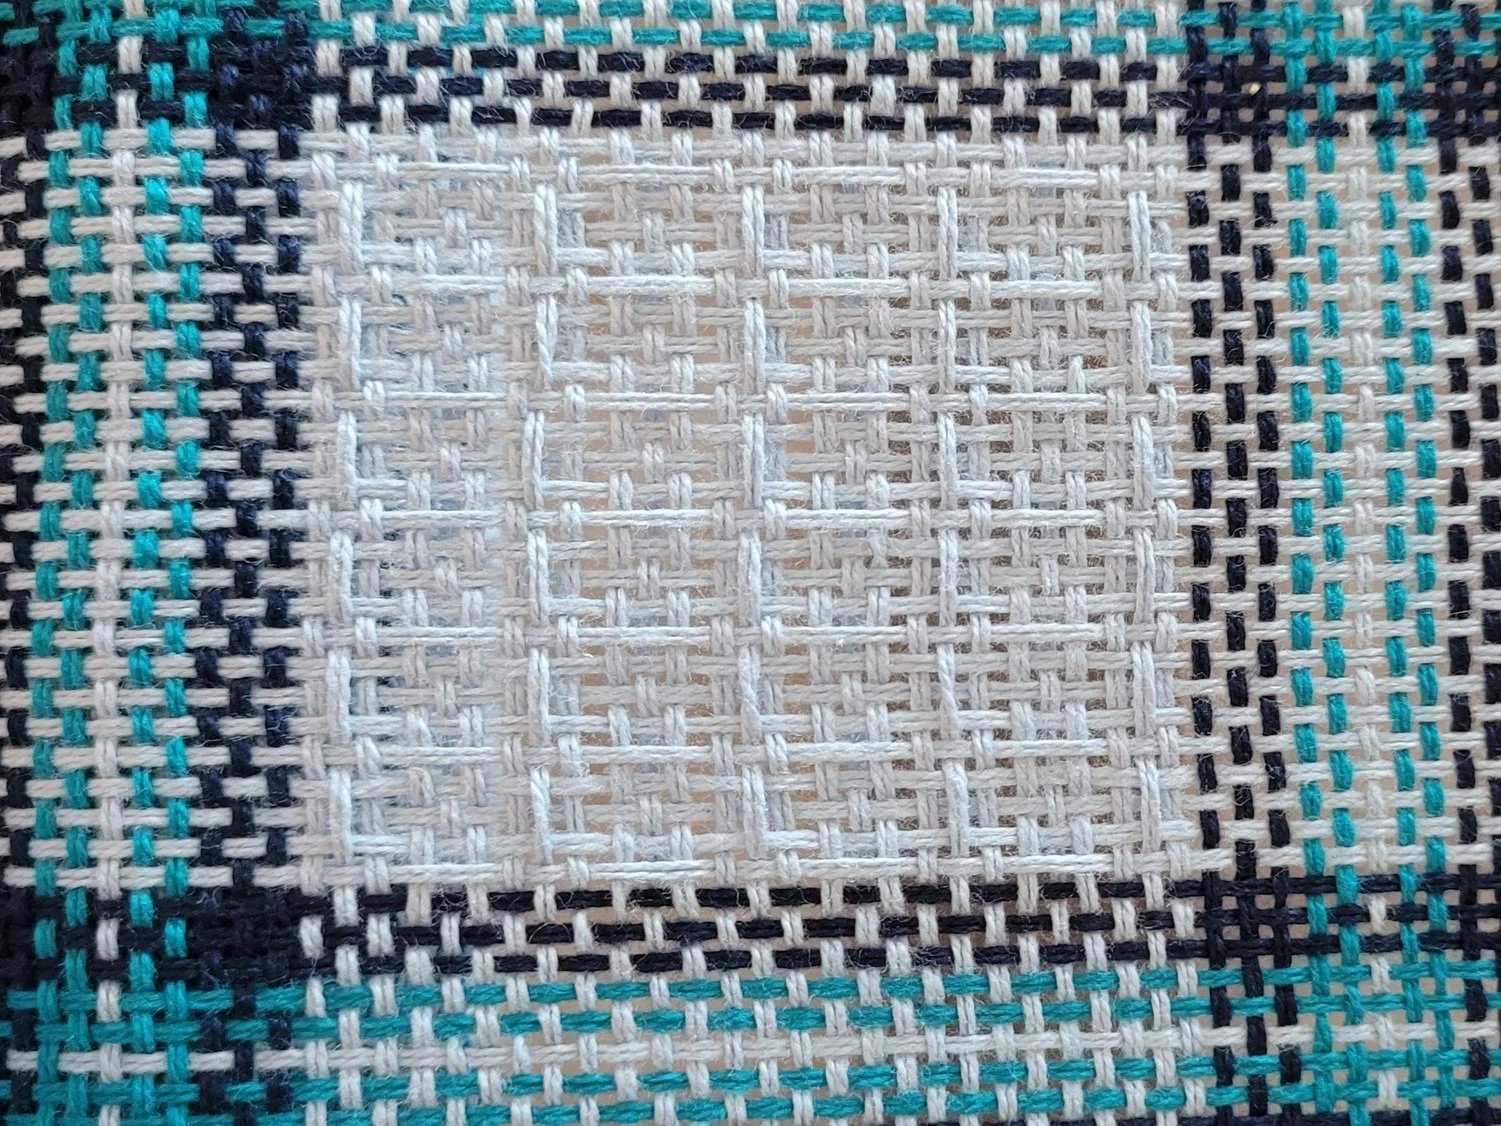
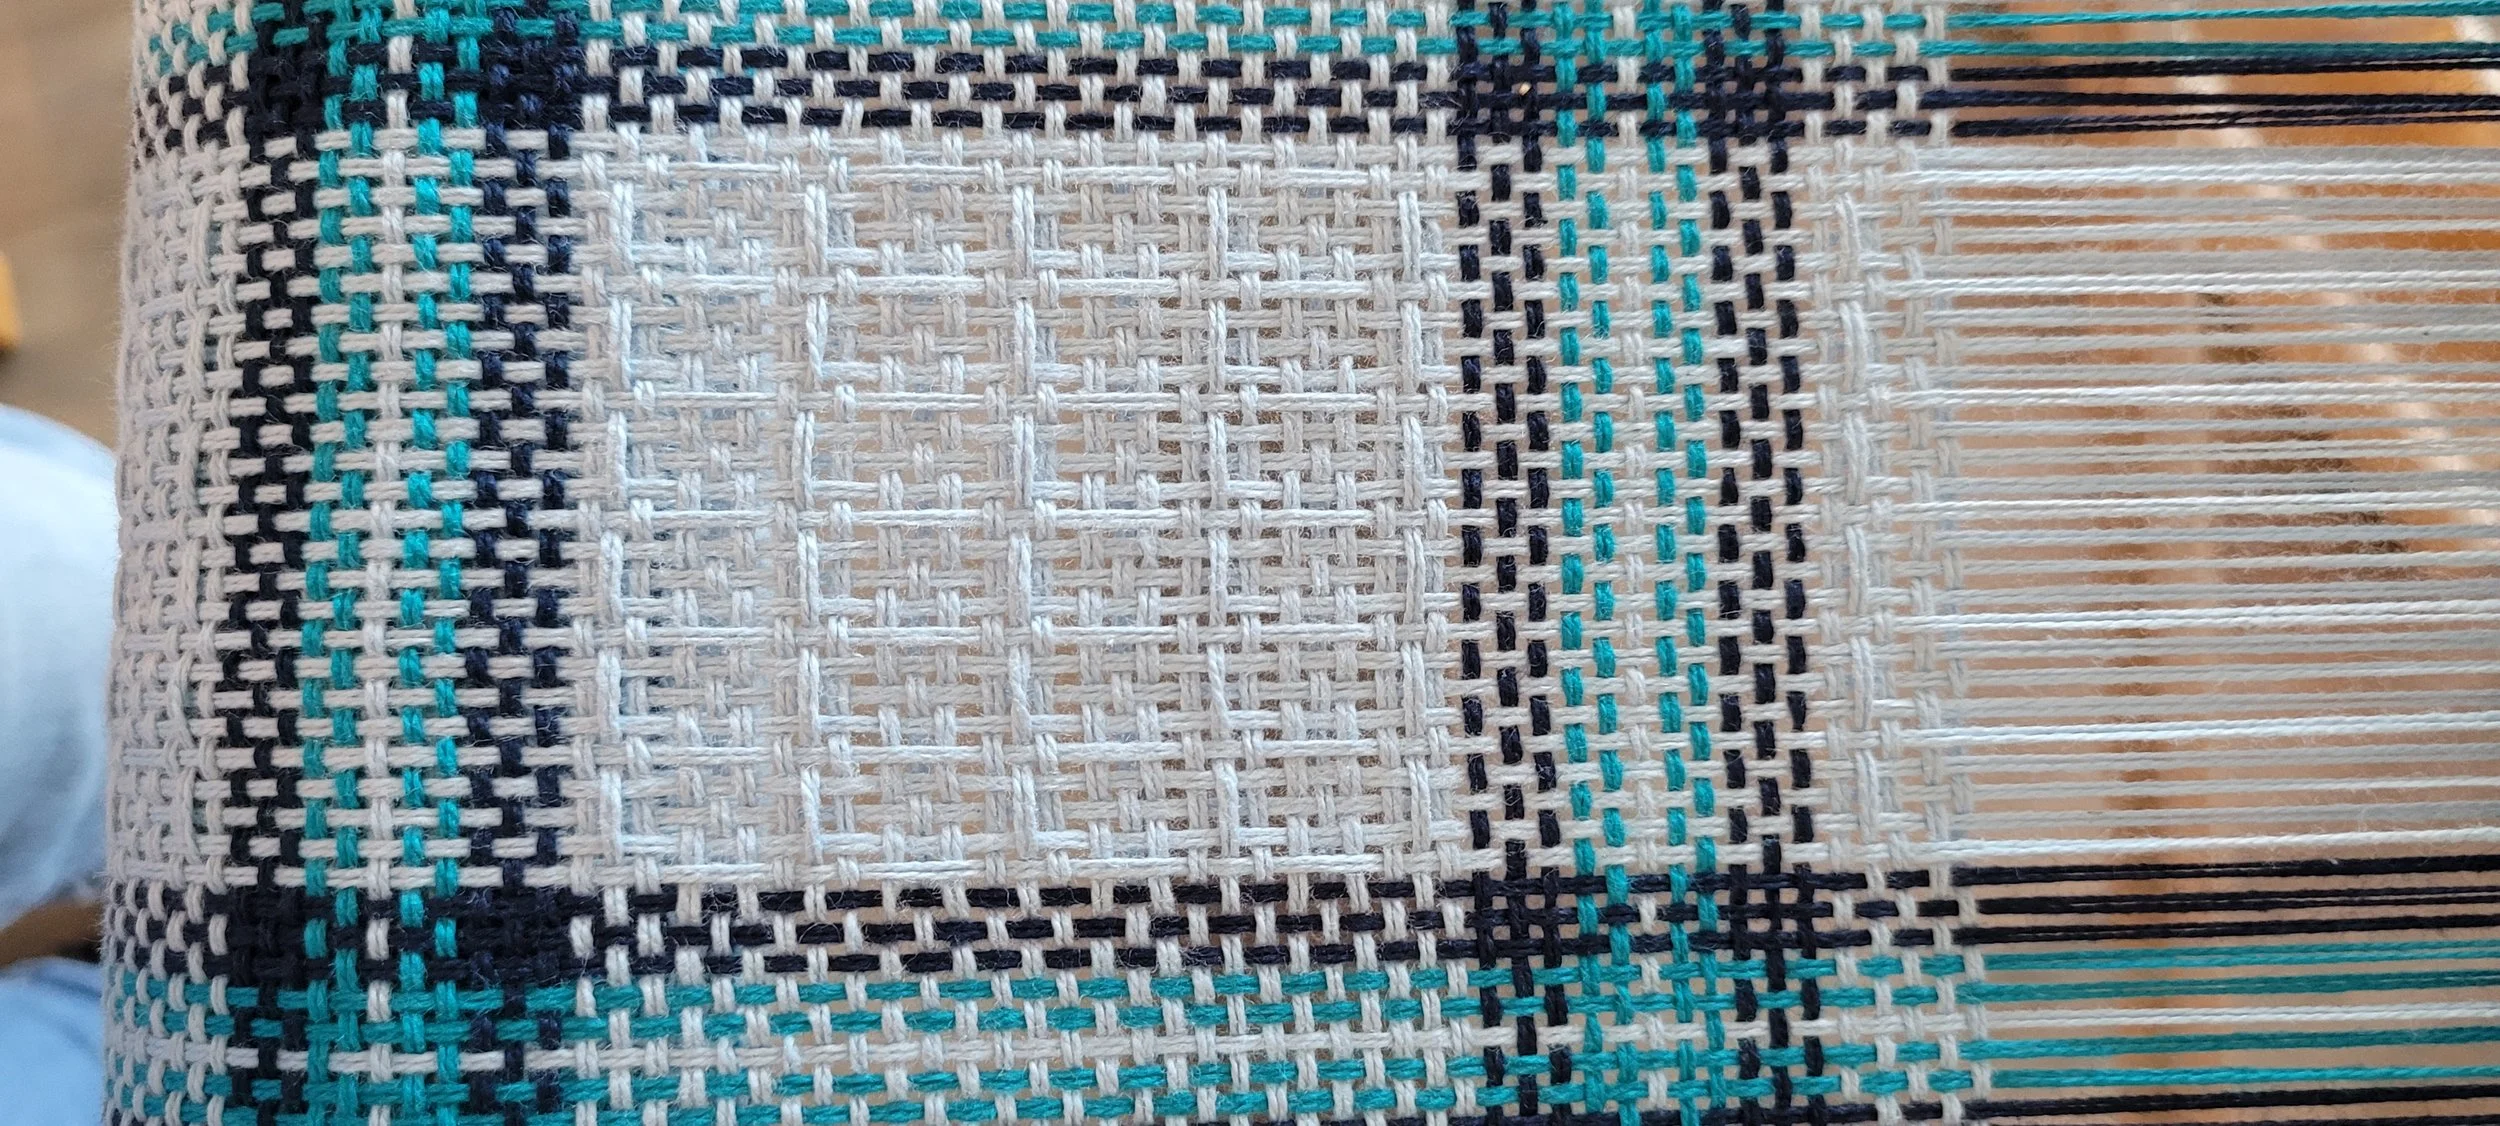
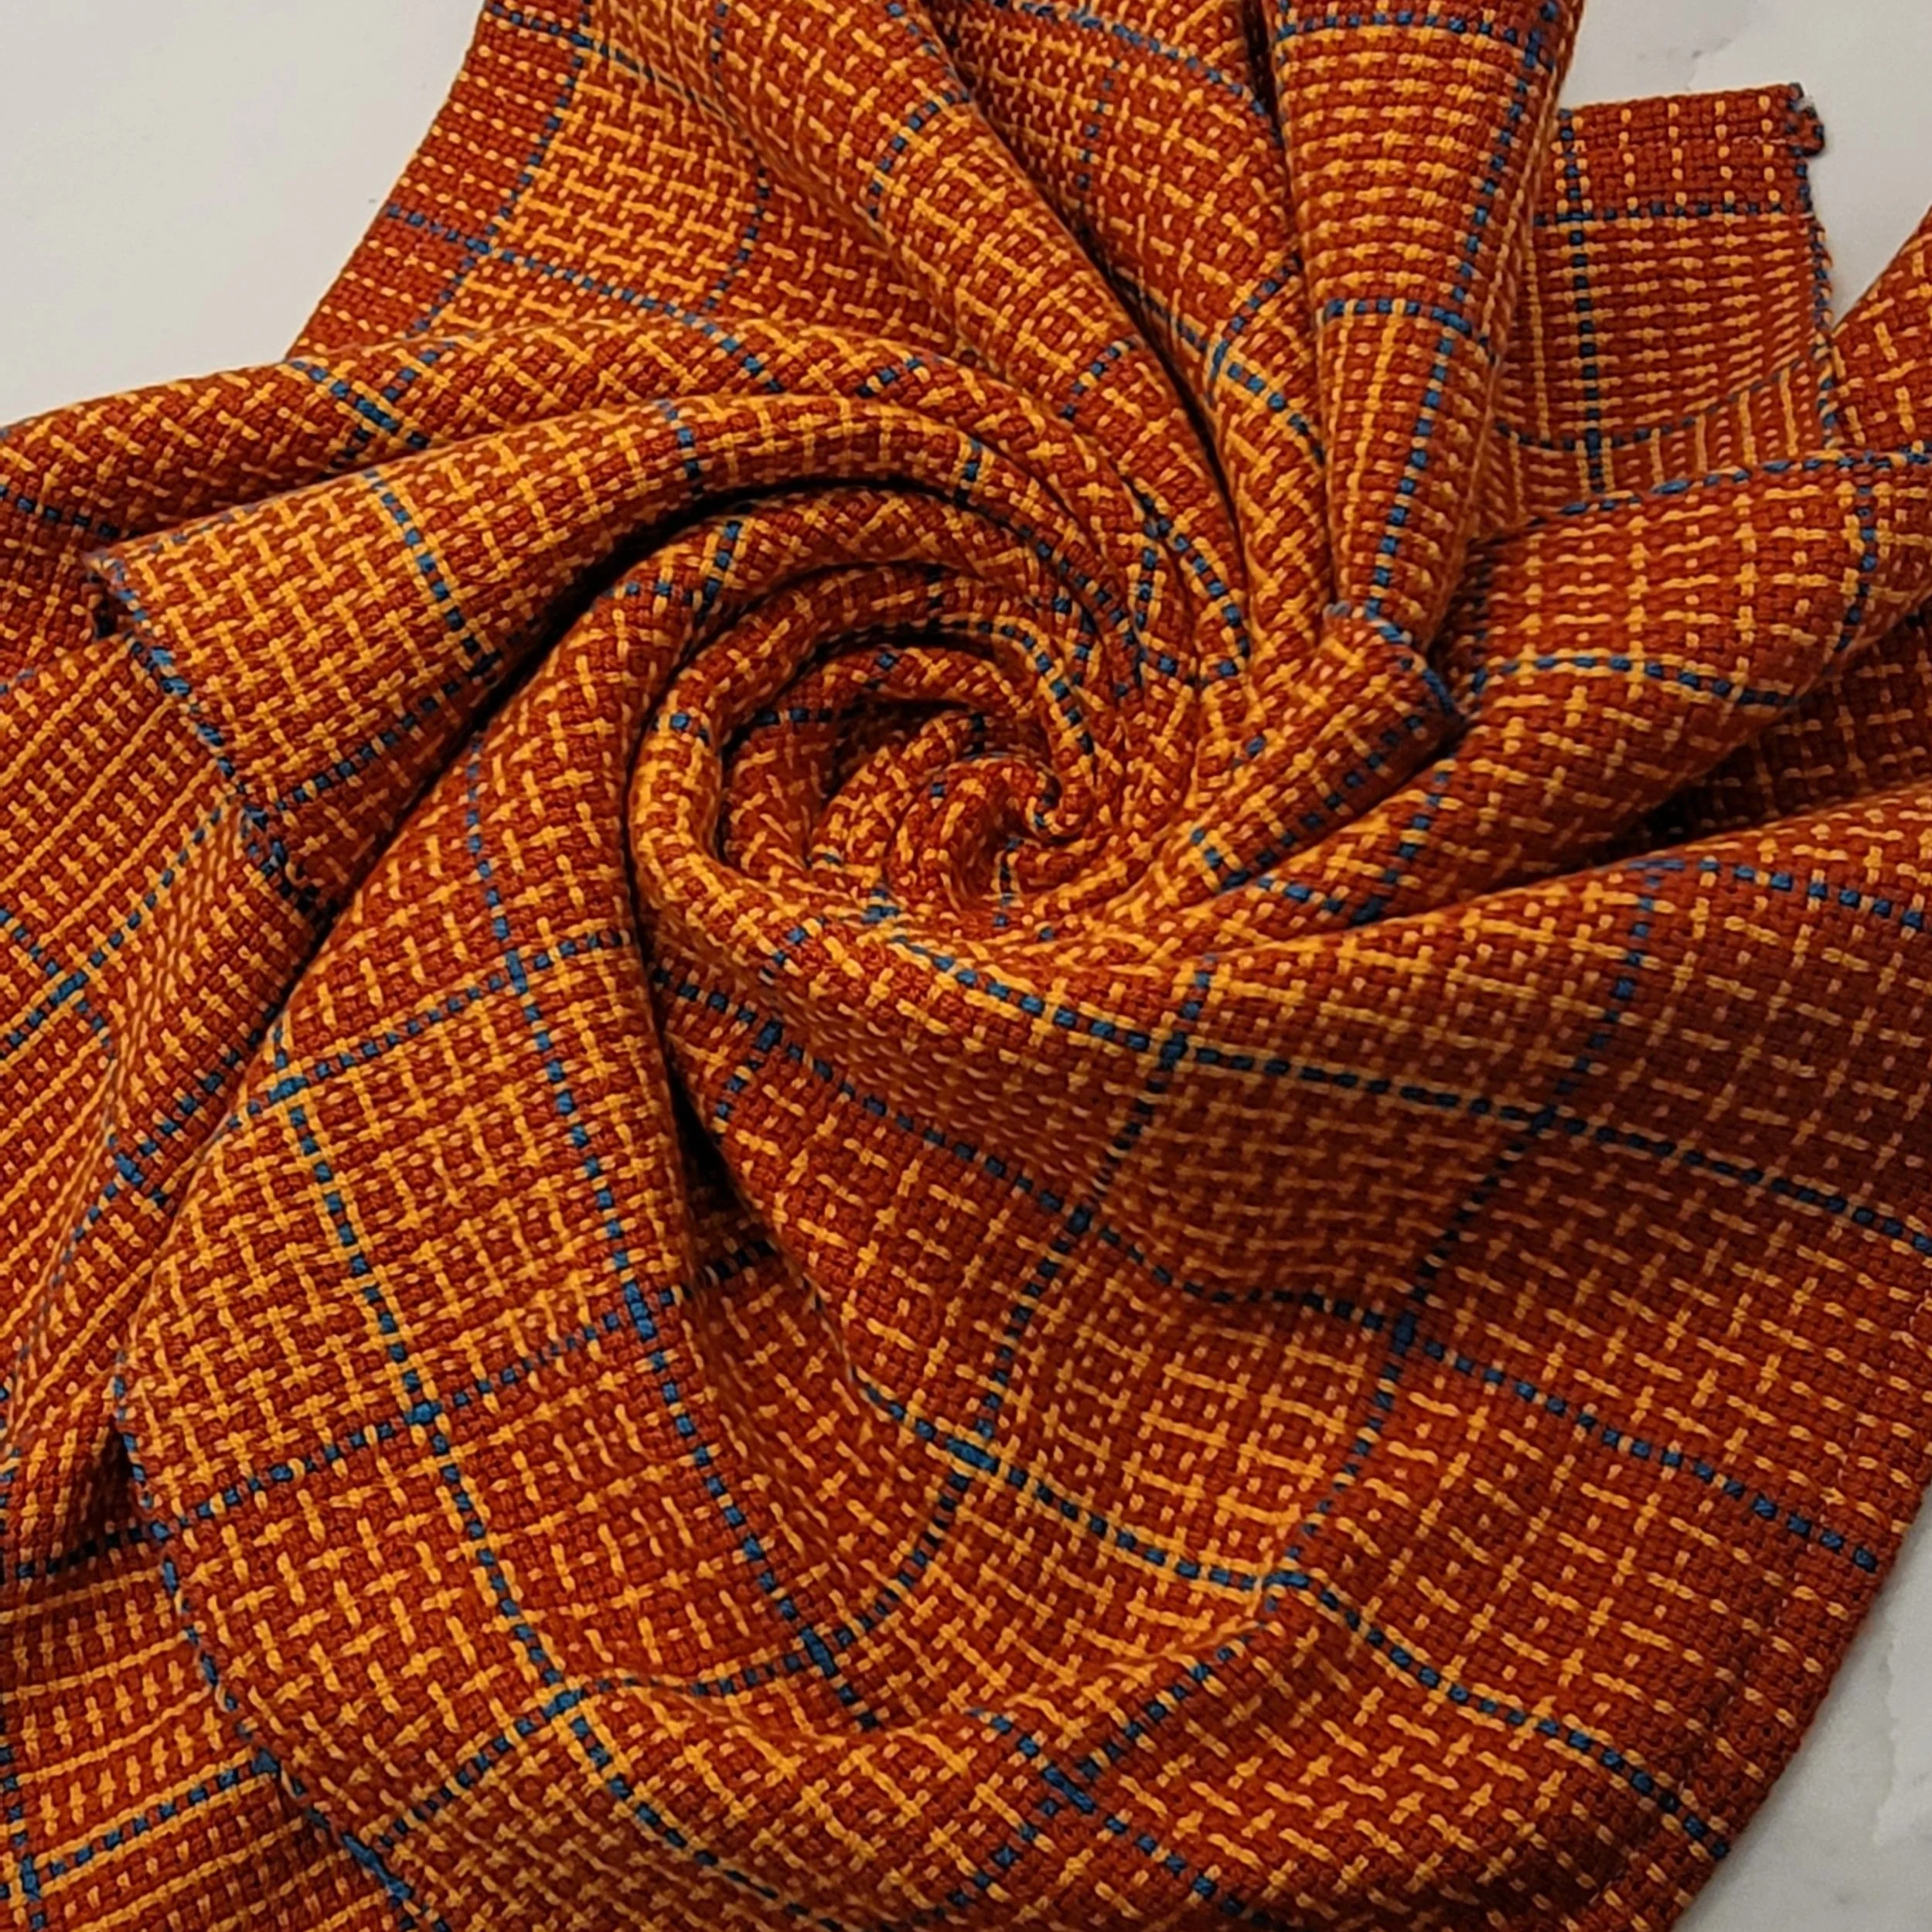
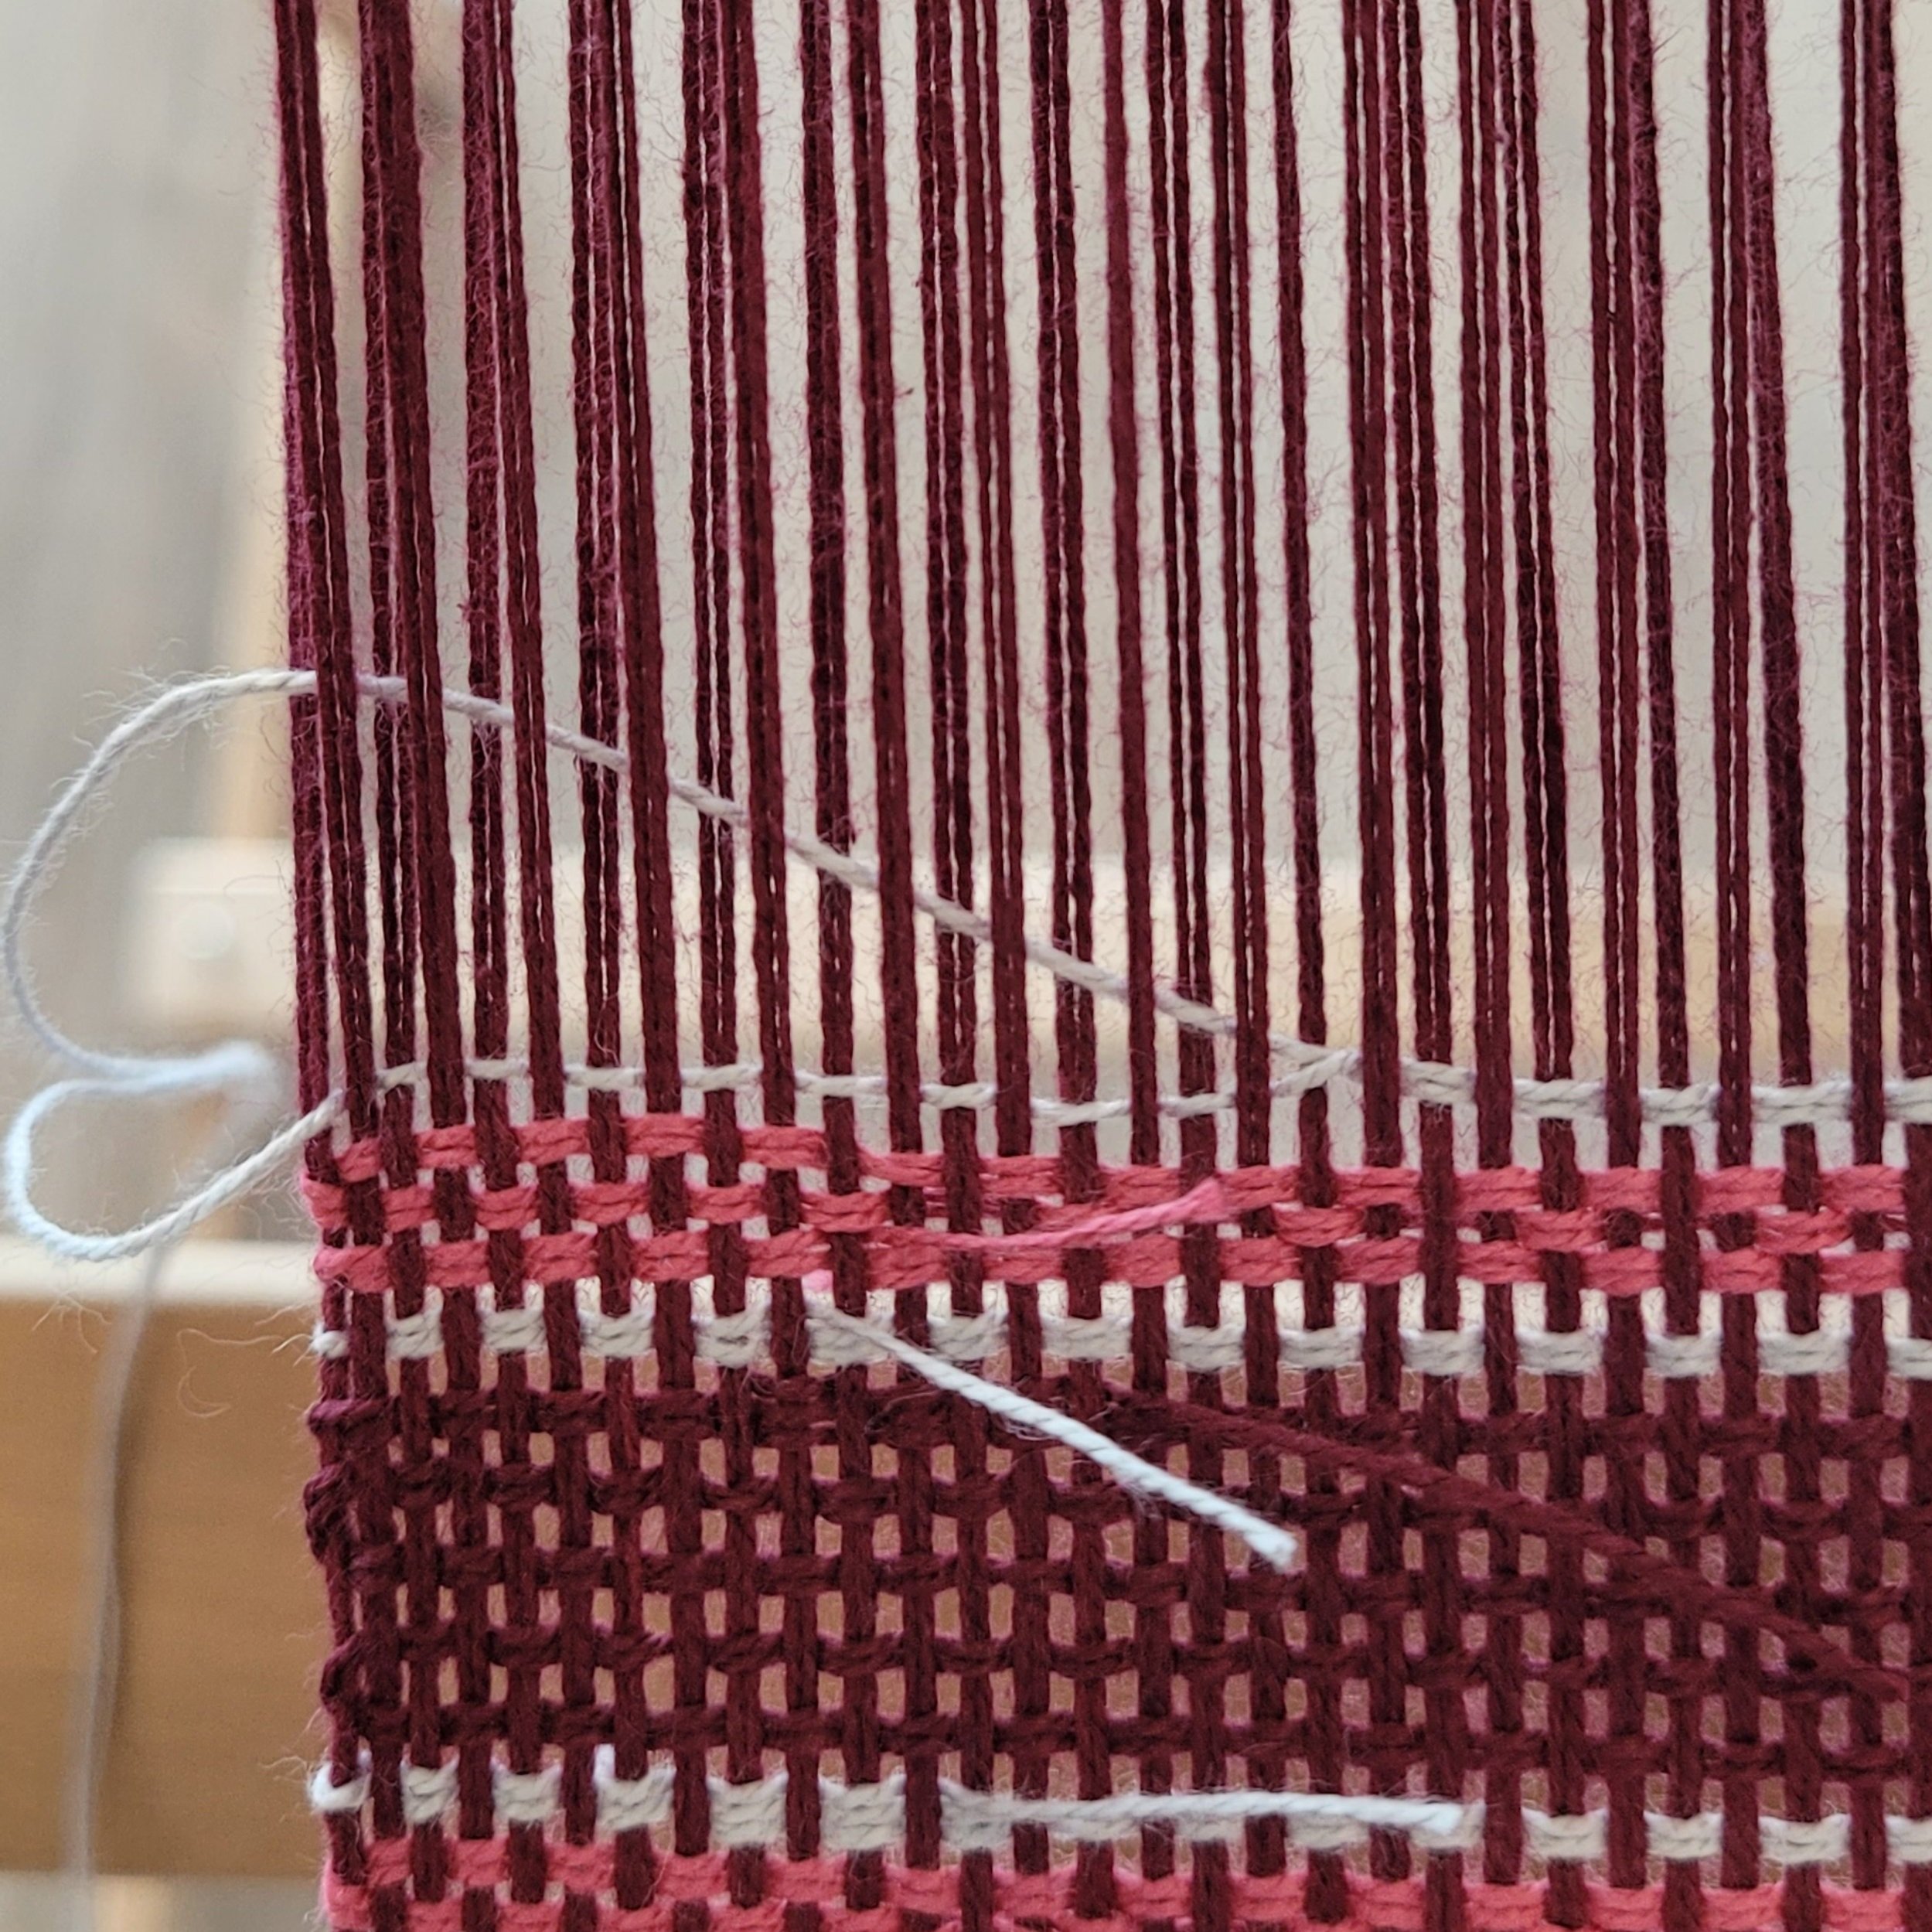
The Mini Plaid Tea Towels is a perfect combination of plain weave and waffle weave. A waffle weave is usually created with the use of a single pick-up stick. The warp floats are made when the heddle is in the up position and the pick-up stick is flat and slid to the back of the reed. The weft floats are made when the heddle is in neutral and the pick-up is on edge behind the reed. Let’s look at what’s going on with the pick-up sticks in the Mini Plaid pattern.

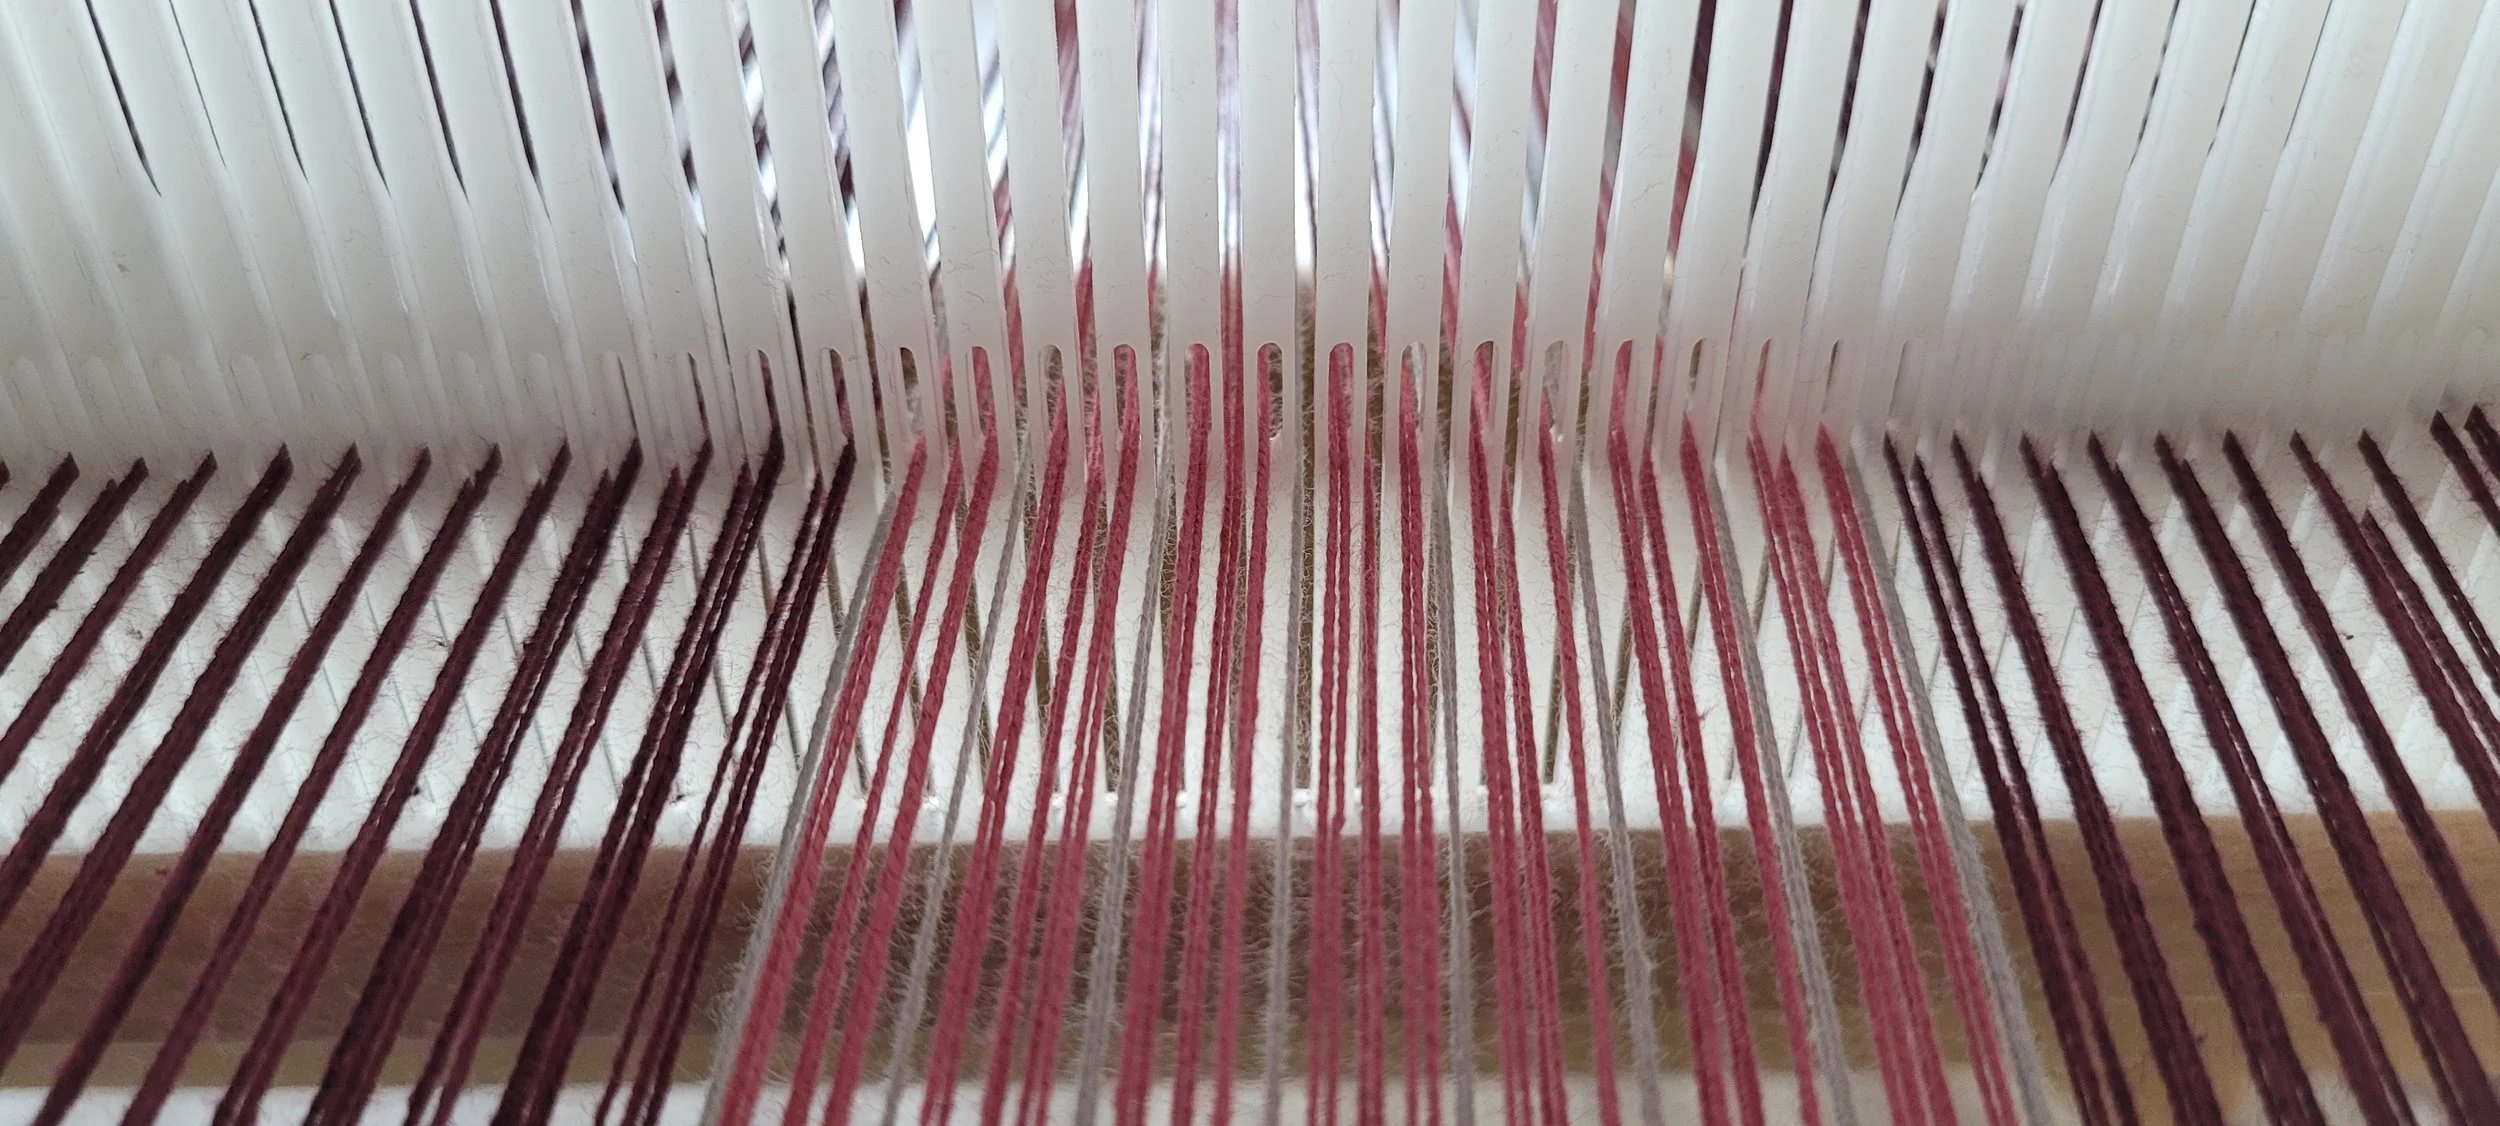
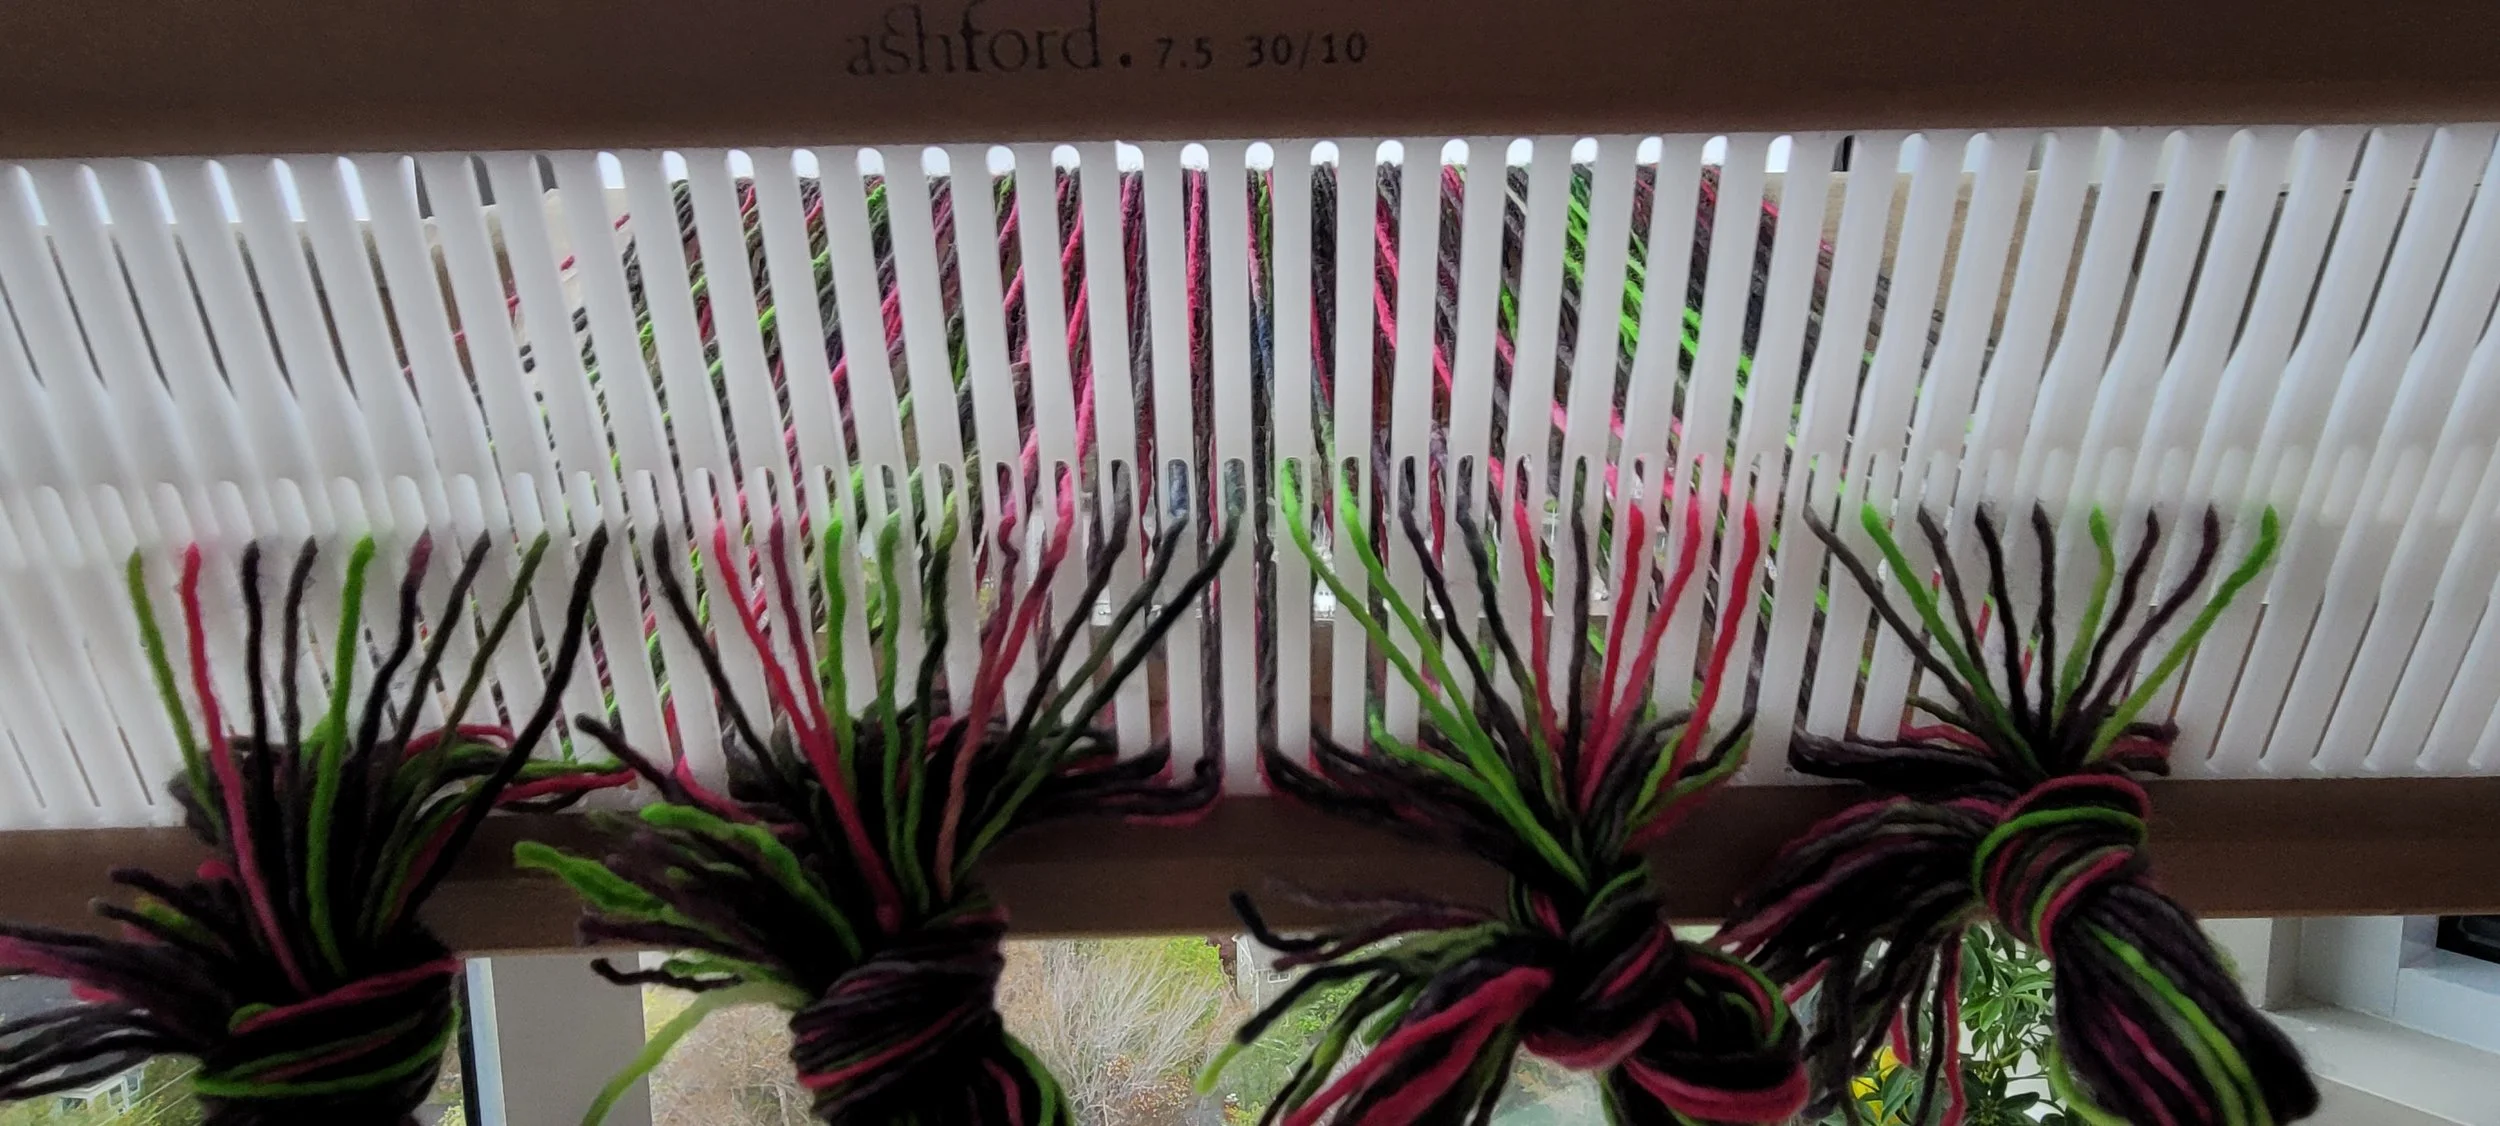
The bottom (or first) pick-up stick is the stick that is inserted as usual. When the heddle is in the neutral position and the pick-up flipped on edge, all the ends on top of the stick will be raised up. When the weft passes through, it will go under those raised-up ends and form the weft floats.
Let’s visualize what would happen if I used this stick for the warp floats of the waffle weave. The heddle is in the up position, so all the hole ends are raised up. The pick-up is slid forward behind the reed, raising up all the slot ends on top of the pick-up stick. Pay attention to the middle of the picture where 7 ends (7 slots in a row) are on top of the stick. The holes are raised up because the heddle is up, and the slots below are also raised because they are on the pick-up stick. That means the underside of the work has a 13-end float!
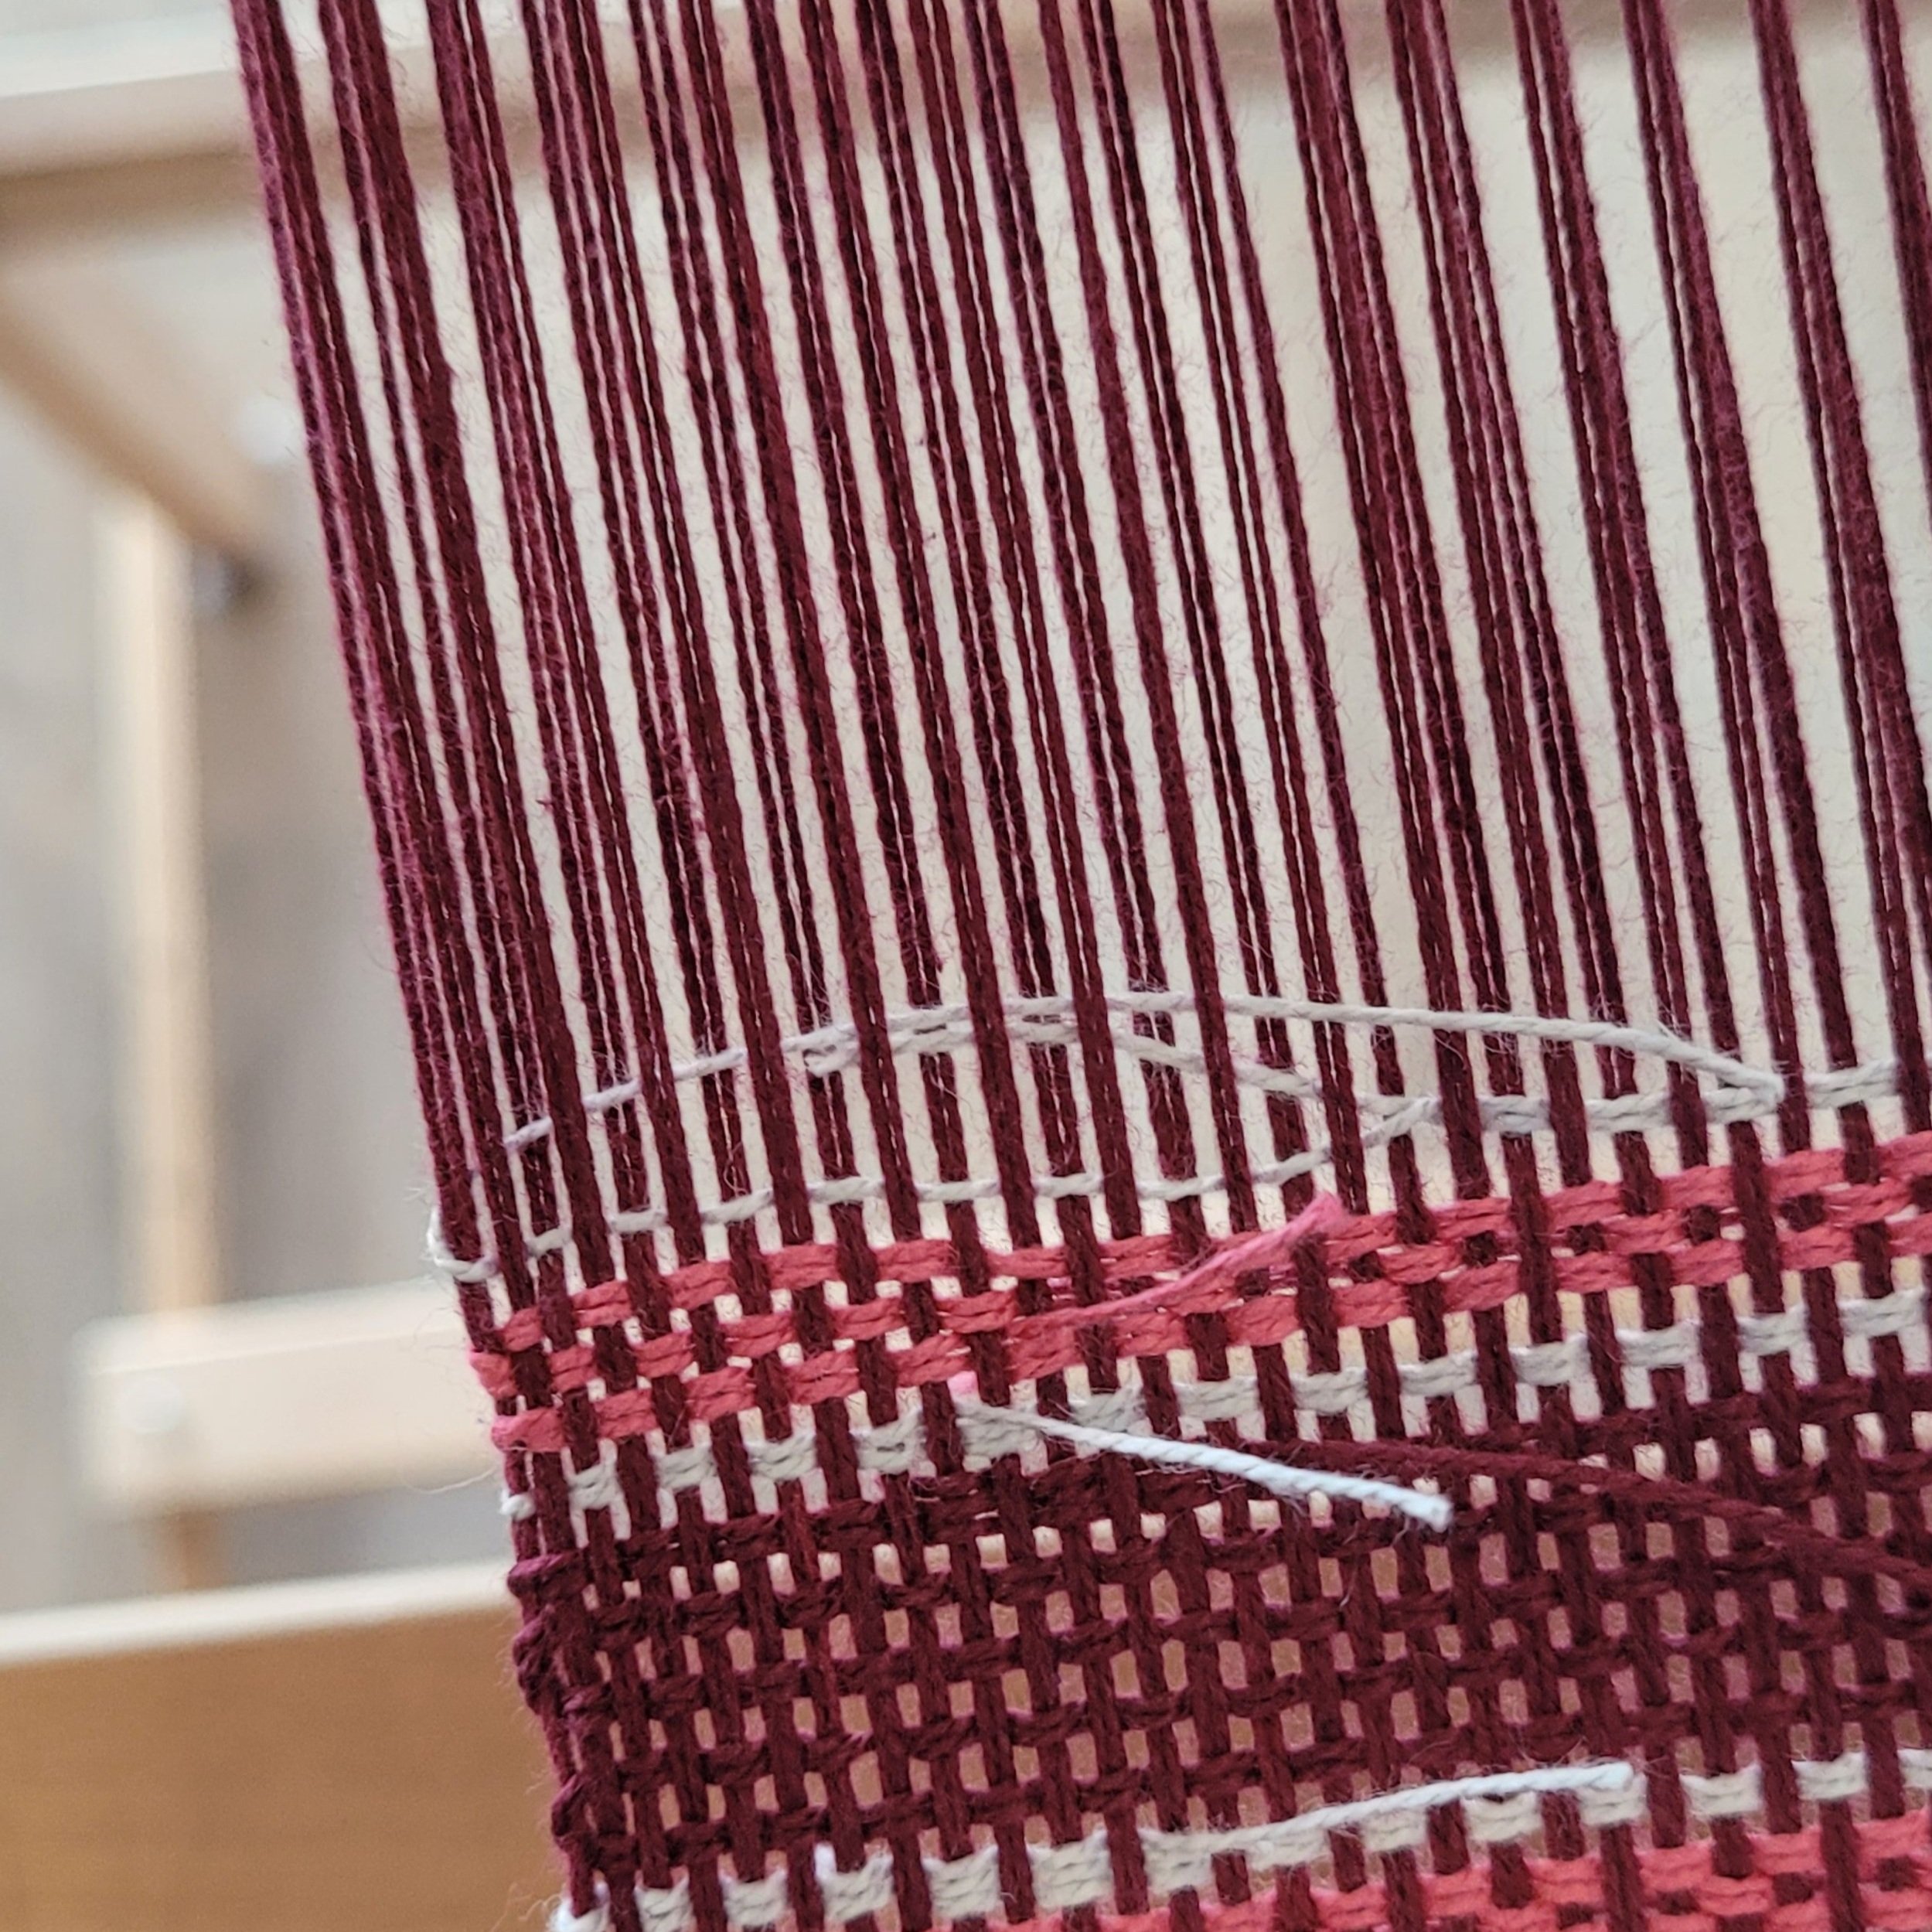
Now, we could move the pick-up stick back and forth as in the video I mentioned earlier. That would be quite complicated. BUT if we add a second pick-up stick, we can weave quite easily! So let’s examine the top pick-up stick in the photo.
The top (or second) pick-up stick is a little unusual as it sits on top of most of the warp. Note that it is going under the same ends as the bottom pick-up stick only in the patterned area. Now, when the heddle is up and the second pick-up stick is slid forward, the pick-up stick does not interfere with any of the plain weave ends.
Note that the top pick-up stick (the one that creates the warp floats) goes under the same ends as the bottom pick-up stick in the patterned area only. This allows them to move smoothly past each other as needed. The easiest way to insert this second pick-up stick is to place the heddle in the down position and with the second pick-up on top of the warp, slip it under the same ends as the first pick-up in the patterned sections only. Here’s a video of how it all works together.
And that’s it! Easy to weave plain weave and waffle weave together! Want to try it for yourself? Try these patterns: Mini Plaid Tea Towels or The Boy Friend Scarf.
Reading My Patterns
This is not a post about how to read drafts! I have no trouble reading a draft designed for a shaft loom but I honestly have a terrible time reading a draft for a rigid heddle that uses a pick-up stick, or multiple pick-up sticks. And I know that many rigid heddle weavers have the same trouble. I hear it all the time in the shop! So, I write my patterns differently from the standard rigid heddle patterns. There is no “typical” draft. In fact, I write my patterns very similar to (or in the style of) a knitting pattern. It’s pretty intuitive to me, but I still get lots of questions, so I thought I’d explain here.
This is not a post about how to read drafts! I have no trouble reading a draft designed for a shaft loom but I honestly have a terrible time reading a draft for a rigid heddle that uses a pick-up stick, or multiple pick-up sticks. And I know that many rigid heddle weavers have the same trouble. I hear it all the time in the shop! So, I write my patterns differently from the standard rigid heddle patterns. There is no “typical” draft. In fact, I write my patterns very similar to (or in the style of) a knitting pattern. It’s pretty intuitive to me, but I still get lots of questions, so I thought I’d explain here.
I can’t add arrows in the text of my blog, so we’ll be referring to pictures. The following pictures are typical of what you will find in my patterns that require pick-up sticks or string heddles. Before we get into the symbols though, let’s quickly review pick-up sticks.
Pick-up sticks create warp and weft floats. Floats are created when either the warp ends skip over 2 or more weft ends or the weft skips over 2 or more warp ends. We often do this mistakenly. Done deliberately, some very intricate patterns can be created.
To create a weft float, the heddle is always in the neutral position with the pick-up stick behind the heddle and on edge. It will always follow an up-shed, or said differently, it will replace a down-shed. To create a warp float, the heddle is always in an up-shed and the pick-up stick is slid flat behind the reed. It always comes after a down-shed, or “adds to” the up-shed. For a more detailed look, here’s a previous blog post: Pick-up Sticks Will Explode Your World.

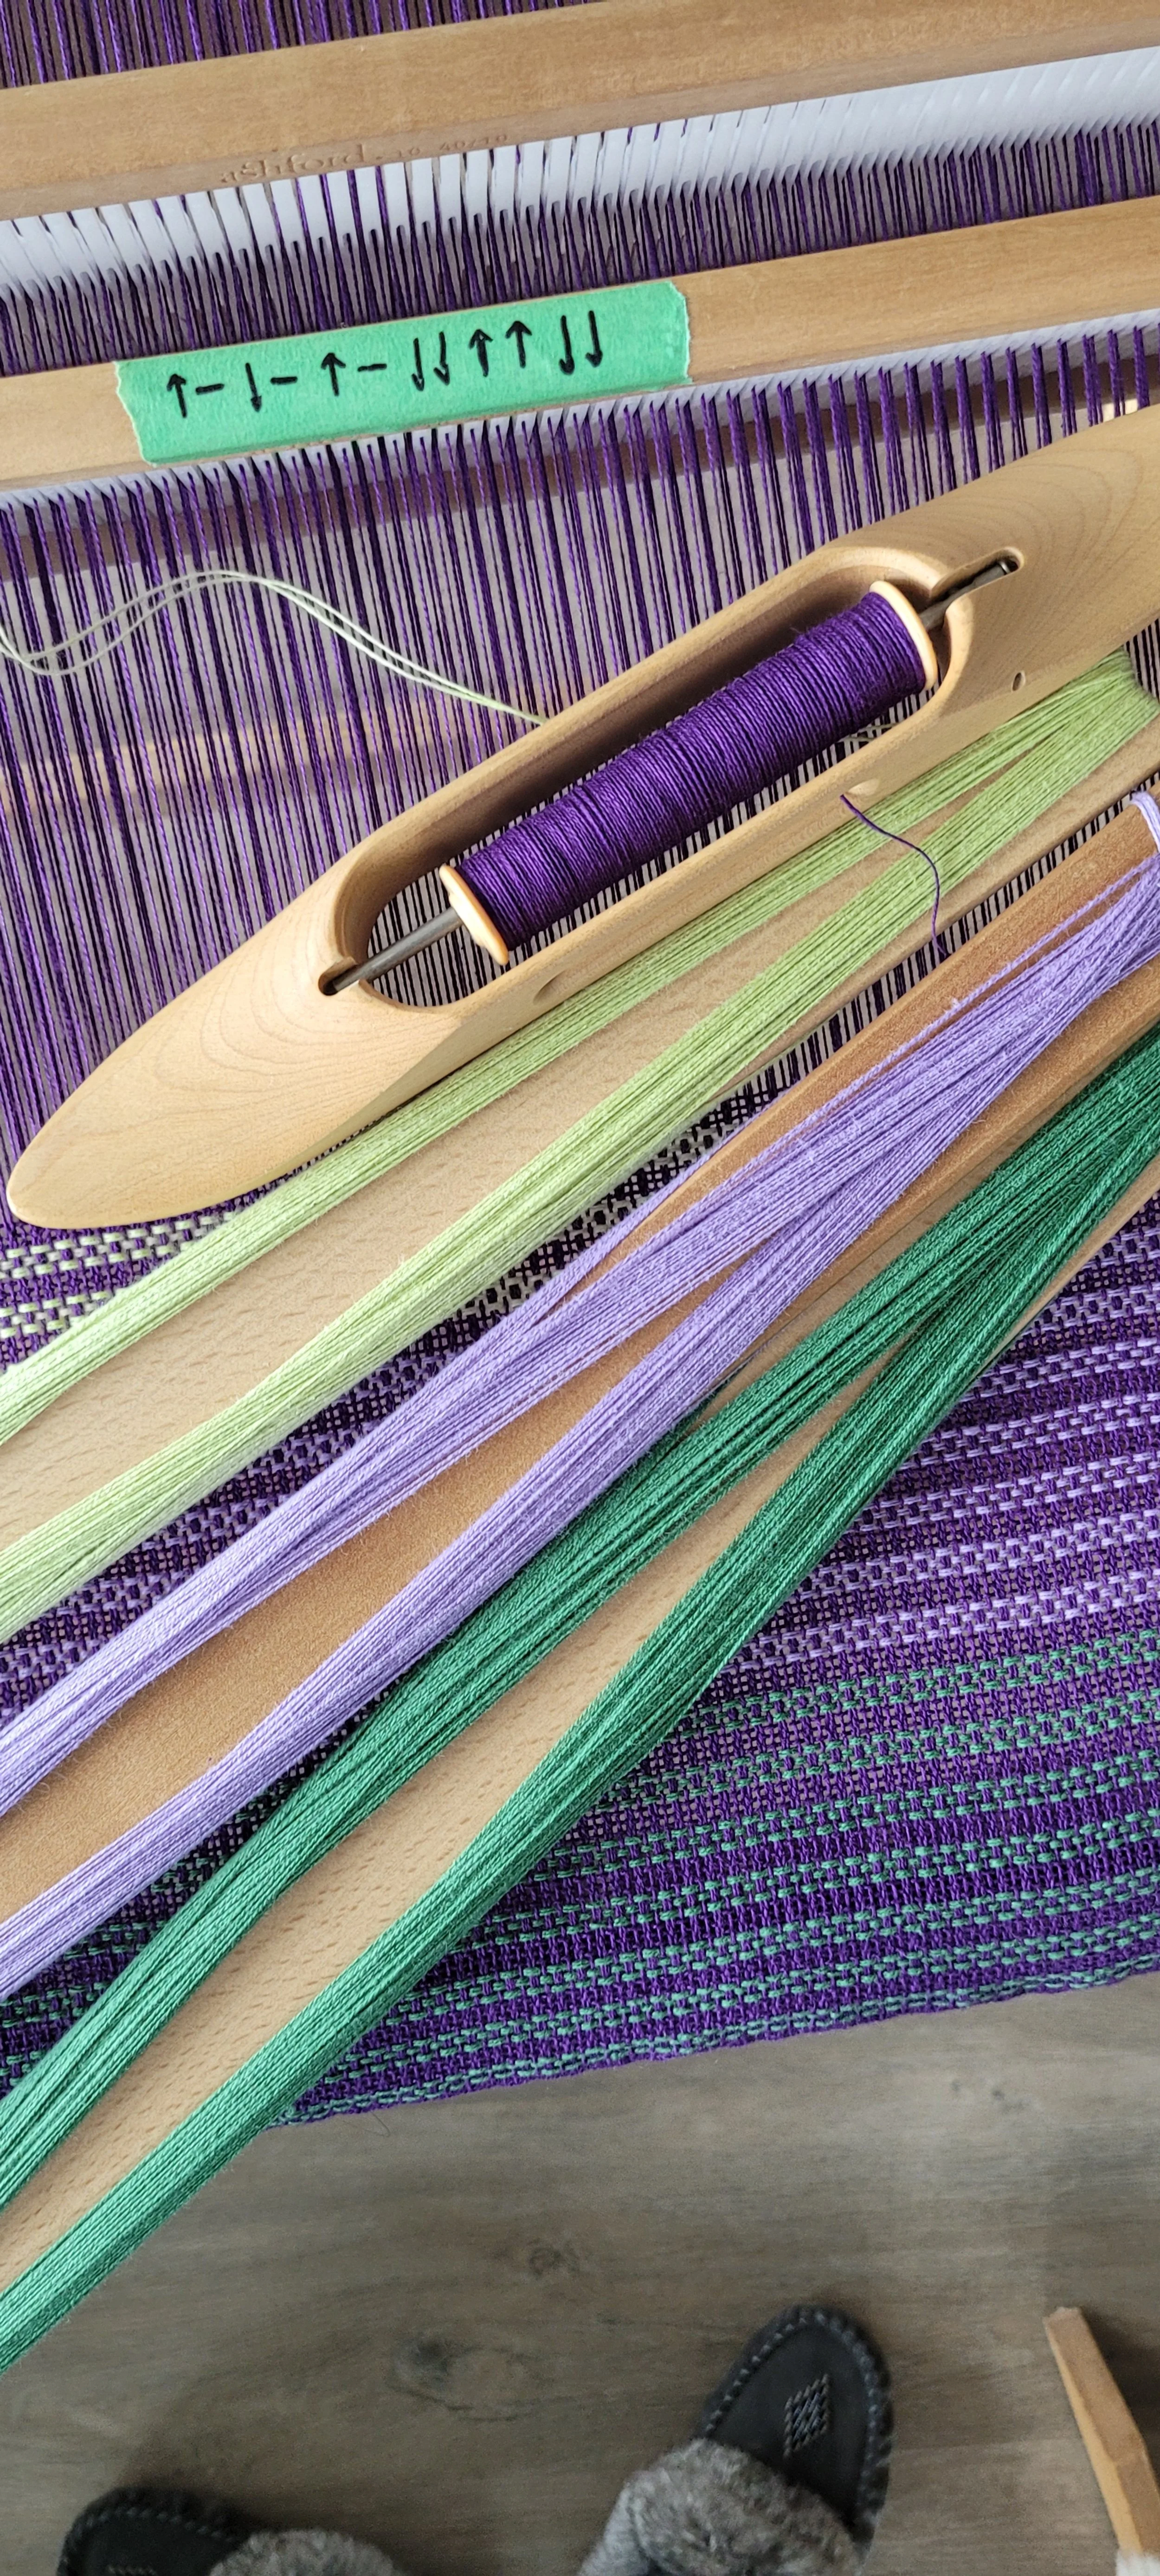
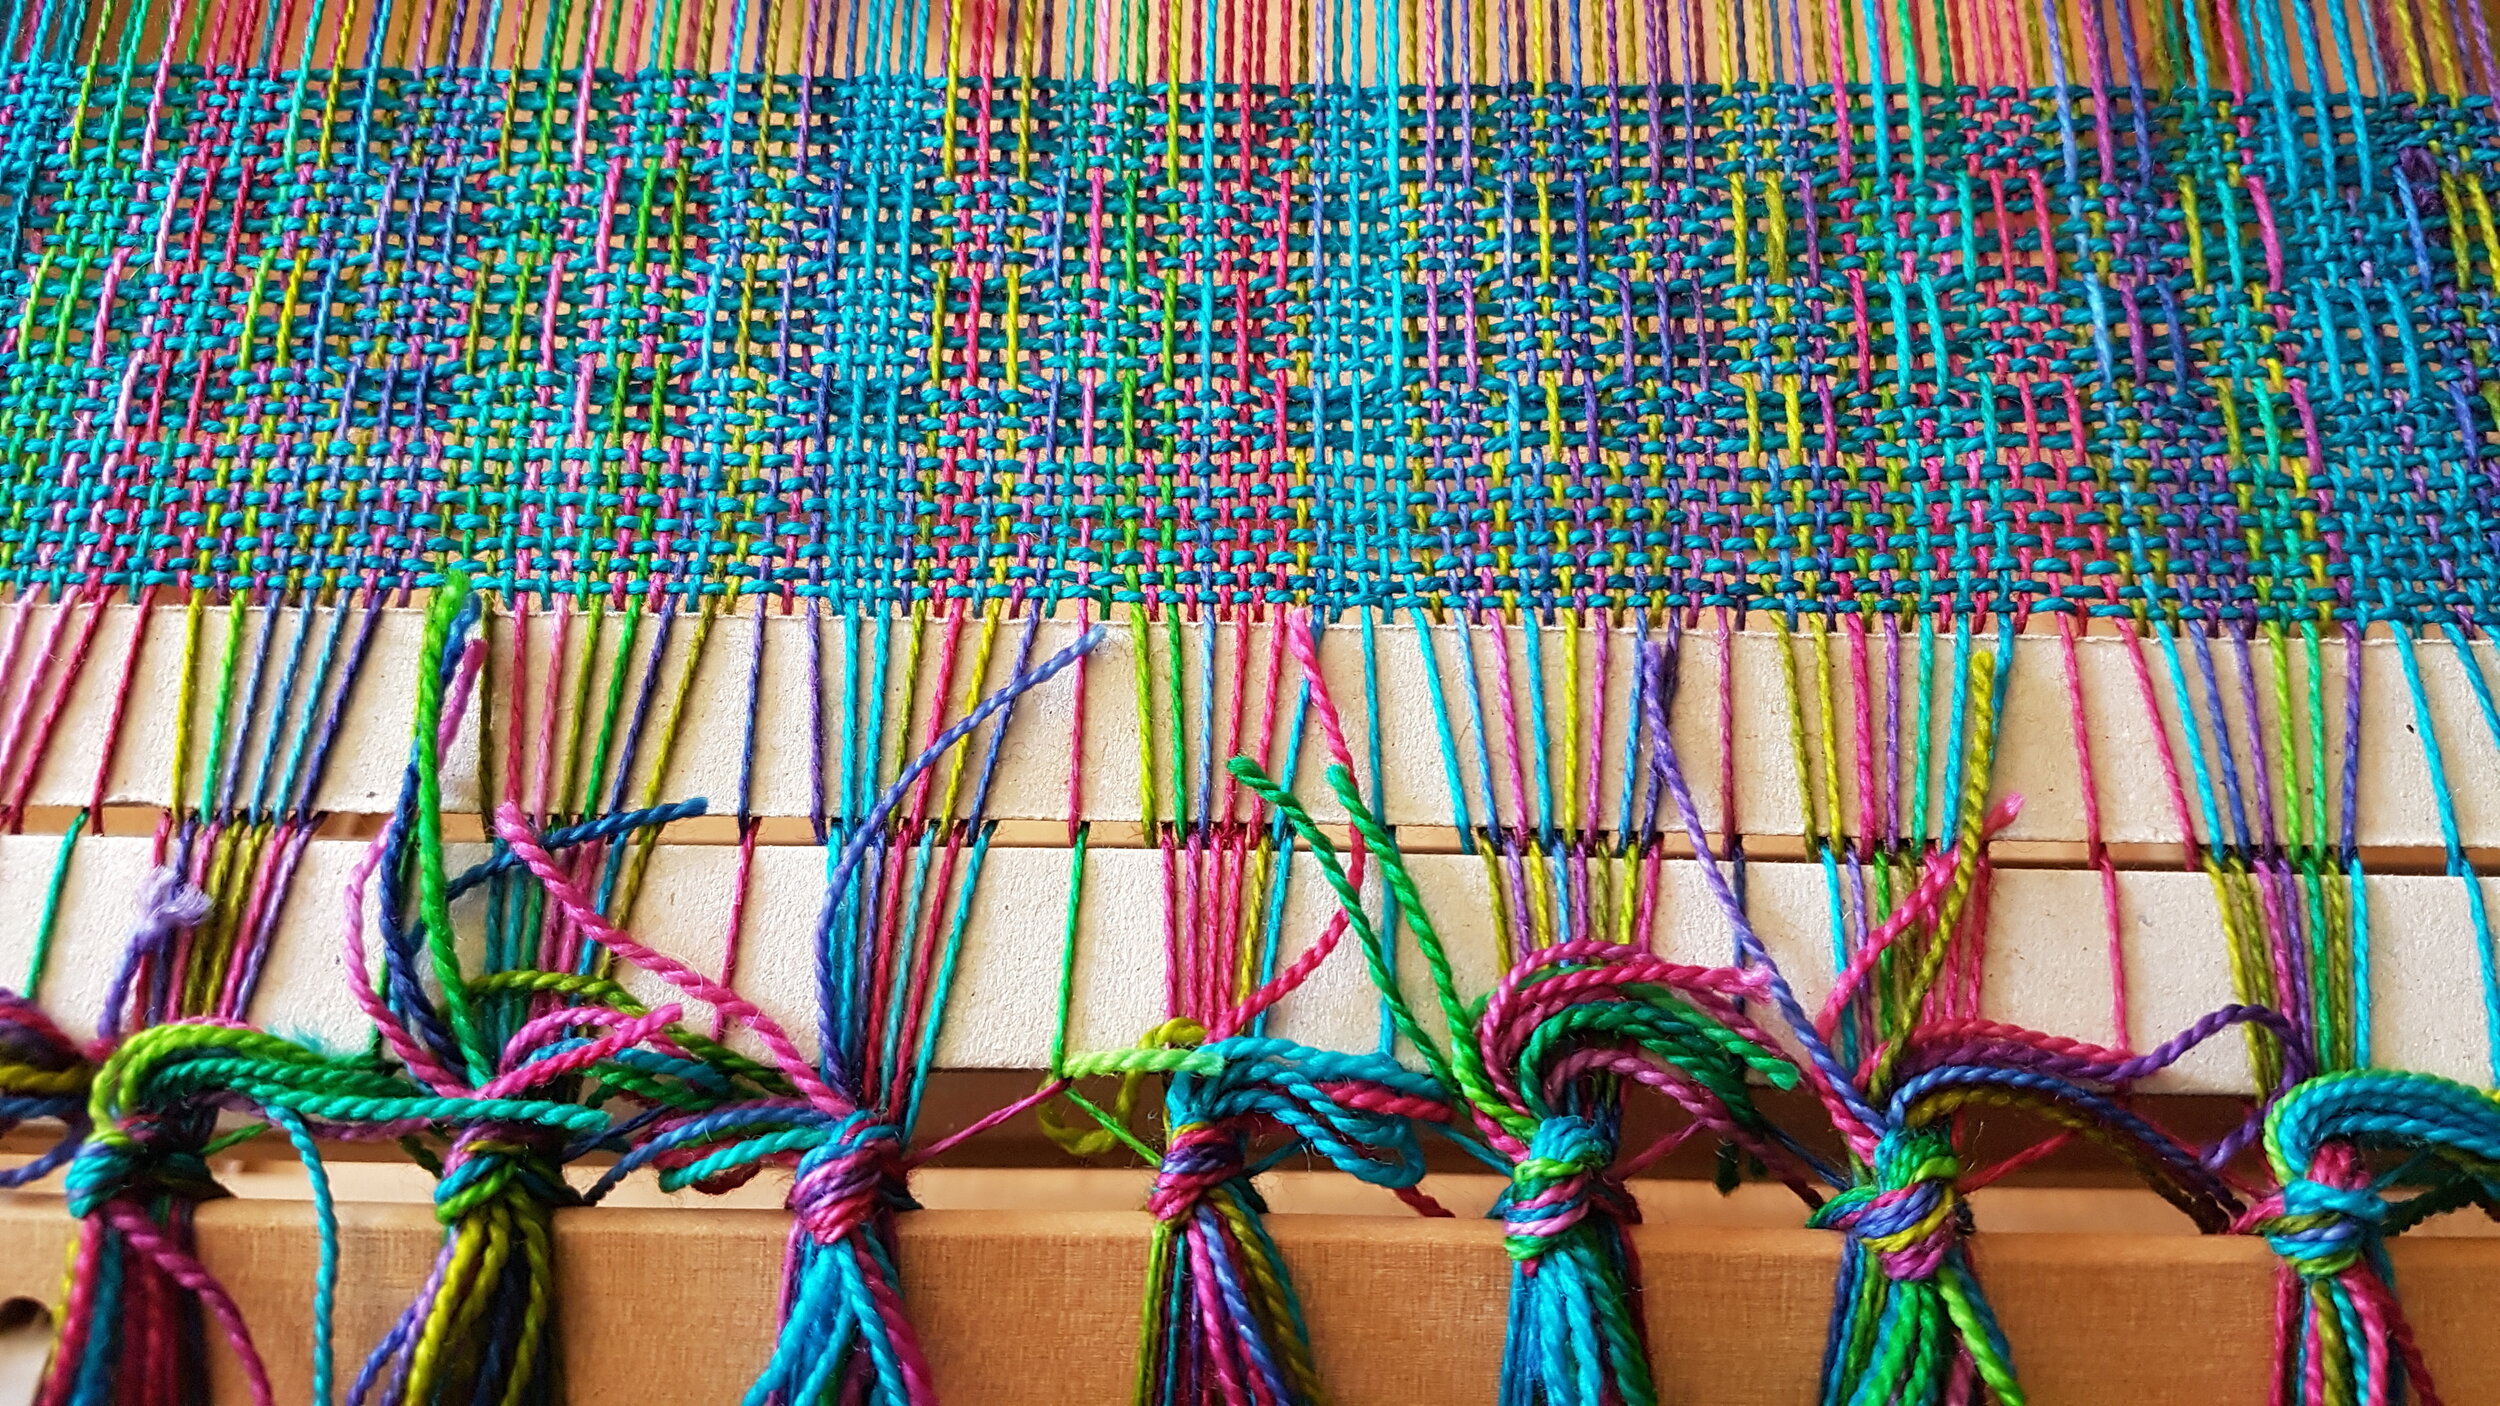
Ok, onto my method! I use arrows and dashes. Up arrow means the heddle is in the up position, downs arrow means the heddle is in down and the dash means the heddle is in neutral. Pretty easy right? The complications come when multiple symbols are used together like step 1 in the picture to the right. Read the symbols from left to right (just like reading this page) and then “read” your heddles and pick-up sticks from the front of your loom to the back. If you are using 1 heddle, the first symbol refers to the heddle, the second to the pick-up stick. So in the picture to the right, the first pattern line tells us that the heddle is in the neutral position and the pick-up stick is used (this will give us a weft float). We know that since the heddle is in neutral, the pick-up is turned on edge.
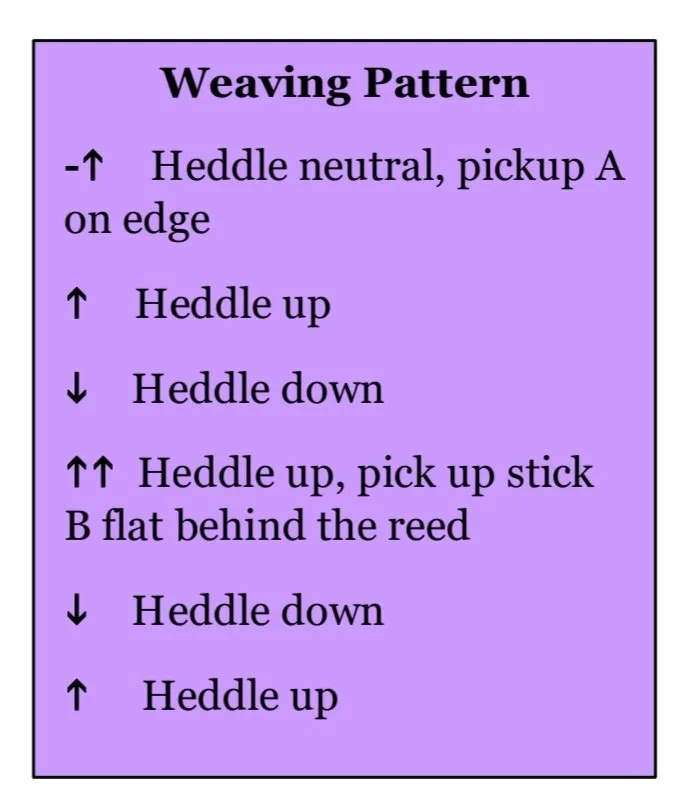
This next example is a little more complex because it uses 2 pick-up sticks. Step 1 tells us the heddle is in the neutral position and pick-up stick A is used on edge. Because the heddle is in neutral, we also know the pick-up is on edge (just in case the pattern doesn’t say). Steps 2 and 3 use just the heddle, first in the up-shed, then in the down-shed. The fourth step has 2 up arrows. Reading from left to right, and then from the front of the loom to the back, the heddle is in the up position and uses pick-up B. Since the heddle is up, we know that the pick-up will be flat behind the heddle.
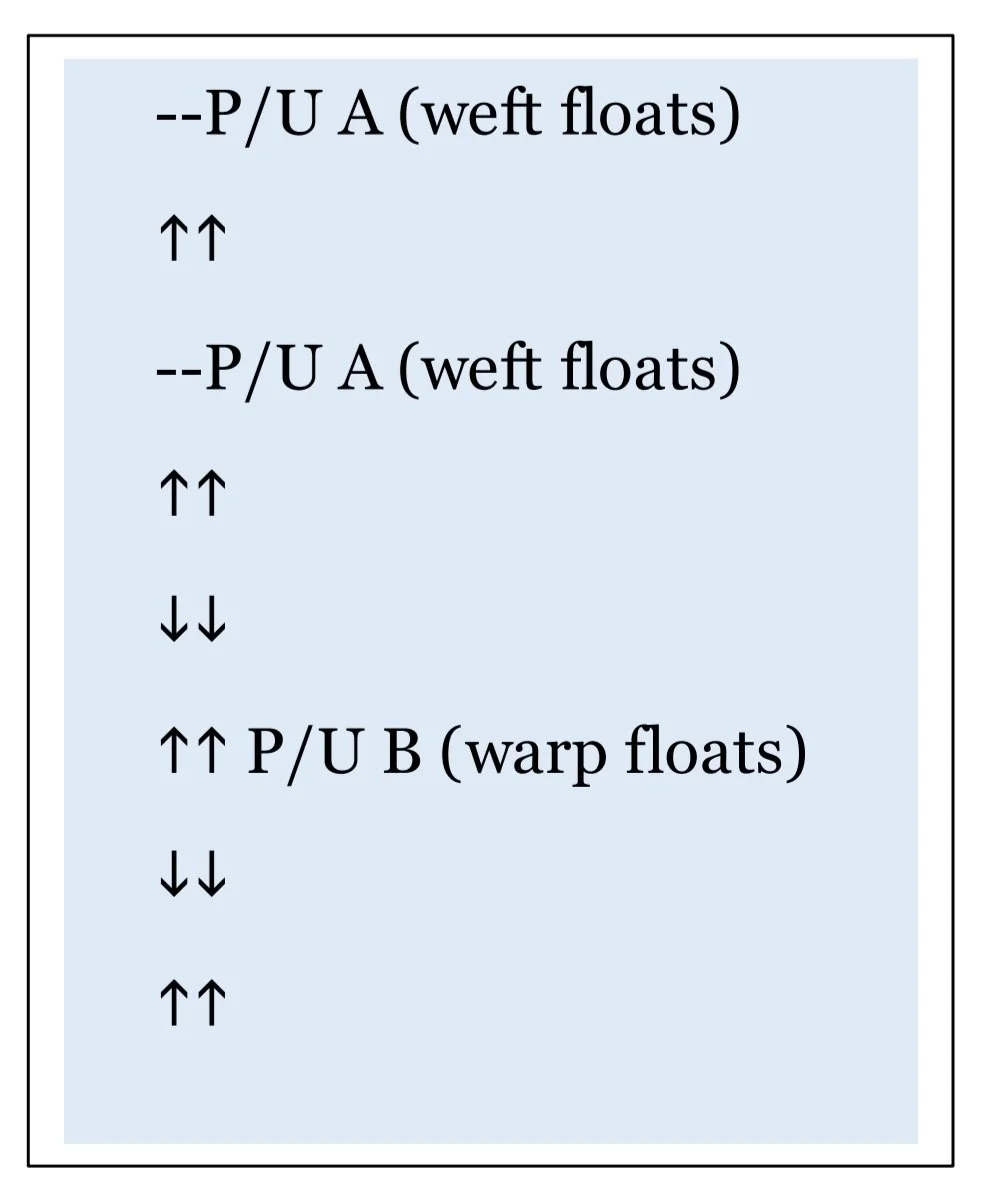
Finally, the most complex! This pattern uses 2 heddles and 2 pick-up sticks. That means some steps have 3 symbols. Let’s look at step 1. Reading from left to right we see 2 dashes then P/U A. Reading our loom from front to back, this tells us that both heddles are in the neutral position and we will be using pick-up A. Since the heddles are in neutral, we know that pick-up A is on edge.
Step 2 has 2 up arrows, so both heddles are up and no pick-up is used. Step 3 is the same as step 1. Let’s move to step 6. Here we see 2 up arrows and P/U B. Again, looking at our loom, both heddles will be up, and pick-up B will be used. Since the heddles are up, we know that the pick-up stick will be flat behind the heddle.
Next blog I’ll discuss inserting pick-up sticks “The Rogue Weaver” way and things I’ve learned to make my pick-up life easier. I love pick-up patterns and the complex weaves that can be done with just a few sticks!
In the meantime, if this blog made sense to you, you can weave up any of my patterns!

Tea Towels: 8/4 or 8/2 doubled?
I weave a lot of tea towels. Tea towels are perfect for trying out new patterns and seeing how colours play together. Even if in the end, the pattern didn’t work as hoped, you still have a useable tea towel! I generally use 8/2 cotton doubled, which leads to the question: why use 8/2 instead of 8/4 cotton?

I weave a lot of tea towels. Tea towels are perfect for trying out new patterns and seeing how colours play together. Even if in the end, the pattern didn’t work as hoped, you still have a useable tea towel! I generally use 8/2 cotton doubled, which leads to the question: why use 8/2 instead of 8/4 cotton?
It’s a good question, I could use 8/4…it would be faster to warp and easier to weave as there is no need to double the weft, but I have 4 reasons why I use 8/2 over 8/4.
While warping, I thread the slots and holes. So while I’m warping, I will see 2 threads in each slot and 2 threads in each hole. Each pair of threads is counted as 1 end. Then, after winding, I can tie on and start weaving…I skip the step of taking one end from a slot and moving it to a hole.
2. It’s super easy to have colours with a single or odd number of ends. With 8/2 cotton, to have a single end of colour, I just thread the desired slot or hole and its done! If I was using 8/4 cotton, I would need to do one of 2 things:
a) Tie the colour to the back warping stick, run it through the slot then cut and tie at the warping peg; or:
b) At the threading stage I can rearrange the ends to fit the colour order.
A Log Cabin threaded using 8/4 for example will need the threads rearranged when threading the heddle. However, using 8/2 doubled means I can arrange the threads in order while I warp!
Warping single end stripes can also highlight a pattern.
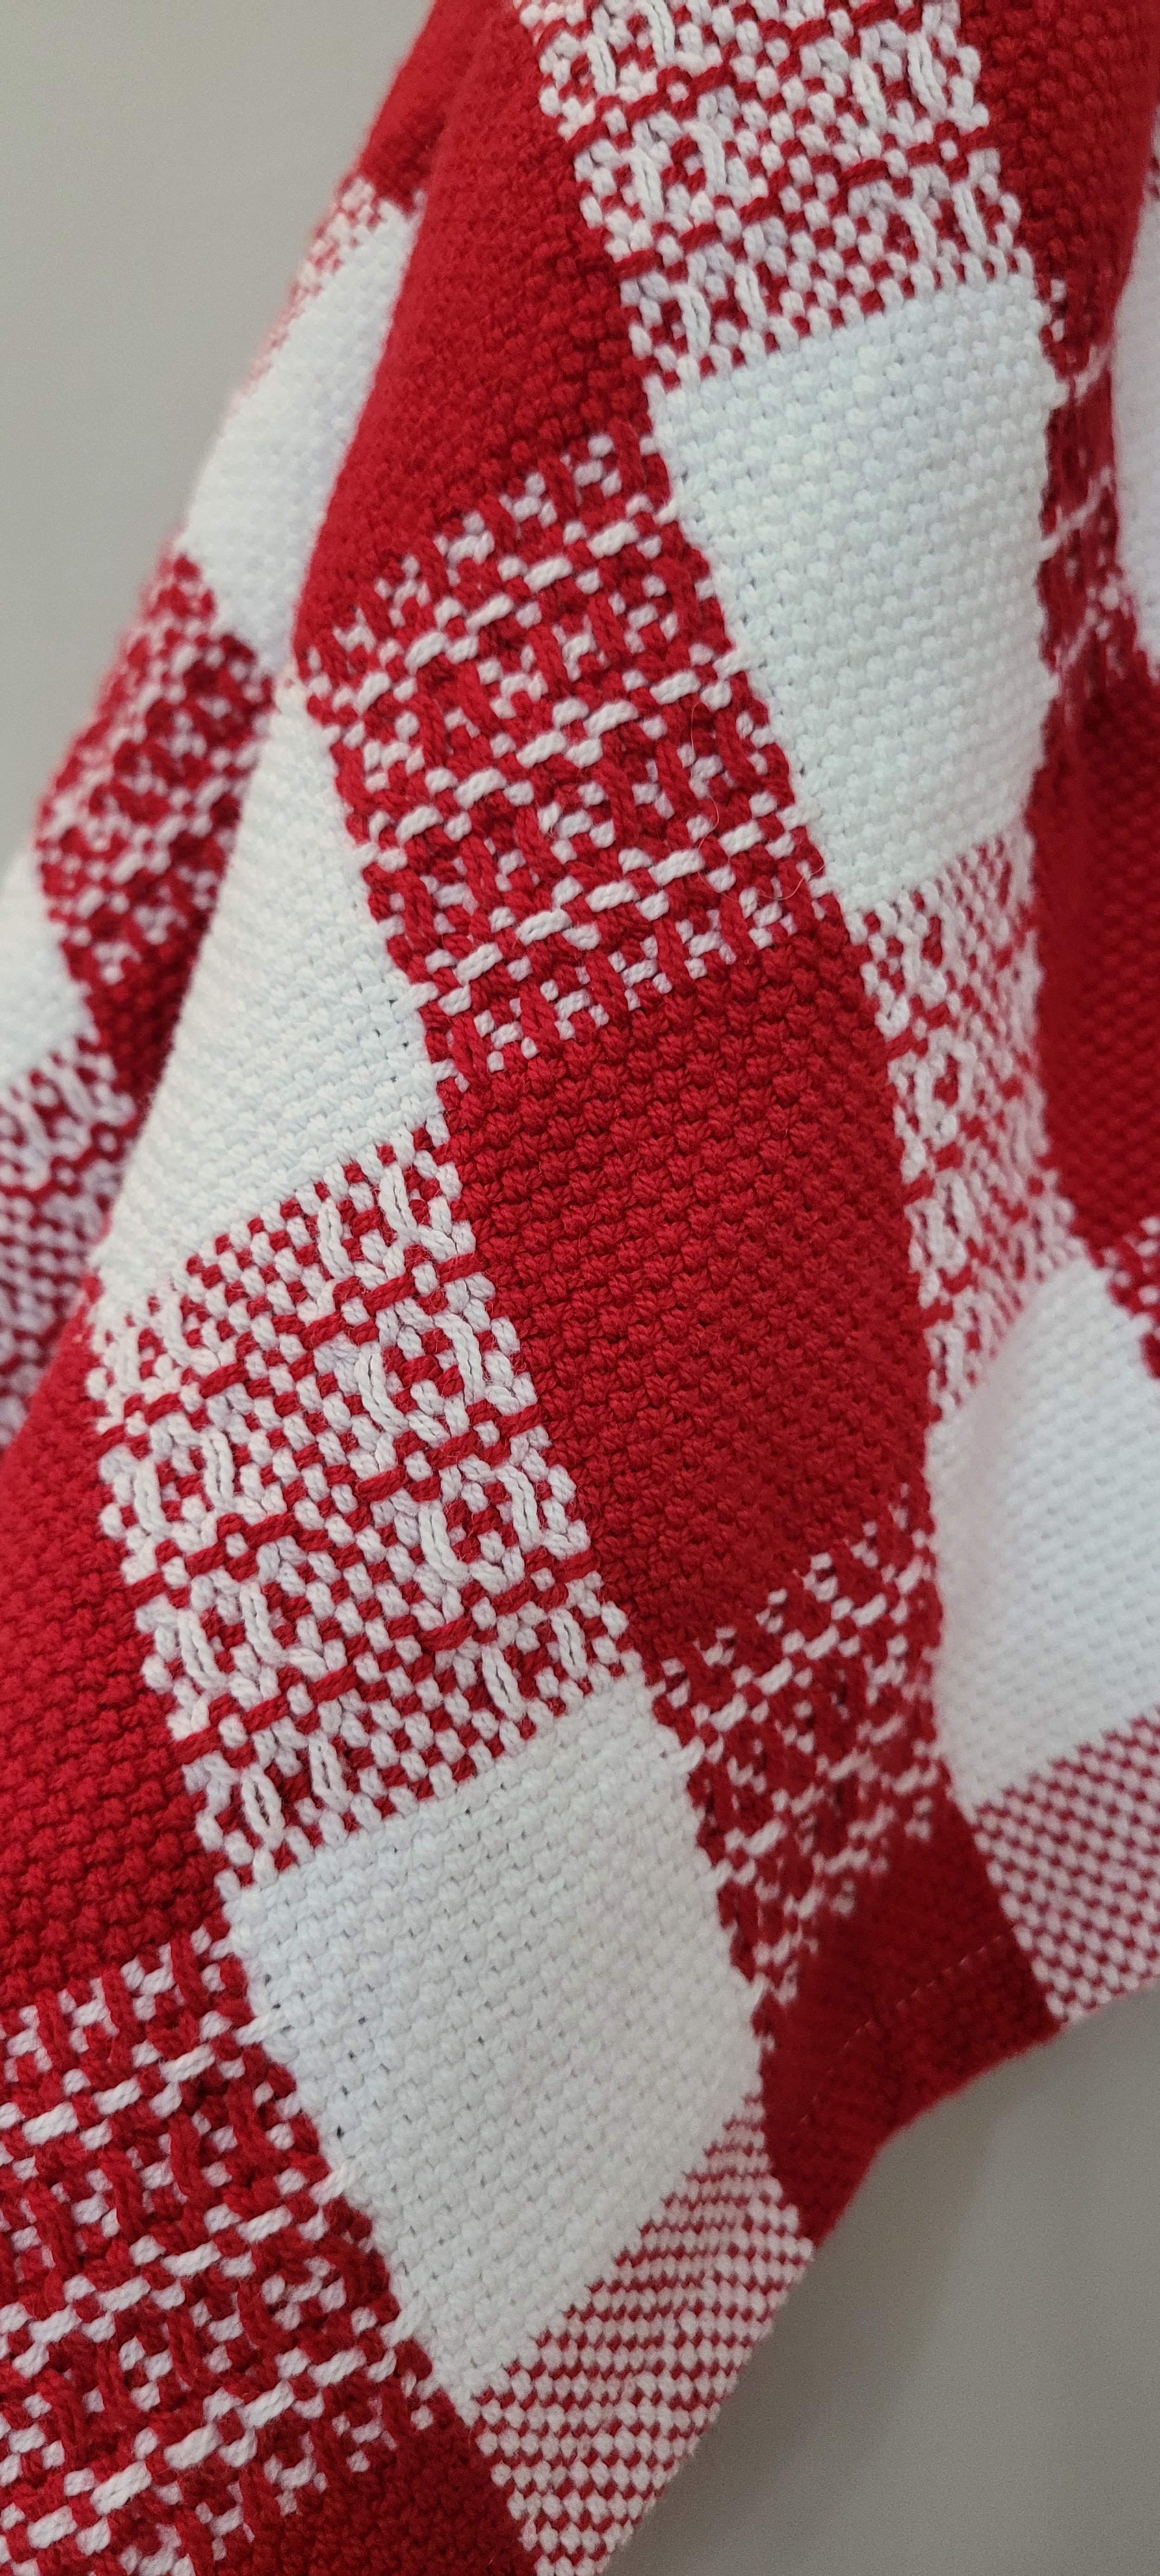
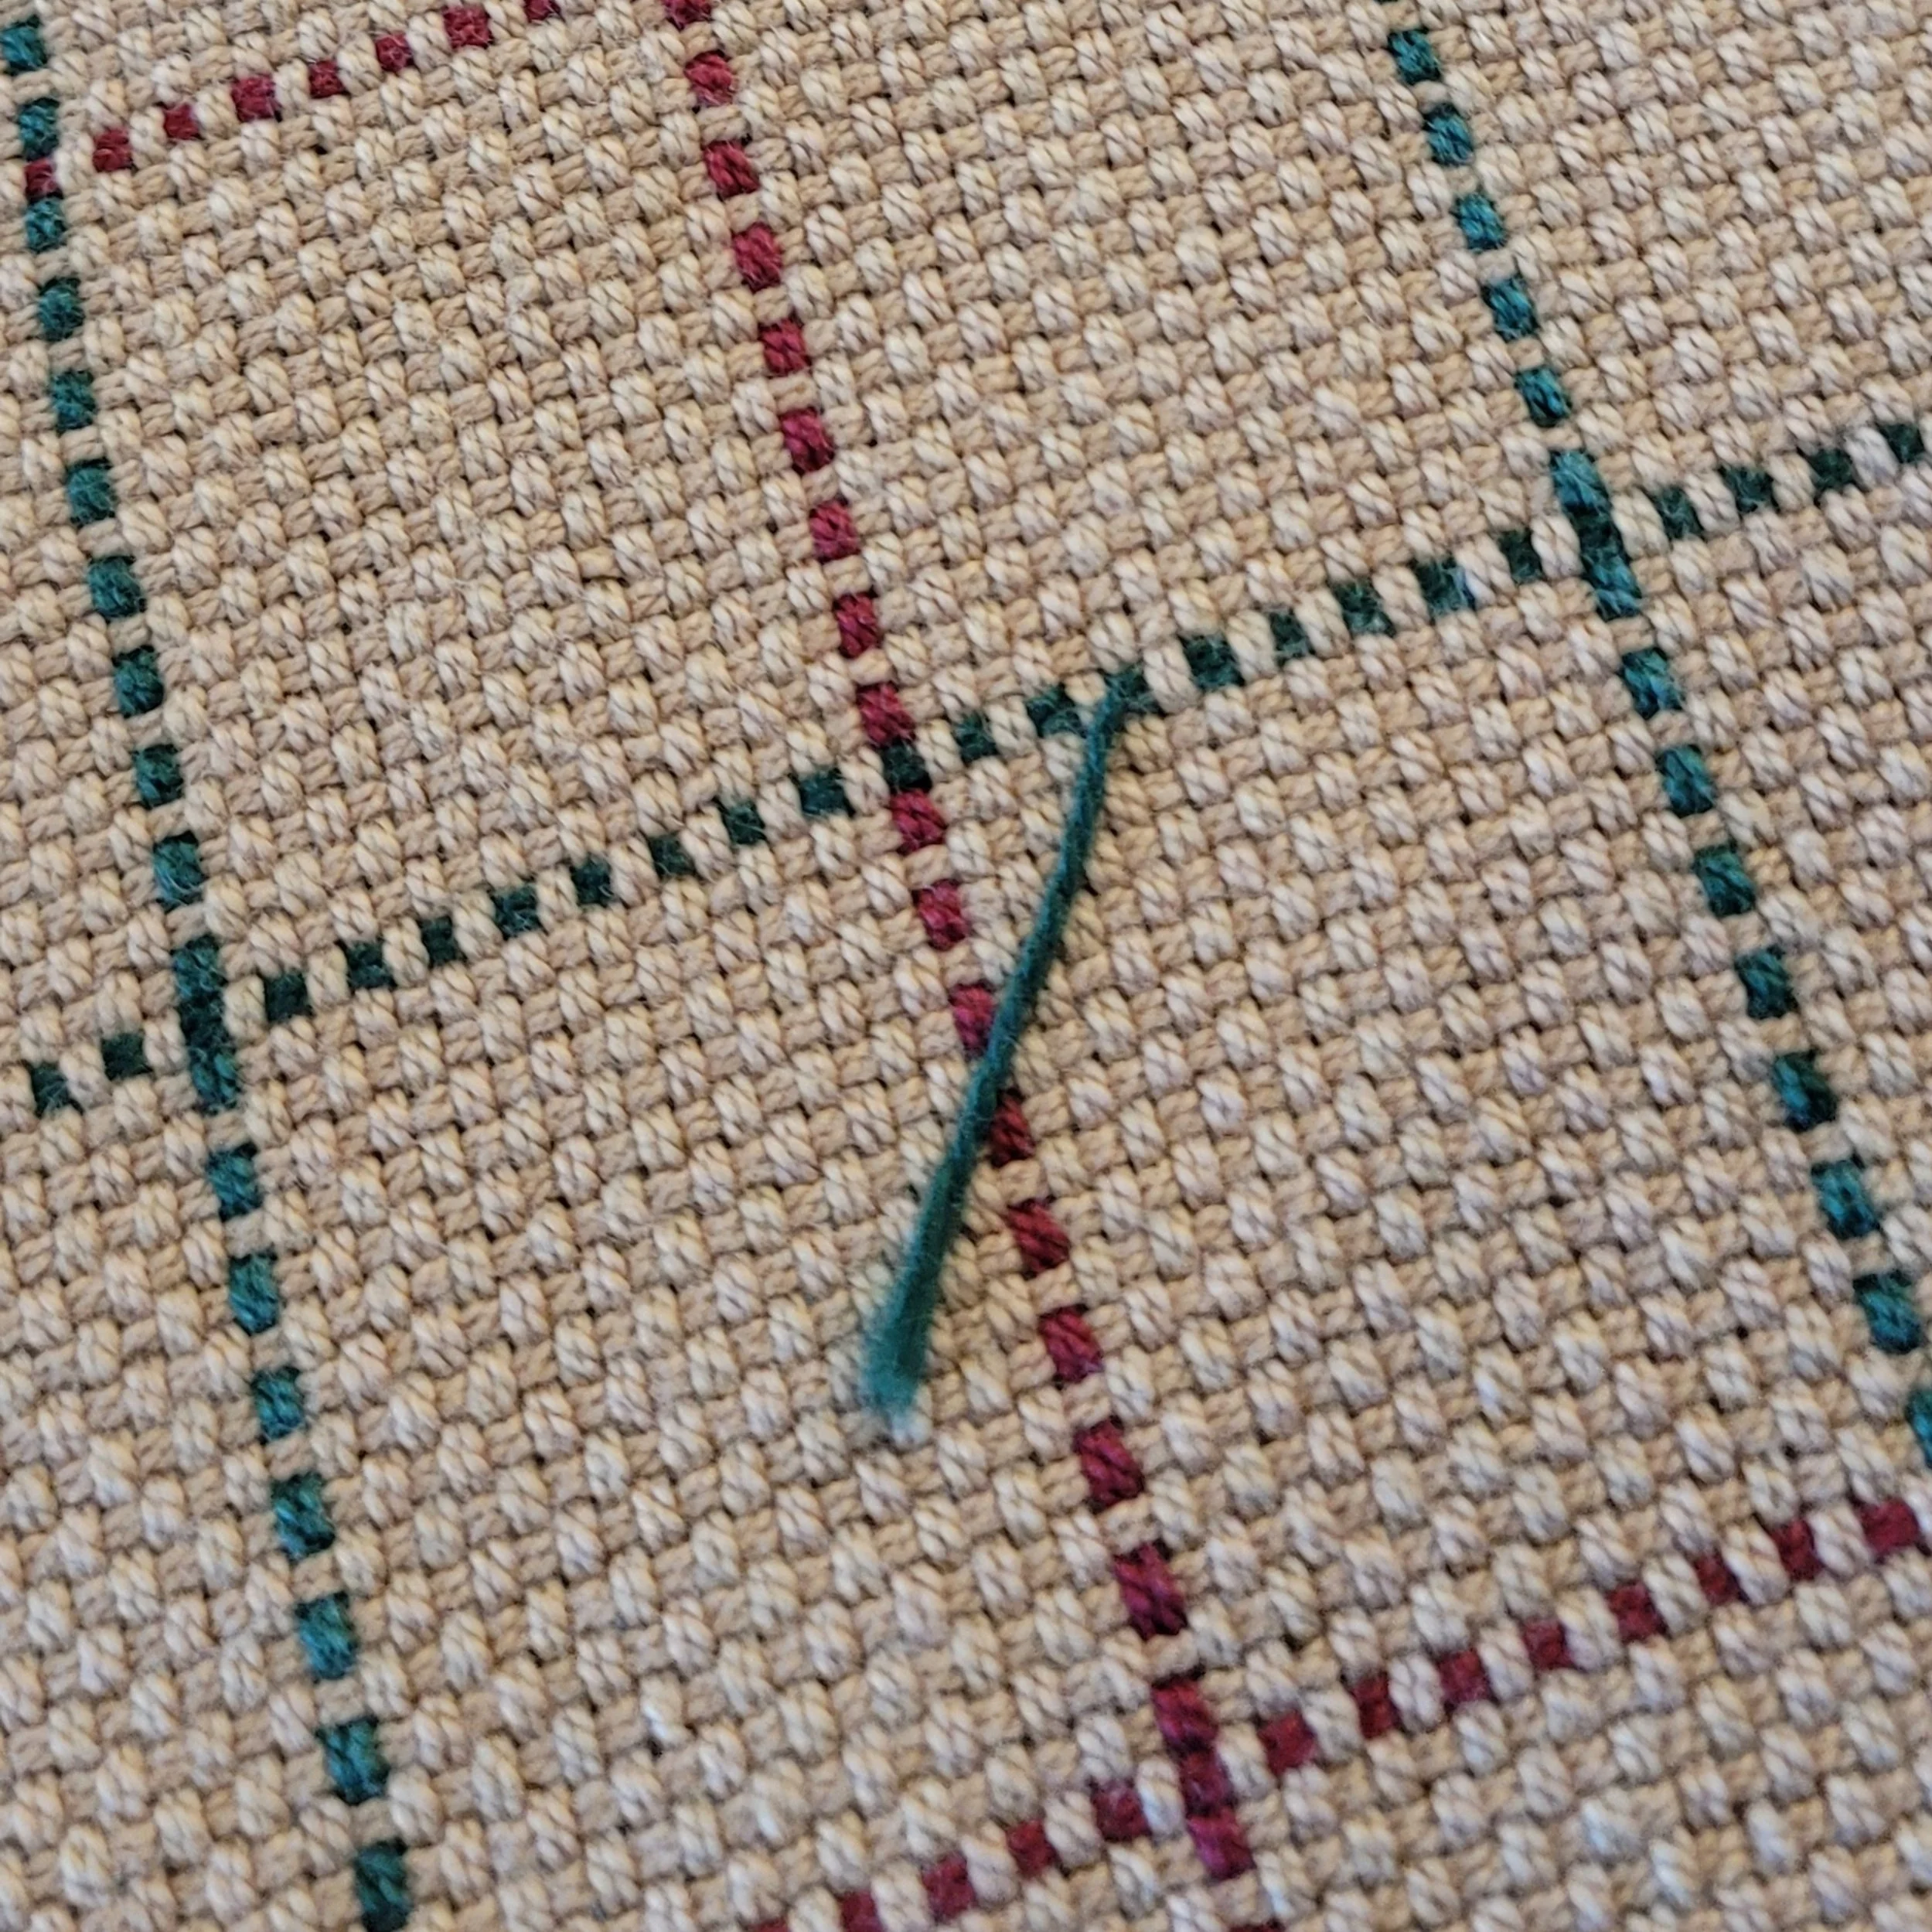
See the diagonal yellow in the center? This is tracking.
3. Tracking: these are the diagonal lines that appear in your weaving after wet finishing. Everything looks great on the loom, then when the towels come out of the washing machine it is covered in lines. There are various reasons why tracking happens which I am not going to cover today (mostly because I don’t understand the technicalities yet!) but I do not like tracking. It’s a personal preference, if you like tracking, that’s ok! I rarely experience tracking when using 8/2 but it often happens with 8/4.
4. Finally, I just like the feel of 8/2 doubled better than 8/4 single. It might just be my imagination, but I think they feel softer.
Are there disadvantages to using 8/2 over 8/4? Well, it is a little bit harder to wind the weft evenly on your shuttle. And if your tension isn’t tight enough it can be easy to go under only 1 thread instead of the the 2 threads that make up a single end. But over all, I will always choose 8/2 over 8/4!
Want to try some towels with more complex warping patterns? Check these one out. You can click the picture for more info or to purchase the pattern.

Split Plying and Weaving Single Picks
A common question I see on FB groups is about changing colour: how long to carry a colour up the side, how to reduce bulk at the changes, where to change colour etc. My way is not the only way and you should absolutely do what makes you happy and gives you the results you like.
This is not an exciting blog. I’m not sure technique posts are ever exciting. I do think that weaving is worth doing well though, and this is a technique that will up your weaving skills.
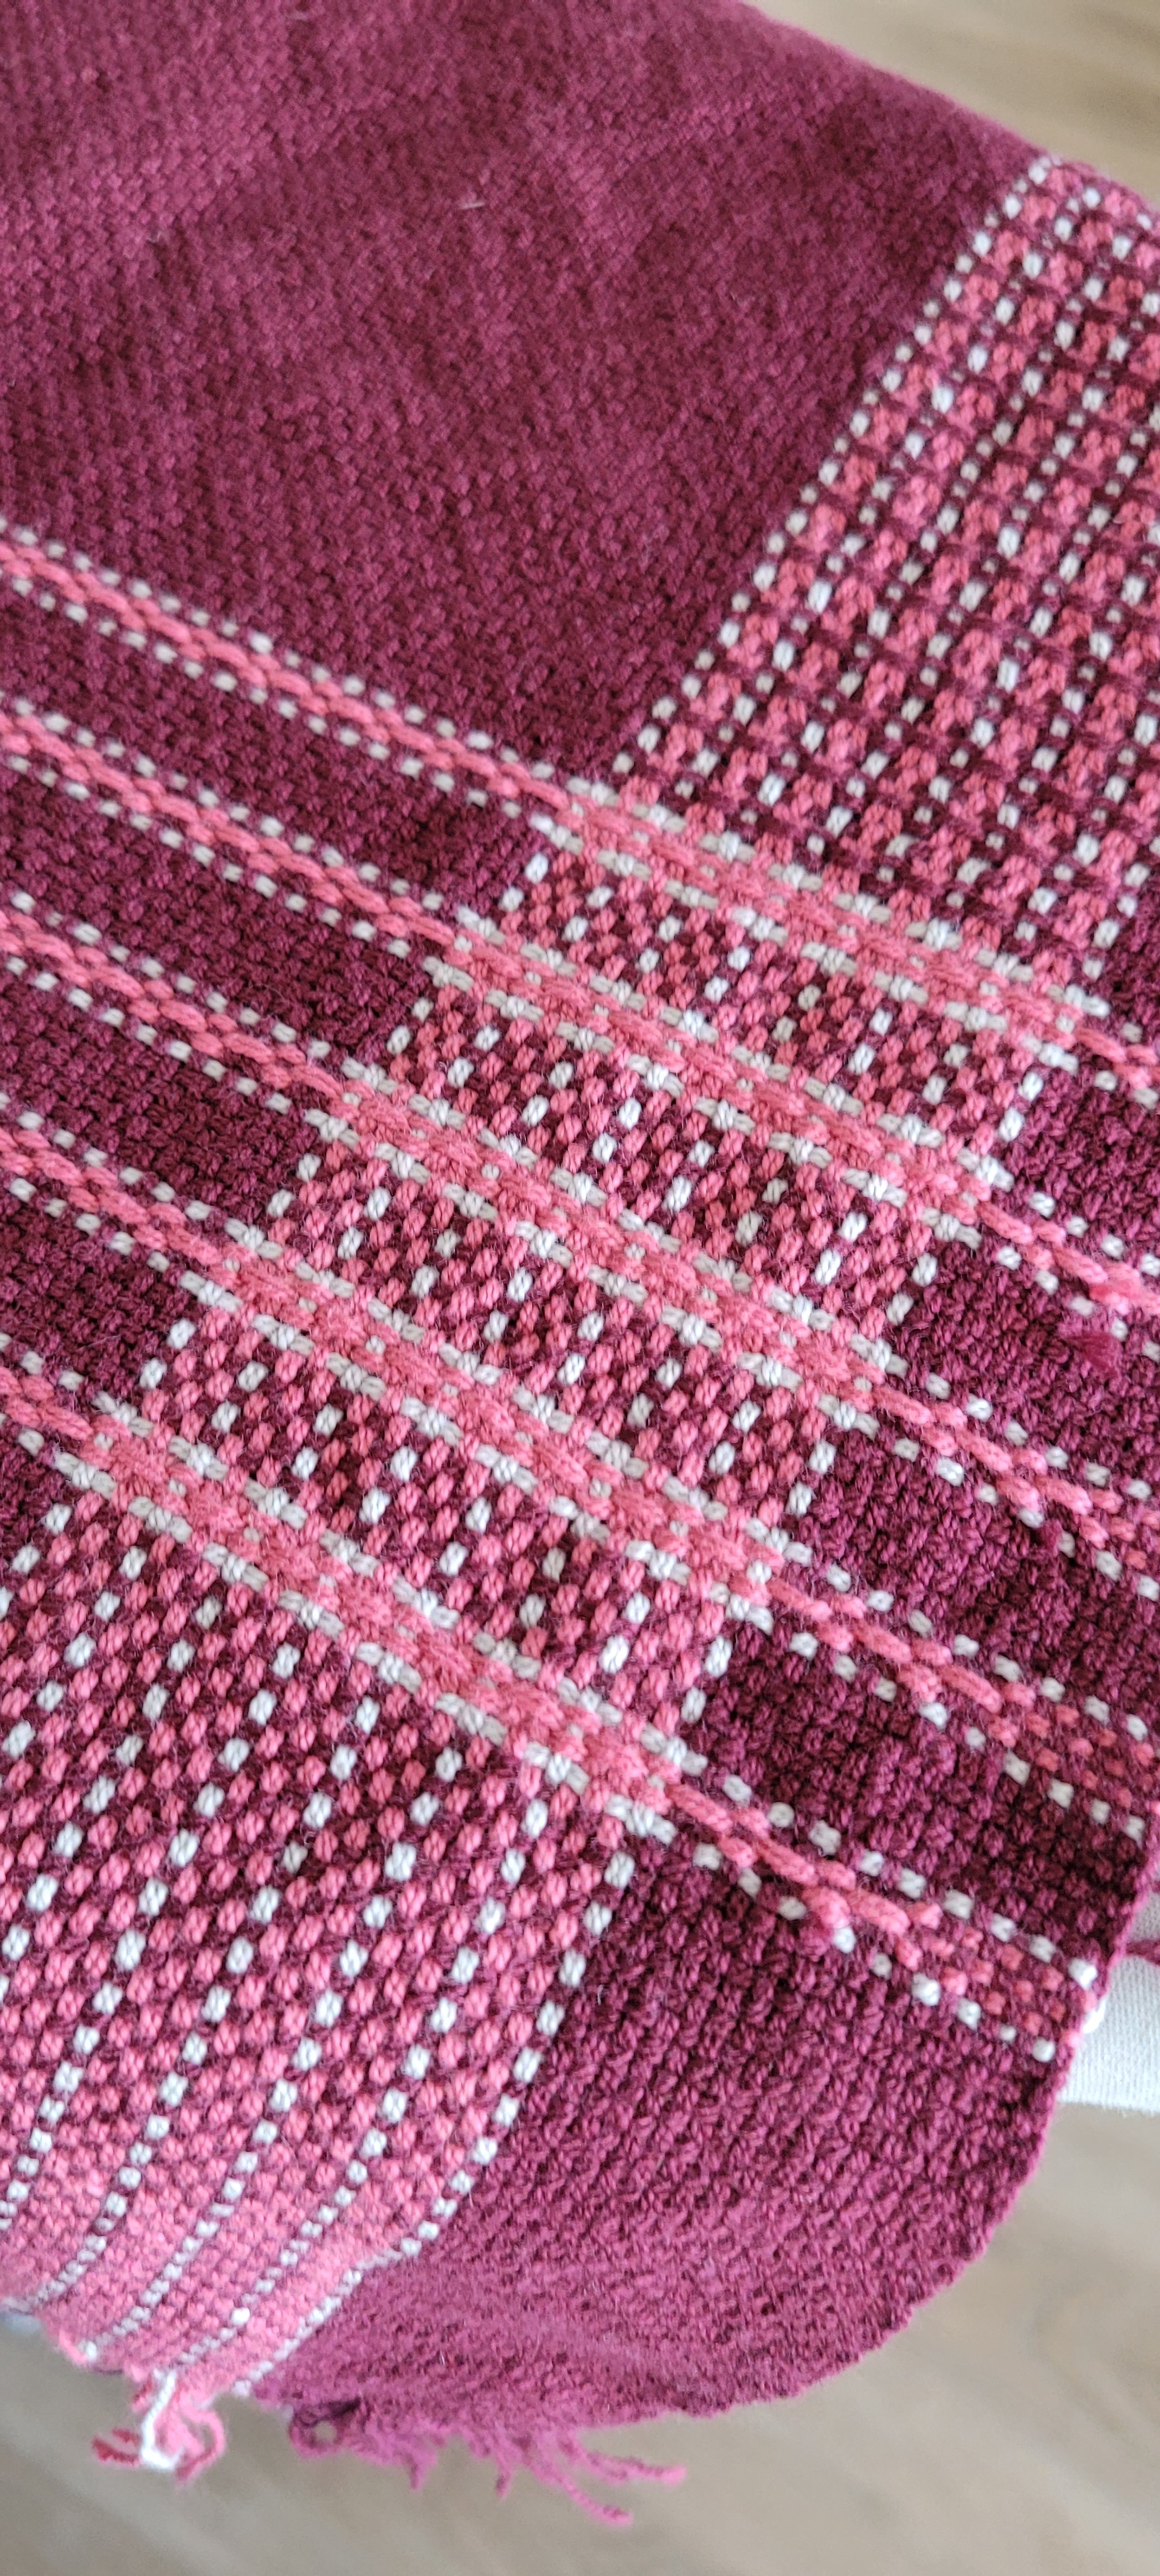
This project had a lot of colour changes and I split the plies. After wet finishing the changes are invisible.
A common question I see on FB groups is about changing colour: how long to carry a colour up the side, how to reduce bulk at the changes, where to change colour etc. My way is not the only way and you should absolutely do what makes you happy and gives you the results you like.
If you’ve read my blogs and posts, you will know that I strive for visual perfection. I want my weaving to look perfect. Not machine made: hand weaving will always be distinguishable from machine woven fabric and should be, but I don’t want visible mistakes. So I’ve worked to perfect the colour change.
Here’s how I do it.
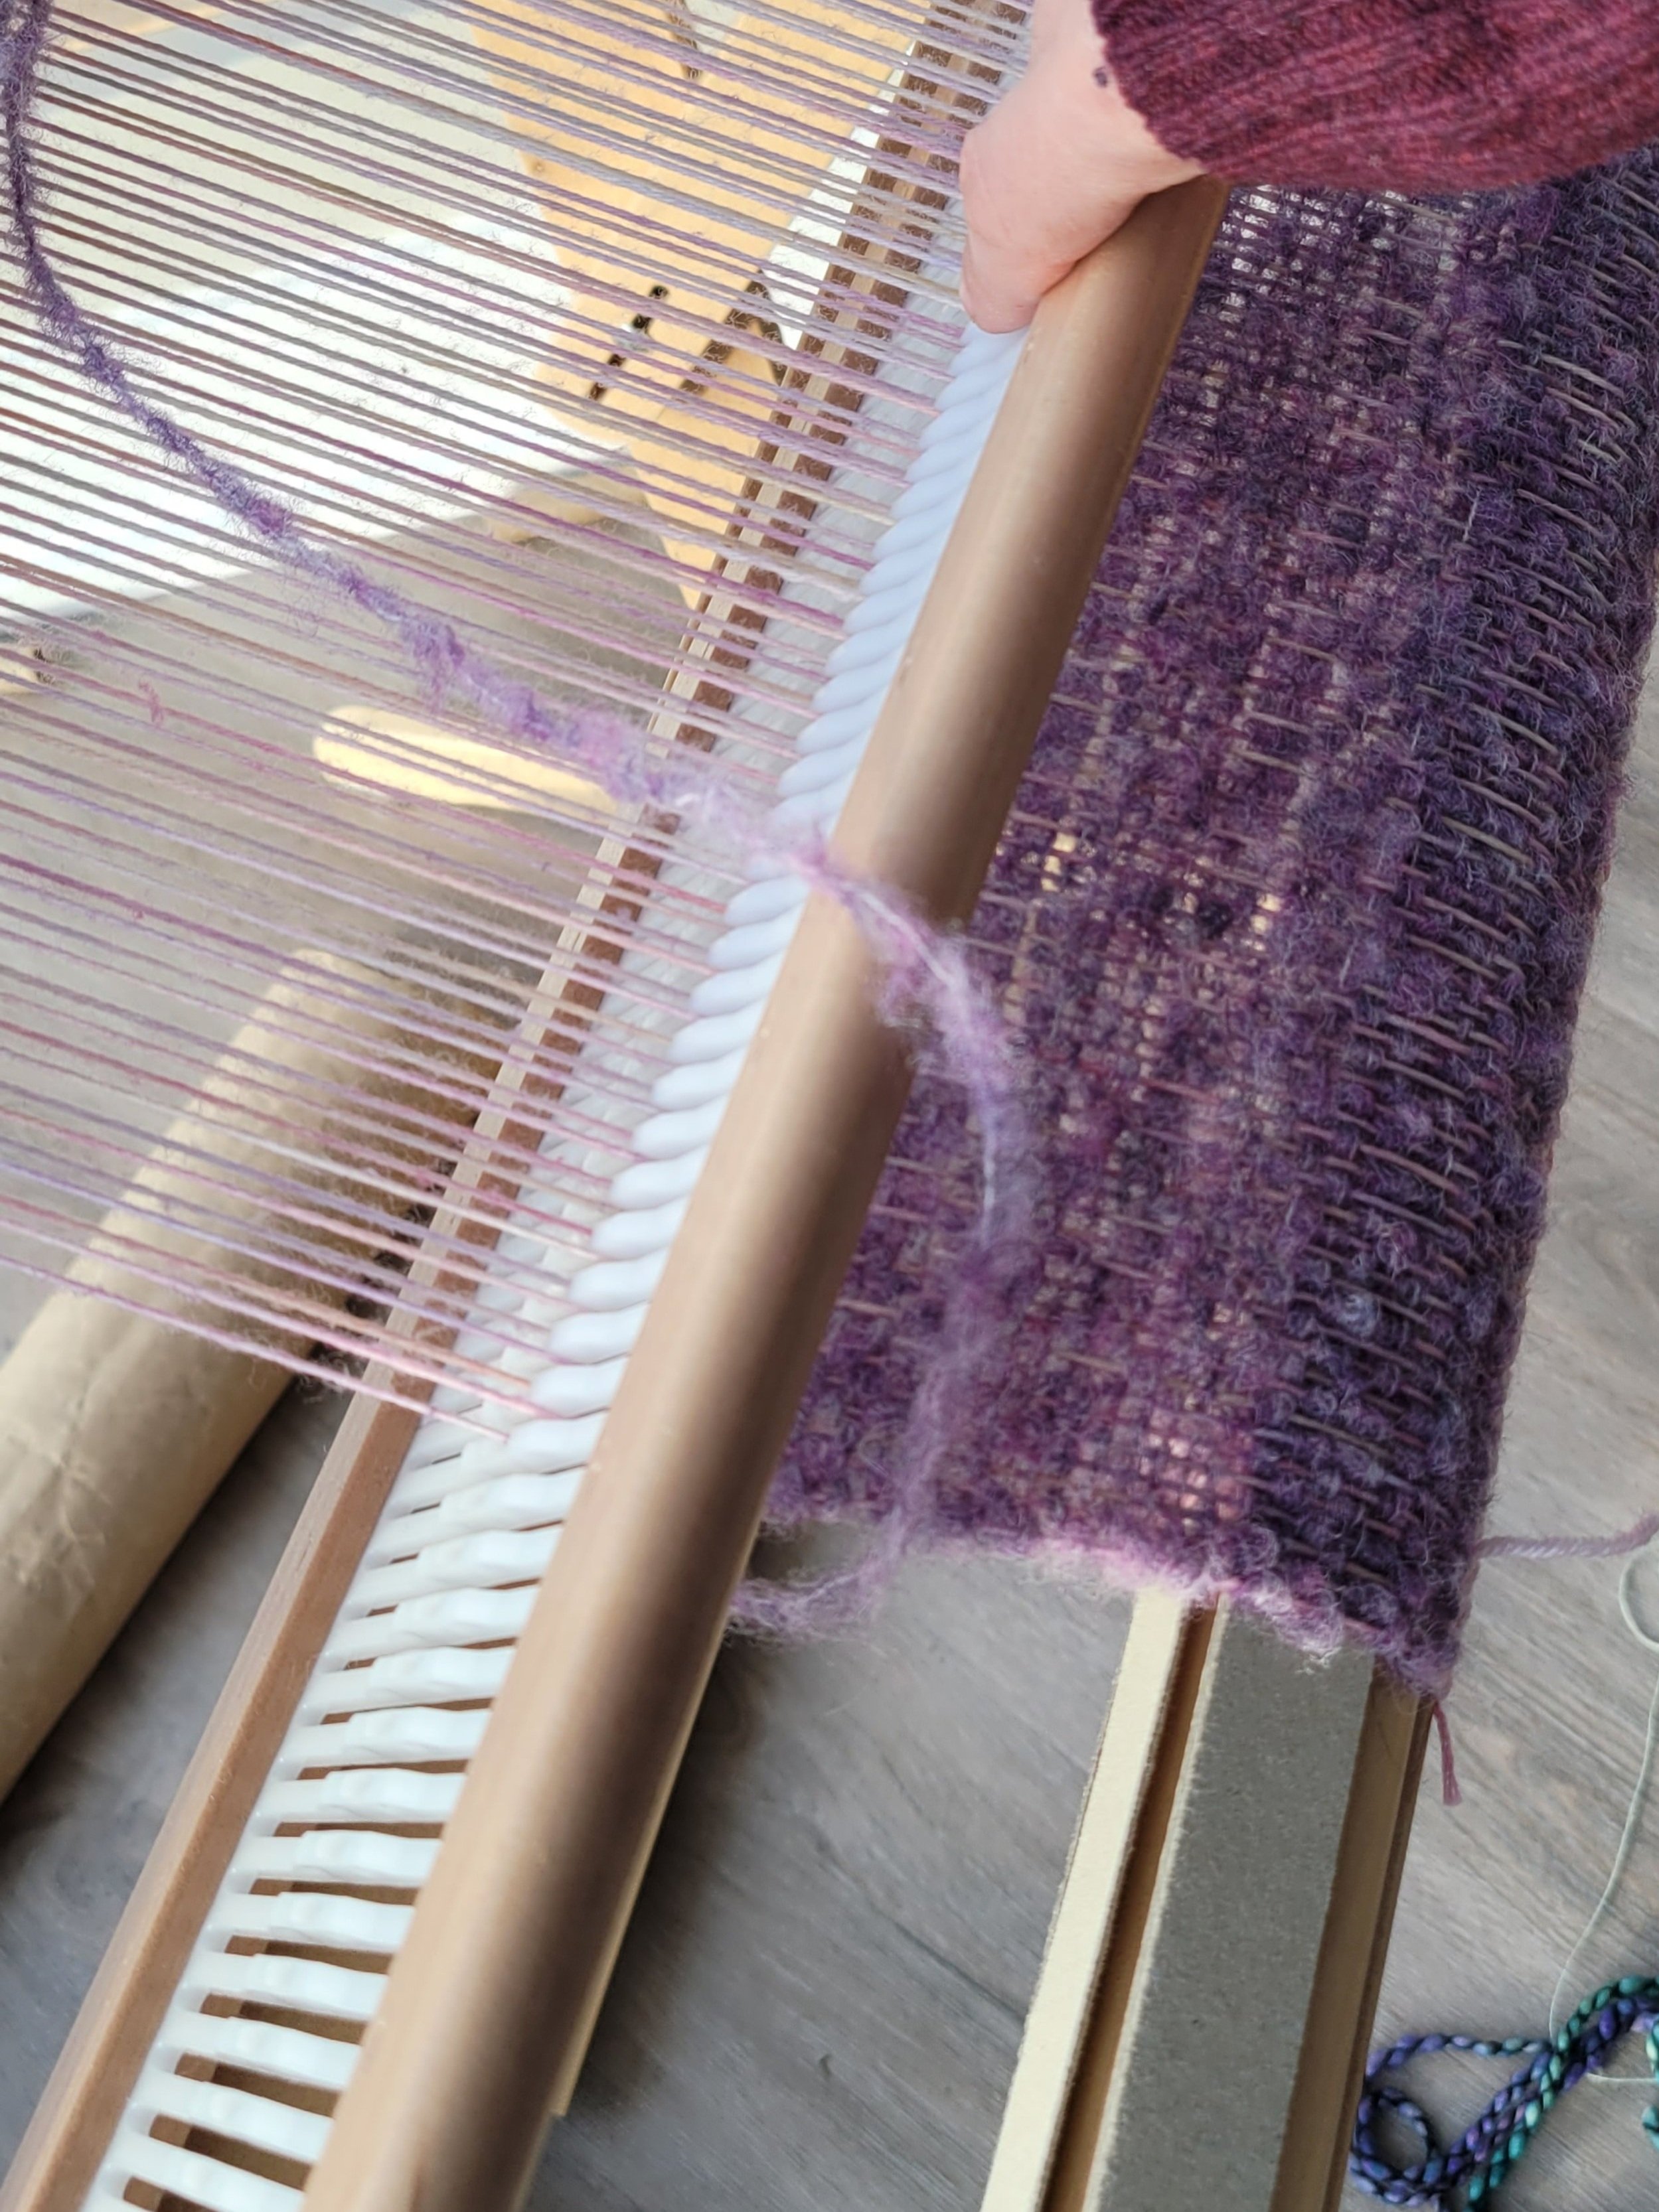
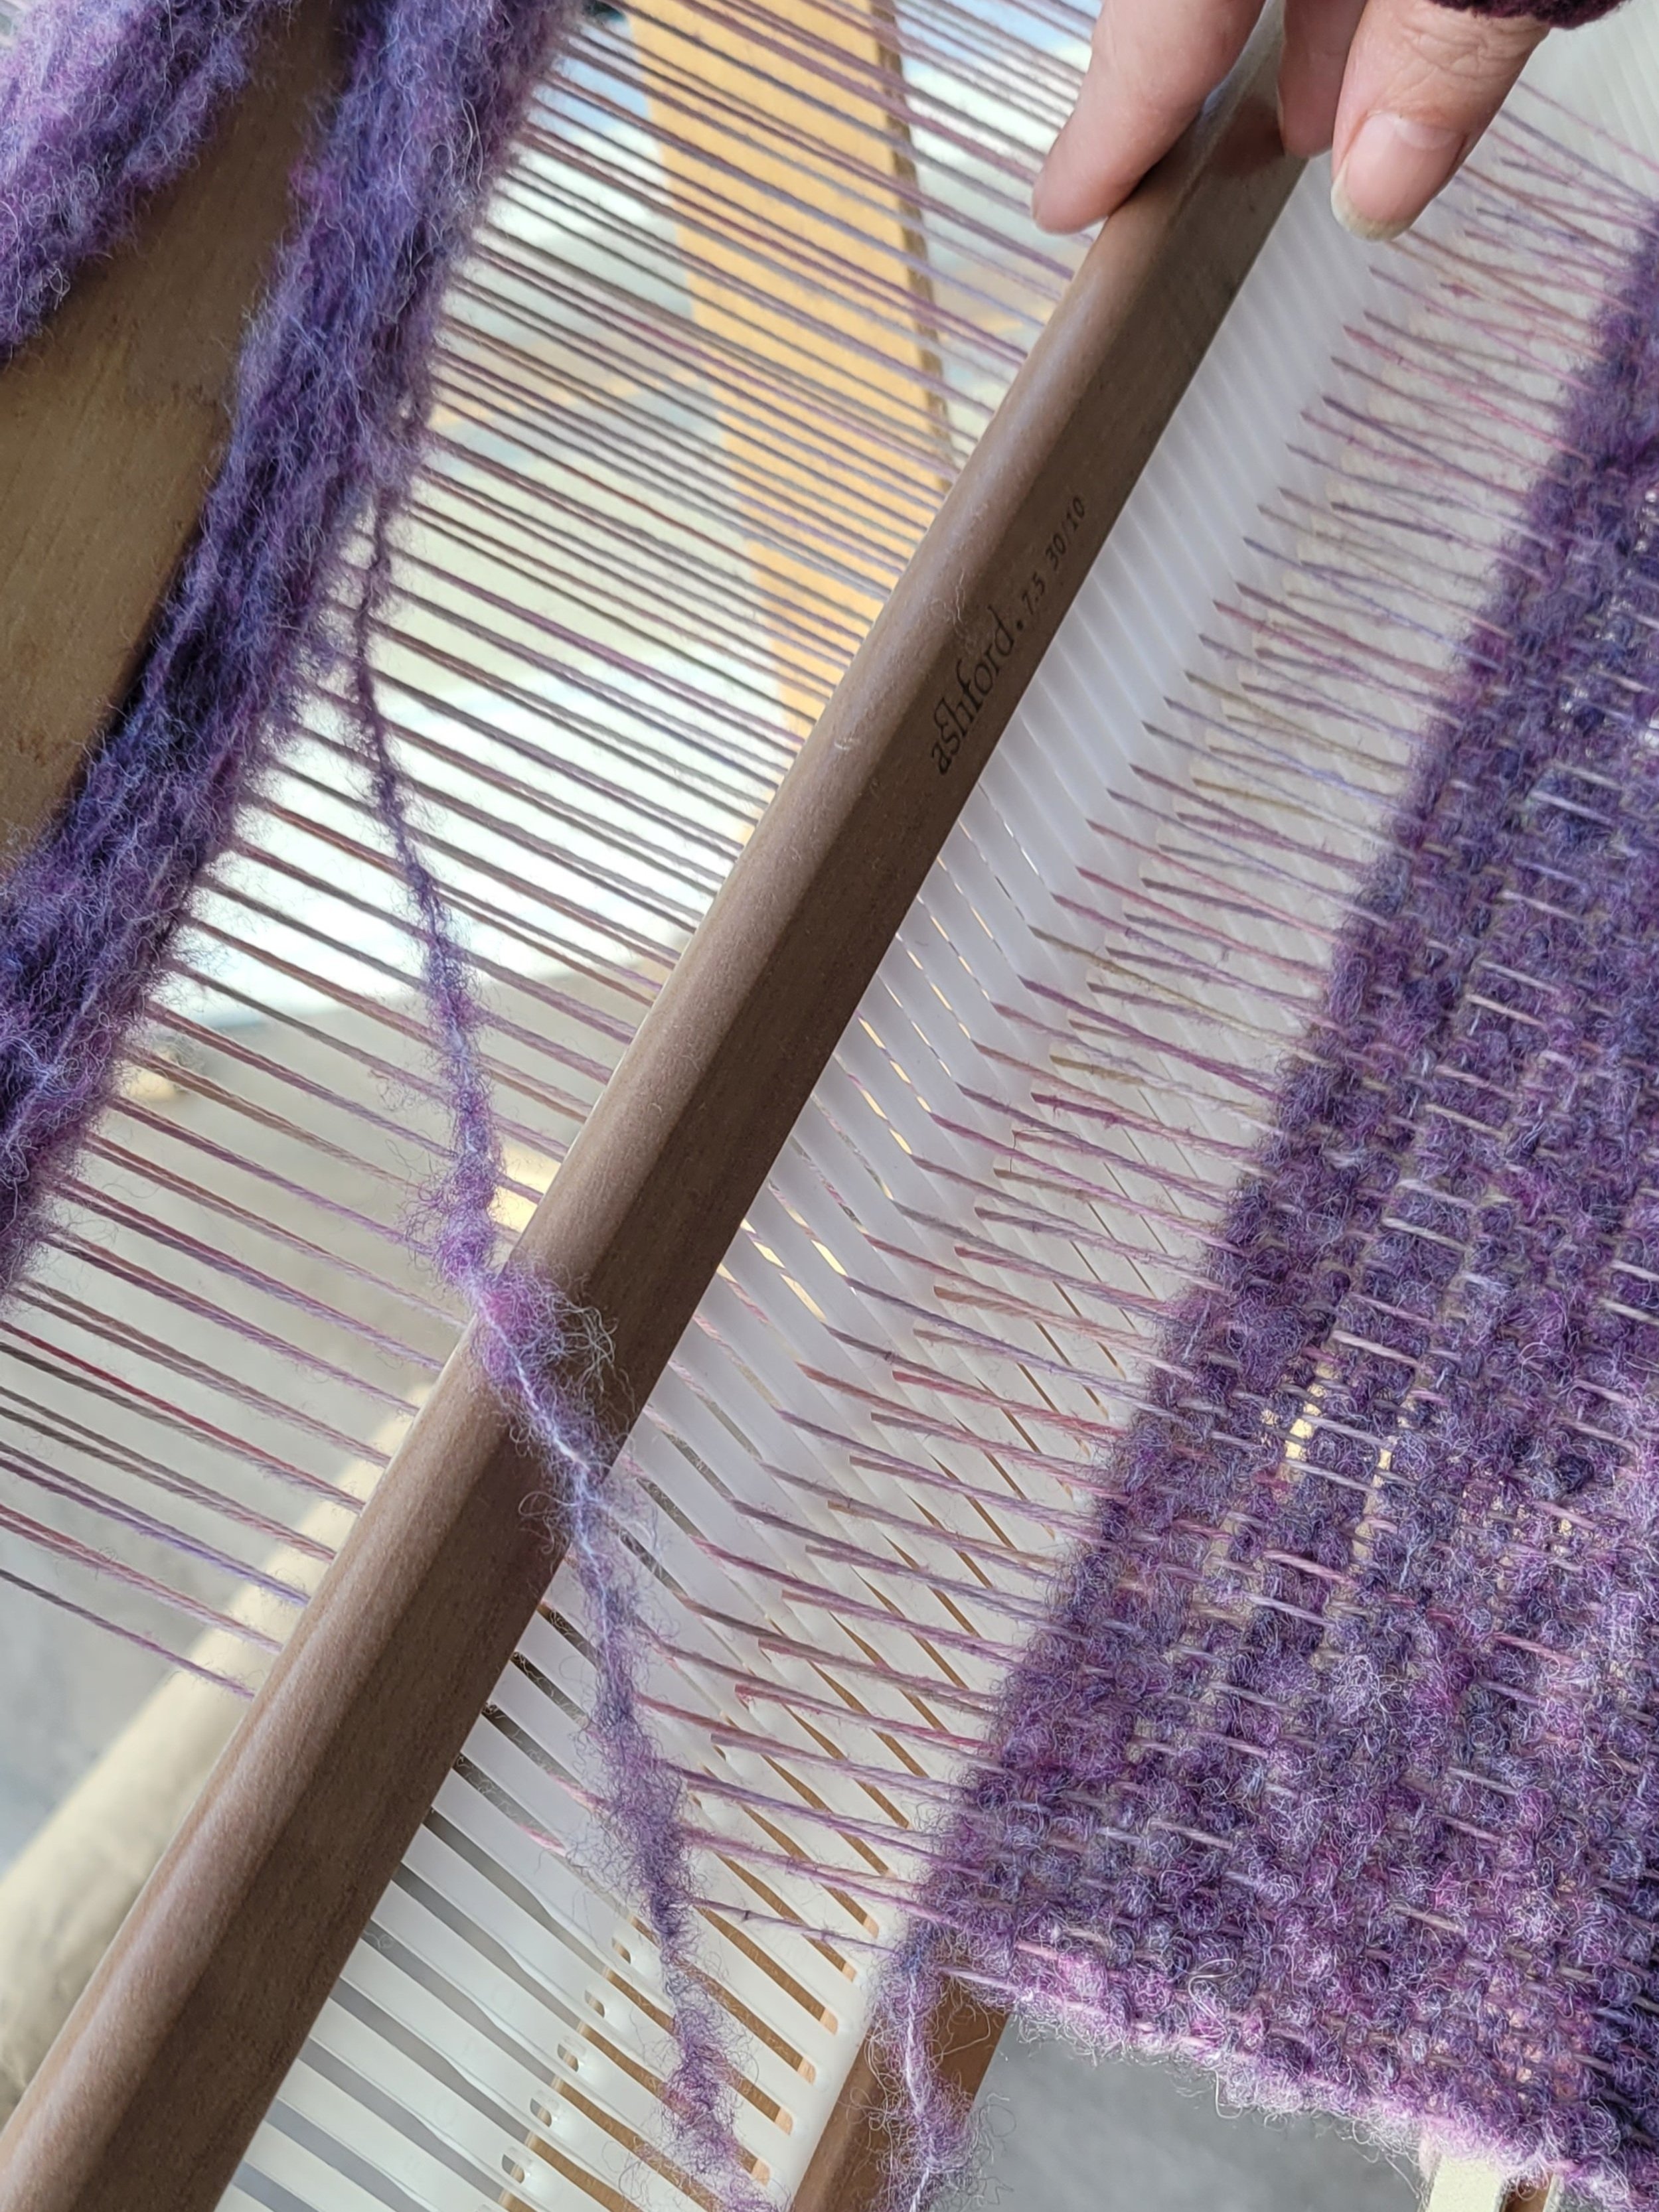
Step 1: Weave the last pick of the colour. After the shuttle leaves the shed, clip the end leaving about a 2” tail.
Step 2: Untwist the fibre in the tail and split the plies in half. (I’ll discuss single ply weft later)
Step 3: Pull half the plies out of the weaving about an inch into the shed
Step 4: Take the remaining pies, wrap them around the last warp end and send them back through the shed overlapping the other ply and a bit past into the full fibre
Step 5: press the weft into place. Do not trim the tails until after the piece has been wet finished.

That’s it! It’s not hard, but it is time consuming, particularly if there are a lot of colour changes. Here’s a video: https://youtu.be/VHmaK8LCKIc
Now, about carrying yarn up the side…if the carried yarn is the same colour as the warp, go for it! IBe sure to catch the resting weft with the working weft. f they are different colours, I’ll only carry up a maximun of 2-3 picks. I find it really shows and I don’t like how it looks. But you do what gives you the result you want!
The green shows the overlap of a single pick doubled…its virtually invisible!
And finally…a single pick of a colour. This is pretty easy if you are using your weft doubled. Have a shuttle with the weft wound single. Send the shuttle through the shed leaving a long tail. Press into place, do not change sheds. Split the plies of the tail. Wrap the tail around the last warp end and send it through the same shed about halfway or so. Wrap the shuttle around the last warp end and send it back through the shed. Bring it out of the shed just before you meet the weft from the other side. Clip leaving a tail long enough to overlap the first tail. Split the plies, and weave it back into the shed overlapping the other end. Press into place. Don’t clip any ends until after wet finishing. That’s it! If there are lots of single picks, I like to stagger when my yarns overlap. Here’s a video: https://youtu.be/9mflcqlshJ0
One final thing, I said we would talk about single ply yarns. If your warp is heavier than the weft, I don’t worry too much about bulk or the change being seen. Simply wrap the weft around the last warp end and weave about an 1” back into the same shed. Press into place. Otherwise, single ply yarns will usually split if you untwist it. Just be careful because it will also want to pull apart.

Cotton and that Pesky Lower Shed
I weave tonnes of tea towels, which means I use A LOT of cotton. I think cotton is great and I love weaving with it, but it has some unique challenges. One of them is that pesky lower shed. You all know exactly what I’m talking about, in fact, I bet you are all groaning about it right now! I’m not gong to promise to solve all your problems, but here’s how I eliminate (mostly) that sagging shed.
I weave tonnes of tea towels, which means I use A LOT of cotton. I think cotton is great and I love weaving with it, but it has some unique challenges. One of them is that pesky lower shed. You all know exactly what I’m talking about, in fact, I bet you are all groaning about it right now! I’m not gong to promise to solve all your problems, but here’s how I eliminate (mostly) that sagging shed.
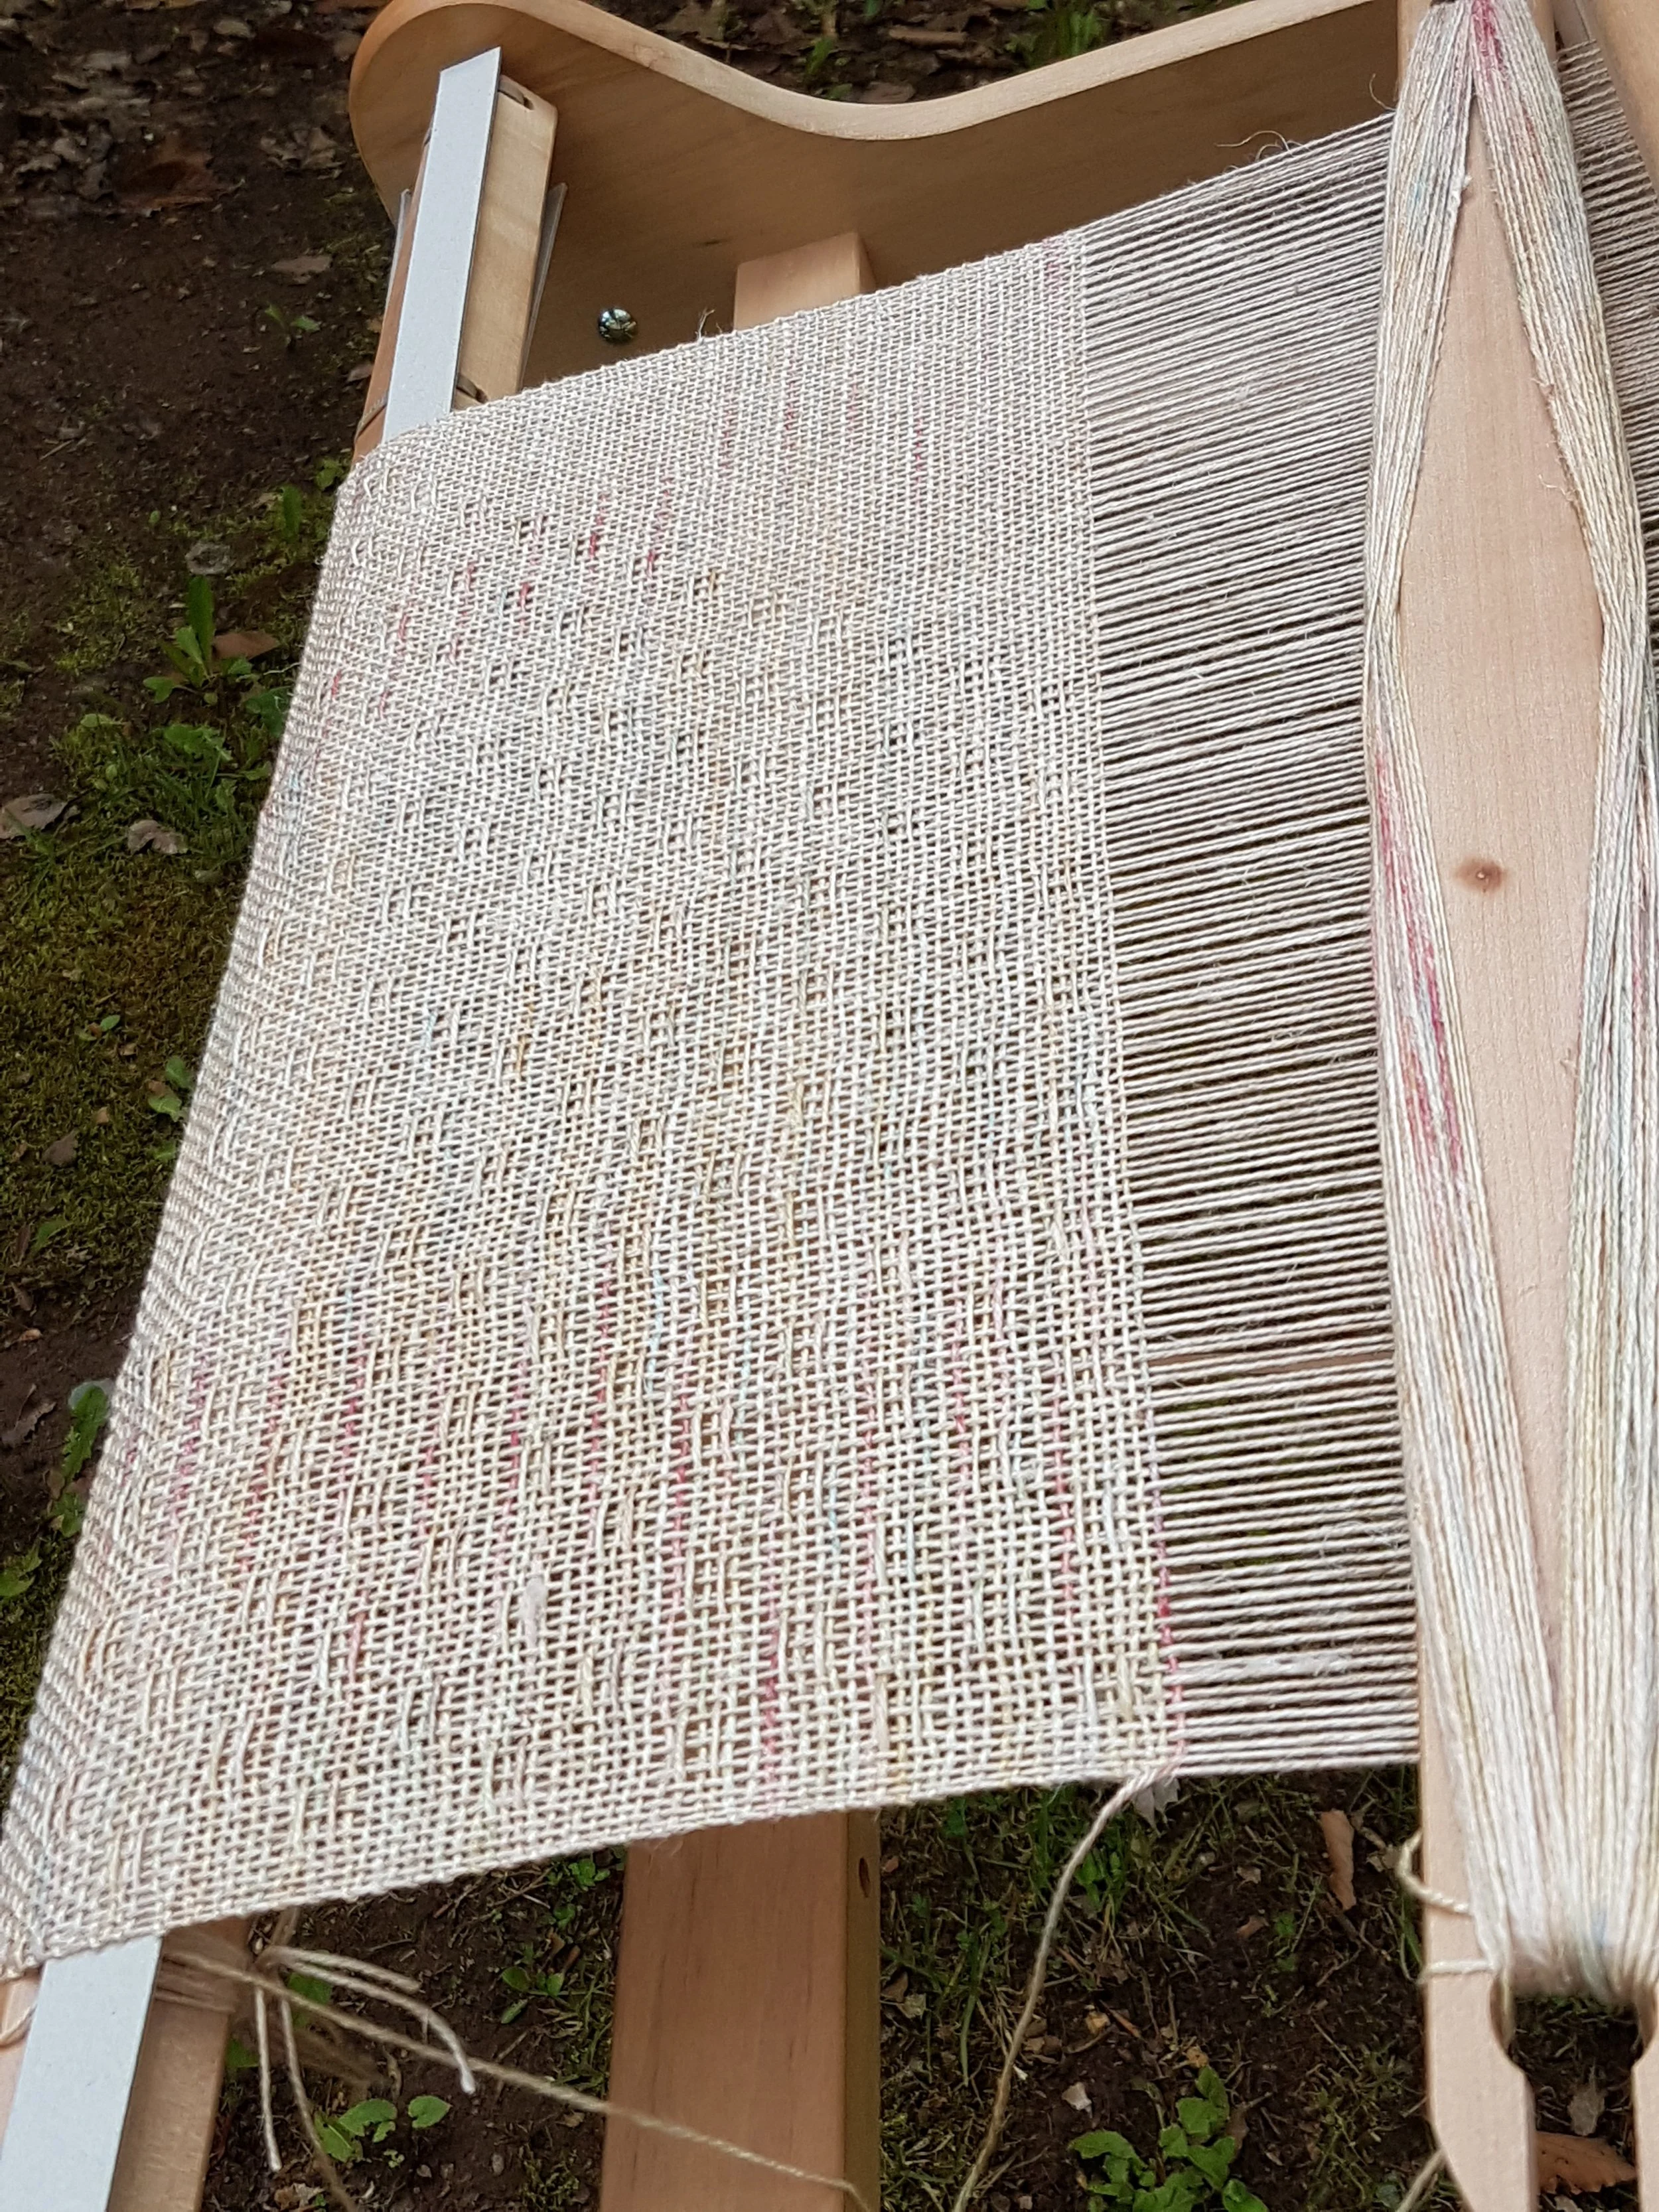
First, let’s talk about why this happens. When the heddle is lifted to the up shed, the ends get a little stretch as they go up. When the heddle is lowered, the stretch is released. Yarns with a little bit of stretch in them can easily accommodate the slight changes. Cotton on the other hand has no stretch. So the extra stretch that is needed in the up shed results in a loose down shed. This is frustrating for weavers, especially for new weavers who wonder what they have done wrong. Here’s how I tie on and start warping and I rarely have a loose lower shed.
Tie on in neutral. When you tie on, make sure that the holes and slots form a nice even line of threads across the loom. (see pictures 1 and 2 below)
After tying on, weave in 2 warping sticks, 1 in the up shed, one in the down shed. Press them firmly into place. The lower shed will still sag, see picture 3 below.
Return the heddle to neutral and tighten up the tension. I use a very high tension. Don’t worry (too much) about harming your loom, I have woven hundreds, maybe even more than a 1000 tea towels on my Ashford loom and it works as well as it did when I first bought it. As long as you can raise the heddle to get the upper shed, you should be fine. Note the flat even lower shed in picture 4. Here’s a video


Generally, this solves the problem. Even if my lower shed is a little loose I will start weaving. By the time I have woven about an inch, the shed has almost always tightened up. If in the very rare case it hasn’t, place the heddle in the down shed. Slide a pick up stick into the shed behind the reed and slide it back to the back beam. Leave it in for the duration of the project sliding it back as far as possible each time you wind forward.
I recently used Yoga Cotton by Ashford. This cotton is designed specifically with this problem in mind. It has a nylon core that is completely covered with cotton. The 18% nylon adds just enough stretch to eliminate the sag.
Happy Weaving!

String Heddles
If you follow me, you know I like to push the limits of rigid heddle weaving, but at the same time, I want weaving to be easy and fun. And I love pick-up sticks!!! Often when I use multiple pick-up sticks they slide over each other so need to be inserted only once. However, I also have patterns where one pick-up stick needs to be reinserted each time it is needed. When I first started weaving with multiple sticks, I didn’t mind reinserting the stick each time.
Let’s talk about string heddles, what they are, how to make them and why you might use them.
If you follow me, you know I like to push the limits of rigid heddle weaving, but at the same time, I want weaving to be easy and fun. And I love pick-up sticks!!! Often when I use multiple pick-up sticks they slide over each other so need to be inserted only once. However, I also have patterns where one pick-up stick needs to be reinserted each time it is needed. When I first started weaving with multiple sticks, I didn’t mind reinserting the stick each time. And really, I still don’t most of the time. I put off using string heddles because I didn’t want to stop weaving long enough to make them. Then I didn’t really like them because they sometimes came untied while weaving. But I’ve learned a few things and now I like string heddles!
What are String heddles?
String heddles are exactly what they sound like…string that acts as a heddle around a single warp end. Your rigid heddle has slots and holes. Each warp end is threaded into a slot or hole and the movement of the heddle determines which ends go up and which stay down. When you weave you will notice that the slots stay level and the holes either move up or down. String heddles will only be used on ends that are in slots are used the same way as a pick-up stick adding up to 2 extra sheds!
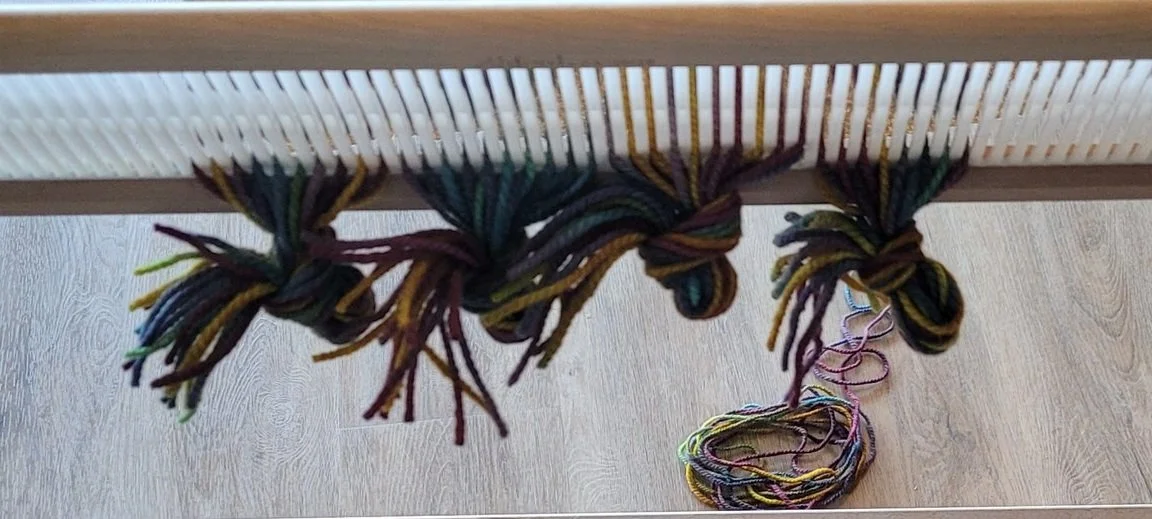
How to Make String Heddles
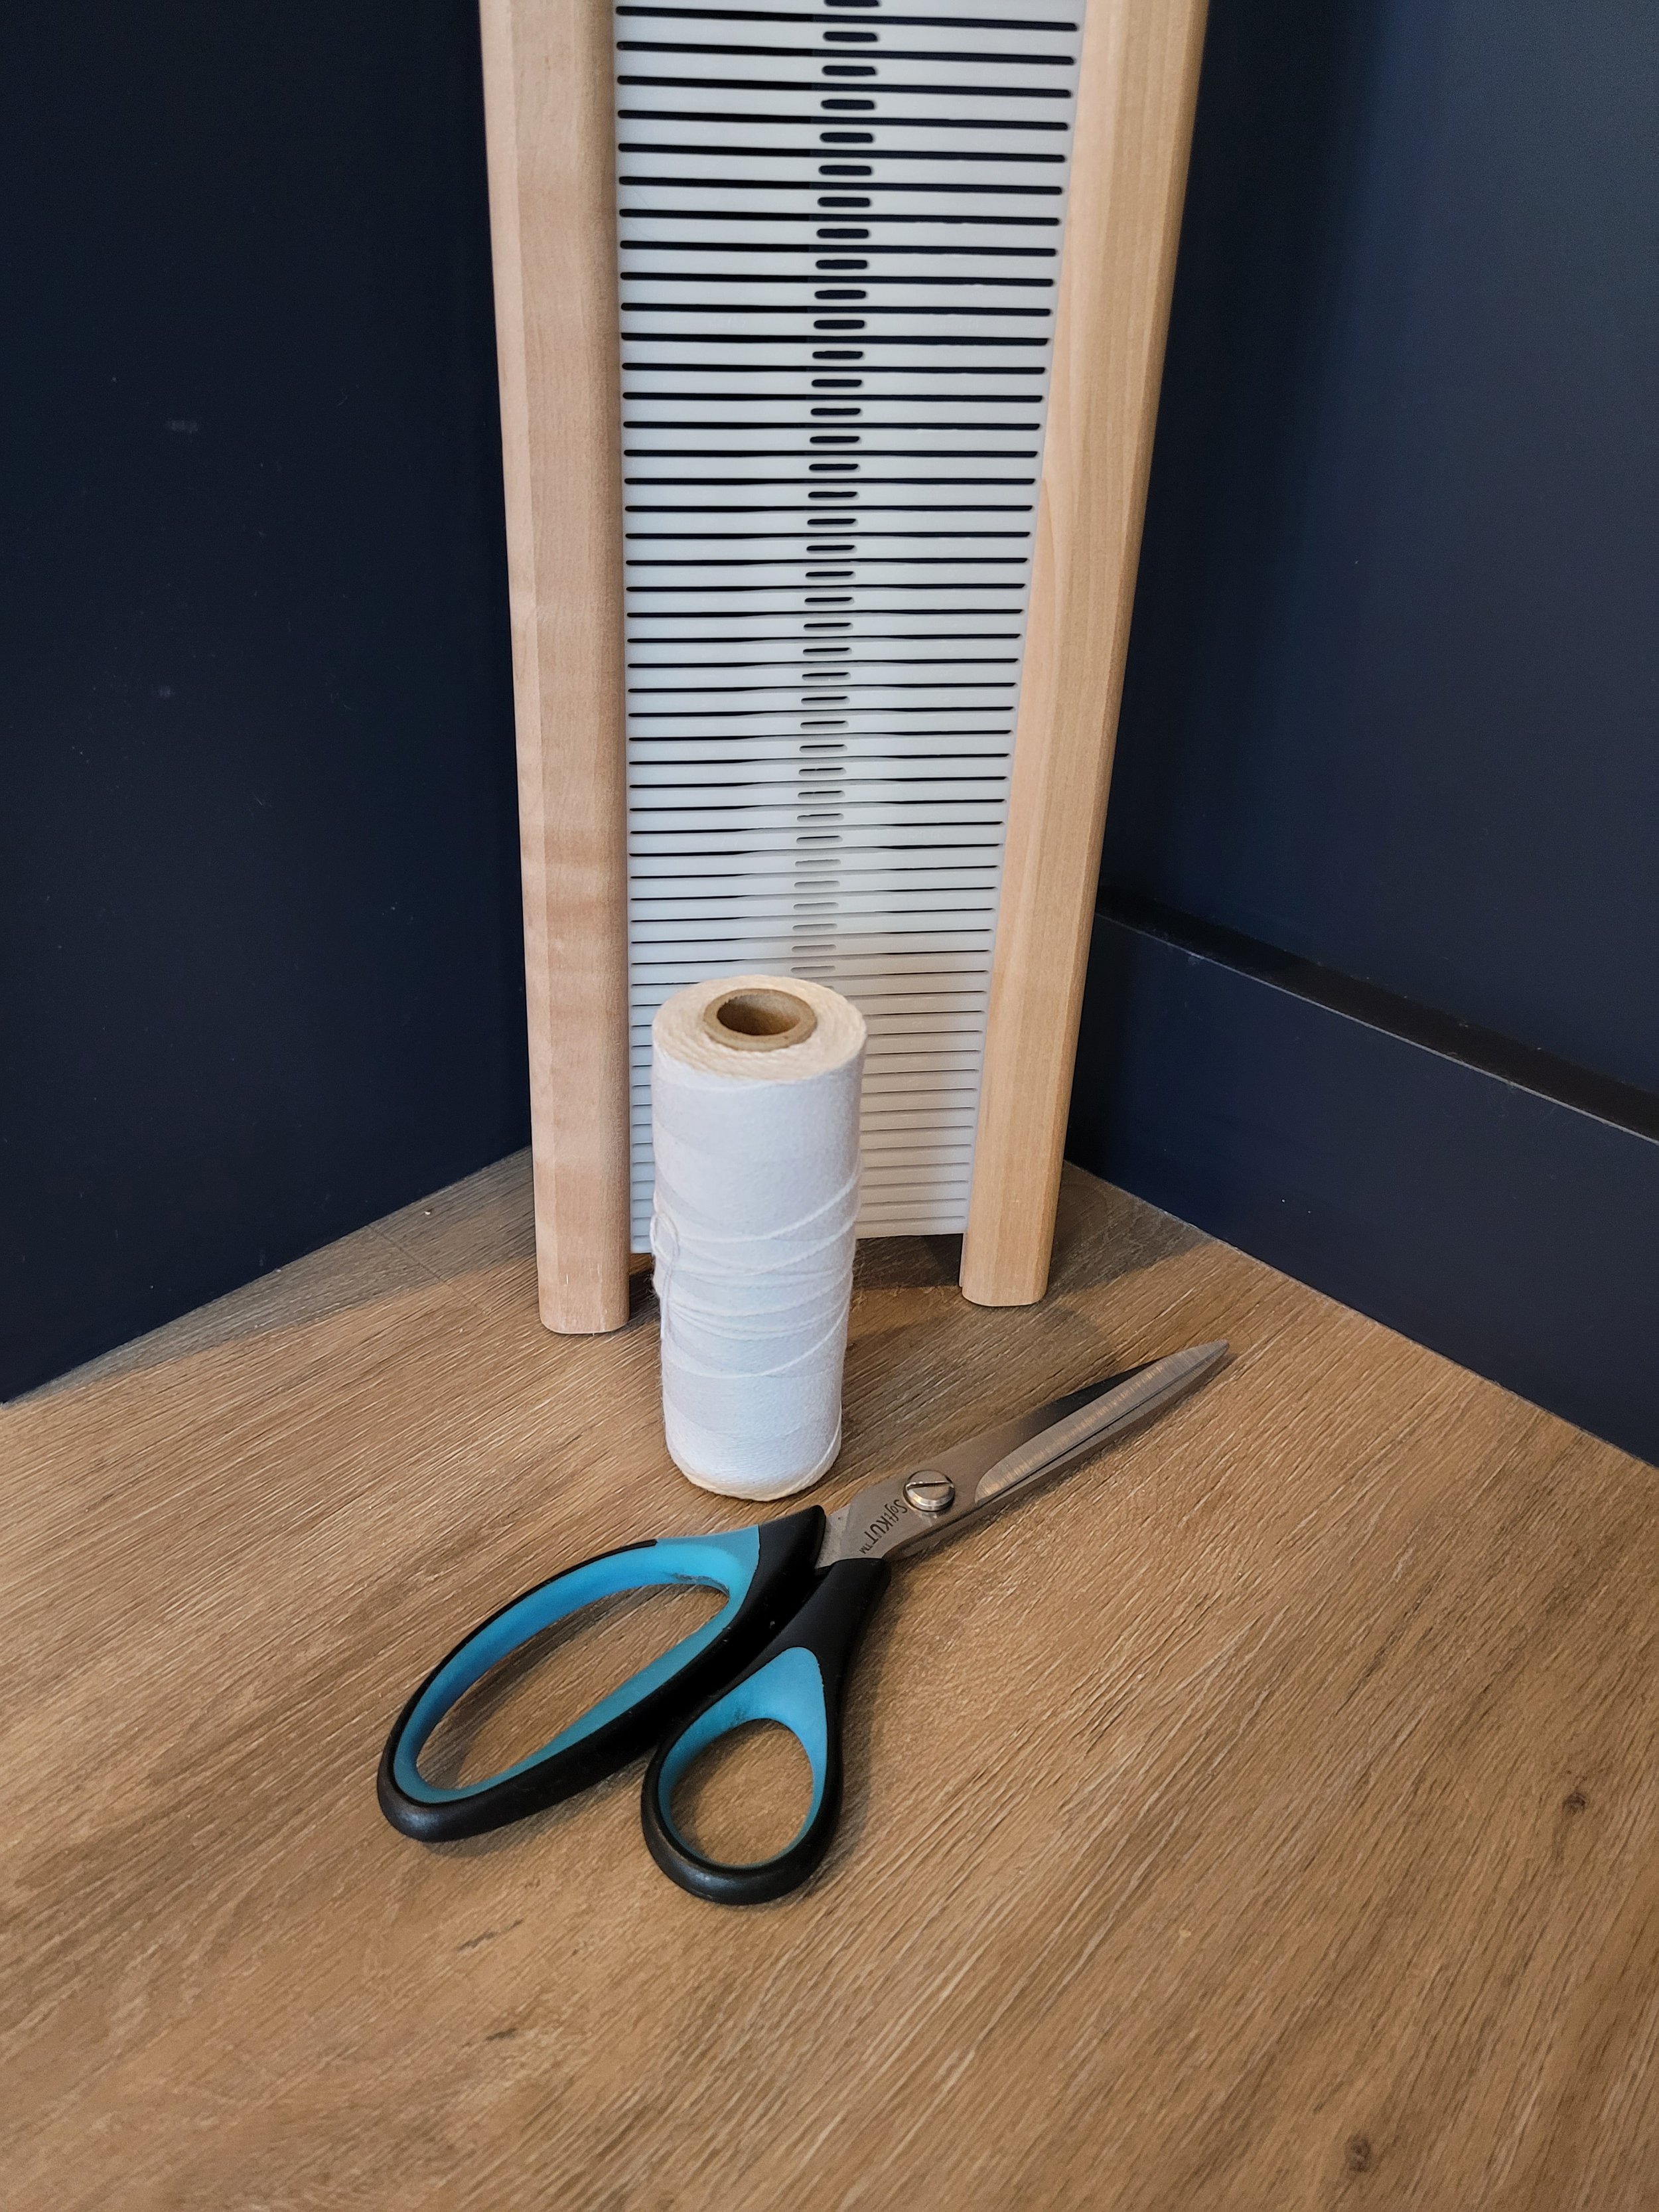
You can make your own string heddles. It really isn’t hard, just time consuming. You will need an extra reed, 8/4 cotton and a pair of scissors.
Sitting in a comfortable chair, rest one end of the reed on the floor and hold the reed between your knees. Wrap the cotton once around the reed and tie a square knot. Cut the ends short. Done, you now have 1 string heddle! I leave the heddles on the reed until I have made them all. I keep them in groups of 10 to make counting easier. So after I have 10, I slide them all together down the reed, then make the next 10, slide them down leaving a space between them and the previous 10. Here’s a video: https://youtu.be/MkjMSigjMOs

As I mentioned earlier, I put off using string heddle because I didn’t want to take the time to make them. And I have a solution for that…texsolv heddles!!!! These are premade heddles for floor looms, but they work great as string heddles and have several advantages: they do not come untied, they do not stick or get fuzzy, they are all the same size and best of all, you do not have to tie them!! They are more expensive, I bought the 9.5” heddles from LeClerc for about $27/100. They come as a single long “string” so do need to be cut apart. Be careful when cutting to ensure that you are cutting in the right spot. Switching from handmade cotton heddles to texsolv has definitely improved my weaving life! If you have a choice, buy the shortest heddles available. (Bonus, you can use these on your inkle loom too!)
Inserting String Heddles
If you can insert a pick-up stick, you can insert string heddles. You will need 2 pick-up sticks or shuttles a little longer than the warped width in the reed, string heddles, and painter’s tape.
Insert the pick-up stick as usual. The string heddles will go around the warp ends that are on top of the pick-up stick. Count these ends and count out the right number of heddles (this acts as a check at the end). Starting at one end, add the first string heddle. Put it under the warp end, then fold the heddle up and place both ends on the second pick-up stick. I usually wait until I have a number of string heddles inserted and on my fingers before putting them on the second stick. Here’s a video: https://youtu.be/zw3FRtq5yQ4

Work your way across the loom. If you counted out the right number of heddles before you started, you should have no heddles left. As a second check, place the heddle in neutral and flip the pick-up on edge. Every end on the pick-up should have a heddle. Flip the pick-up flat and pull up the stick with the heddles: it should lift all the ends off the pick-up stick. You can now remove the pick-up stick.
Use painter’s tape to tape the heddles so they can’t slide off the pick-up stick (now called a heddle rod). I run one strip from end to end then wrap tape around each end.
Here’s a few things to note when using string heddles:
If you are using a pick-up stick and string heddles, the string heddles must be inserted in front of the pick-up stick.
When you are using the pick-up stick, the heddle rod will slide forward to the back of the reed. This won’t cause any problem with the shed.
Remember to slide the pick-up stick back to the back of the loom when using the string heddle rod.
If you are getting a small shed in the plain weave sections check to make sure that the string heddles are all moved to the back of the loom.
Why Use String Heddles?
String heddles are best used when there are multiple pick-up sticks in a repeating pattern. You will see in many patterns that when 2 pick-up sticks are used, one is inserted and remains in the project for the entire weaving process. The second needs to be replaced each time it is needed. Every time you inset a stick, there is opportunity for error. Using string heddles means you only need to do it once. I will often weave the first repeat with just pick-up sticks. After examining the cloth and confirmed the pick-up stick is correctly inserted, I will add the string heddles. It’s easier to correct a misplaced pick-up stick than a misplaced string heddle.
It takes time to insert a pick-up stick. We aren’t running a marathon, and weaving should be fun, not time driven, but some patterns can mean more time is spent inserting the pick-up stick than weaving! Once we switch to string heddles things move a little faster.
Finally, string heddles open a whole new range of possibilities for you and your rigid heddle! Complex lace work suddenly becomes very possible!


Looking for some projects to try out string heddles? Check out these patterns:
Two Heddles For Sett
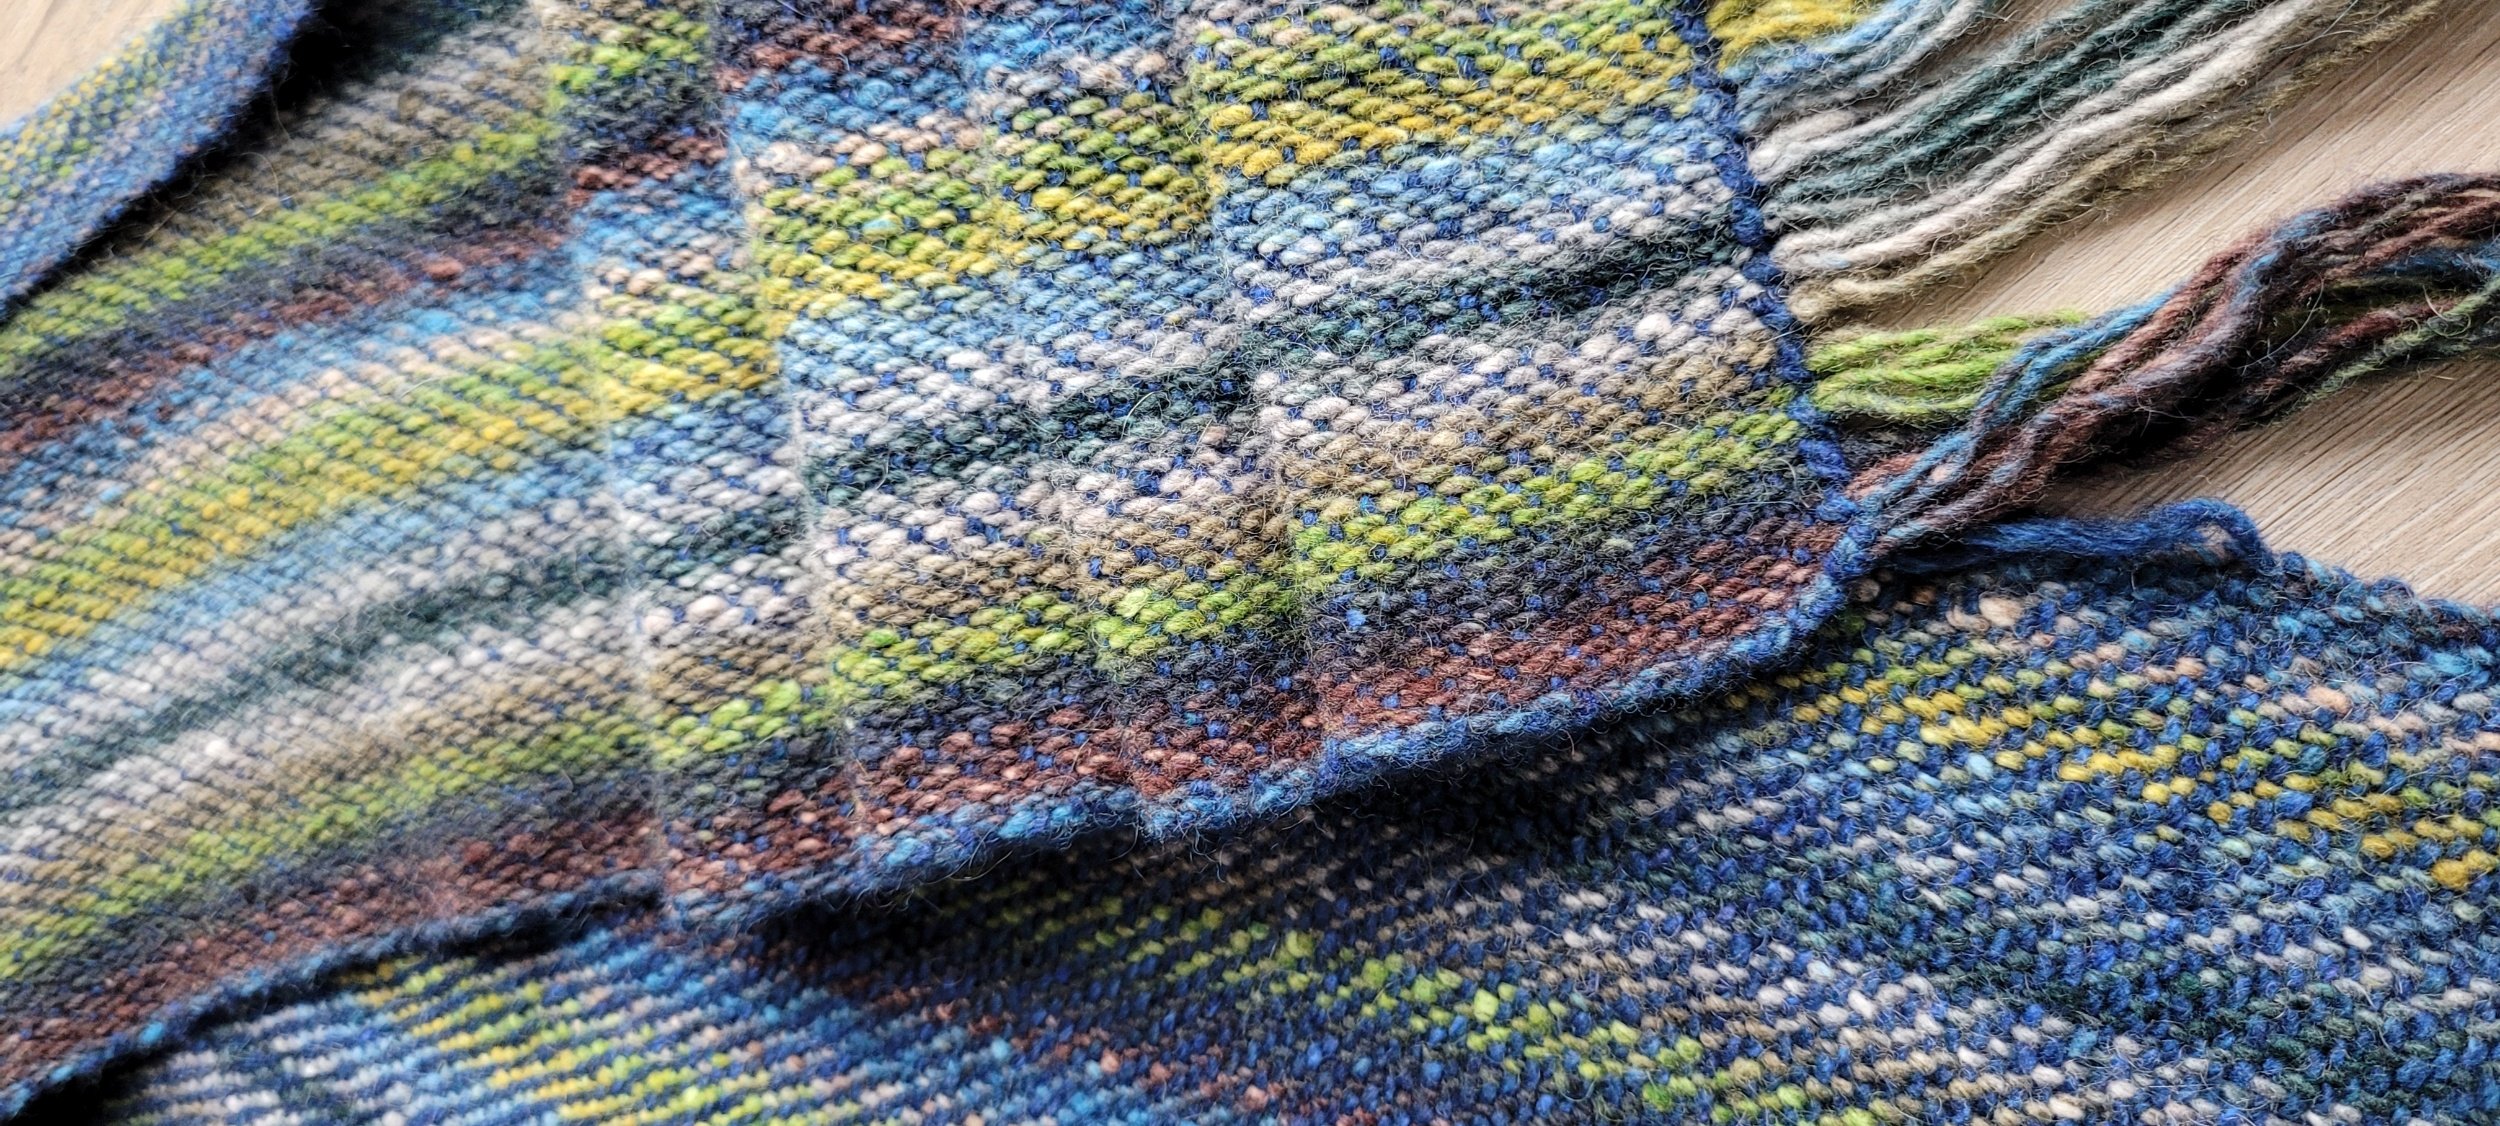
If you’ve been following me on social media you will know that I spent the summer playing with 2 heddles. I updated my double width blanket pattern, improved my twill skills and worked on 2 heddles for proper sett which is what I’m going to focus on today.
If you’ve been following me on social media you will know that I spent the summer playing with 2 heddles. I updated my double width blanket pattern, improved my twill skills and worked on 2 heddles for proper sett which is what I’m going to focus on today.
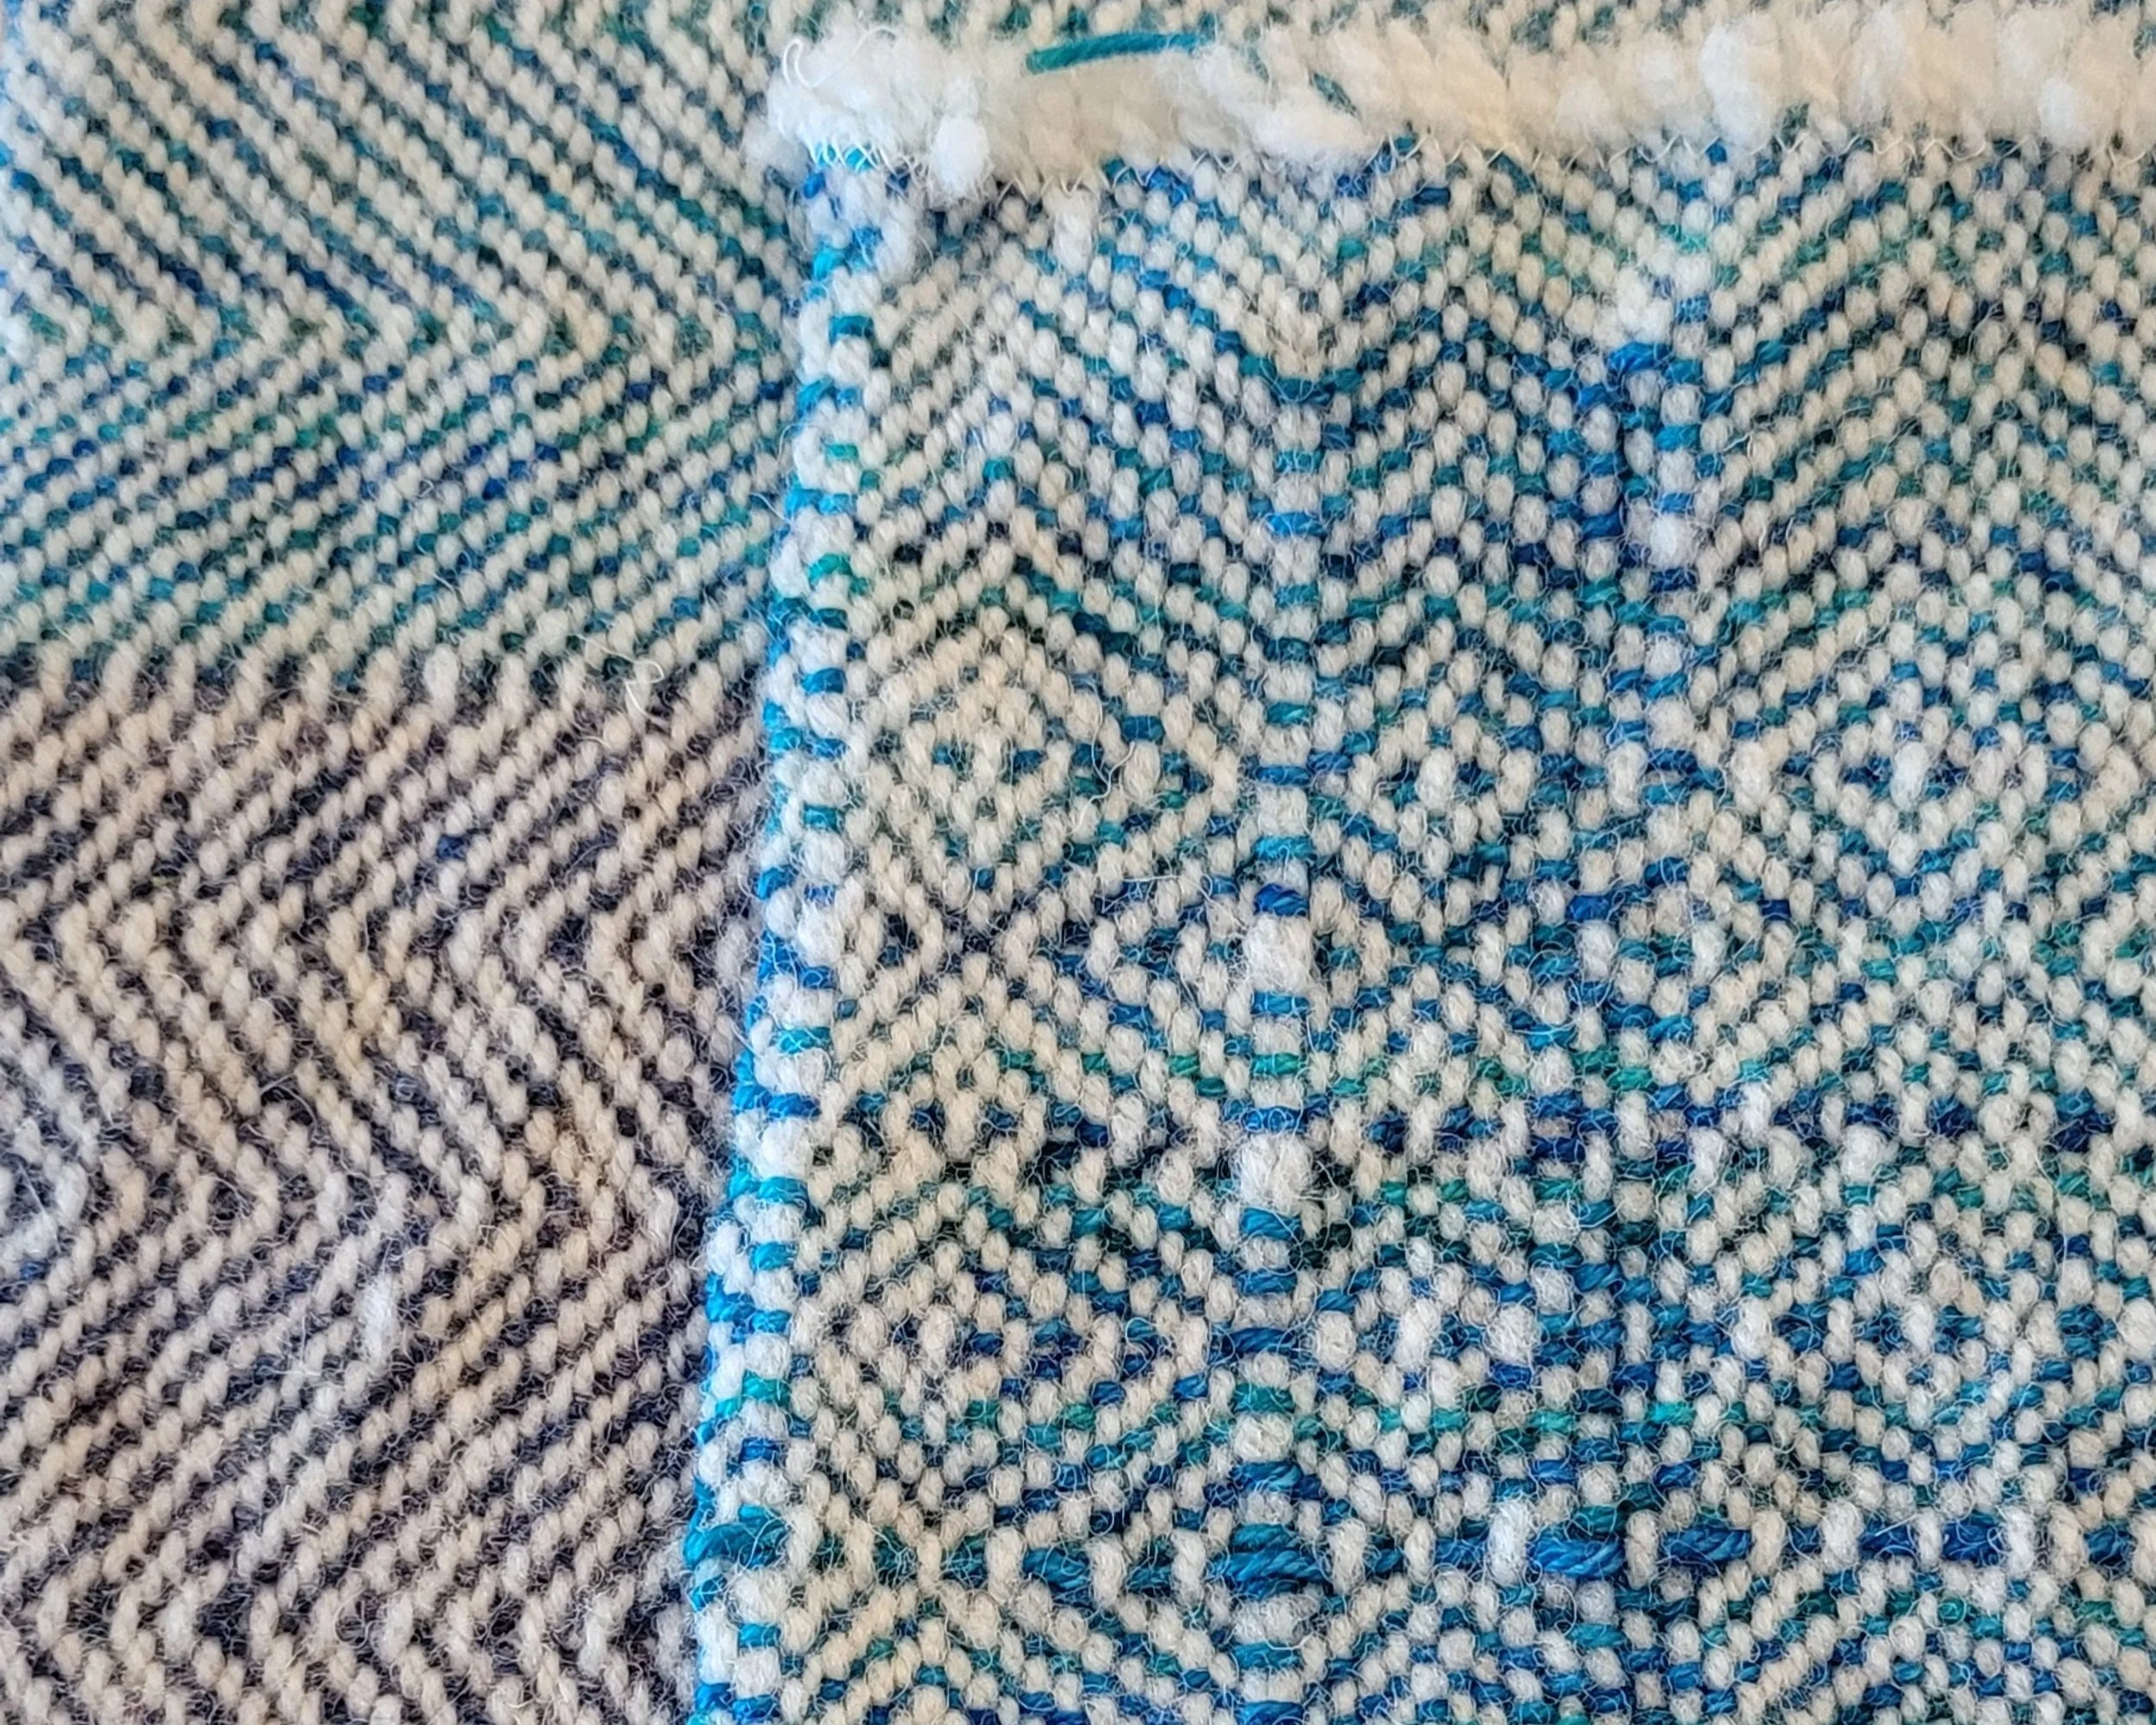
First, let’s talk about sett. Sett refers to how many threads are in an inch of warp. This is determined by your reed size. So if you are using a 7.5 dent reed and have one end in each slot and hole, your sett is 7.5. We can play with this little and most of us do this when we weave tea towels with 8/2 cotton doubled on a 10 dent reed. In this case, there are 2 ends in each slot and hole giving us technically 20 ends per inch (EPI), or a sett of 20. Since the pairs of threads move together as 1 end giving us more of a basket weave look than plain weave (even though we, as rigid heddle weavers still call this plain weave). And, we count the pairs as 1 end and put the sett at 10epi.
If we want a traditional 1 end up, one end down plain weave (also called Tabby in the floor loom world) we need to use 2 10 dent heddles. Tea towels with 2 heddles will give us a lighter feeling fabric…but because there are the same number of threads, they are just as absorbent. Plus, with 2 heddles, we can weave some interesting effects without needing to use pick-up sticks!

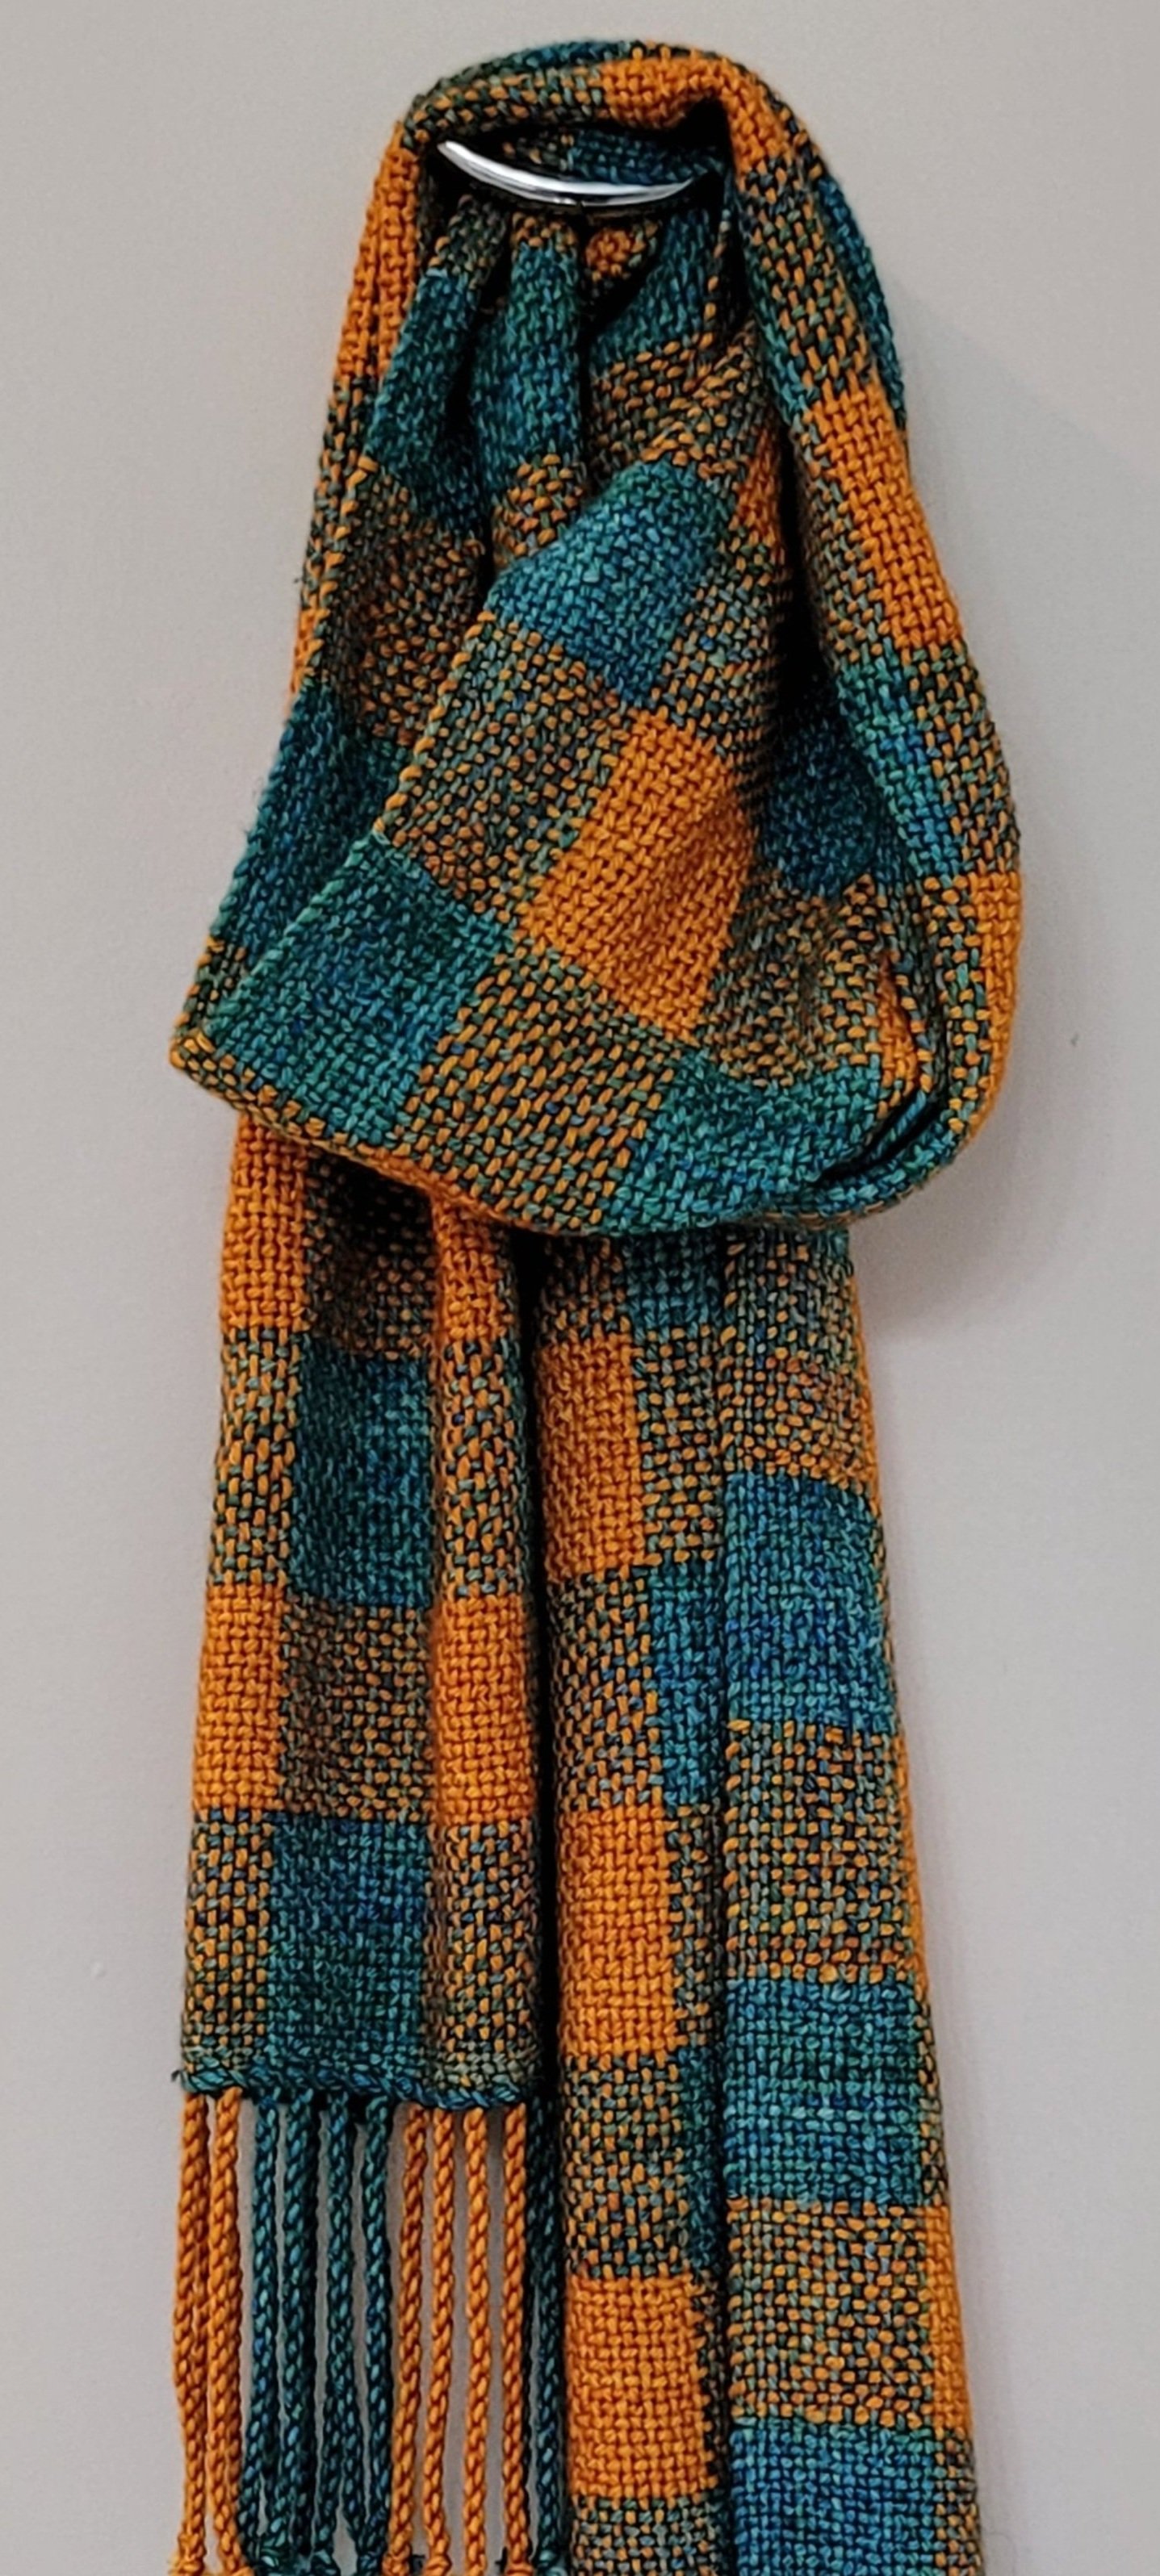
There are other reasons to use 2 heddles though. Sometimes a yarn looks like it will be great for weaving, but when you do the abrasion test, it fails! Using 2 heddles might solve this problem. When the yarn rubs in the heddles it can fuzz or fray and even break. Using a larger reed gives the yarn more space and it will fray less. But then the sett is too big. Two reeds can fix this! This scarf is set at 15epi. If I tried to thread this yarn in a 15 dent reed it would not work: the yarn would get jammed in the holes and become terribly fuzzy and likely break. It will work nicely in a 10 dent if you are careful. But for a heavier, warmer scarf, 2 7.5 dent reeds worked beautifully. The slots and holes are big enough to allow the yarn to move freely and I had no fuzzing at all (while I did have some on a 10 dent).
Now we know why you might want to use 2 heddles. What about warping and threading? Don’t be intimidated. Take your time and follow the instructions and it will be ok. It will take more time, and initially, much more concentration, but like everything, it gets easier as you practise.
Warping
You will need a double heddle block. These are standard with all newer Ashford and Schacht looms


Place the reed in the loom. It doesn’t matter if it is in the front of the back heddle block.
Thread each slot twice. This means there will be 4 ends in every slot. These 4 make one group and will be worked as a single group when threading the heddles.
Wind as usual. Tie slip knots in the warp after winding to ensure that if the reed falls off the loom, you haven’t lost all your threads!
Threading the Back Heddle
Place the heddle in the back position. Take 1 end from each slot and thread it through the hole to the right. Do this across the loom. When you are done, there should be 3 threads in every slot and 1 in every hole. The 3 threads in the slot and the thread in the hole to the right are 1 group. This will be important in the next step. As you work your way across the loom, remember to tie slip knots to protect the warp! (I have knocked the reed and lost all my threading, trust me, tie the slip knots!)
Threading The front Heddle
This one is a little more challenging. Take your time and remember to tie slip knots after every 3-4 groups. This way, if you make a mistake, you will know which 4 ends make 1 group.
Place the second heddle in the front block.
For the first bundle, take the three ends from the slot and thread them directly into the slot directly in front. (I count the slots to be sure, this is important as you don’t want the threads to be too angled from the back heddle to the front)
Now, take the 4th end of this group (the one in the back hole) and thread it through the slot to the right of the slot with 3 ends.
Take the 3 ends and thread 1 to the slot on the right (the one that has the thread from the back hole), 1 in the hole to the right and leave the last thread in the slot.
In the front reed you should now have, from right to left, 2 ends in 1 slot, 1 end in a hole and 1 end in a slot. This is the set up, and the hardest part. The rest is smooth sailing!
Grab the next group of 4 in the back heddle. Thread the end from the hole to the slot in front (the slot with 1 end). Take the next three ends and thread them slot, hole, slot. So the same slot you just threaded (It now has 3 ends) the hole to the left, and the slot to the left (that slot now has a single end)
Work your way across the loom. You should see 3 ends in every slot (except the first and last) and 1 end in each hole.
Done!
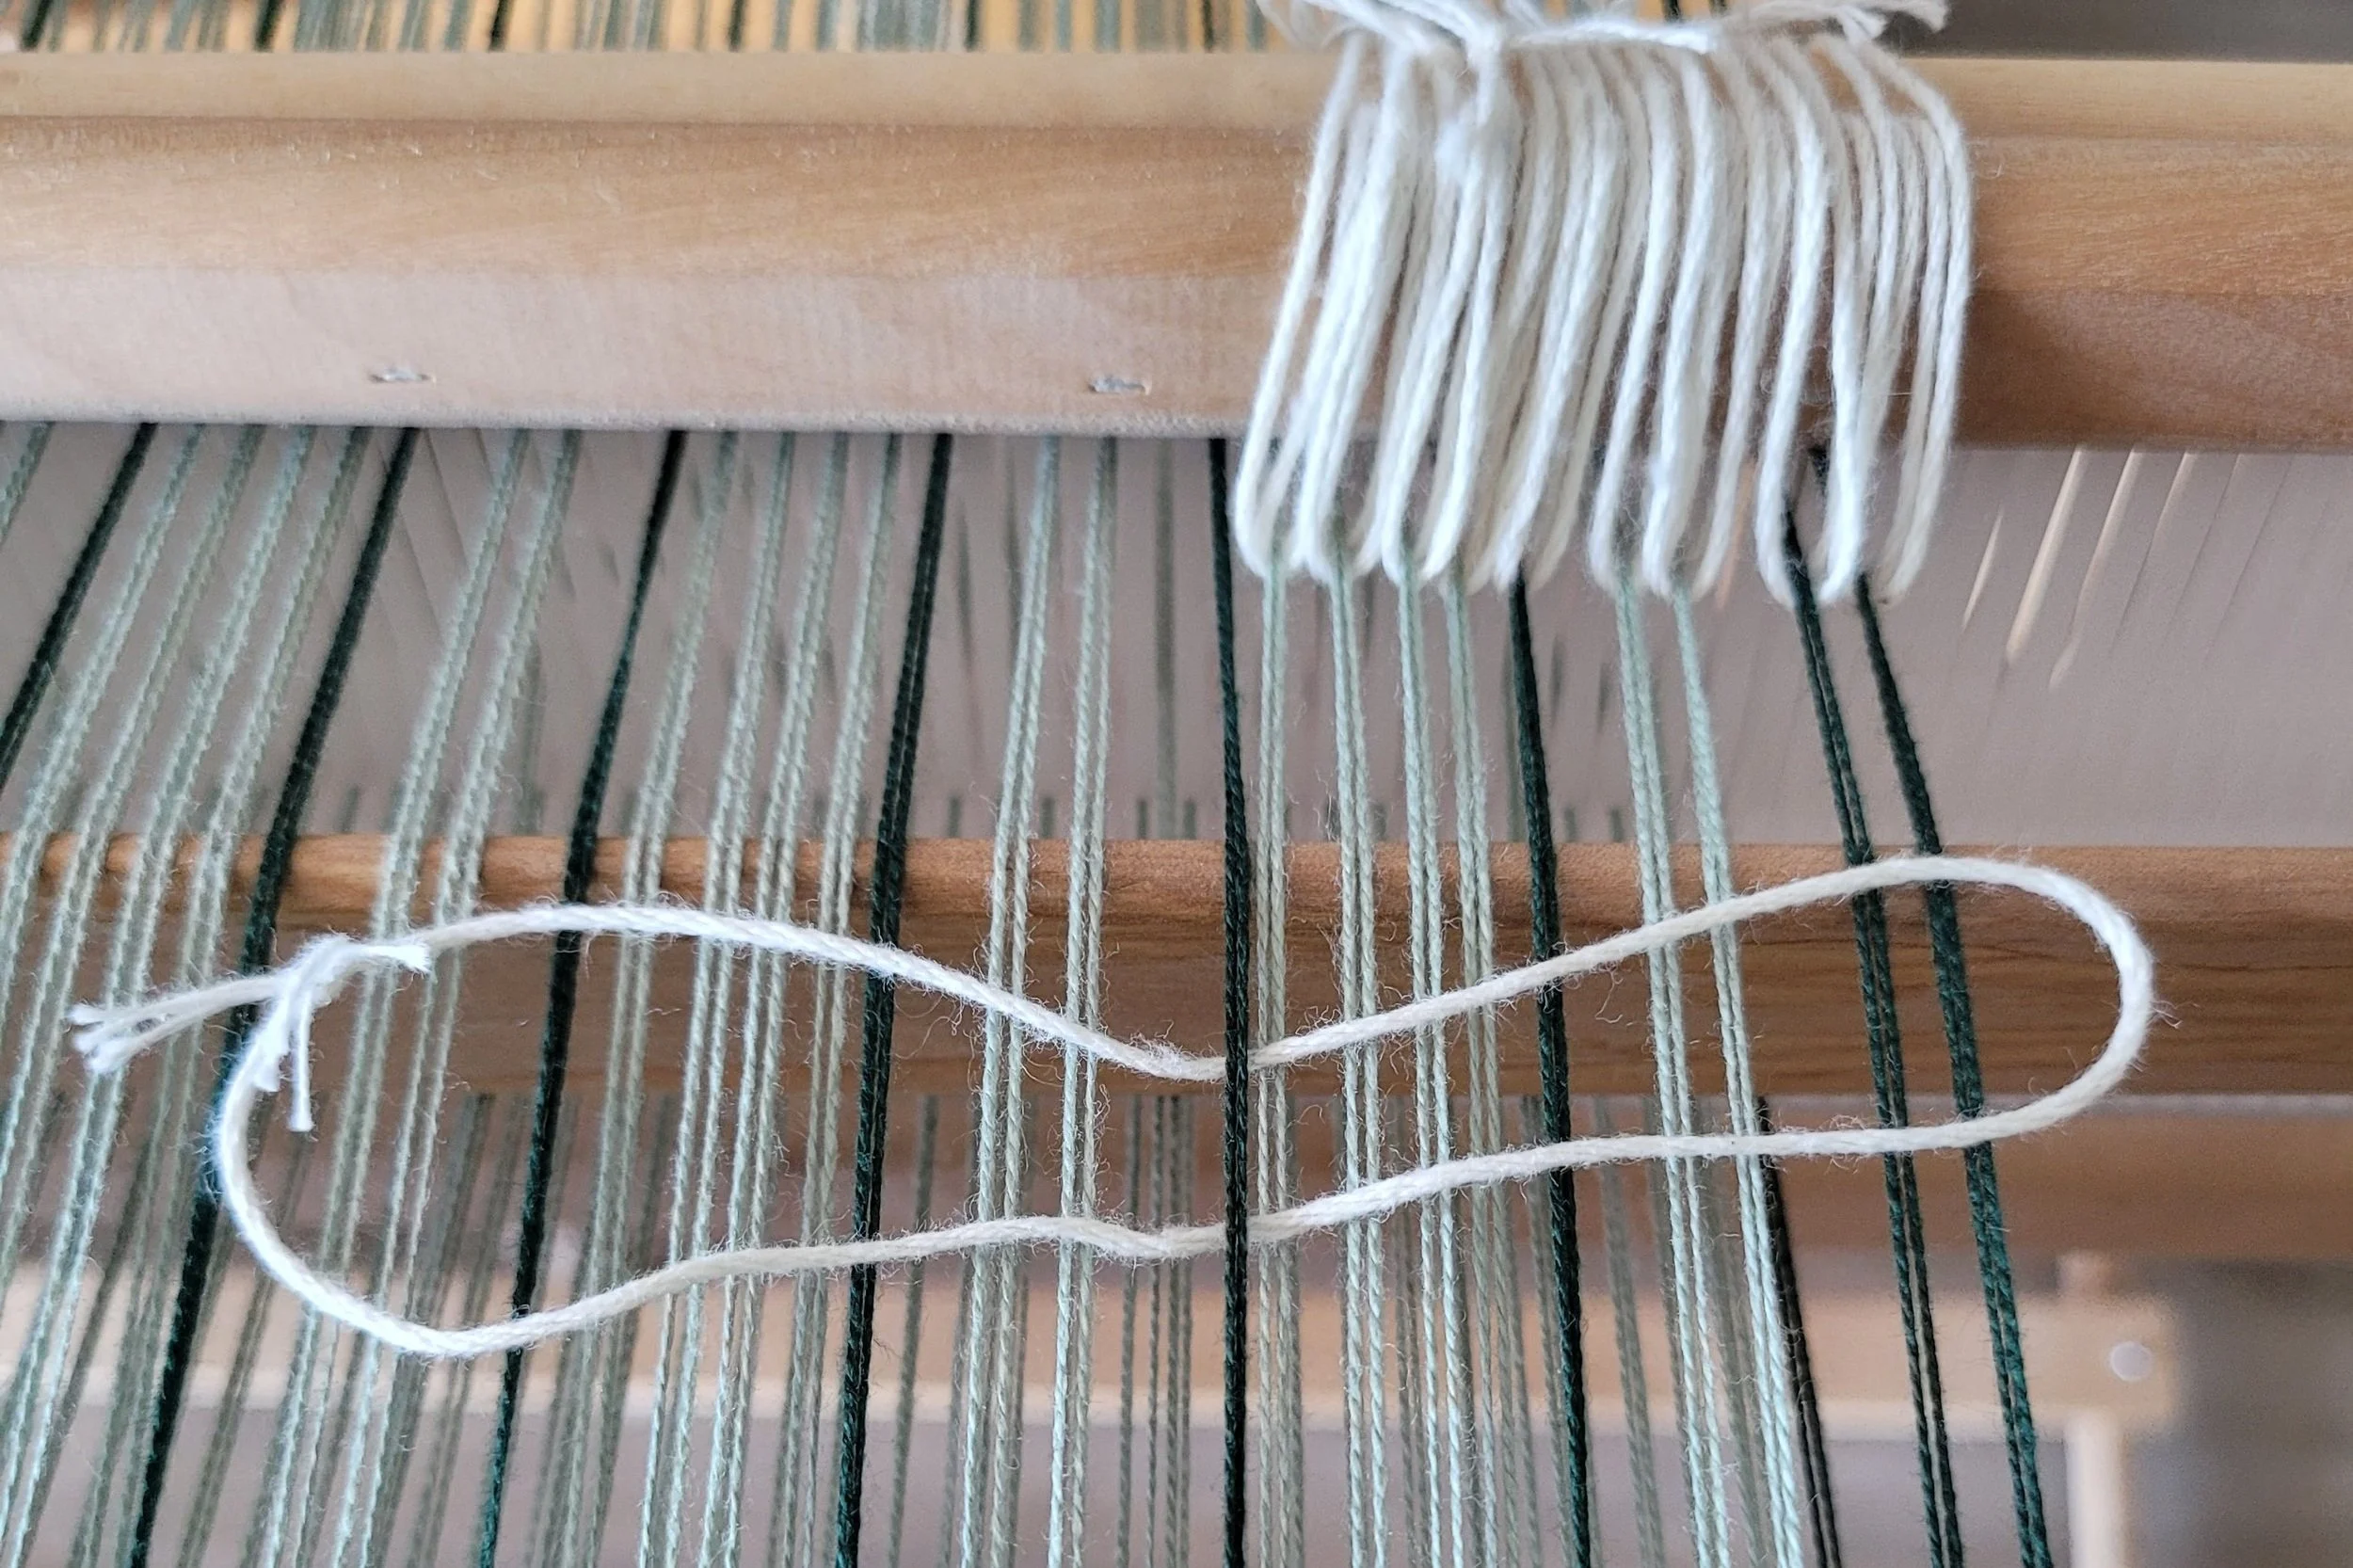
After tying on you will want to check for crossed threads between the heddles. If you find crosses, untie the relevant bundle and rethread the crossed ends (they will go back into the same slot or hole)
Writing this makes it seem very complicated. Here’s a couple videos that hopefully will make everything clear!
https://youtu.be/yj6i_TA2D4g Threading the back heddle
https://youtu.be/egaN-ru2Br8 Threading the front heddle
Weaving is easy! For plain weave, the heddles work together…both heddles up. both heddles down. If you are using a pick-up stick, insert it the same way as usual, and use as you normally would. There are a few things to remember when adding pick-up sticks, I’ll get them written out in a separate post.
Looking for a project? This is a scarf I did as a weaving class (so the pattern has been test woven and approved!). This is geared to the weaver that has experience with pick-up sticks and wants to add an extra heddle to the mix!
https://www.therogueweaver.com/new-products/2cubedscarfrigidheddlepattern
PS Are you interested in test weaving? Stay tuned for more details!
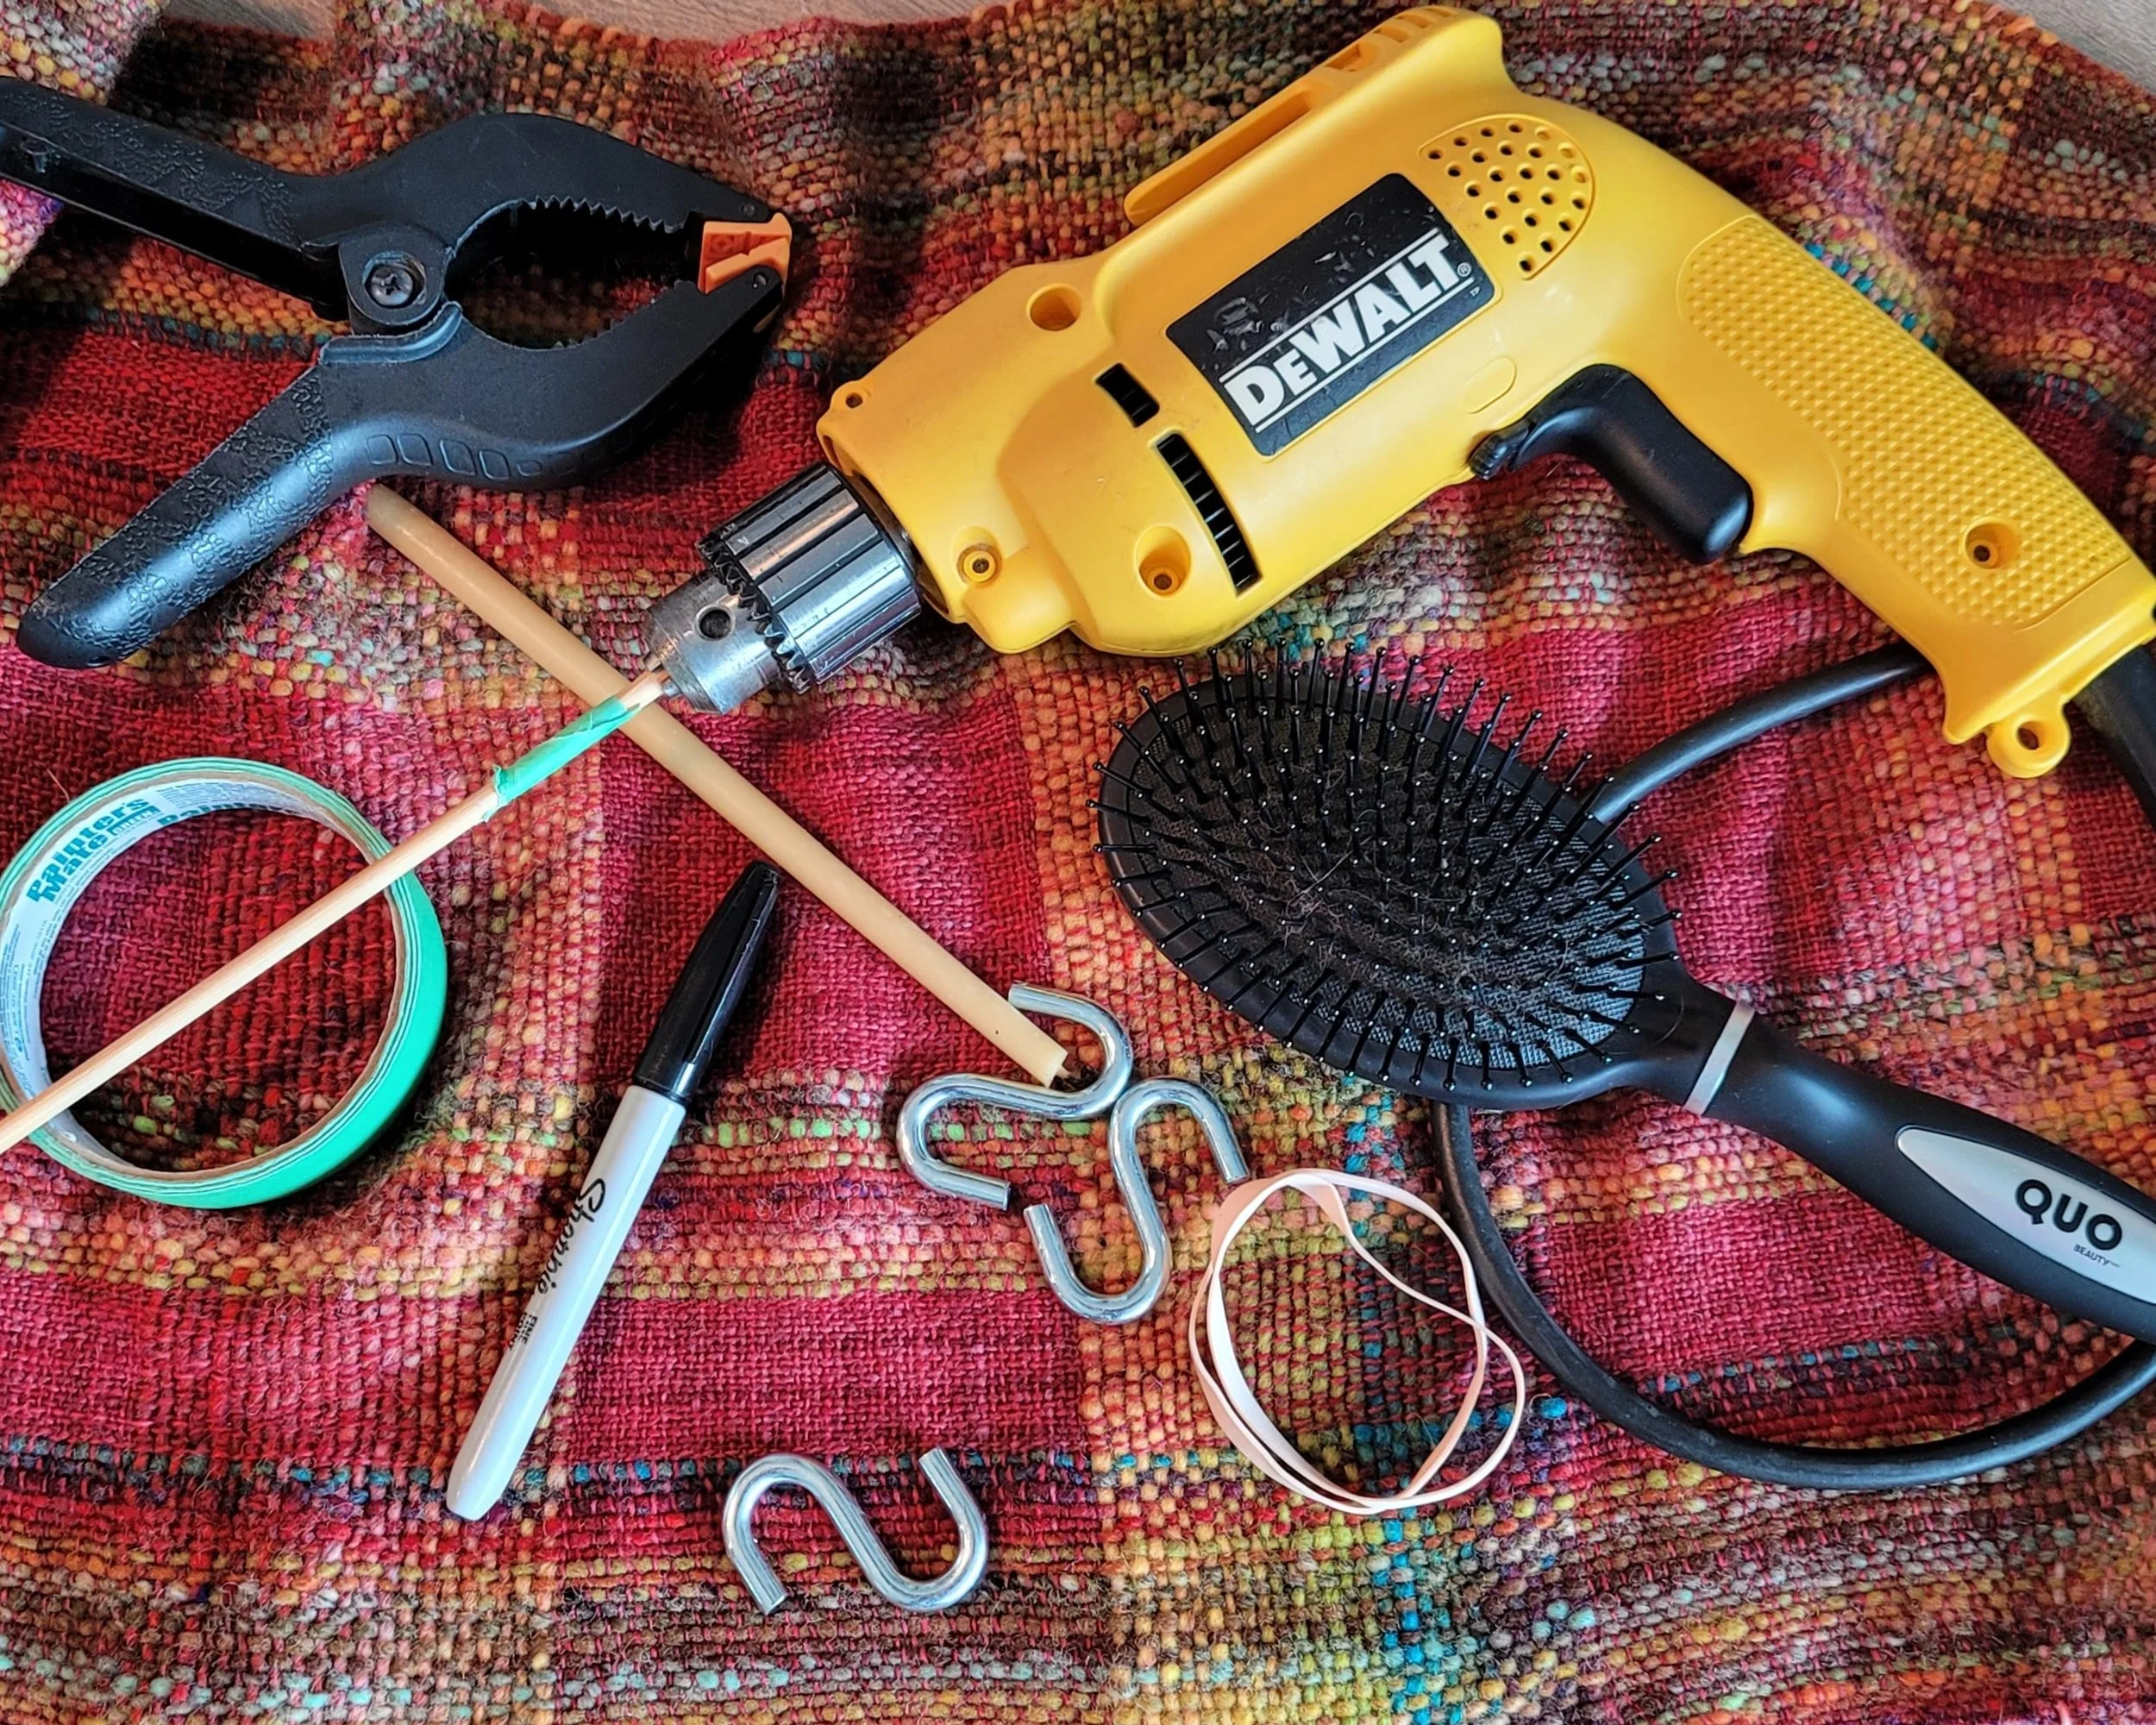
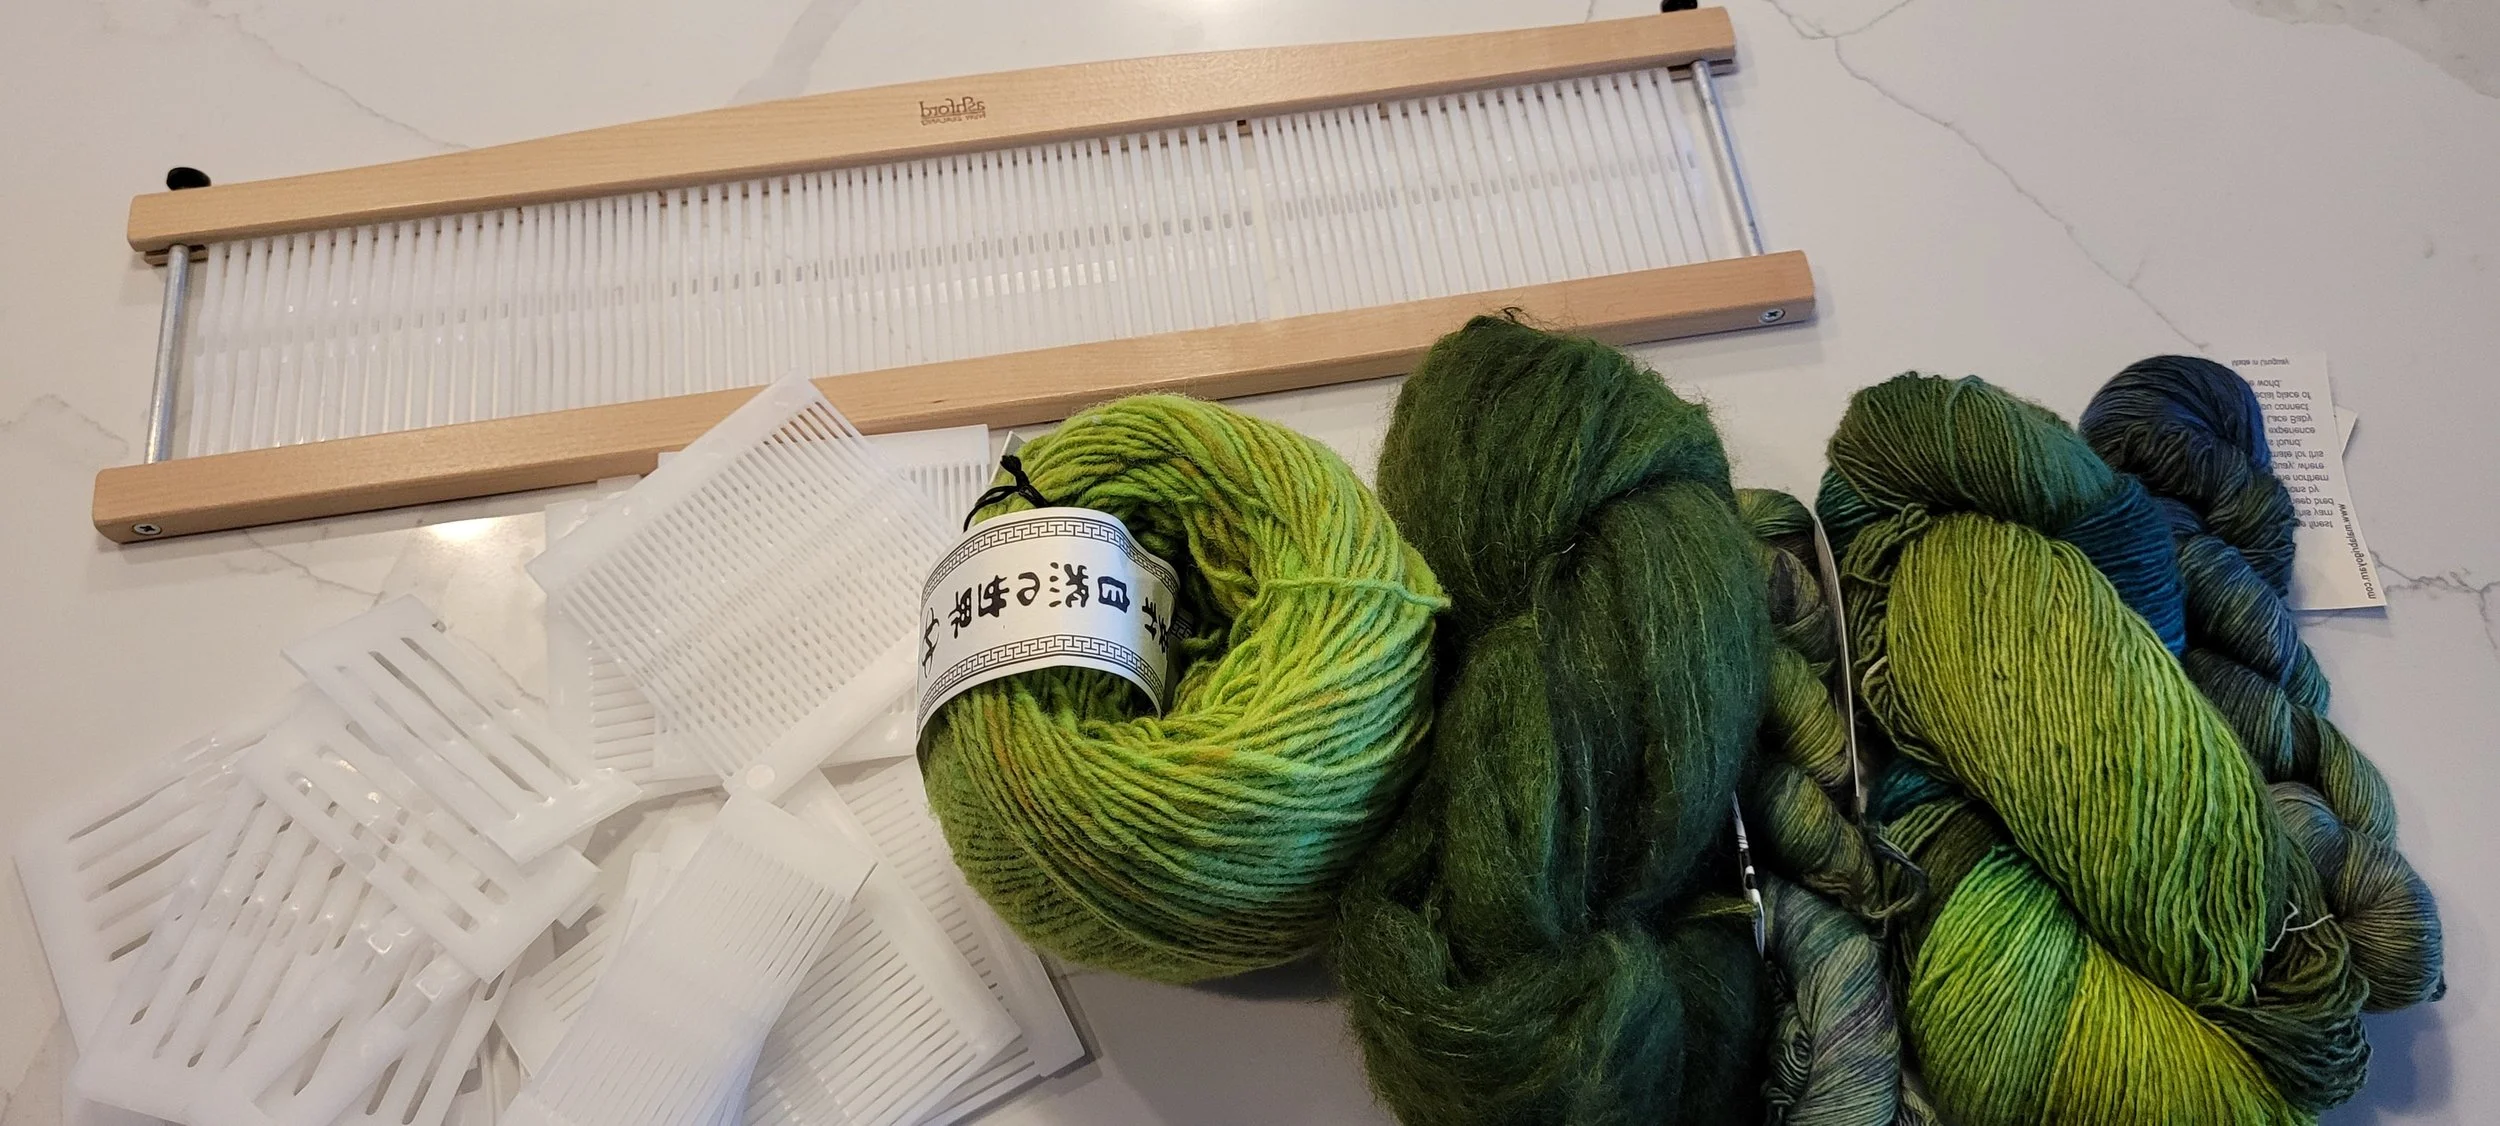
9 Tools You Need To Add to Your Weaving Kit
Crafters are naturally resourceful. We want to use what we already have instead of buying a new tool. Because let’s face it: the buying fewer tools means more money for yarn! Here’s a list of my favourite household items that I use to make my weaving life easier.
One of the best things about crafty people is how we make do with what we have. This means rooting through our junk drawers, craft supplies and even the tool chest to find just the right tool to accomplish the job. Today we’re going to look at some of my favourite everyday tools that I use weaving.
Elastic Bands
You know how when you direct warp everything looks great when you start, but when you keep warping the first ends start to sag? As you begin to warp, the back warping stick is pulled by the warp towards the reed. But only by 1 pair of ends. Its isn’t very firm. However, as you add more warp, the stick has more and more pressure added so it pulled more toward the reed. This causes the beginning of the warp to sag. It isn’t really a problem, particularly if you use the crank and yank method of winding or a tensioning devise. But if you like a neat tidy look or walking your loom to the pegs, you might want too eliminate the sag. And it’s such an easy fix!! All you need are 2 elastic bands. The elastics from asparagus are perfect and you might have them in your junk drawer. Simply stretch one from the back warping stick to the reed on each end. Just remember to take them off before you start winding!
2. S-Hooks and Metal Washers
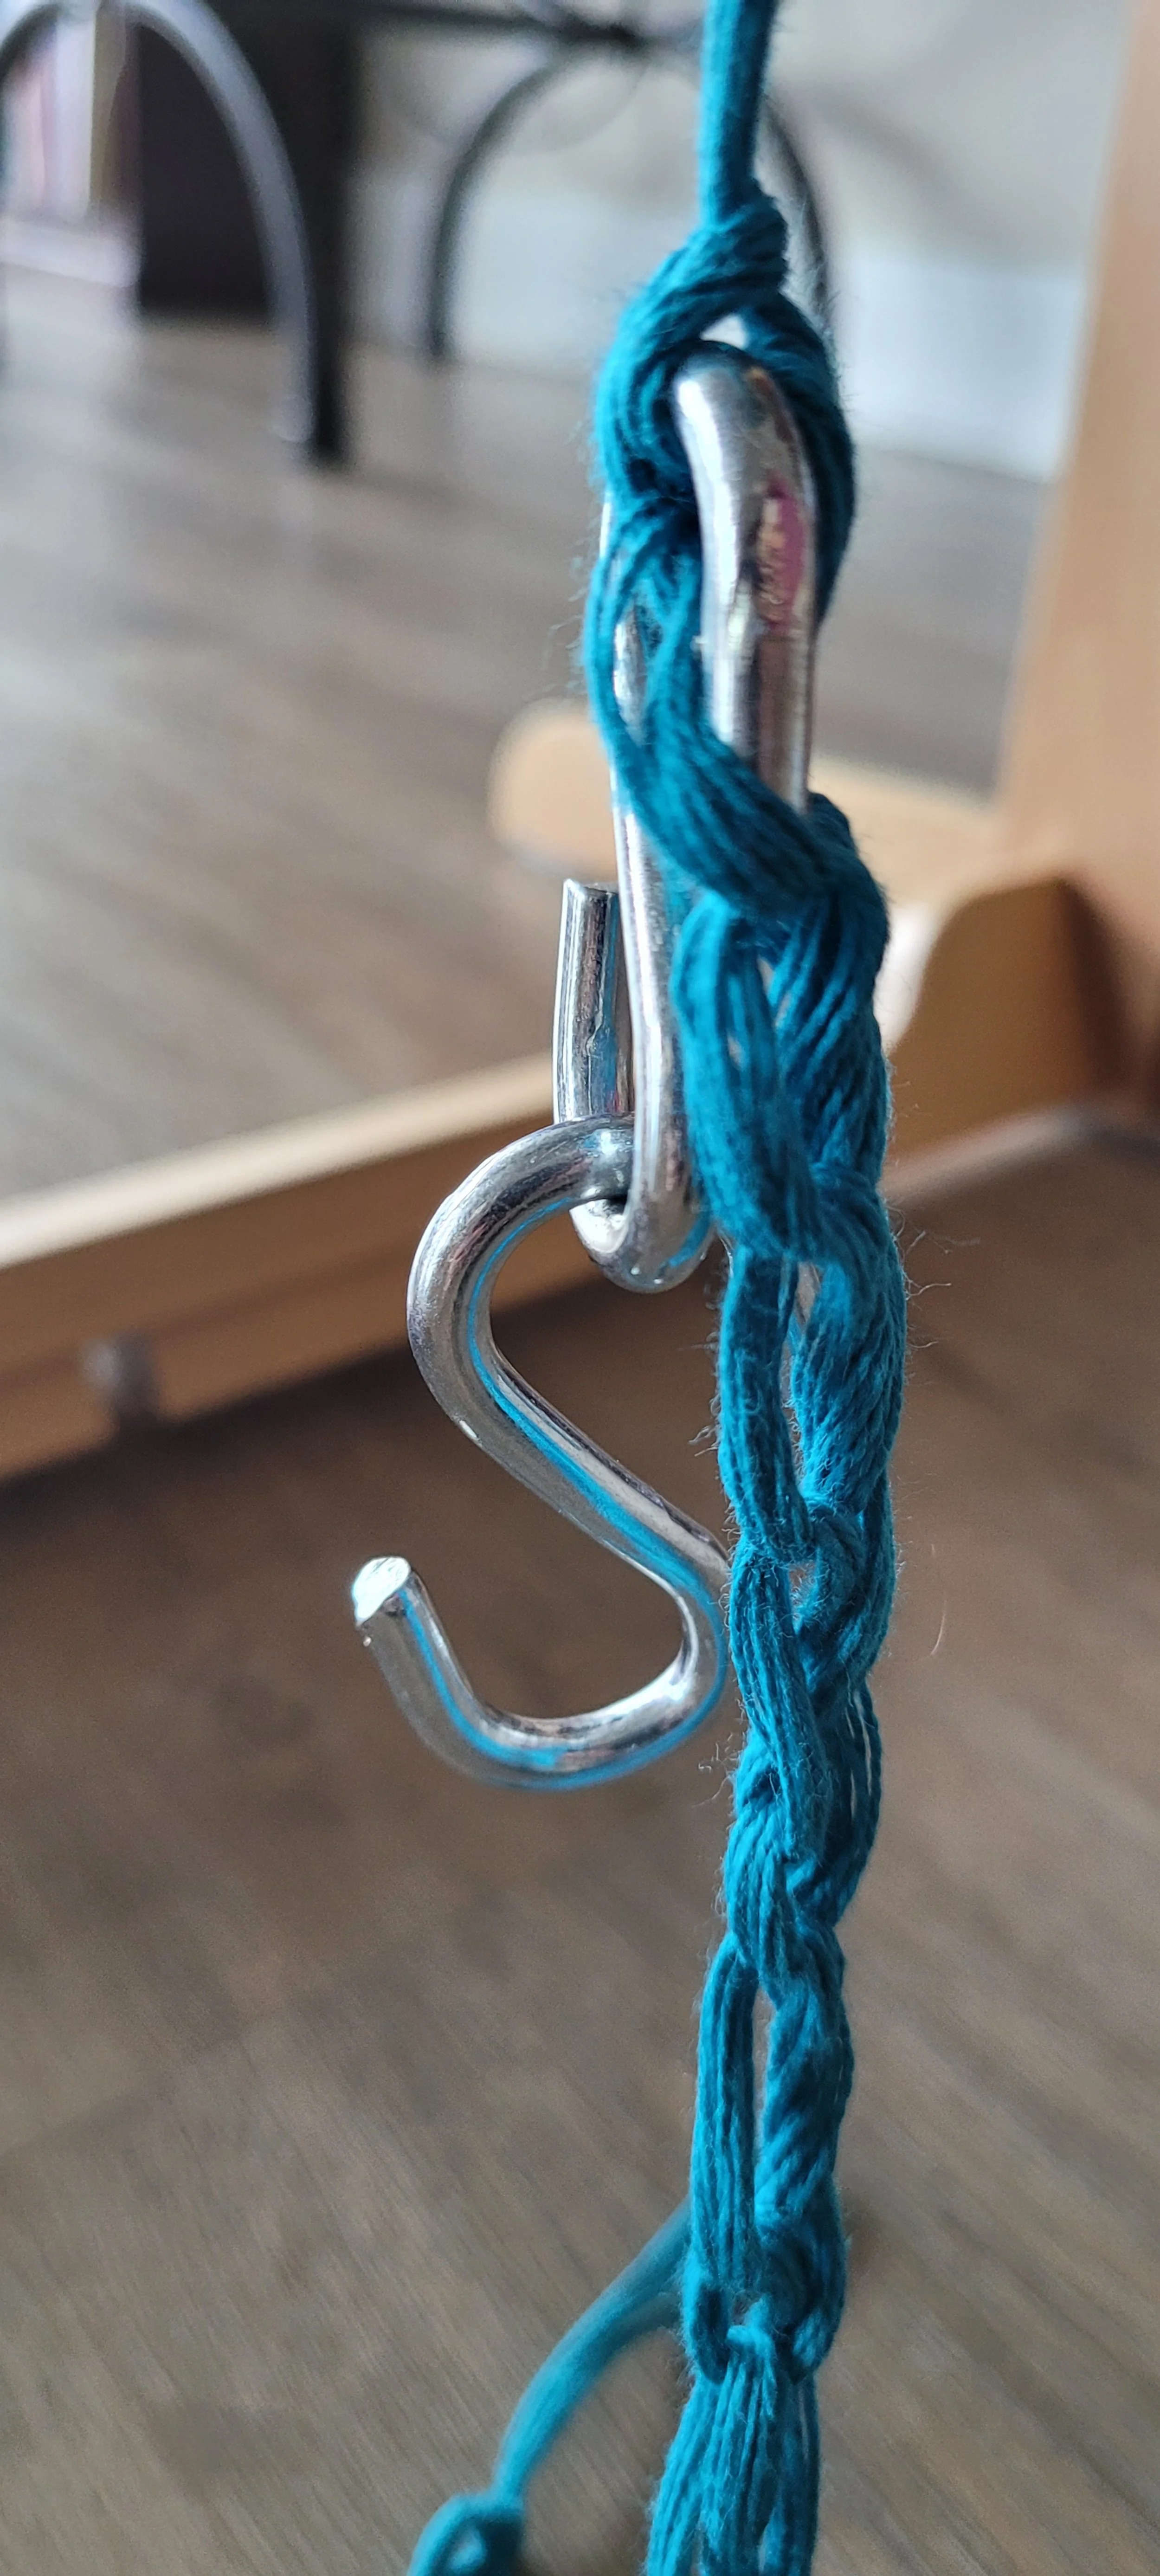
No matter how careful I am to keep my tension even, I still have the occasional warp end that is just a little bit looser than the rest. Or I’ve caught my shuttle on it and pulled it loose. Or I missed a slot and needed to add extra warp after winding. Or the pattern makes some ends looser. Or just because a tighter end slot makes for a neater selvedge. You can never have too many S-hooks. I use 2” S-hooks, they seem to be heavy enough to use with out needing any extra weight. Smaller ones may need metal washers for extra weight. S-hooks are my favourite weights because they slip onto the warp so easily and do not need adjusting when winding forward.
3. Weights
I use 5-7lb barbells, but heavy books, bags of Flour, Rice, Kitty Litter or any other heavy thing will work. If you direct warp using a stand and you have a wider loom (24-32”) you may notice that the loom slides when you do a wide warp. Weights on the cross bar of the stand will prevent this. If you are warping to a chair or stool, you may want to weight it as well.
4. Camera
Your phone camera can be your best friend (or your worst enemy) when weaving. In fact, this deserves a whole post on its own, but here’s a few of the ways you can use your camera. Take pictures of the beginning of your work…paying special attention to the yarn, including the labels and colourway, reed size and how you began the weave (hemstitch, how many ends, how long a hem before starting the pattern). Take pictures of the placement of the pick-up sticks. Take pictures of colour changes and at what measurement they happened at. Also take pictures as you weave…the camera will point out mistakes that your eye has missed!
5. Electric Drill and Chopstick
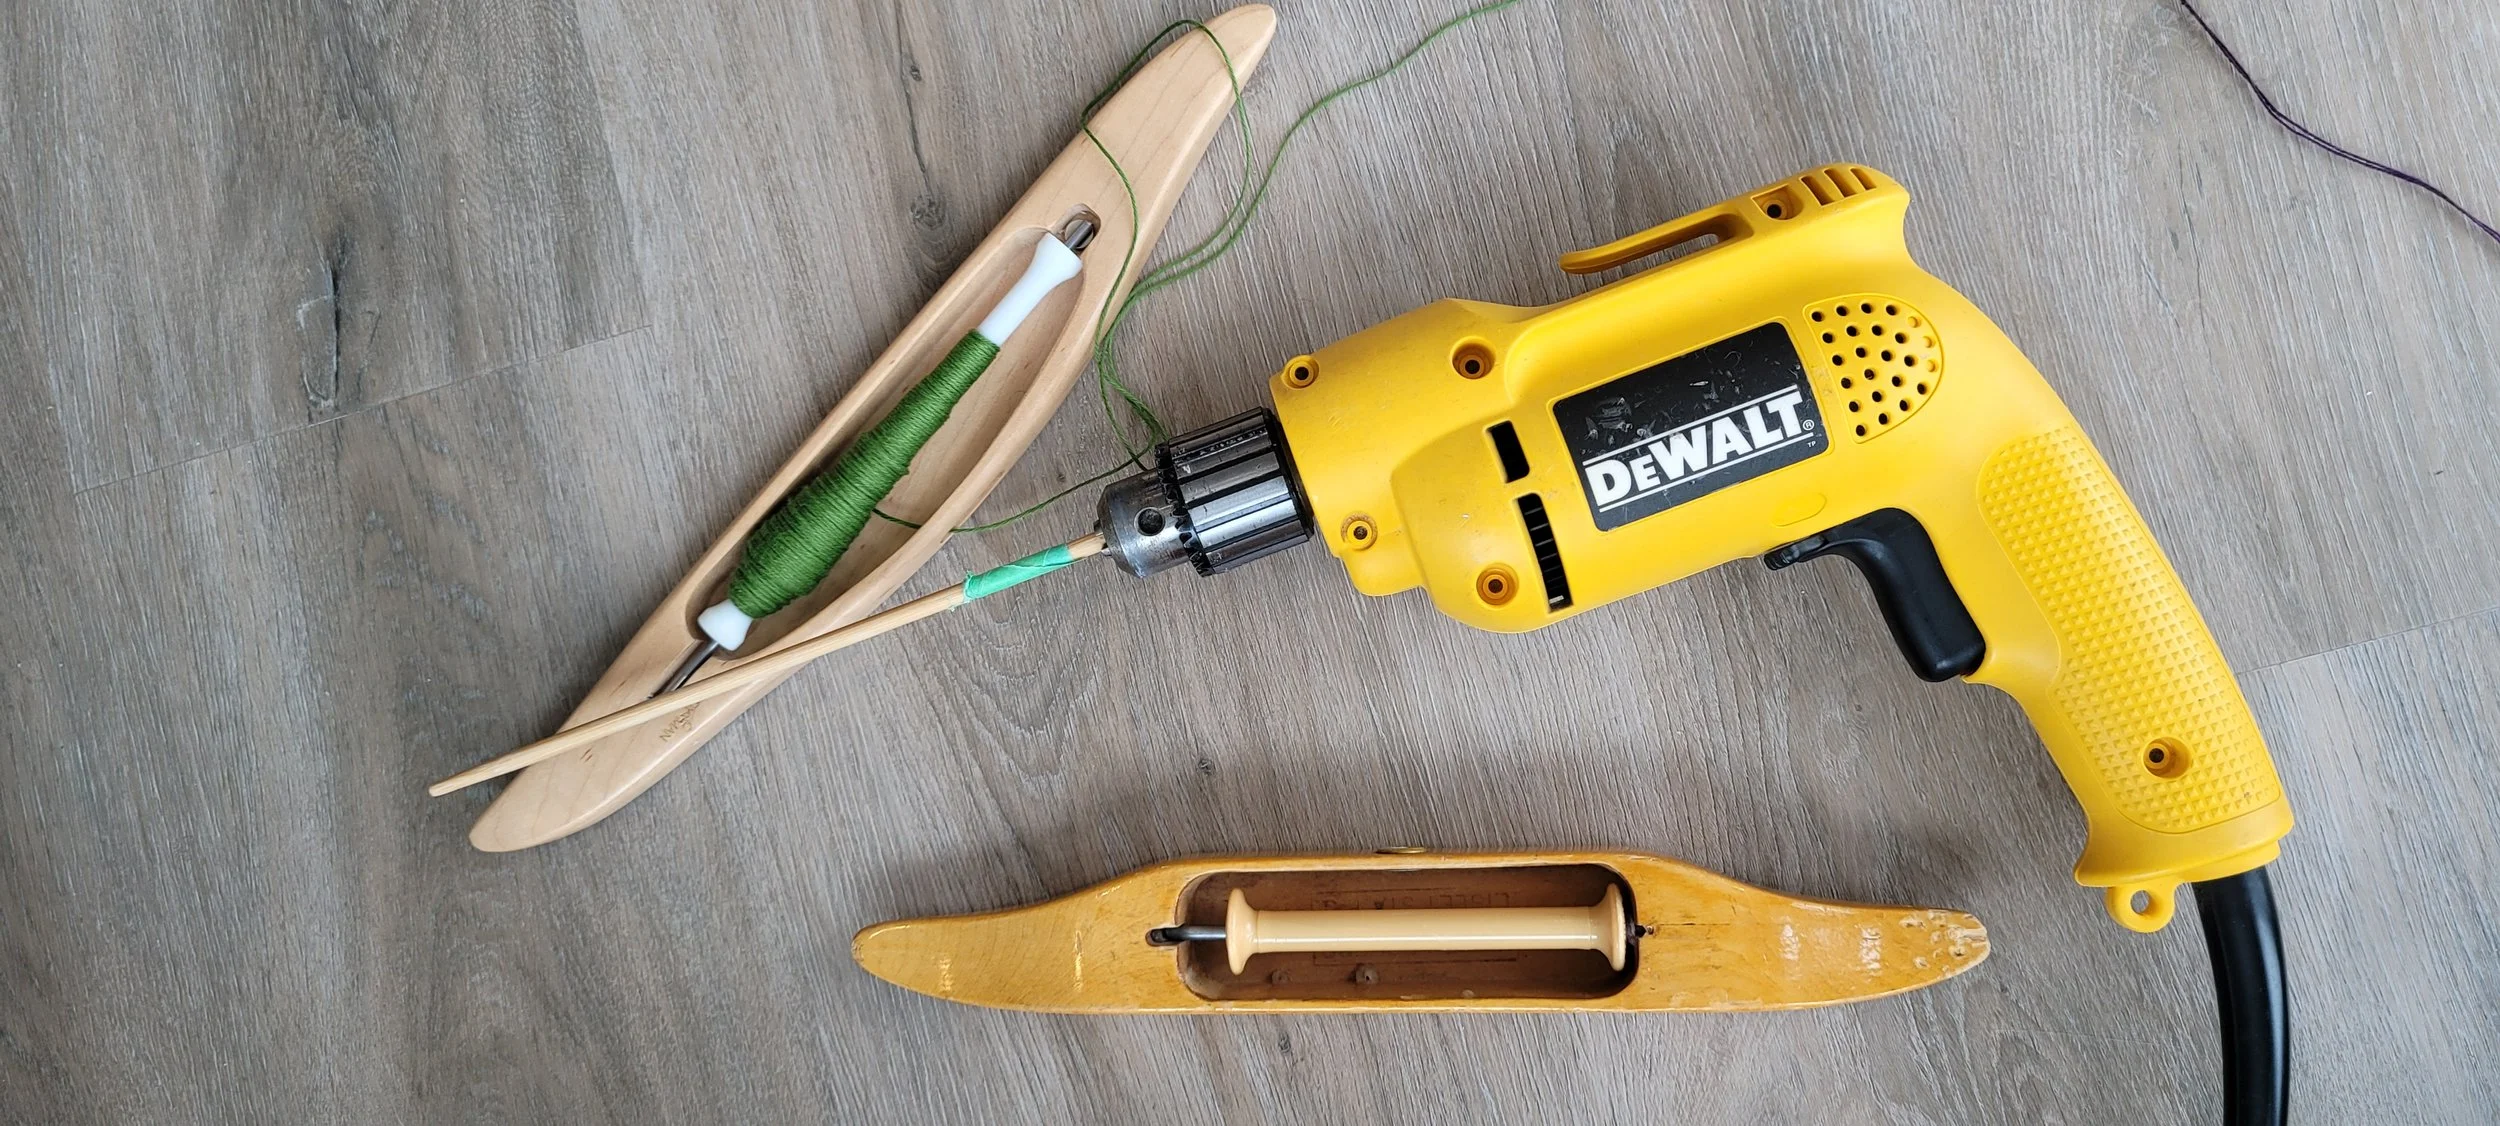
I love using boat shuttles with my rigid heddle. Boat shuttles are particularly useful of you have a small space to weave in. However, boat shuttles means winding bobbins. I use my electic drill to wind bobbins, For regular bobbins I use a drill bit with paper wrapped around it and taped to be sure the bobbins fits snugly. I have a chop stick that fits my Handywoman bobbin perfectly. You can also get a dowel from a hardware store. (Make sure to bring your bobbins with you)
6. Spring Wood Clamps

I love these clamps! They work for clamping your loom and your peg and I think they are easier to use and stronger than the clamps that come with the loom. I clamp my warping pegs to a counter, stool or chair. If I want to take my loom off the stand to warp, I can use the clamps to firmly clamp it to a counter or table.
7. Painter’s Tape and a Magic Marker
I use painters tape a lot! And a magic marker works best for writing on it. Here’s just a few of the ways I use the tape: labeling my pick-up sticks, writing the pick-up pattern on the stick, writing the warping pattern on my reed, writing my weaving pattern on the reed. If you have to rethread to a different reed, pull the warp tight and lay a piece of tape across the warp behind the reed. When you take the reed off, all the threads will be kept in order for easy threading of the new reed. Finally, preventing string heddle from falling of a stick or dowel.
8. Bees Wax Candle
I expect any candle, or even a bar of soap would work. But I like bees wax candles. They smell nice and are naturel. My Ashford loom can be a little squeaky. And sometimes the reed seems to stick in the heddle block a bit. A little rub of wax makes everything move more smoothly and quietly.
9. Hair brush
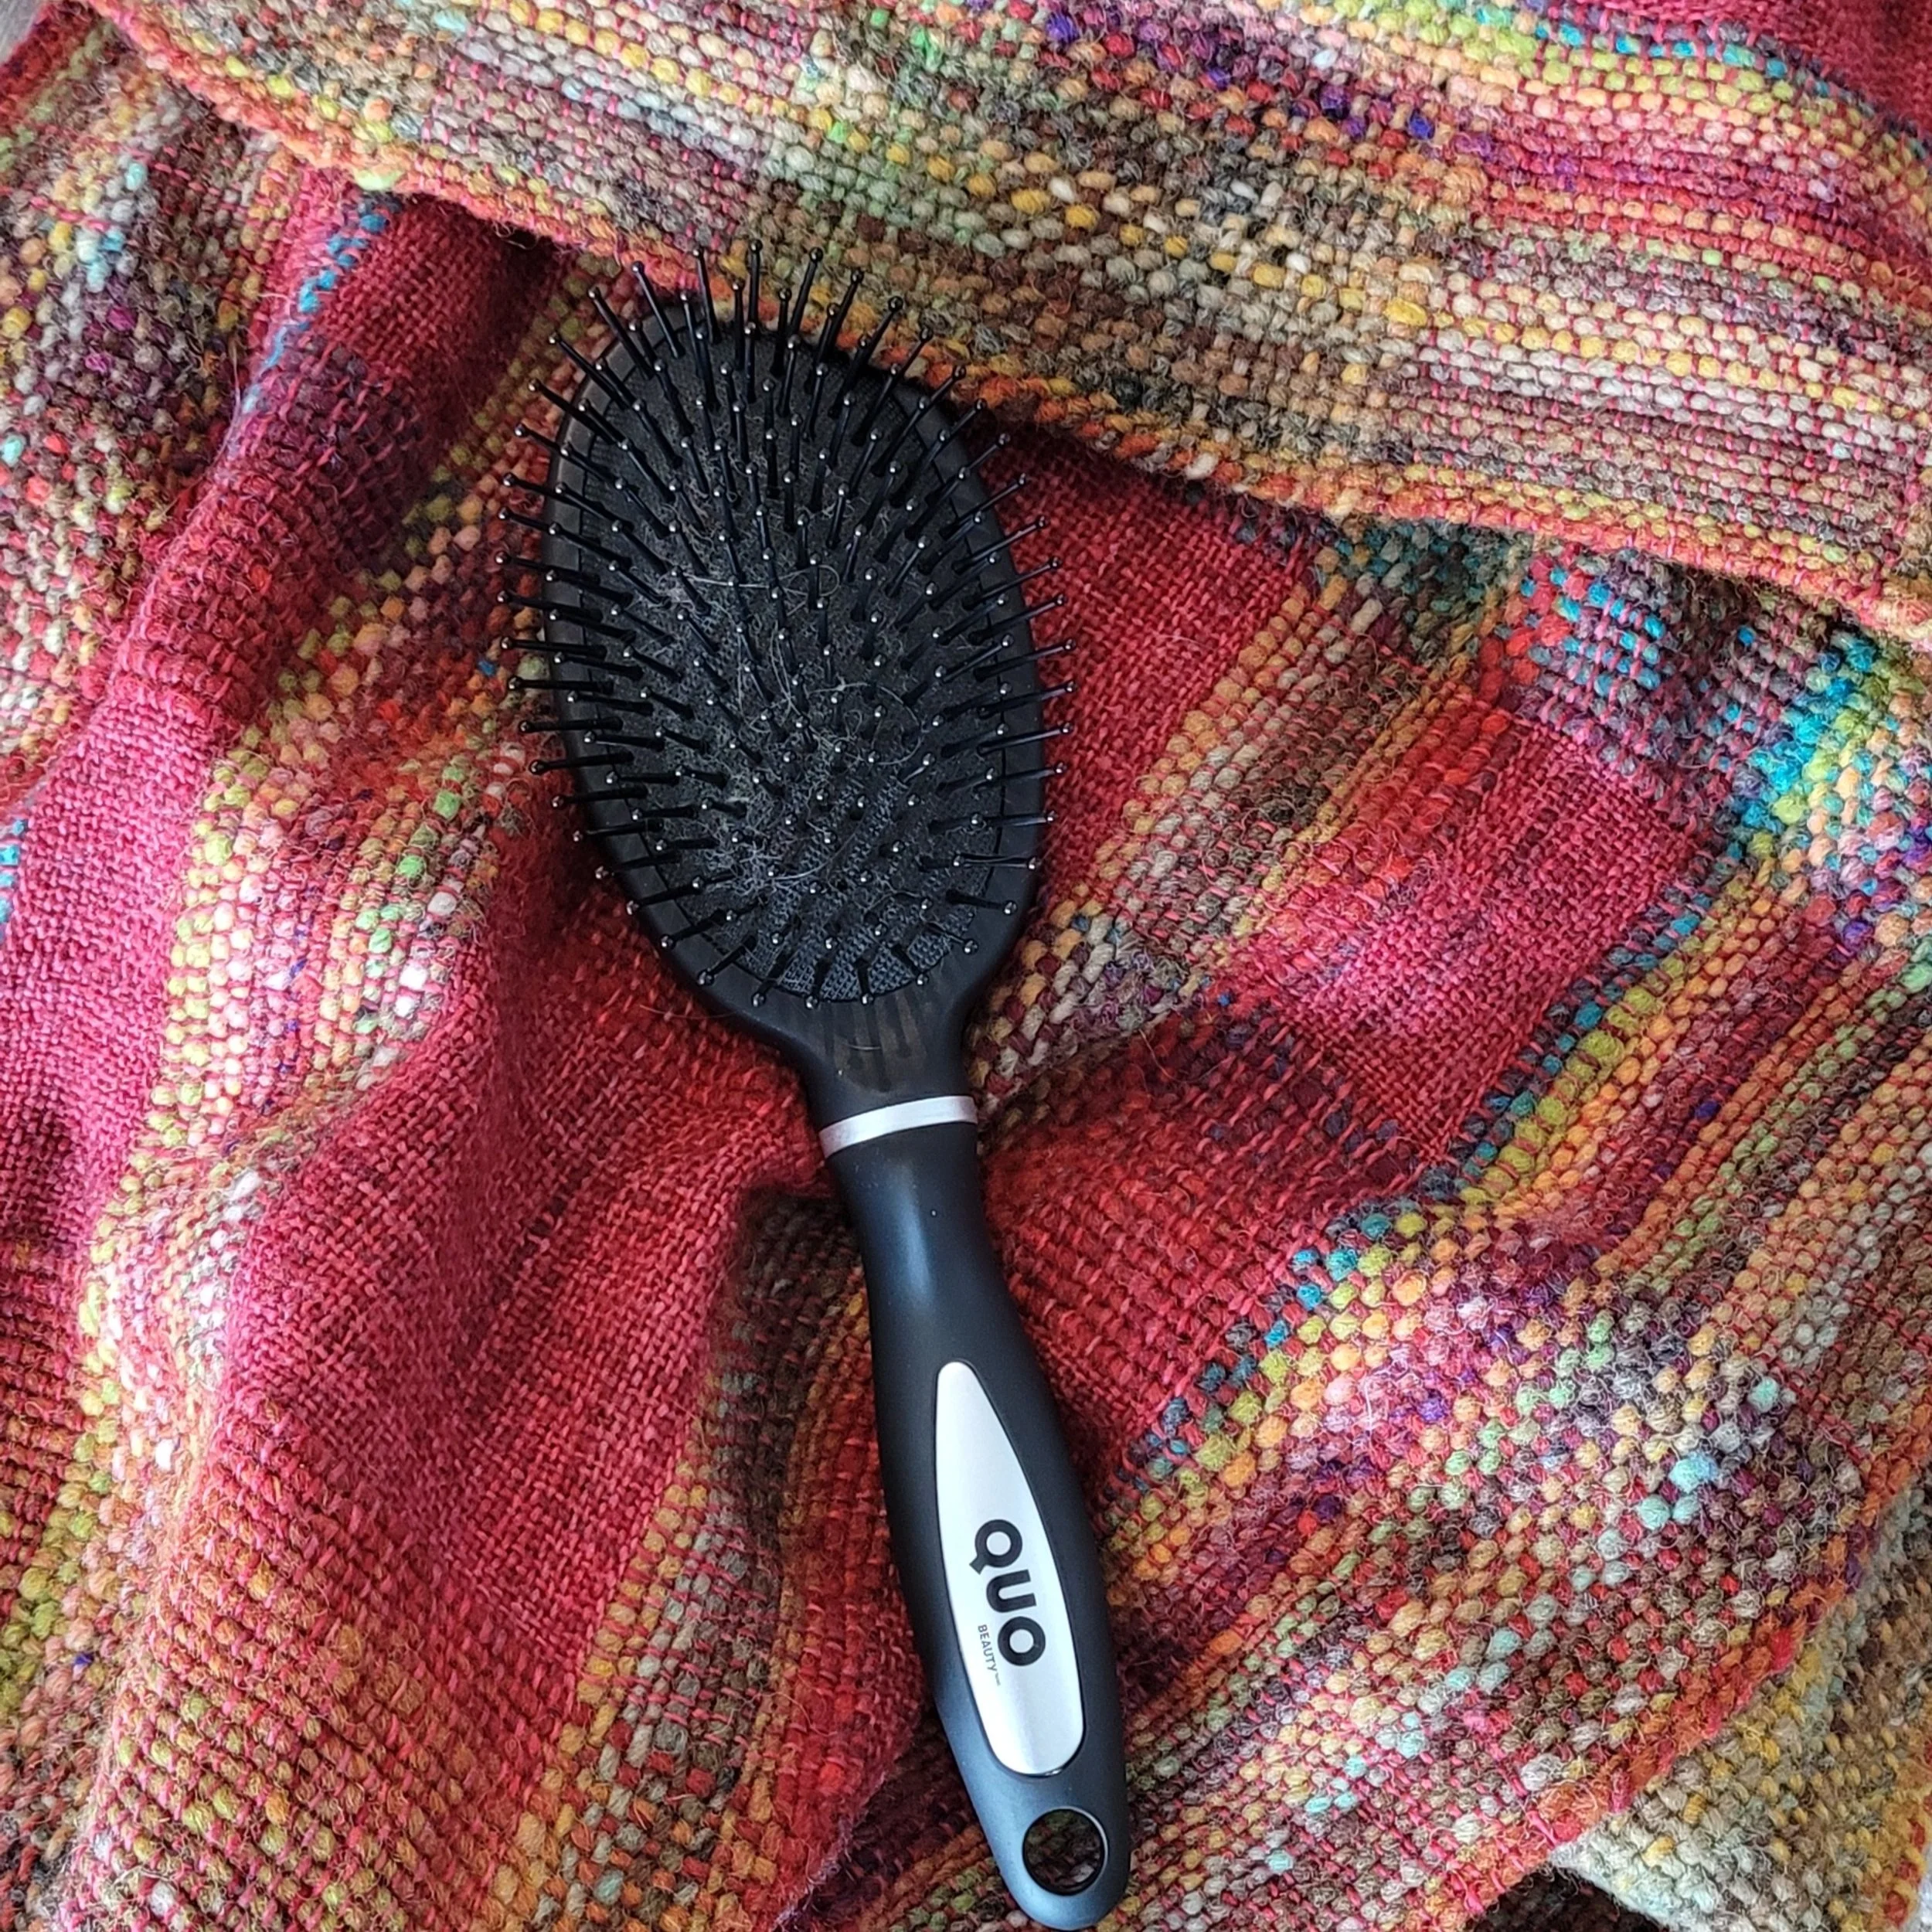
Yup, a regular old hair brush! I use it to brush out my fringe before trimming and twisting.
So, these are some of my favourite non-weaving weaving tools. Do you have some favourite tools?
Also, don’t forget to sign up for my newsletter so you can keep up to date on the latest patterns and blog posts.
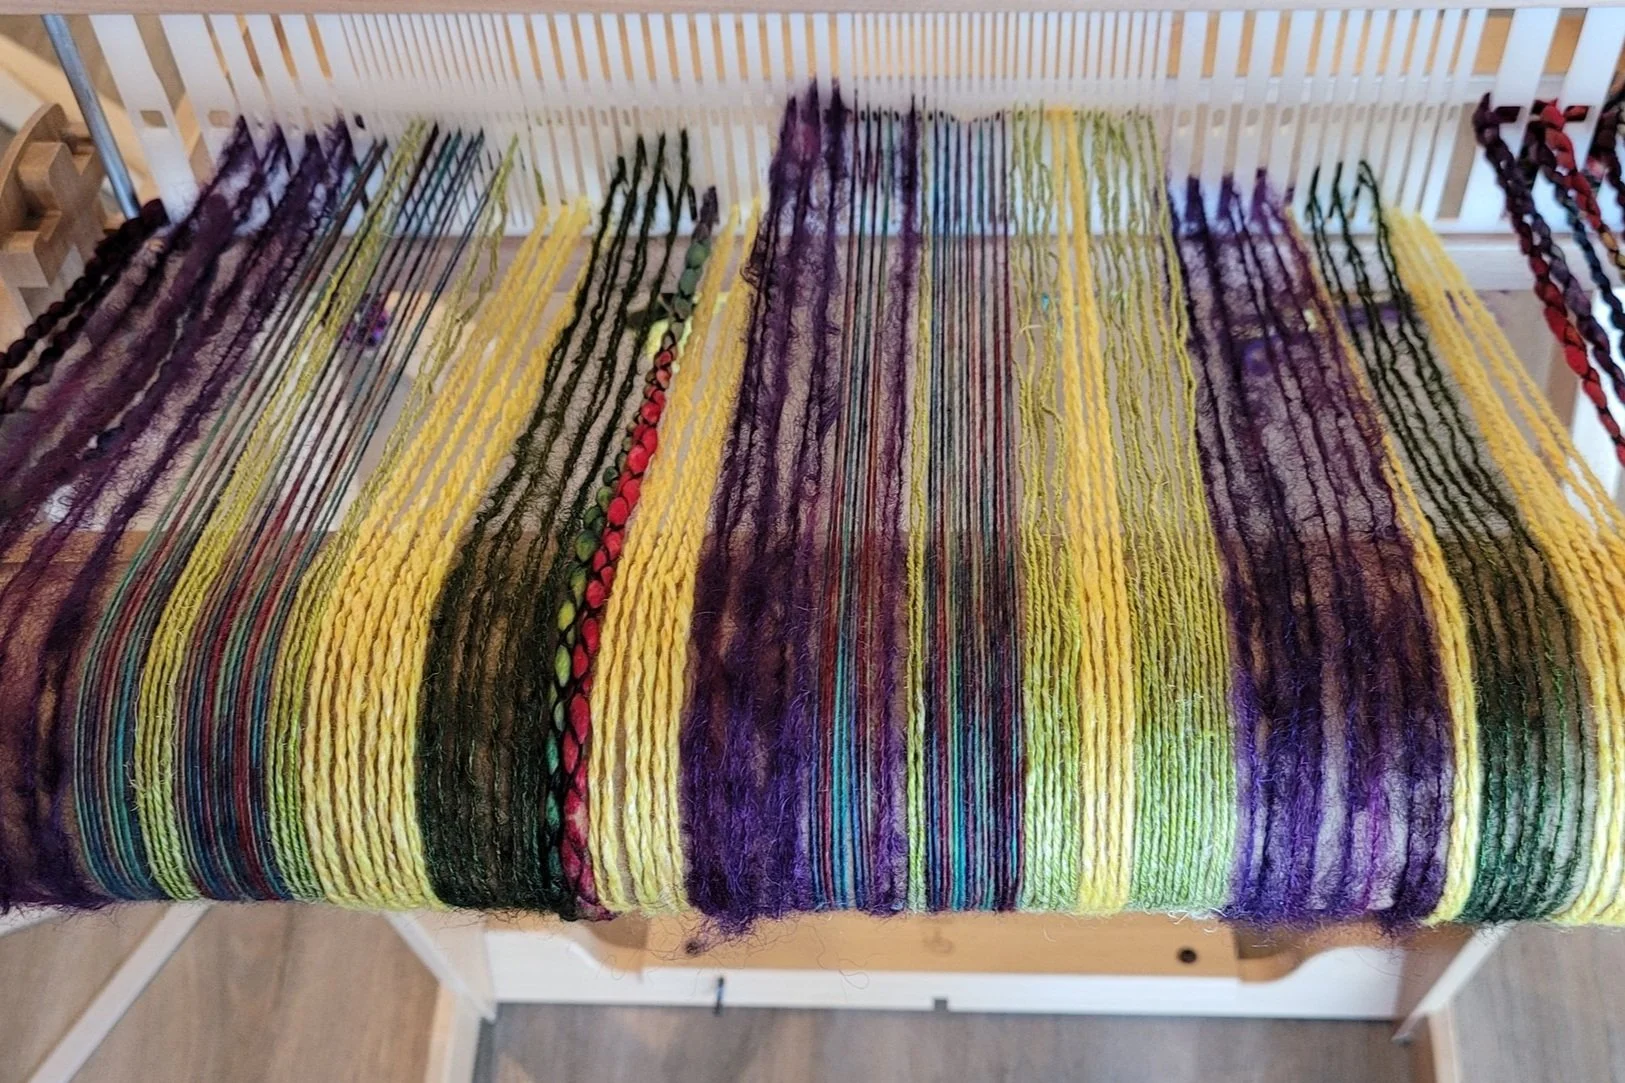
Creating Beautiful Scarves With Your Stash Part 2
First, let’s discuss varident reeds. These reeds have interchangeable pieces so you can arrange it just the way you like. All three major rigid heddle companies deal with the reeds differently. Ashford gives the widest range of dent sizes, 2.5 all the way up to 15 dpi. It includes 2” and 4” pieces. Schacht has sections that at 2 3/8” each in sizes 5-12. Kromski gives the weaver the most organizational options. Each piece has 1 hole, and a unique snap-together format allows the weaver to arrange the pieces however they want. Dent size ranges from 8-12. They also call this reed the “Weaver’s Choice”.
In the last post we looked at weaving your stash using a standard reed. This post will look at weaving with the varident reed.
First, let’s discuss varident reeds. These reeds have interchangeable pieces so you can arrange it just the way you like. All three major rigid heddle companies deal with the reeds differently. Ashford gives the widest range of dent sizes, 2.5 all the way up to 15 dpi. It includes 2” and 4” pieces. Schacht has sections that at 2 3/8” each in sizes 5-12. Kromski gives the weaver the most organizational options. Each piece has 1 hole, and a unique snap-together format allows the weaver to arrange the pieces however they want. Dent size ranges from 8-12. They also call this reed the “Weaver’s Choice”.
Reeds are specific to the loom, however I have heard that Kromski and Ashford reeds are interchangeable. (I haven’t experimented, so I suggest you take your loom in for a “fitting” before purchasing if possible).
Now that we know what a varident reed is, lets see how you can weave your stash.
Step 1
Gather up your yarn. This time anything goes! Don’t worry about keeping the weights similar. Take a look at this post to help you choose your yarns: https://www.therogueweaver.com/blog/2023/7/21/creating-beautiful-scarves-with-your-stash-part-1

Step 2
Sort your yarns by weight and place the reed pieces with the appropriate weight yarn. Not sure which is the best reed? Check out this post: https://www.therogueweaver.com/blog/2019/3/8/design-your-own-shawl-pt-2-choosing-the-right-reed I take a picture of the yarns with their corresponding reed sizes.
Step 3
Decide what order to place your yarns. I prefer keeping the heaviest yarns on the outside. It’s a personal thing, but I think it makes a good visual in the finished scarf. Play around here. Take into consideration how much of each given yarn you have when choosing where to put each yarn and if you have a choice, which reed width to use. You don’t want to run out. After I have my pieces arranged, I take a picture with the yarns. Having a picture means that if the pieces get knocked askew you have a record of what you decided and can see if the yarns look pleasing in the order arranged. Place the pieces in the reed according to the directions that come with the reed.
Step 4

Consider your weft. For these scarves I like using the same in the weft as in the warp. I weave them randomly. It gives a saori-style weave. I start and finish with the heaviest yarn. Pay attention to how much yarn you have available…you don’t want to run out of a weft yarn too soon. I always save a little of the heaviest yarn to ensure I have enough to weave the final bit of the scarf with the same yarn I started with.
Step 5
Warp and weave! You will want to pay extra attention when winding the warp. Different yarns will behave differently as you wind. I use a combination of walking my loom to my pegs and crank and yank. But have some S-hooks handy, you will probably need a few!
Finishing
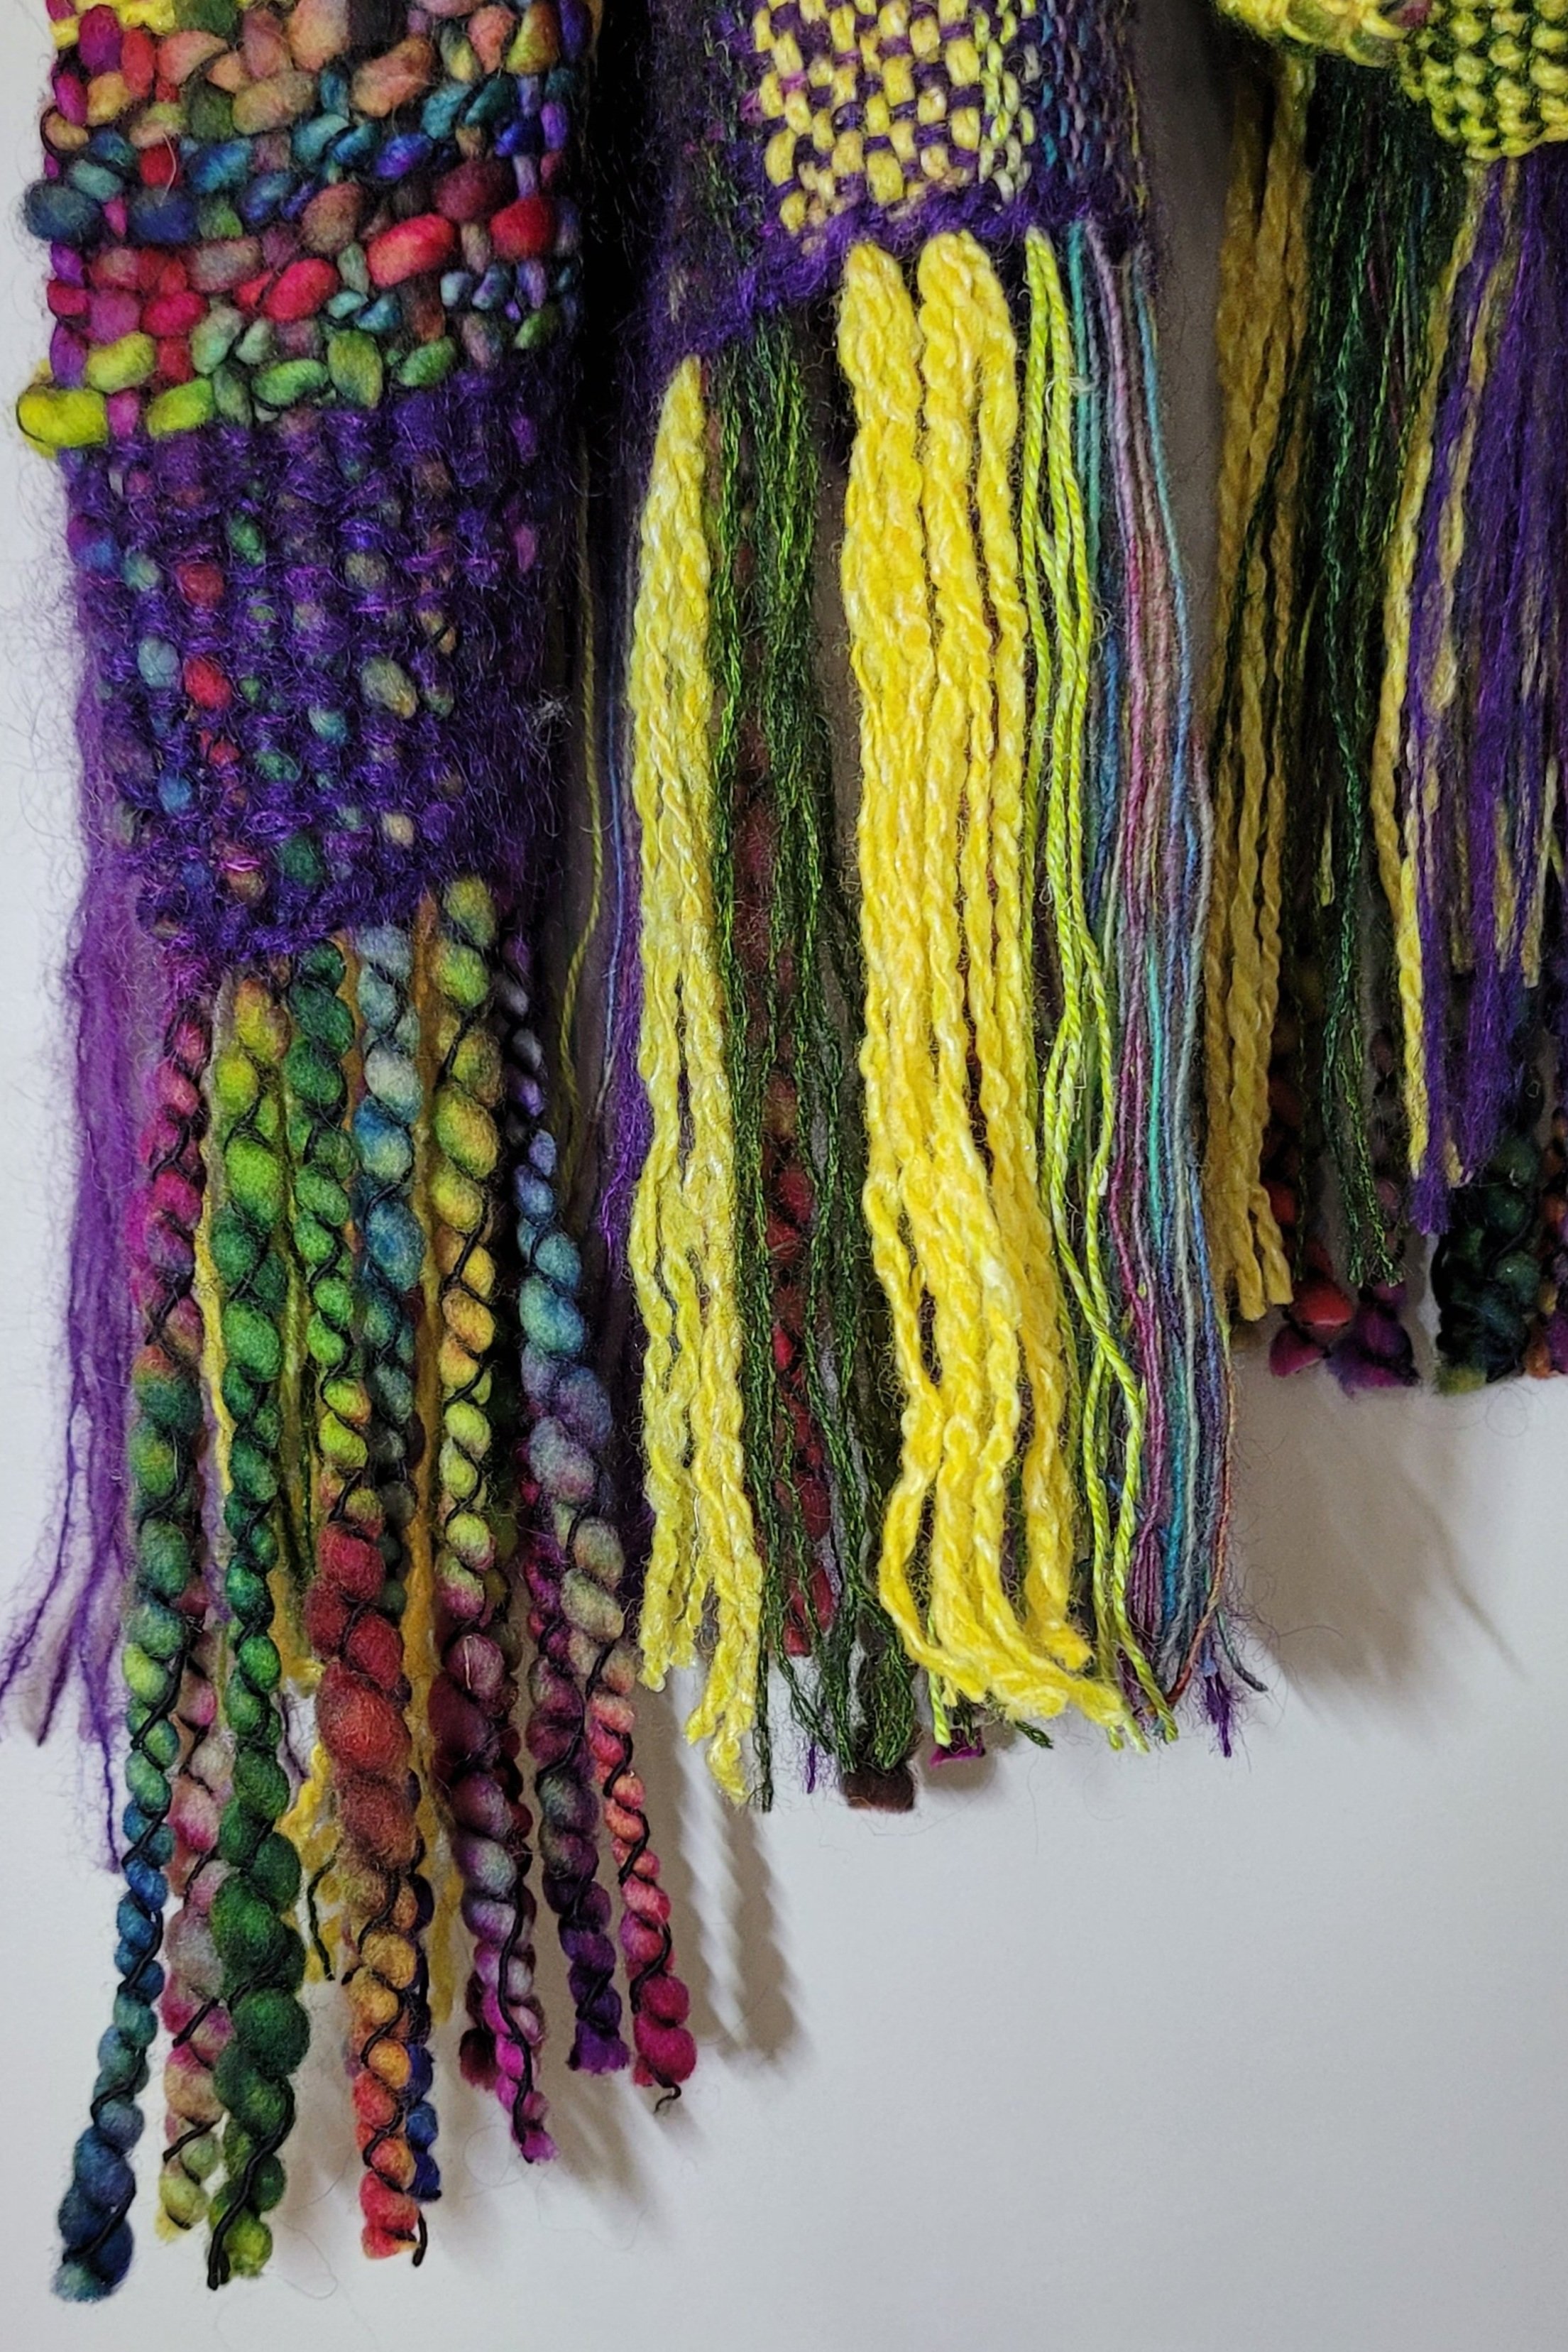
I hemstitch the fringe, but I do not twist the fringe. Some weavers will frown on this as being unfinished. While it is true that a twisted fringe looks more finished and wears better, I think a fringe with so many different weights looks odd. And I love the way a fringe looks with all the different yarns! (There is a reason I call myself The Rogue Weaver!)
To wet finish I soak in hot water and then send through the spin cycle only in my washing machine. I then toss in the dryer for 5 minutes…set a timer and do not walk away!!!!
When the scarf is mostly dry, press using a hot iron and steam (skip this step is your yarn is acrylic!) and trim the ends. Use a hairbrush to gently brush the fringe and trim.
Enjoy your scarf!
Need a pattern to get you started? Take a look at this: https://www.therogueweaver.com/new-products/saori-stylescarfrigidheddleweavingpattern
Creating Beautiful Scarves with Your Stash Part 1
Rigid heddles are a great way to use your stash! Learn how to put together the yarn you already have to create one of a kind works of art.
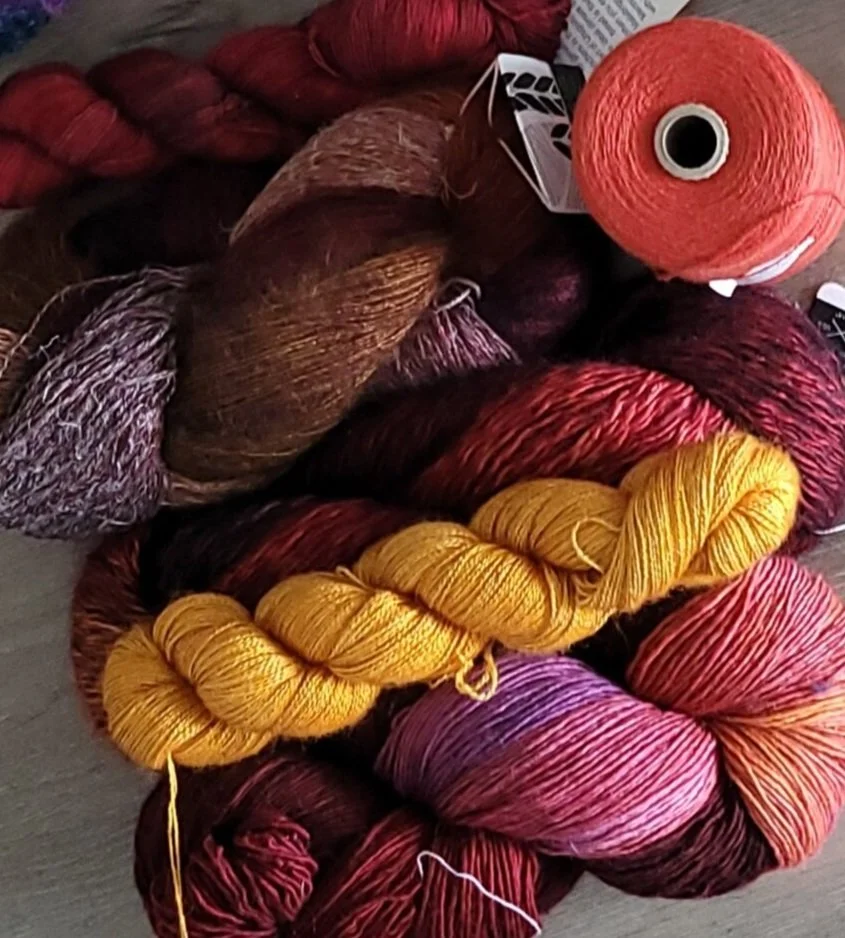
Some of my favourite projects have been woven with yarns in my stash. Well, in theory it all comes from my stash. In reality I always need to buy at least one more skein. Please tell me you understand!
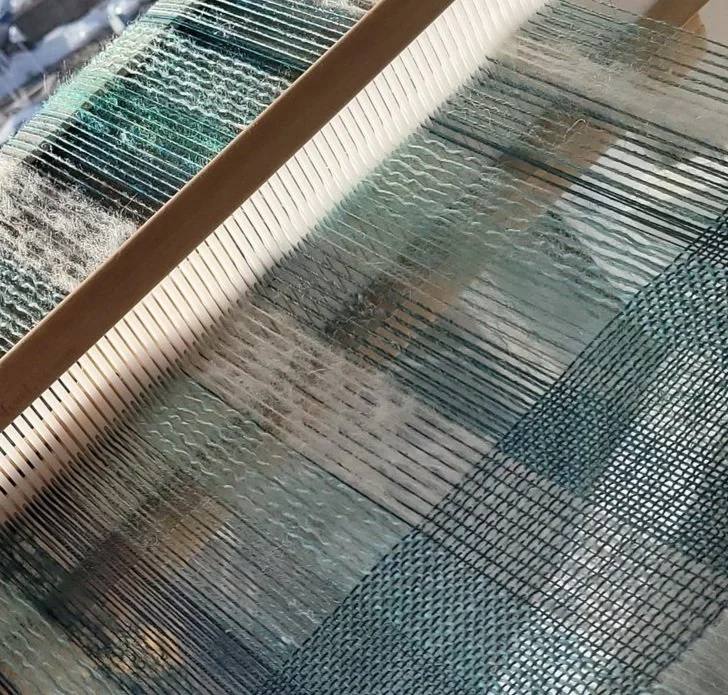
Multi warp weaves are fun and are a great way to use up all the little bits that aren’t enough for a project but too much to throw away. Today I’ll walk you through how I put together a multi warp scarf using a standard reed. I like a 10 or 12.5, but it will depend on the yarns you are choosing.
On a side note, you need to be in the right place mentally for these warps! They can be super easy but more likely they will have trouble spots. Usually there are a couple of areas that want to stick or have tension issues. Prepare yourself for a slower weave with some finger work to clear sheds, particularly if you are using mohair or textured yarns. After you have seen the results of your first scarf, you won’t mind the extra work at all!
Step 1 Gather Your Yarn
Gather up the yarns you could use. This may involve gathering up all your ends, or maybe you have a skein that you want to use but it isn’t enough for the width you want. After you have gathered all the yarns, lay them out and sort them by weight. Lace, fingering, DK/Worsted, bulky and super bulky. Since we are using a standard reed and not a vari-dent, you will need to narrow down your selection to similar weights. Lace and fingering can work together, fingering and DK/worsted or DK/worsted and bulky.

Of course, you can double some of your yarns to fit a larger reed. You can also space heavier yarns to fit. Heavier yarns will usually be fine in a slot but not in a hole, so it is possible to warp the holes with one yarn and the slots with another.
Step 2 Sort Your Yarn
After you have gathered all your yarn and sorted it, take a look at what you have. Do the colours look ok? If you are working on a monochromatic scarf, do all the colours blend well? If for example you have decided on a blue, and most of the blues are on the blue/green side a blue/purple might not fit. If you have a multi mixed in, do you need to add an extra colour from the multi to pull things together? Does your scarf need a “pop” colour? The “spice” blend above was quite dull until I added the gold. Pinterest colour schemes is my favourite place to go when I’m not sure of my colour scheme.
Don’t forget to consider how each yarn will finish. Mixing super-wash and non-super-wash can lead to interesting results as can mixing linen, silk, wool, alpaca cotton ect. Keeping the stripes narrow will reduce surprises. On the other hand, strategically placing a super-wash amidst the non-super-wash can create lovely scalloped ends on your scarf.
Step 3 Choose Your weft
For these scarves I like to use a thin weft so the warp shines. I also like to use the same weft through the whole project. My favourites are:
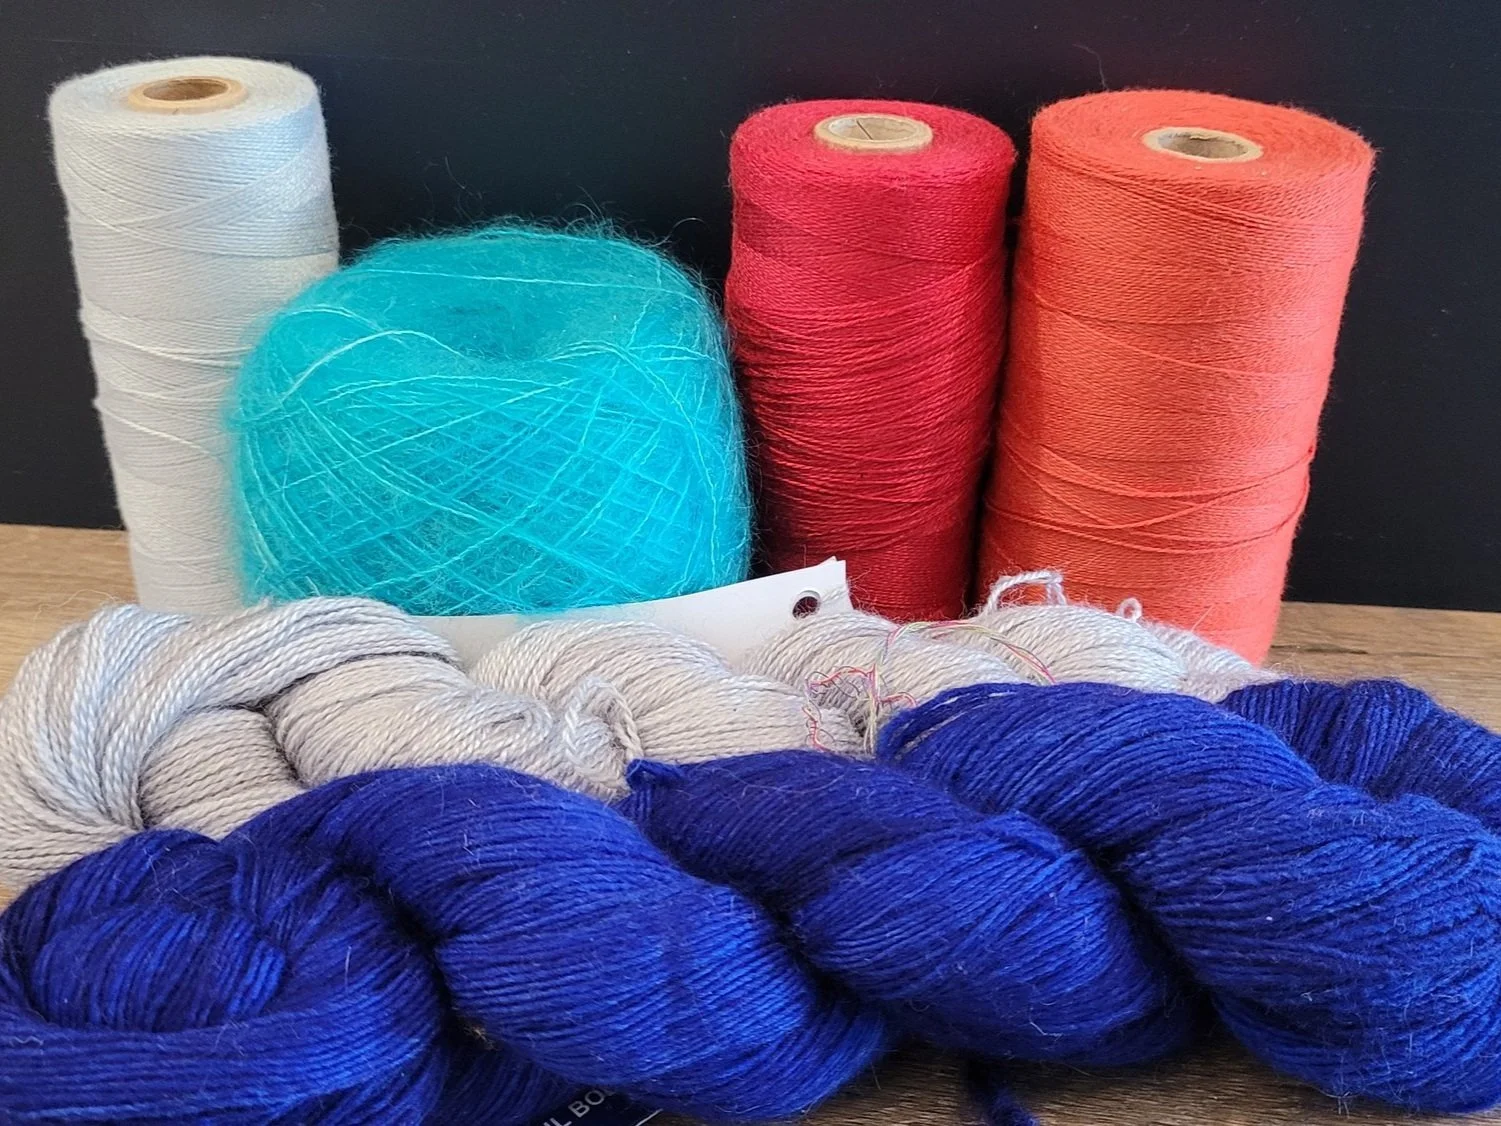
Mohair (Handmaiden Angel Hair, or Super Kid Silk, Rowan Super Kid, Malabrigo Mohair)
8/2 tencel, I get if from Maurice Brassard. It has a lovely shine and comes in so many colours;
Bamboo Cotton, again Maurice Brassard. The shine is a little less than Tencel.
8/2 cotton, again from Maurice Brassard. This has a matte finish, and there is every colour available!
Any lace weight yarn. If your warp is mostly slippery yarns use a woolie lace. If you warp is mostly sticky yarns, silk or other slippery yarns will work well.
Step 4 Warp and Weave!
Now it’s time to warp! I place all my yarns on the floor behind my loom and warp randomly. As a general rule, I do not cut and tie. However, if my yarns start to tangle, I will, just to save my sanity! It helps if you keep your balls of yarn spread far apart. Also, working from the center of the ball rather than the outside will help. You will have lots of crossed threads behind the reed which will pose no problem until the end. Here’s my solution: https://youtu.be/vPPT_RXdqb4
If you have some yarns that you want in slots only, remember this while warping and then also while threading the heddle.
You will need to pay special attention to winding. With many warp yarns, things can get a little sticky. Just keep an eye on that’s happening in front of the reed. I use a combination of walking my loom to the pegs and crank and yank for these shawls to ensure the best tension possible.
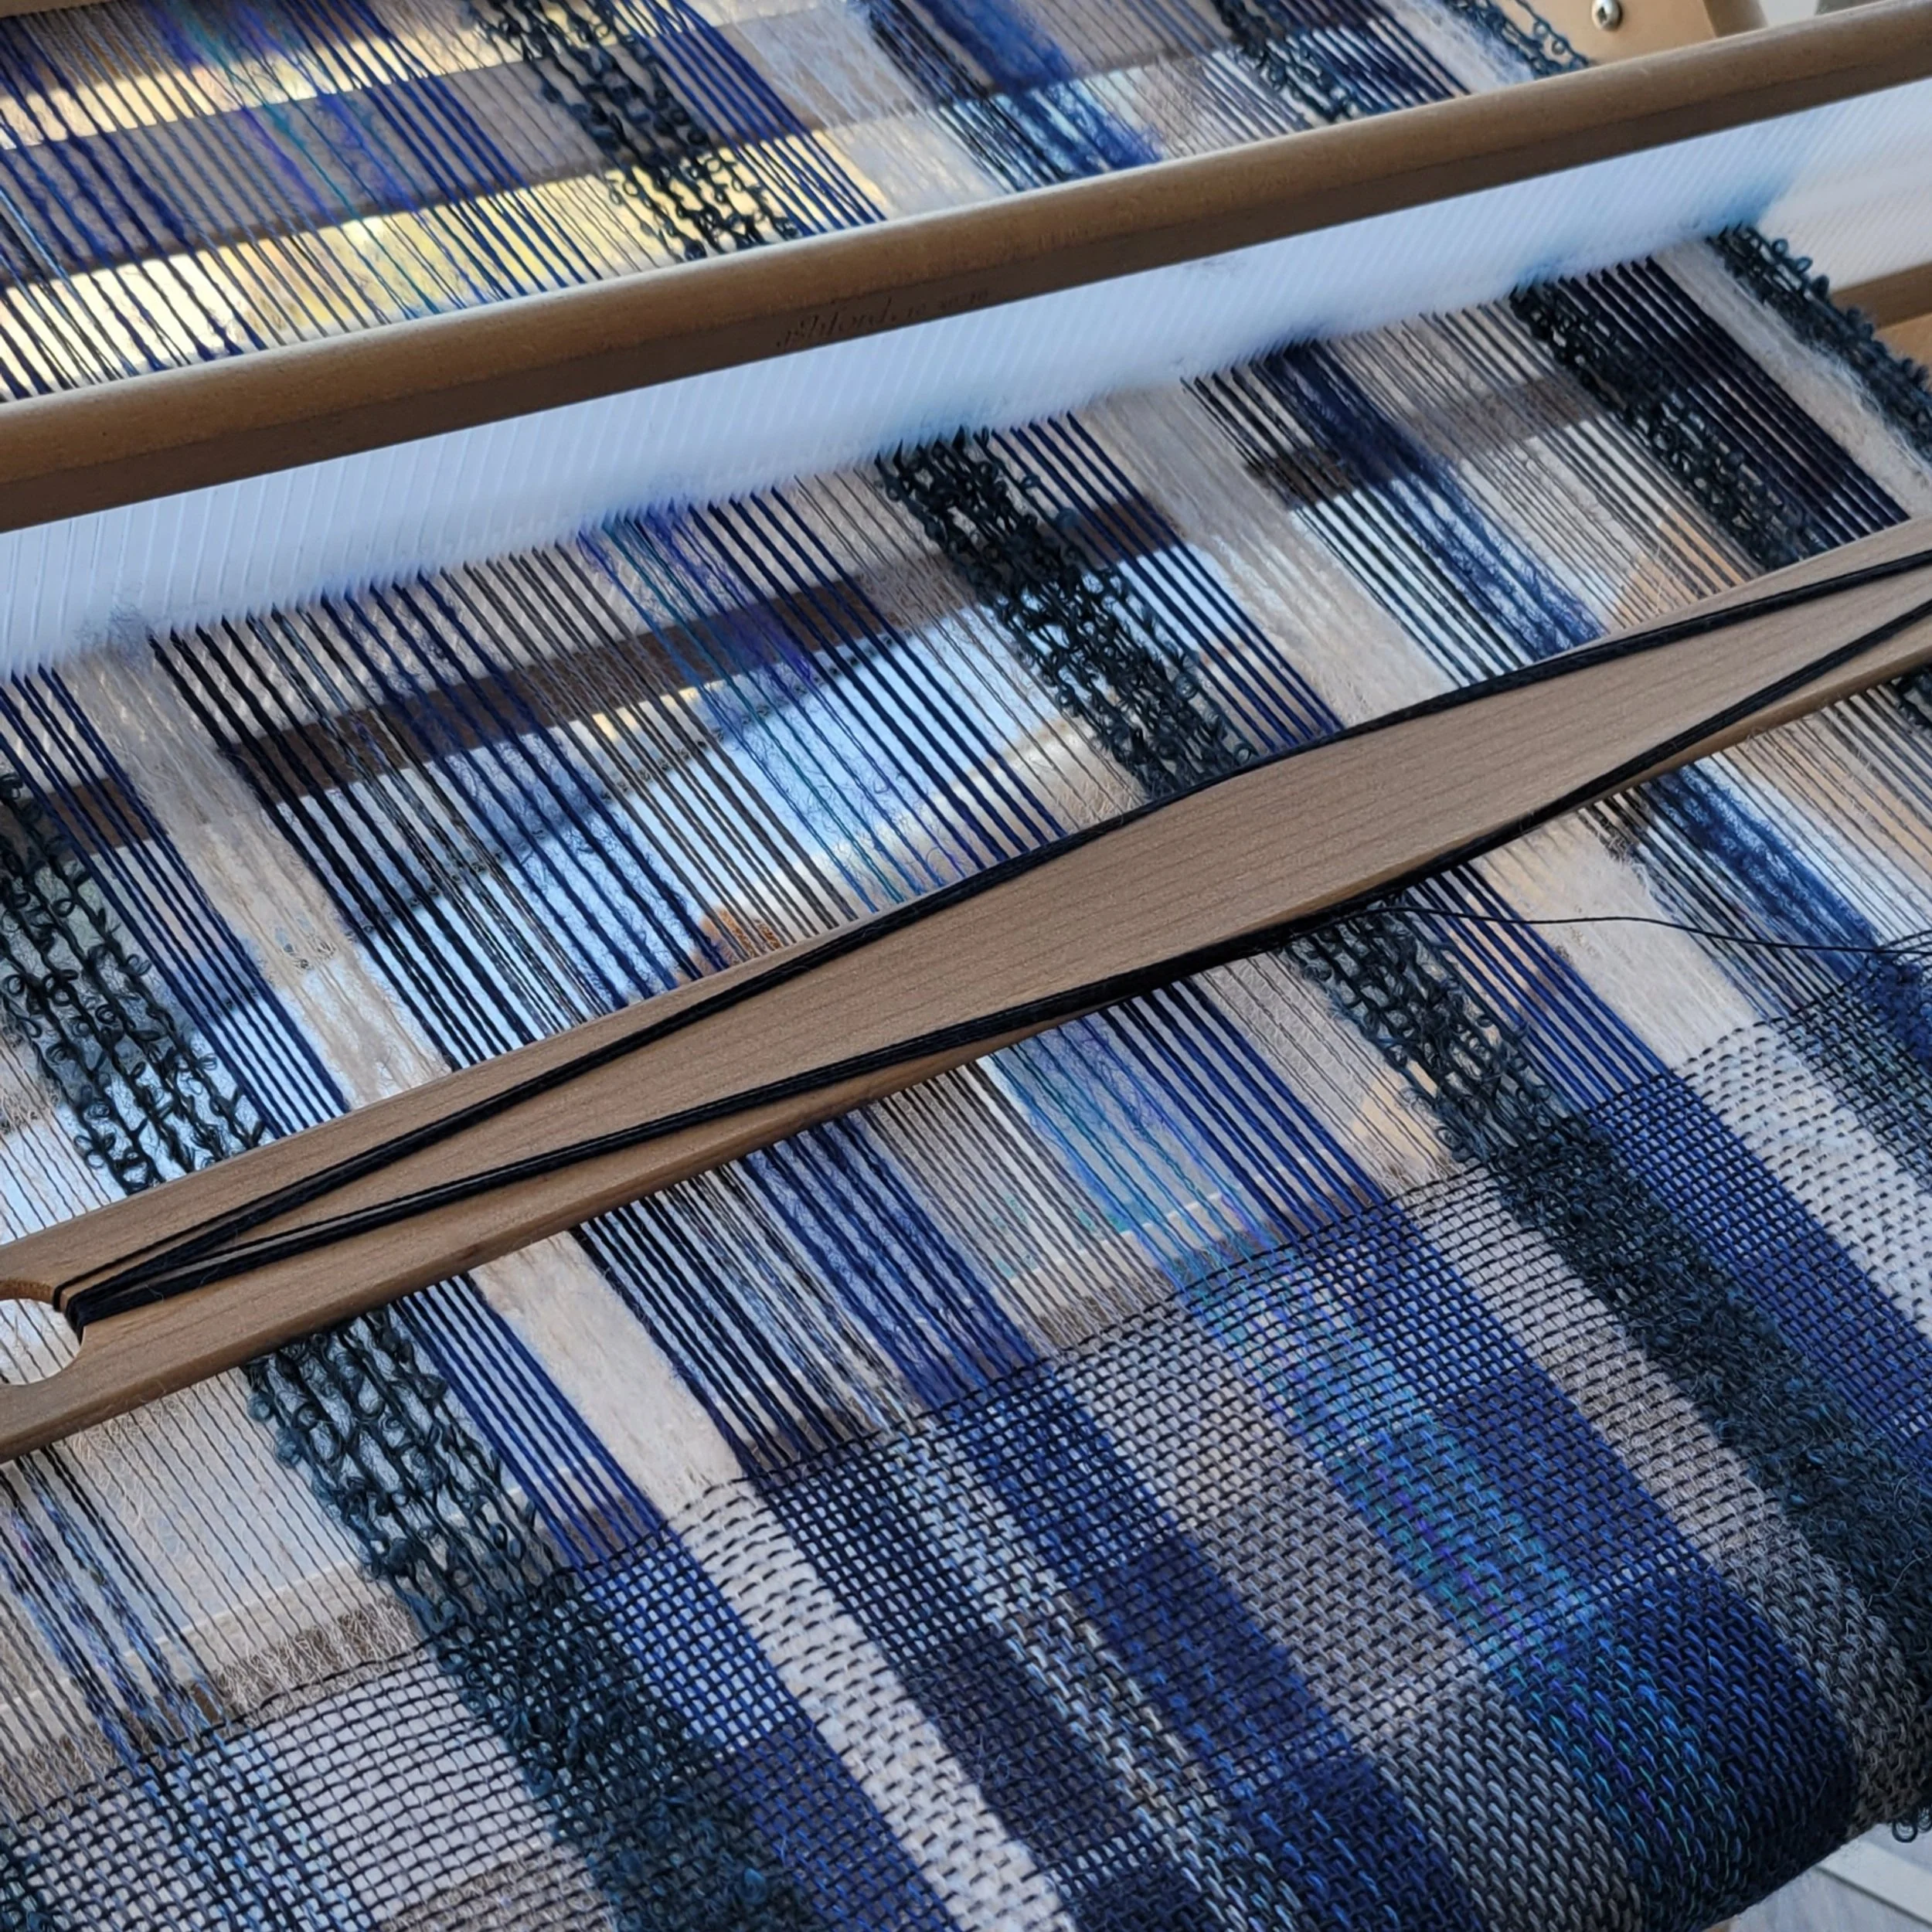
After the first inch or so of weaving, you will know which yarns are going to give you trouble. Add S-hooks as needed and use your fingers and shuttle to clear the sheds. If you have mohair in the warp, it sheds as you weave. The shedded fluff can gather behind the reed, clear this out regularly.
I hemstitch, usually in bundles of 4 and don’t twist the fringe. I love the look of all the different yarns flowing together. You can rub in something like fray check if you want. I have never done this.
Wet Finish
Wet finish however you usually do. My method is to soak in hot water, send the scarf through the spin cycle ONLY in my washing machine then toss in the dry for 5 minutes. I tie the fringe in loose slip knots to prevent tangling. After drying you may need to gently tease apart some sections of the fringe.
The final step is to trim the fringe and press. I use a hair brush to gently brush the fringe then cut using my cutting mat and rotary cutter. Don’t skip the pressing, it really makes a difference!
Enjoy your scarf! (and go buy more yarn, after all you used your stash!)
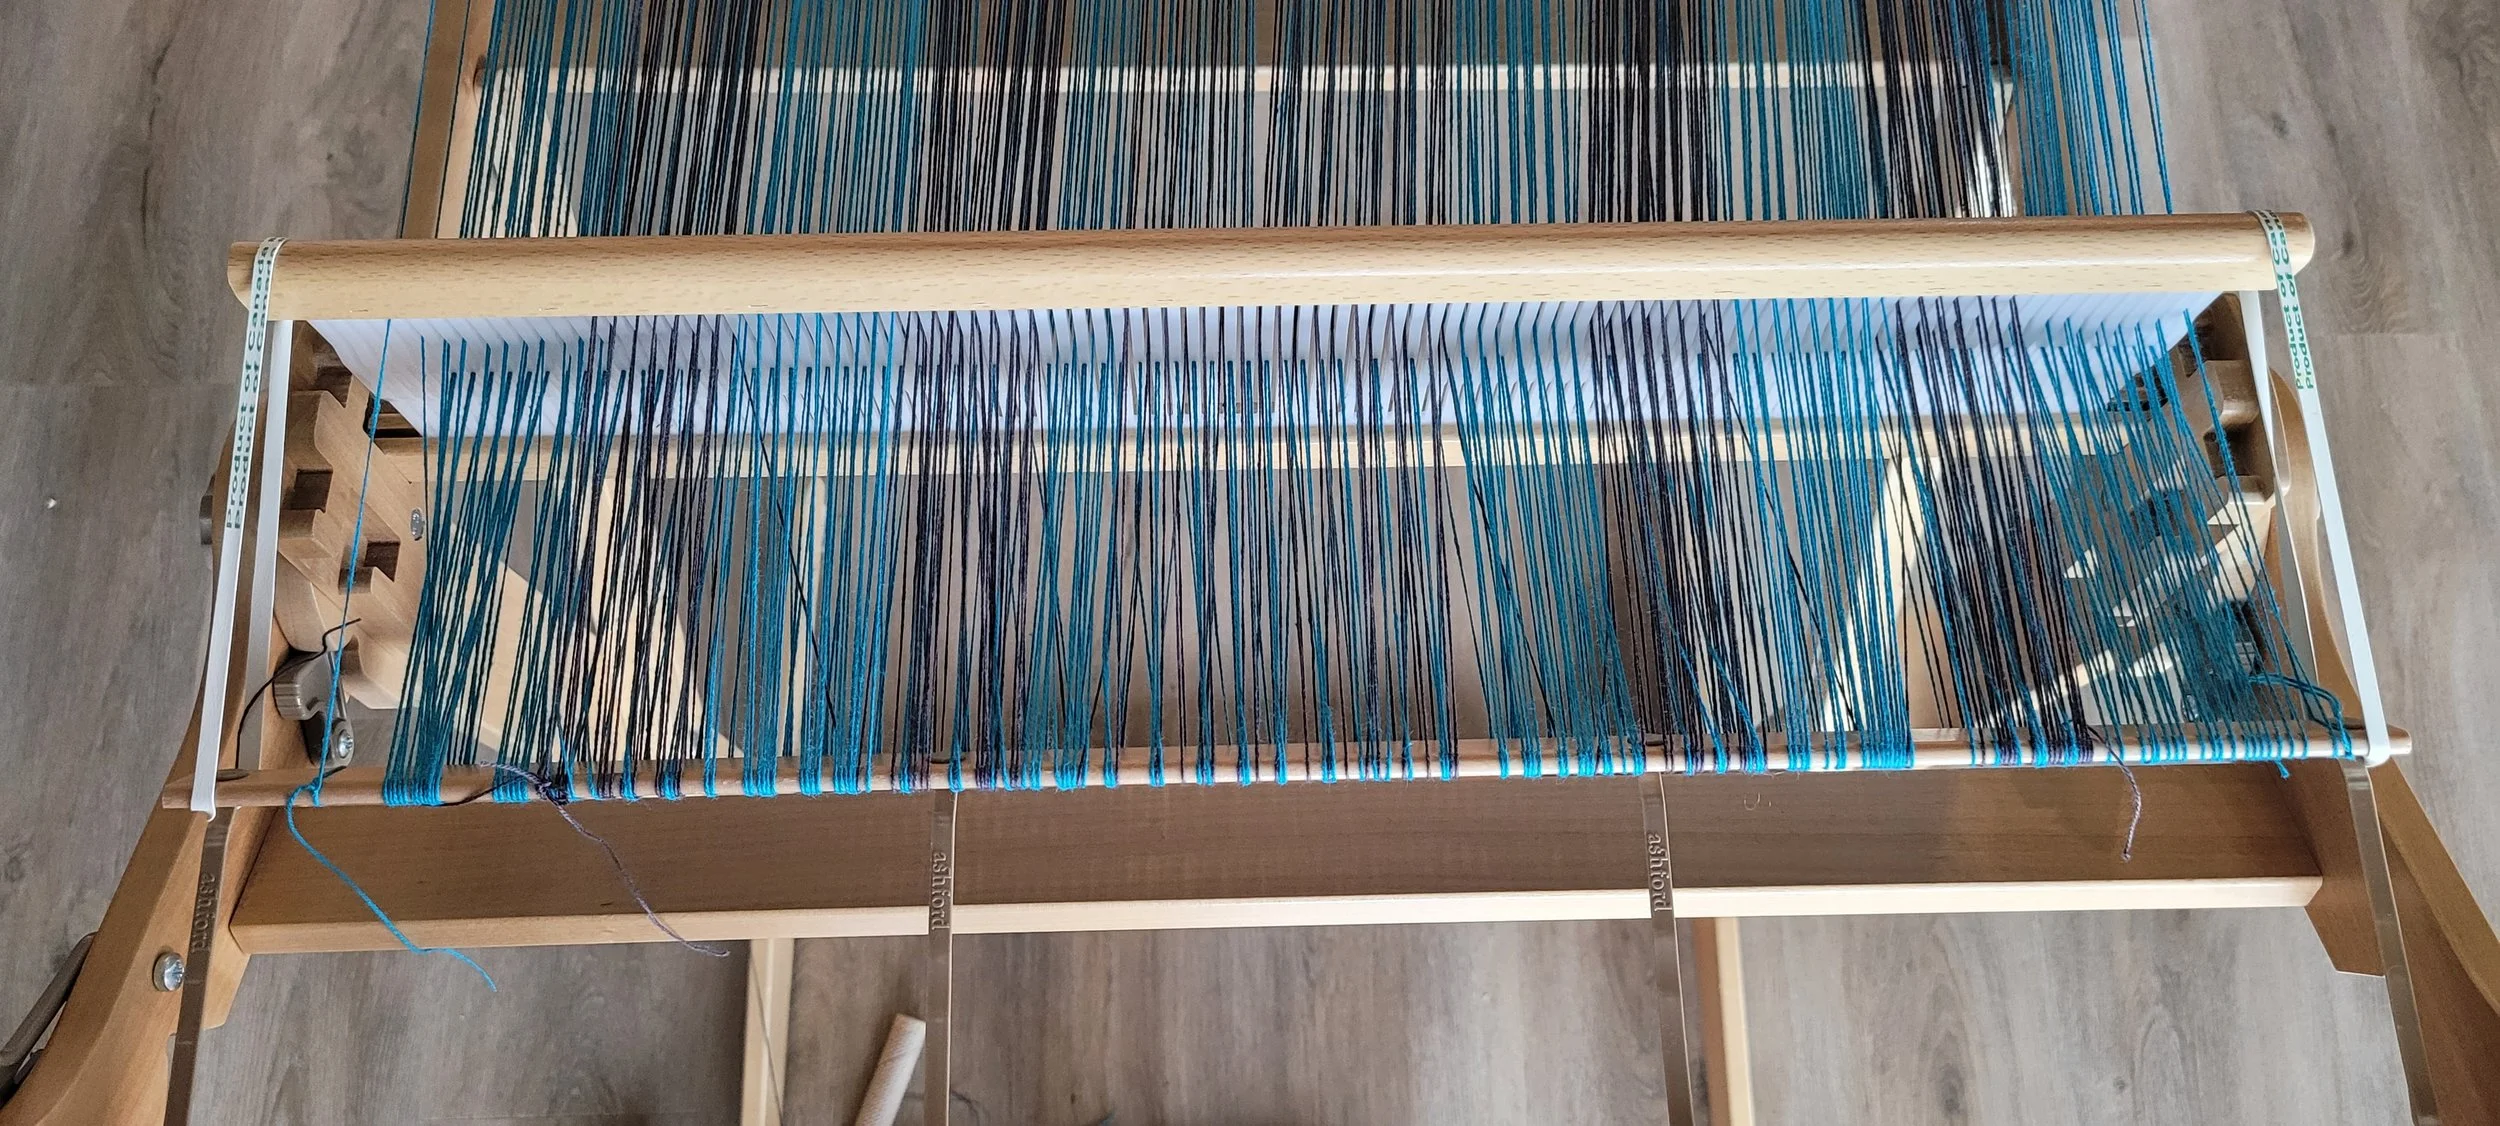
Twill On A Rigid Heddle Part 2
Today we’re going to look at how to warp and thread your rigid heddle for a basic twill.
Before we get there though, a few words of encouragement. Weaving should be fun. When you go to your loom you should look forward to it find it relaxing. If you find yourself forcing yourself to the loom figure out why that is. Is it the project, the yarn, the colour? Is the project too challenging so you can’t relax? Is it because you feel like you “should” do something?
Today we’re going to look at how to warp and thread your rigid heddle for a basic twill.
Before we get there though, a few words of encouragement. Weaving should be fun. When you go to your loom you should look forward to it find it relaxing. If you find yourself forcing yourself to the loom figure out why that is. Is it the project, the yarn, the colour? Is the project too challenging so you can’t relax? Is it because you feel like you “should” do something? Plain weave is beautiful, and if that is what you love, don’t let someone make you feel less because you haven’t “moved past” the beginner stage. There is so much beauty to be found in plain weave, and if you plain weave for the rest of your weaving life, you are a successful weaver!
Ok, back to twill…
Warping is easy…warp just like you would for any other single heddle project. Two threads for every slot. I don’t recommend trying to double the ends when you are first beginning, stick to 1 thread equals 1 slot.
The interesting (challenging!) part comes in the threading. How you thread the slots and holes creates the pattern. For the purposes of this post (and all my patterns!) here’s how I write the patterns.
0 = the hole in the reed
| = the slot of the reed
When I use the symbols, the first symbol always matches the back reed (the reed closest to the back of the loom). The second symbol always refers to the front heddle, the heddle that is closest to the weaver.
So, 0 | means that the yarn is going through the hole in the back reed and the slot in the front reed.
There are three ways that a yarn can go through the 2 reeds. Each represents 1 shaft.
Shaft 1: | 0 back slot, front hole
Shaft 2: 0 | back hole, front slot
Shaft 3: | | back slot, front slot
Pay attention to these things:
When threading from slot to slot, thread to the slot immediately in front of the back slot.
Some slots will have more than 1 end.

Note the crossed threads. I had to undo and rethread this section.
Sometimes slots and holes will be skipped.
As you thread, keep an eye on what is happening between the reeds. The threads should not be crossed and they should travel in a relatively straight line…of course when going from a slot to a hole there will be a slight angle, but only very slight. If you are repeating a pattern across the loom, you should see a regular pattern in the front and the back heddle. For example, a basic 1, 2, 3, you will see a pattern on the front heddle…2 holes, empty hole, 2 holes, empty hole across the reed. The slots will also have a repeating pattern. Seeing this pattern will help you as you check your work.
I always tie my warp so it can’t fall out of the heddle!
I work in small bundles. For a 1, 2, 3 threading I will work with 6 ends at a time (3 slots). After I have threaded those 6 ends, I tie a slip knot and move to the next 6 ends. This makes it easier for me to know where I am in the pattern as well as protects my work if a reed gets knocked loose!
A basic straight twill is threaded 1, 2, 3, repeat or 3, 2, 1, repeat
For weaving there are 3 positions for the reed. Each represents 1 shed. Here is how to read my symbols. Each shed is shown using 2 symbols. The first symbol refers to the front reed, the second symbol to the back reed.
Shed 1: 🡩-- front heddle up, back heddle in neutral
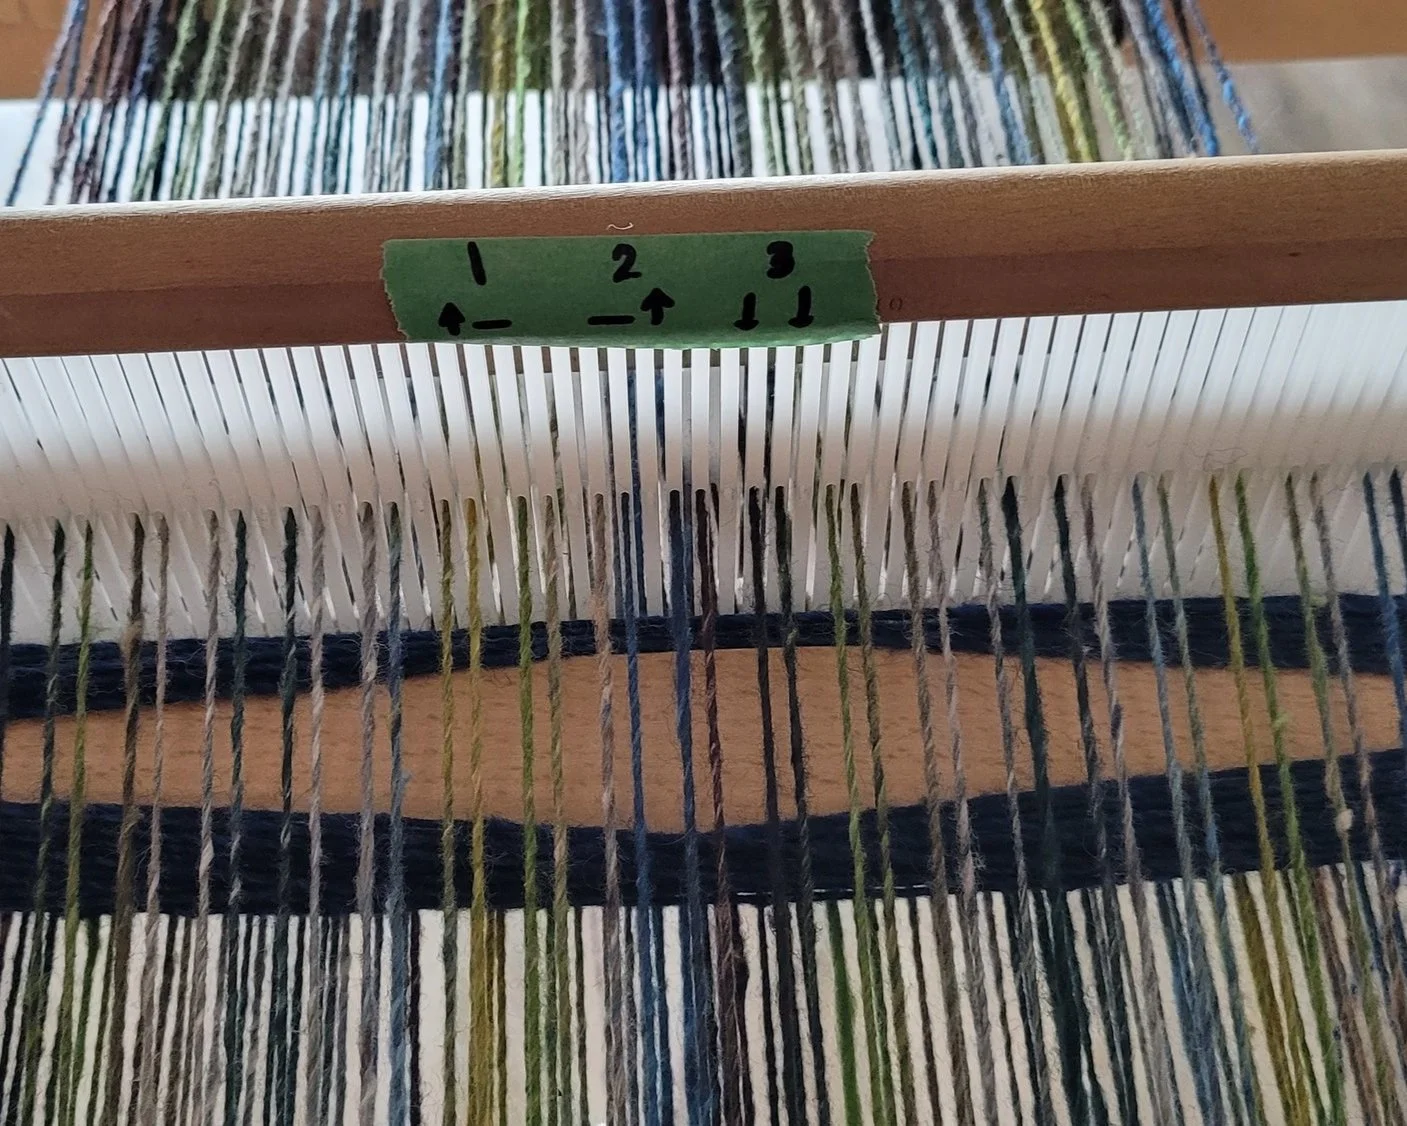
Shed 2: --🡩 front heddle neutral, back heddle up
Shed 3: 🡫🡫both heddles down
A basic twill is woven 1, 2, 3 repeat or 3, 2, 1 repeat.
To weave, begin in shed 1, slide the weft through. Use the front heddle to press the weft into place. Set the front heddle in the neutral position;
Lift the back heddle into the up shed, pass the weft through, use the front heddle to press the weft into place, let the front heddle hang on the warp;
Place the back heddle in the down position, place the front heddle in the down position, pass the weft through and use the front heddle to press into place, Let the front heddle hang;
Place the back heddle in the neutral position and the front heddle in the up position.
And that is how to weave a basic twill. Here’s a video to help: https://youtu.be/Bo6yKNvyVEw and another one here: https://youtu.be/awN1tQSAdho
Next up we’ll look at creating different patterns (herringbone and point twill I hope 😊).

Weaving Twill On a Rigid Heddle Part 1
For the past few weeks I’ve been working on some 2 heddle patterns. This means I’m (re)learning how to use 2 heddles! My plan is to have 3 patterns ready for September classes: Twill, Double Width and 2 heddles for Proper Sett.
Rigid Heddle Weaving Patterns: Explore Beautiful Weaving Scarf Patterns for Twill Weaving
For the past few weeks I’ve been working on some 2 heddle patterns. This means I’m (re)learning how to use 2 heddles! My plan is to have 3 patterns ready for September classes: Twill, Double Width and 2 heddles for Proper Sett.
Today I’m going to talk about twill. I’ve been focused on sticking to 2 heddles only, no pick-up sticks or string heddles. This allows me to have 3 sheds. Weaving twill with 3 sheds creates a 2/1 twill. This means that the weft goes under 2 warps and over 1.
Three sheds can do a lot! Here are some samples I’ve woven. I’ve been playing with different threadings: 123, 123, 123; 321, 321, 321; 123, 1, 321, 3; 123, 2, 123, 123, 2, 123 and more.

This piece is called a twill gamp. It shows the different threadings and how the pattern forms with different weaving sequences. You can see each section where I changed the threading and the order of the picks (treadling). You can also see where I’ve made mistakes!! Because this was a practise piece, I didn’t go back and fix the mistakes. I did however keep track of the threading patterns and the weaving patterns so I can weave the individual patterns again.
Plain weave is beautiful, and twill on a rigid heddle is a challenge, so why do it? Twill makes for a denser fabric with out losing drape. In fact it is likely to drape better than plain weave. Twill makes a nice fabric for cutting and sewing.
You can tell the difference between twill and plain weave just by looking. Plain weave will look the same on both sides. The weft goes over 1 under 1 and creates a square look. Twill on the other hand will look different on each side. It also has a distinctive diagonal rib pattern. On a well woven twill, the diagonal will be a 45 degree angel. Twill also has a lighter and darker side.

While it’s true threading for twill can test your patience, especially as you are learning, the weaving itself is quite smooth and easy. I like to use painter’s tape to write the weaving sequence and stick it to my reed.
Over the next few posts I’ll be talking more about 2 heddle weaving. Next up, we’ll take a closer look at the threading process.

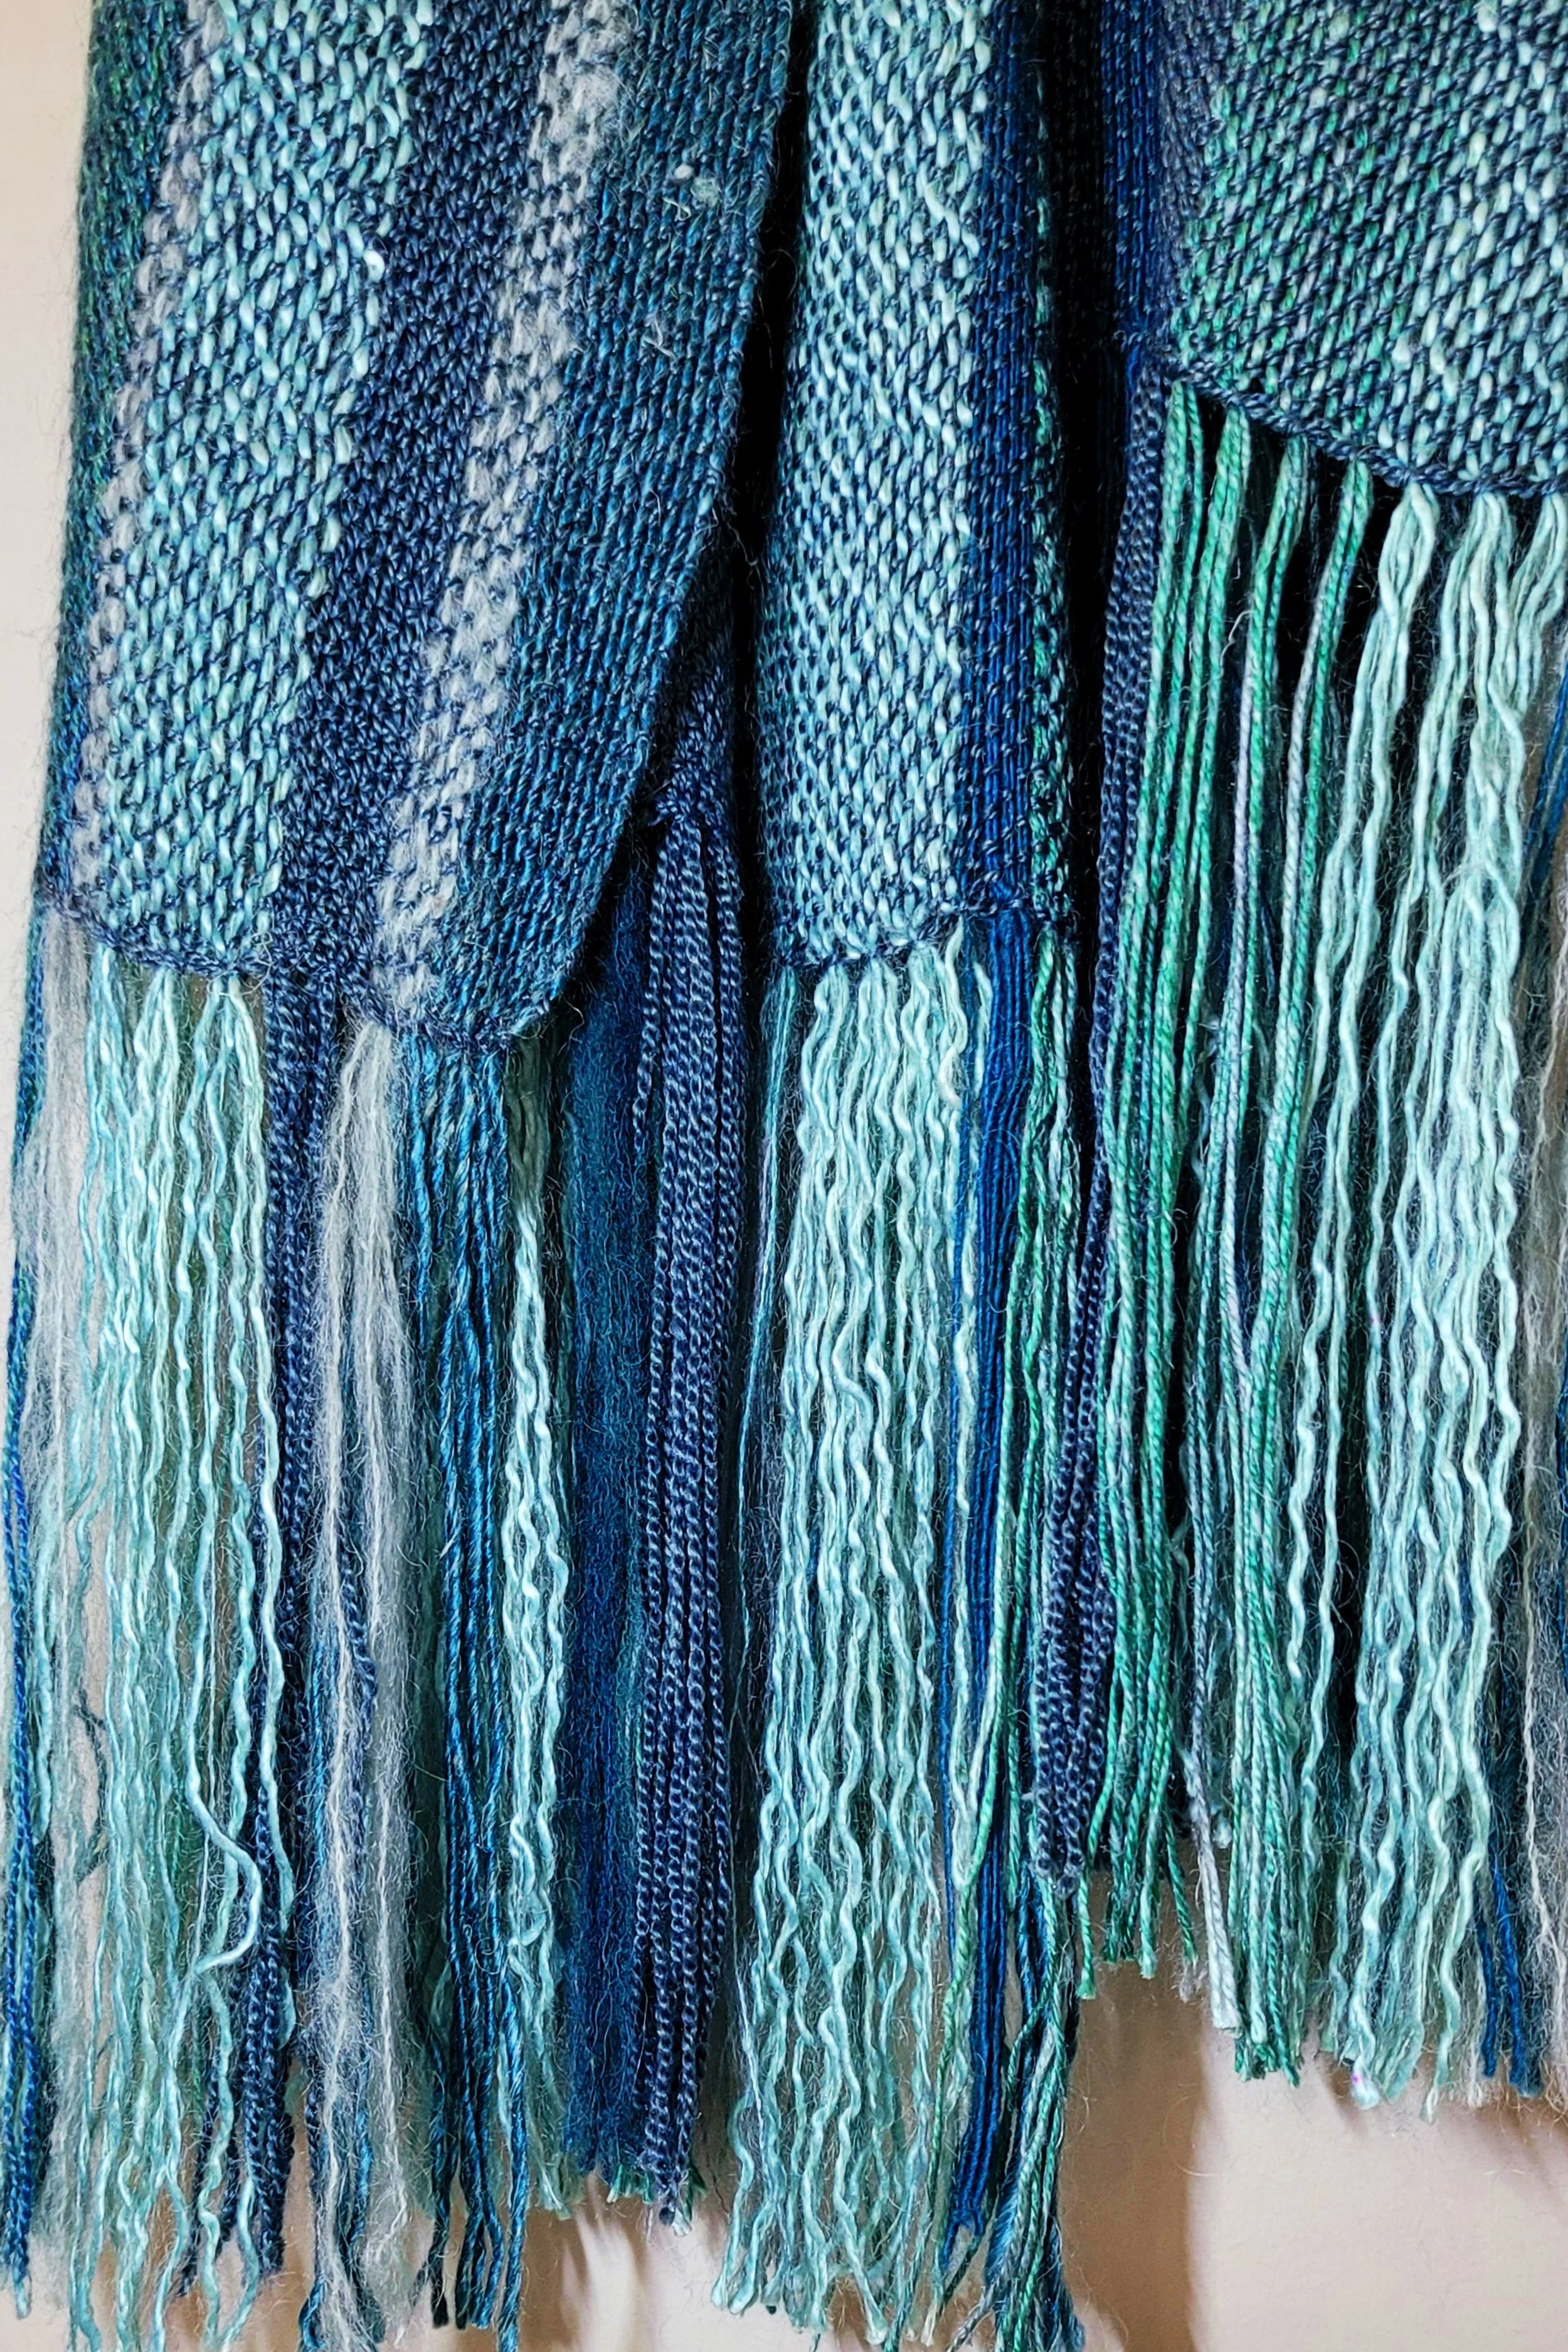
Fringe Twisting
Fringe twisting is just one more step in finishing your weaving. And just like every other thing in the weaving process, you need to think about your fringe before the project ever gets on the loom. Let’s look at fringe generally first.
Why twist? The most important reason is because it looks nice and stays looking nice. An untwisted fringe looks great when it is freshly trimmed and pressed. After that the yarns begin to unravel, shred, tangle and, let’s face it, start looking a bit ratty. If you are making something for baby, a blanket for example, long thin threads can wrap around little fingers and cut off circulation.
There are times you may decide not to fringe twist. Sometimes the yarn is so beautiful you want the colours to shine (I can’t bear to twist Handmaidens’ Maiden Hair) Or the fringe will look too heavy for the item. When I make loose gauzy mohair wraps, I don’t twist. And of course, there are other ways of finishing a fringe that don’t require twisting…various types of knots for example.
As I said earlier, fringe begins before the yarn goes on the loom. Fringe is made with the loom waste. That means when you are calculating warp you do not have to add extra for fringe but on the other hand, when you tie on, you want to leave enough waste to have the desired length of fringe. This is never and issue for me, I always have enough! Also, be sure that when you cut your work off the loom that you have left enough for fringe.

Having a fringe requires a hemstitch. Well, you could do it without a hemstitch, but it will look much better if you have hemstitched. So, when you hemstitch, think about how many ends you want in each bundle and hemstitch accordingly. Fingering weight I usually hemstitch in bundles of 4 and do a 2x2 fringe twist.
And now, what you have all been waiting for…the actual fringe twisting, step by step!

You will need: t-pins, something to stick your pins into (foam blocks work well) a ruler and sharp scissors.
1. Trim your fringe (remember that it will be shorter after twisting so don’t over trim) I use a rotary cutter and mat for this step.
2. It works best if you have your work anchored. Pin the edge of your work to the foam blocks…don’t skimp on the pins!

3. Clip the yarn into your fringe twister (I love my Leclerc quad) If I’m doing a 2x2 fringe I’ll take my first bundle of 4, divide it into 2 groups of 2 and place each group of 2 in one clip. With my quad twister I can do 2 bundles at a time.
4. Start twisting! Count the number of turns (this will vary depending on the yarn and the length of the fringe. Counting will ensure your fringe looks uniform across the work.
5. Hold the ends of 2 bundles and unclip. Tie a knot in the bottom and release. Gaze in awe as the yarn twists around itself.

6. After the first bundle is twisted, have a look. Is it twisted enough? Not enough? Do you like the length? Adjust as needed, then continue across the work . Repeat for the other side. Keep your ruler handy to make sure you are making the fringe the same length. Knotting a little higher or little lower can have a big impact!
7. Check to be sure the fringe is even and knots are tight. Trim close to knot.
You now have a lovely fringe that will keep your scarf, or blanket or table runner, or whatever you have woven, looking beautiful for years of use!


Dealing with Pesky Loose Ends
I’ve been working with linen lately. I’m finding it slippery, unforgiving, and tricky as warp! The first time I warped and tied on just as usual. Everything went well until the first time I wound forward. Everything went loose! Next time I paid extra special attention to winding on and checking tension. Again, everything was fine until I wound forward the first time and again, everything went loose. Third time I tried using 2 heddles. I think I need to practice more with 1 heddle before I try that again!


I’ve been working with linen lately. I’m finding it slippery, unforgiving, and tricky as warp! The first time I warped and tied on just as usual. Everything went well until the first time I wound forward. Everything went loose! Next time I paid extra special attention to winding on and checking tension. Again, everything was fine until I wound forward the first time and again, everything went loose. Third time I tried using 2 heddles. I think I need to practice more with 1 heddle before I try that again!
Loose threads are not the end of the world. Those loose ends can be fixed. Today I’ll give 2 of my favourite tips for loose threads.
Have you ever warped, tied on, then found when the heddle is in the downshed all the lower threads are crazy loose? I find this happens most often with warps with little to no stretch…cotton, linen, silk. First thing, be sure when you are winding and tying on all the threads are even in the heddle (slots and holes should be side by side).
If you’ve done that and you still have a problem it is super easy to fix. Place the heddle in the down shed, place a shuttle or pickup stick in the shed behind the heddle. Slide to the back warp beam. Slide the stick back each time you wind forward. Problem solved!

2. Sometimes there are just 1 or 2 threads that are loose. You can pay extra attention to those spots while weaving to be sure your shuttle goes over and under the troublesome ends or you can fix the problem for good. Simply hang an s-hook on the offending end and let it hang behind the back warp beam. You can add extra s-hooks to give extra weight as needed. I generally add s-hooks to the first and last end when weaving with cotton. I find it helps keep my selvedges tidy.
These 2 tricks mean I never need to deal with loose ends…and neither do you!
Happy Weaving!

Hemming
A good hem starts on the loom. I think about my hem before I ever start weaving. I want both hems to took the same so the first thing I think about is colour. If my weft is all one colour, it’s easy, my hems will be the same colour. If I’m using multiple colours, I need to choose a colour. If I’ve used a border colour that will become my hem colour. Otherwise, I use the darkest colour, or white no particular, reason, just because.

I make a lot of tea towels and dish cloths. That means I also sew a lot of hems! This post will take you through my steps to making hemming easy so those towels don’t languish in the “need to be finished” pile.

A good hem starts on the loom. I think about my hem before I ever start weaving. I want both hems to took the same so the first thing I think about is colour. If my weft is all one colour, it’s easy, my hems will be the same colour. If I’m using multiple colours, I need to choose a colour. If I’ve used a border colour that will become my hem colour. Otherwise, I use the darkest colour, or white no particular, reason, just because.
The next thing I think about is cotton weight. Most of my towels use 2/8 cotton doubled. For my hems, I use 2/8 single even if the main weaving will be 2/8 doubled. This makes for a lighter hem that does not add a lot of bulk. My sewing machine thanks me! When I use chenille or boucle or slub I will still use 2/8 cotton if I have the right colour. I also press my weft in tightly…usually 15 threads for each inch woven. I weave 2-2 1/4” per hem. I do not hemstitch my towels ever.

I never warp just 1 towel, I always warp for at least 2, sometimes 4. Usually 2 because I can get bored with 4! Doing more than one towel means I need to know the end of one and the beginning of the next. I just weave in 2 picks of a contrasting cotton.

When I take my work off the loom, I take it straight to my sewing machine. I sew a straight stitch at either end to secure the weft. Then I will sew a straight stitch on either side of the contrasting threads. I’ll cut all ends leaving 1” or so hanging and trim the extra warp again, leaving about a 1” fringe. I do not cut my towels apart yet.

Next, it’s bath time. Tea towels and dish cloths are meant to stand up to hard wear. They get thrown in hot water and soap for a regular cycle, then dried on high.
Next comes pressing, which can be a whole post on its own. Pressing is literally pressing the iron on the work, hold for 15 seconds or so then pick up the iron and move it to the next spot. Don’t iron as normal, sliding the iron back and forth across the work, as you may distort the weave (straight lines may become wavy). While pressing, trim all remaining ends flush to work and remove any remaining fringe. You won’t want to, but press both sides. Cut the towels apart by cutting between the 2 contrasting threads and remove those threads.

Now finally we get to the actual hem! Flip towel to wrong side. Turn end over about a ½” and press. Turn again and press so that the raw edge cannot be seen. I try to line up the hem so it just hits the beginning of the actual towel. Press firmly. Repeat for the other side of the towel, being sure you are working with the wrong side up. Make sure your threads line up, particularly at the colour changes.
Sew hem with a straight stitch and press once more. I love my walking foot for this task. Alternatively, you can hand sew your hem with 2/8 cotton. Give your towels a final press
Hemming is a lot of work, but a well sewn hem can make or break a towel.


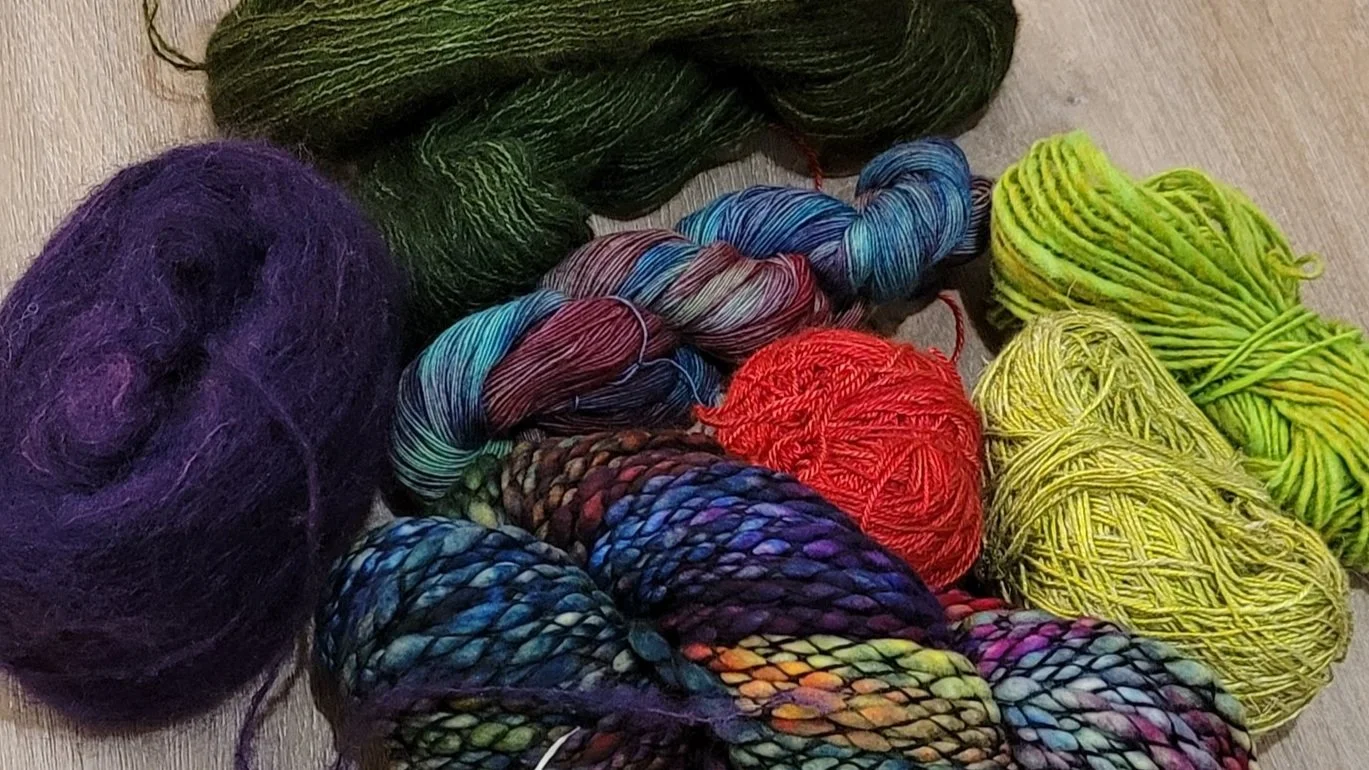
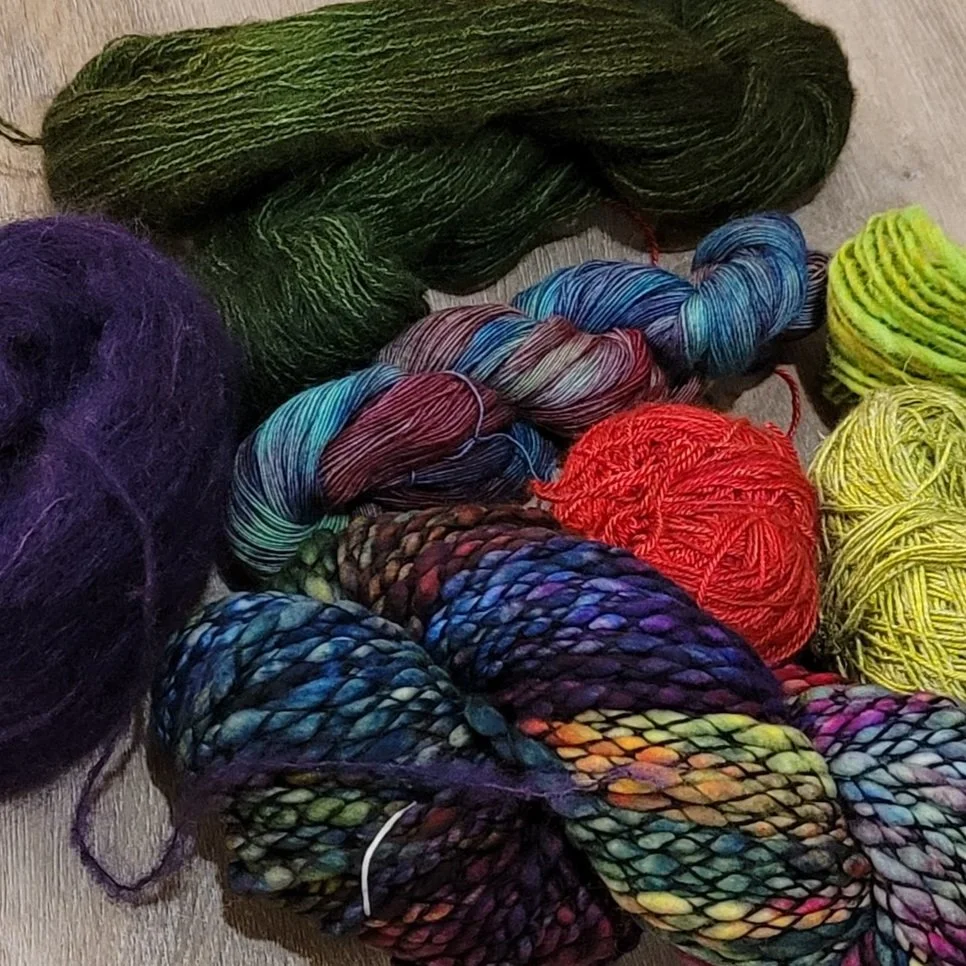
Lessons Learned from Yarn
As many of you know, my 2020 weaving challenge was colour. I needed to use more of it, particularly the bright colours. I didn’t just want more colours though, I wanted confidence to put colours together. I made a ridiculous number of tea towels. 2020 became the year of tea towels. Tea towels act as a perfect palette for mixing colours and if I wove an ugly tea towel, well, that would be one more tea towel for my kitchen! As it turned out, each one was my favourite, until I wove the next one!

As many of you know, my 2020 weaving challenge was colour. I needed to use more of it, particularly the bright colours. I didn’t just want more colours though, I wanted confidence to put colours together. I made a ridiculous number of tea towels. 2020 became the year of tea towels. Tea towels act as a perfect palette for mixing colours and if I wove an ugly tea towel, well, that would be one more tea towel for my kitchen! As it turned out, each one was my favourite, until I wove the next one!
Challenging ourselves is good. There were times however, when I needed a changeI needed something simple yet beautiful. Something I could do without thought and just allow my mind to be filled and soothed by the softness of the yarn and the richness of the colour. The kind of weave that allows me space to think, to process and to just be at peace in the moment. And that’s what we are looking for in our crafts isn’t it? Our craft grounds us so that when we go back into the world we can go peacefully, and bring that peace to others. We may not like what is happening around us but we can face it with calm determination knowing that our outward circumstances cannot rule our hearts. Whatever happens in the world, we can march out and meet it with the same patience we untangle a stubborn knot.
Which leads me to today’s post. I’ve learned a lot from yarn. In fact, weaving, or any craft involving yarn, can teach us much about how to live life.

1. Never fight the yarn
Knots happen. They seem to happen most often in the really expensive yarns. You know, the skeins you bought because you loved them so much but now you’re afraid to use? Those ones, they love to knot. Also, mohair. Untangling knots is a slow, sometimes tedious activity. But we all know that the looser we hold the yarn the easier it is to untangle. Once a knot gets pulled tight to can be impossible to untie. The best way to sort a knotty problem is to patiently, gently, tease the threads apart and always move in the same direction as the yarn. Gradually work away at the little knots, one at a time and the big snarl goes away. Keep your hands and your heart soft.
2. A little tension is good…too little and you create a mess, too much and things begin to crack.

Tension (or stress) is good, but not too much. A yarn under tension will not tangle. That’s why we warp and weave under tension. Just the right tension and everything works the way it should. Let things relax too much and you get a tangled mess; too much and things begin to break. Don’t be afraid of a little tension in your life. It will help keep you moving forward. And when things get to be too much, take a hot bath…hot baths relax everything!
3. Listen to the yarn…you cannot expect yarn to be what it was never meant to be.
Some yarns are stretchy, some are fuzzy, some are a little prickly. Some yarns work as warp and some just won’t. Take time to get to know your yarn. A prickly yarn will always be prickly, don’t try to make it be a soft neck warmer. Definitely don’t make a loose bulky yarn act like warp. Forcing yarns out of their comfort zones a little might yield some fabulous results…taking them too far can ruin something that might have been beautiful. Approach each project with an open mind, willing to listen and try something different if need be.

4. Don’t write off a yarn because of one bad experience.
Some yarns require a little more patience than others. Mohair for example. Mohair makes for delicate, airy wraps but many avoid it as warp. It is sticky, it is a challenge, but treated with just a little extra care it can work. A wider sett and just a little extra patience brings out the best in even the stickiest mohair. Then there’s boucle. Winding boucle on a rigid heddle requires a little more attention: even under tension it likes to tangle. But winding can be done easily by slowing down and “snapping" small bouts of warp as you crank and yank. Just a little bit of the right attention at the right time can make all the difference in the world!
I believe we all learn life lessons from whatever crafts we engage in. What are some of the things you’ve learned from your chosen craft?

Pick-Up Sticks will Explode Your World
I’m a big fan of plain weave. It is perfect for so many projects…hand painted warps shine, stripes in tea towels stand out and for a purely meditative weave, nothing beats plain weave. But have you tried pick-up sticks? They will explode your weaving world!
Pick up sticks weaving
I’m a big fan of plain weave. It is perfect for so many projects…hand painted warps shine, stripes in tea towels stand out and for a purely meditative weave, nothing beats plain weave. But have you tried pick-up sticks? They will explode your weaving world!
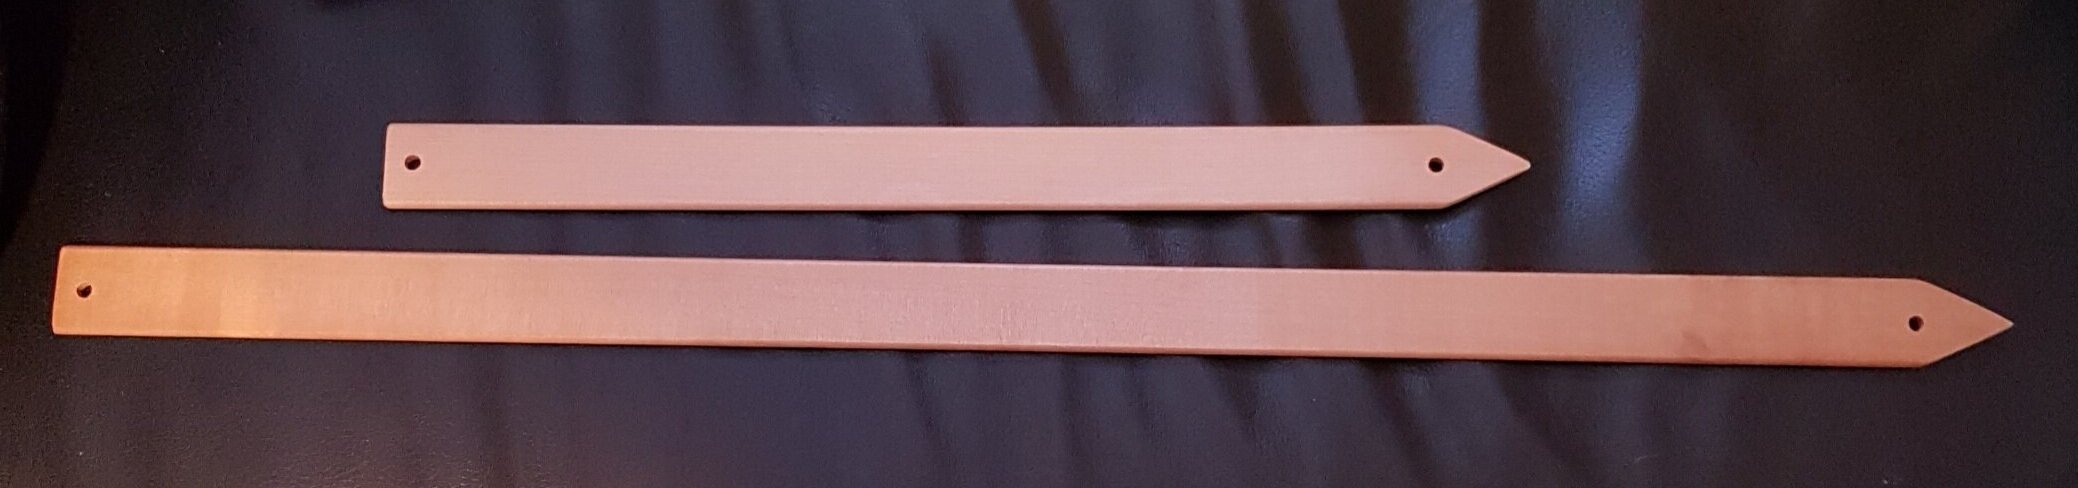
What are pick-up sticks? Essentially, they are just like stick shuttles except they have rounded ends, or a point. The pointed end makes it easy to pick up some threads and go under others. When inserted pick-up sticks create an extra shed (or 2) so it’s possible to do more than plain weave. (If you don’t have any pick-up sticks shuttles work too)
There are 2 ways to insert pick-up sticks.

1. Place the heddle in the down position, this brings all the ends in slots to the top. Stand behind the loom slide the point over and under the threads as the pattern directs. It might be over 1, under 1; over 2 under 1; over 5, under 5, or any other combination.
2. Place the heddle in the down position. Working in front of the reed place the pick-up stick as the pattern directs. Turn the pick-up stick on its edge to raise up the threads on top, slide a second pick-up stick under the raised threads behind the reed.
I always use method 1 but my books all use method 2. Method 2 works well for those with back or neck problems who don’t want to lean over the back of their loom. Here’s a video because it’s so much easier to see than write!
Sometimes it can be difficult to see exactly which threads to go over and under. If the warp is dark, slide a white piece of paper in the shed after placing the heddle in the down position. If the warp is light, use a dark piece of paper.
Now that the stick is in place you have 2 new sheds to use! (Remember the shed is the space the shuttle slides through).

Weft floats
1. Place the heddle in the neutral position. Slide the pick-up behind the heddle and flip it on its side. When the yarn goes through this shed you will see weft floats.
2. Place the heddle in the up position. Slide the pick-up stick behind the heddle leaving it flat. This will create warp floats.
And that is all there is to weaving with pick-up sticks! And this is only the beginning! You can use multiple pick-up sticks to create incredibly complex patterns. Patterns using only 1 pick-up stick are simple, the stick can stay in place the entire weave. With multiple sticks they usually need to be removed and replaced each repeat. That’s when you might want to start using string heddles. (But that’s for another post!)
If you think you’re ready to try pick-up sticks, here’s a link to a pattern I use to teach beginner pick-up weaving complete with video links.
Happy Weaving!
New Year, New Weavers
Welcome to a New Year! From what I’ve seen on social media many are embarking on weaving! I know you won’t regret it!! As a weaving instructor I see many new weavers and weavers who want to improve their weaving. There is lots of advice I could give, but today I’m going to keep it short and sweet: don’t beat so hard! That’s it.

Welcome to a New Year! From what I’ve seen on social media many are embarking on weaving! I know you won’t regret it!! As a weaving instructor I see many new weavers and weavers who want to improve their weaving. There is lots of advice I could give, but today I’m going to keep it short and sweet: don’t beat so hard! That’s it.

This is a weft-faced fabric-meant to be dense with no warp showing
Experienced weavers know that what they see on the loom is not the fabric that will come off the loom and is not the fabric that will emerge after finishing. New weavers try to make the fabric on the loom look like the fabric they want when it comes off the loom. So they beat. Really hard. The weft is pressed so tight that nothing is getting through that fabric. When it comes off the loom and is finished a very dense stiff fabric results (and they have used way more yarn than they anticipated, or the pattern called for). I know this from personal experience!
Here’s the non-technical theory behind weaving. When you weave, the warp is under tension (stretched out). This allows the fibres to move up and down easily and create nice sheds for the shuttle. When the fabric (it’s actually called a web at this point) is cut off the loom, all the tension is released. So if you wove 80” on the loom, it might only measure 72” off the loom as the fibres go back to their natural relaxed state. This will vary depending on the fibre.

Weaving on the loom-note the holes
After you have taken the work off the loom, it takes a hot bath. This relaxes the fibres even more, and with agitation, fulling can occur. Fulling draws the fibres closer together creating a stable fabric. So now your 72” piece might only measure 65” (again, this will vary depending on the fibre)
In order for this to happen, the fibres need to have room to relax and move.

A ruler works too!
Here’s a couple tips to help you out:
1. Keep a tape measure handy. A balanced weave (good for beginners to practice) will mean that you have the same ppi (picks per inch) as epi (ends per inch). So if I am weaving a scarf on a 7.5 dent reed I should have 7.5 weft threads per inch of weaving. Check you work often with the tape measure. Especially when you are coming back after a break.

This is the same project as above after finishing-no holes!
2. Pay attention to how you draw your heddle forward. If the heddle is tilted towards you, you cannot see the weft being pressed into place. If you tilt it a little away from you, you have a great view of what is going on and have a little more control. You should be able to see through your work easily. Here’s a little video https://www.instagram.com/tv/CI6xZN-JWLQ/?utm_source=ig_web_copy_link
I hope this is helpful to the new weavers out there! Follow me on facebook or Instagram to find out when new blog posts are out. This year I plan to cover some beginner tips (things like edges, pick up sticks, and project planning) as well as delve deep into double heddle weaving, and, just because I can’t control myself, there will be some inkle weaving, tablet weaving and floor loom weaving. I’d also love to cover topics you are interested in, so if there is something you are looking for, please let me know!