

Colour Adventure
This will not be a post about colour theory or how to put colours together or even how colours work in weaving. Because I’m really not good at putting colours together. I’m better than I used to be but I’m really conservative in colour choices. Usually I pick a variegated yarn and pair it with a solid colour that appears in the variegated skein. Lately however I’ve been pondering Noro yarns.


Noro Ito-so many colours!
This will not be a post about colour theory or how to put colours together or even how colours work in weaving. Because I’m really not good at putting colours together. I’m better than I used to be but I’m really conservative in colour choices. Usually I pick a variegated yarn and pair it with a solid colour that appears in the variegated skein. Lately however I’ve been pondering Noro yarns. Somehow, there are a million colours in one skein and it works! Is it just because someone else put the colours together or is it because all colours go together?

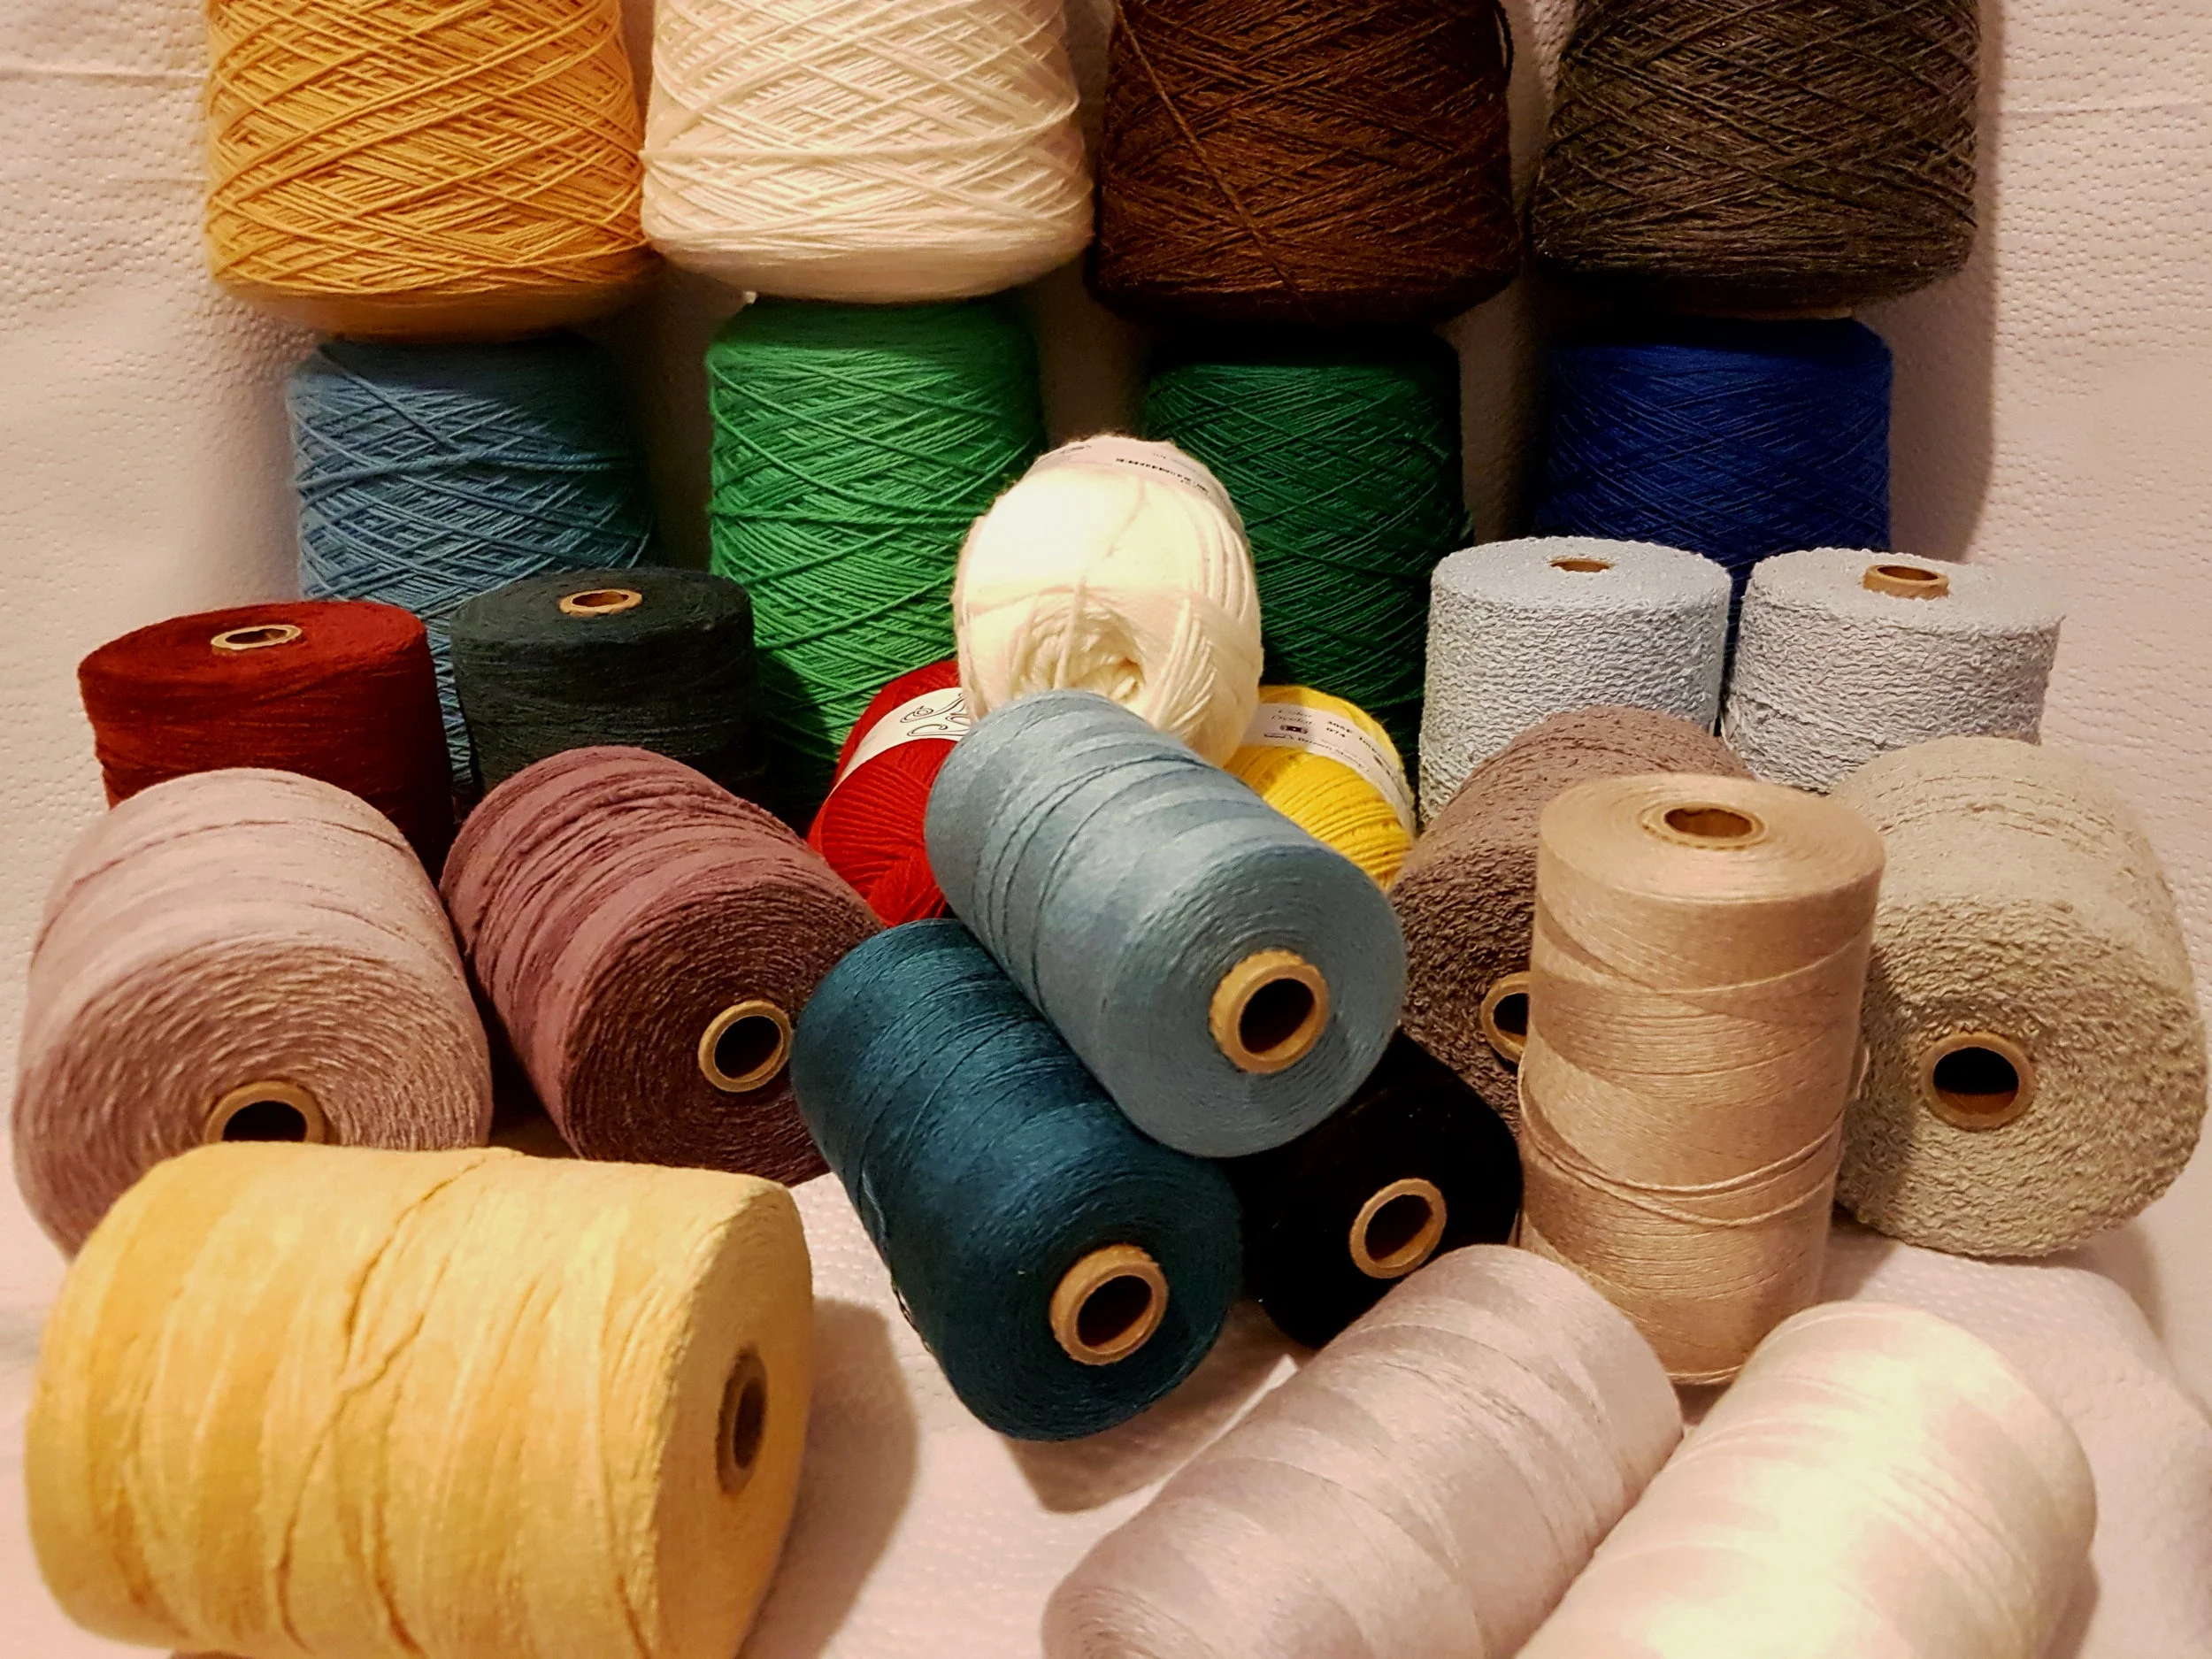
Tea towels are my favourite experimental projects so I decided to try putting colours together. I’ve also been fascinated by the table cloths at a local restaurant…lots of bright colours in no seeming order. So I decided to warp my floor loom for table runners and placemats, and my rigid heddle with tea towels. I knew I wanted 8 colours for my floor loom so I gathered all my 4/8 cotton and started playing. I lined them all up and picked my favourites. Then I took out the ones that seemed “wrong” and added some that looked “right” . I looked for a balance of light, dark and made sure I had a bright pop. I shuffled the order, checked colour scale, added, took out, wished for another colour, determined I did not need to buy more and rearranged some more. It was fun! And I‘m really happy with the results. I even did a little sample to try a couple different weft colours!


After success on the floor loom I found choosing colours for the rigid heddle much easier. This time I gathered all my 2/8 cotton and picked a main colour. The main colour sandwiches each of the other colours so it was easier to pick colours. Again, I lined everything up, added, took away (and wished for more colours). This time when I warped I did it completely random. The blue main colour was the constant, everything else was random. Again, I love the result! I will certainly be trying to more!
So the lesson? Be brave with colour, play and just have fun. It is just string after all!


Mohair for Warp?!
I’m on a few weaving groups on Facebook as well as following a number of rigid heddle weavers on Instagram. As I read the posts I learn a lot, some I agree with, some not so much. One idea that seems to be coming up a lot lately is mohair. Specifically, that one should not use mohair for warp. I must disagree!

I’m on a few weaving groups on Facebook as well as following a number of rigid heddle weavers on Instagram. As I read the posts I learn a lot, some I agree with, some not so much. One idea that seems to be coming up a lot lately is mohair. Specifically, that one should not use mohair for warp. I must disagree!
I know why weavers believe this, I’ve experienced why weavers, after 1 attempt at a mohair warp swear never again, but I love the effect of a mohair warp. I love the light airy feel. I love the drape. I love the warmth. I love how far just a little bit can go. So, here are my tips for using mohair as warp, and a free “pattern” to make your own mohair wrap.
Use the right hedd!e. Mohair is sticky. If it is too close together you will have problems. I usually use my 7.5 (for 1000m/100g) or 5 dent (500m/100g)
Place an extra shuttle or pick up stick behind the reed as follows: with heddle in the down position place shuttle in the shed behind the reed. Slide shuttle as far back as possible. This shuttle will stay in the work for the entire project. I find the down shed is usually the stickiest. The shuttle helps and if it is too sticky and you can’t get a clear shed: just slide the shuttle forward, flip it in its edge and voila!
Be prepared to spend extra time. Weaving with mohair does require a little extra patience. You will need to check to ensure the shed is clear before passing the shuttle through. You will probably spend time hand picking some threads apart. You may need a few s hooks to help with tension issues. You will need to be extra vigilant to ensure the right number of picks per inch.
After winding the work forward, place the heddle in the up position and spend a few minutes making sure there are no tangles behind the reed. This will make it easier to keep the up shed clear until you wind forward again.
Finally, have fun, try some lace or finger techniques. Mix and your warp, most of all, don’t be afraid, it is after all, only string!


I promised a free pattern. It’s not really a pattern because it is so easy, but here it is:

You will need a 7.5 dent reed and a mohair and silk blend (I use Zambezi by Fleece Artist/Handmaiden but Rowan Kidsilk Haze will work just as well. (Or any other mohair silk blend that is 1000m/100g)

Warp measures 100” (2.5 meters) Warp as wide as you like or your loom can handle (1000m will warp and weft 100” x 32”) Tie on in small bundles. I like to tie little bows because they are easier to untie at the end. Plus, they are so darn cute!
Weave at about 6 picks per inch. It really looks like a window screen as you are weaving!! (remember the tips above)

Hemstitch the ends in bundles of 4, alternatively, or if you forget to hemstitch, knots in bundles of 4 look like little beads (ask how I know!) Don’t worry about the spaces between bundles…they will wash out, I promise!
Weave until you can weave no more (about 84”)
Cut off the loom and tie fringe in large loose bundles to prevent tangling. Soak in very hot water (I use my washing machine). Spin out the water and dry on high heat for 5 minutes. Untie bundles and press with a hot iron set for steam. Trim ends and enjoy!
PS If you would like to order an already made wrap, please contact me!

Back to Blogging
In my last post, way back in June, I said I was going to take a break from blogging to focus on actual weaving and selling. I took a longer break than I originally intended and here’s why:
In my last post, way back in June, I said I was going to take a break from blogging to focus on actual weaving and selling. I took a longer break than I originally intended and here’s why:
I was enjoying the actual weaving so much that I was having trouble motivating myself to write. It’s true, I love weaving! And I got so much done. You’ll see my work in the next issue of Little Looms and in the fall edition of Handwoven. (I do like writing, I just like weaving more.)
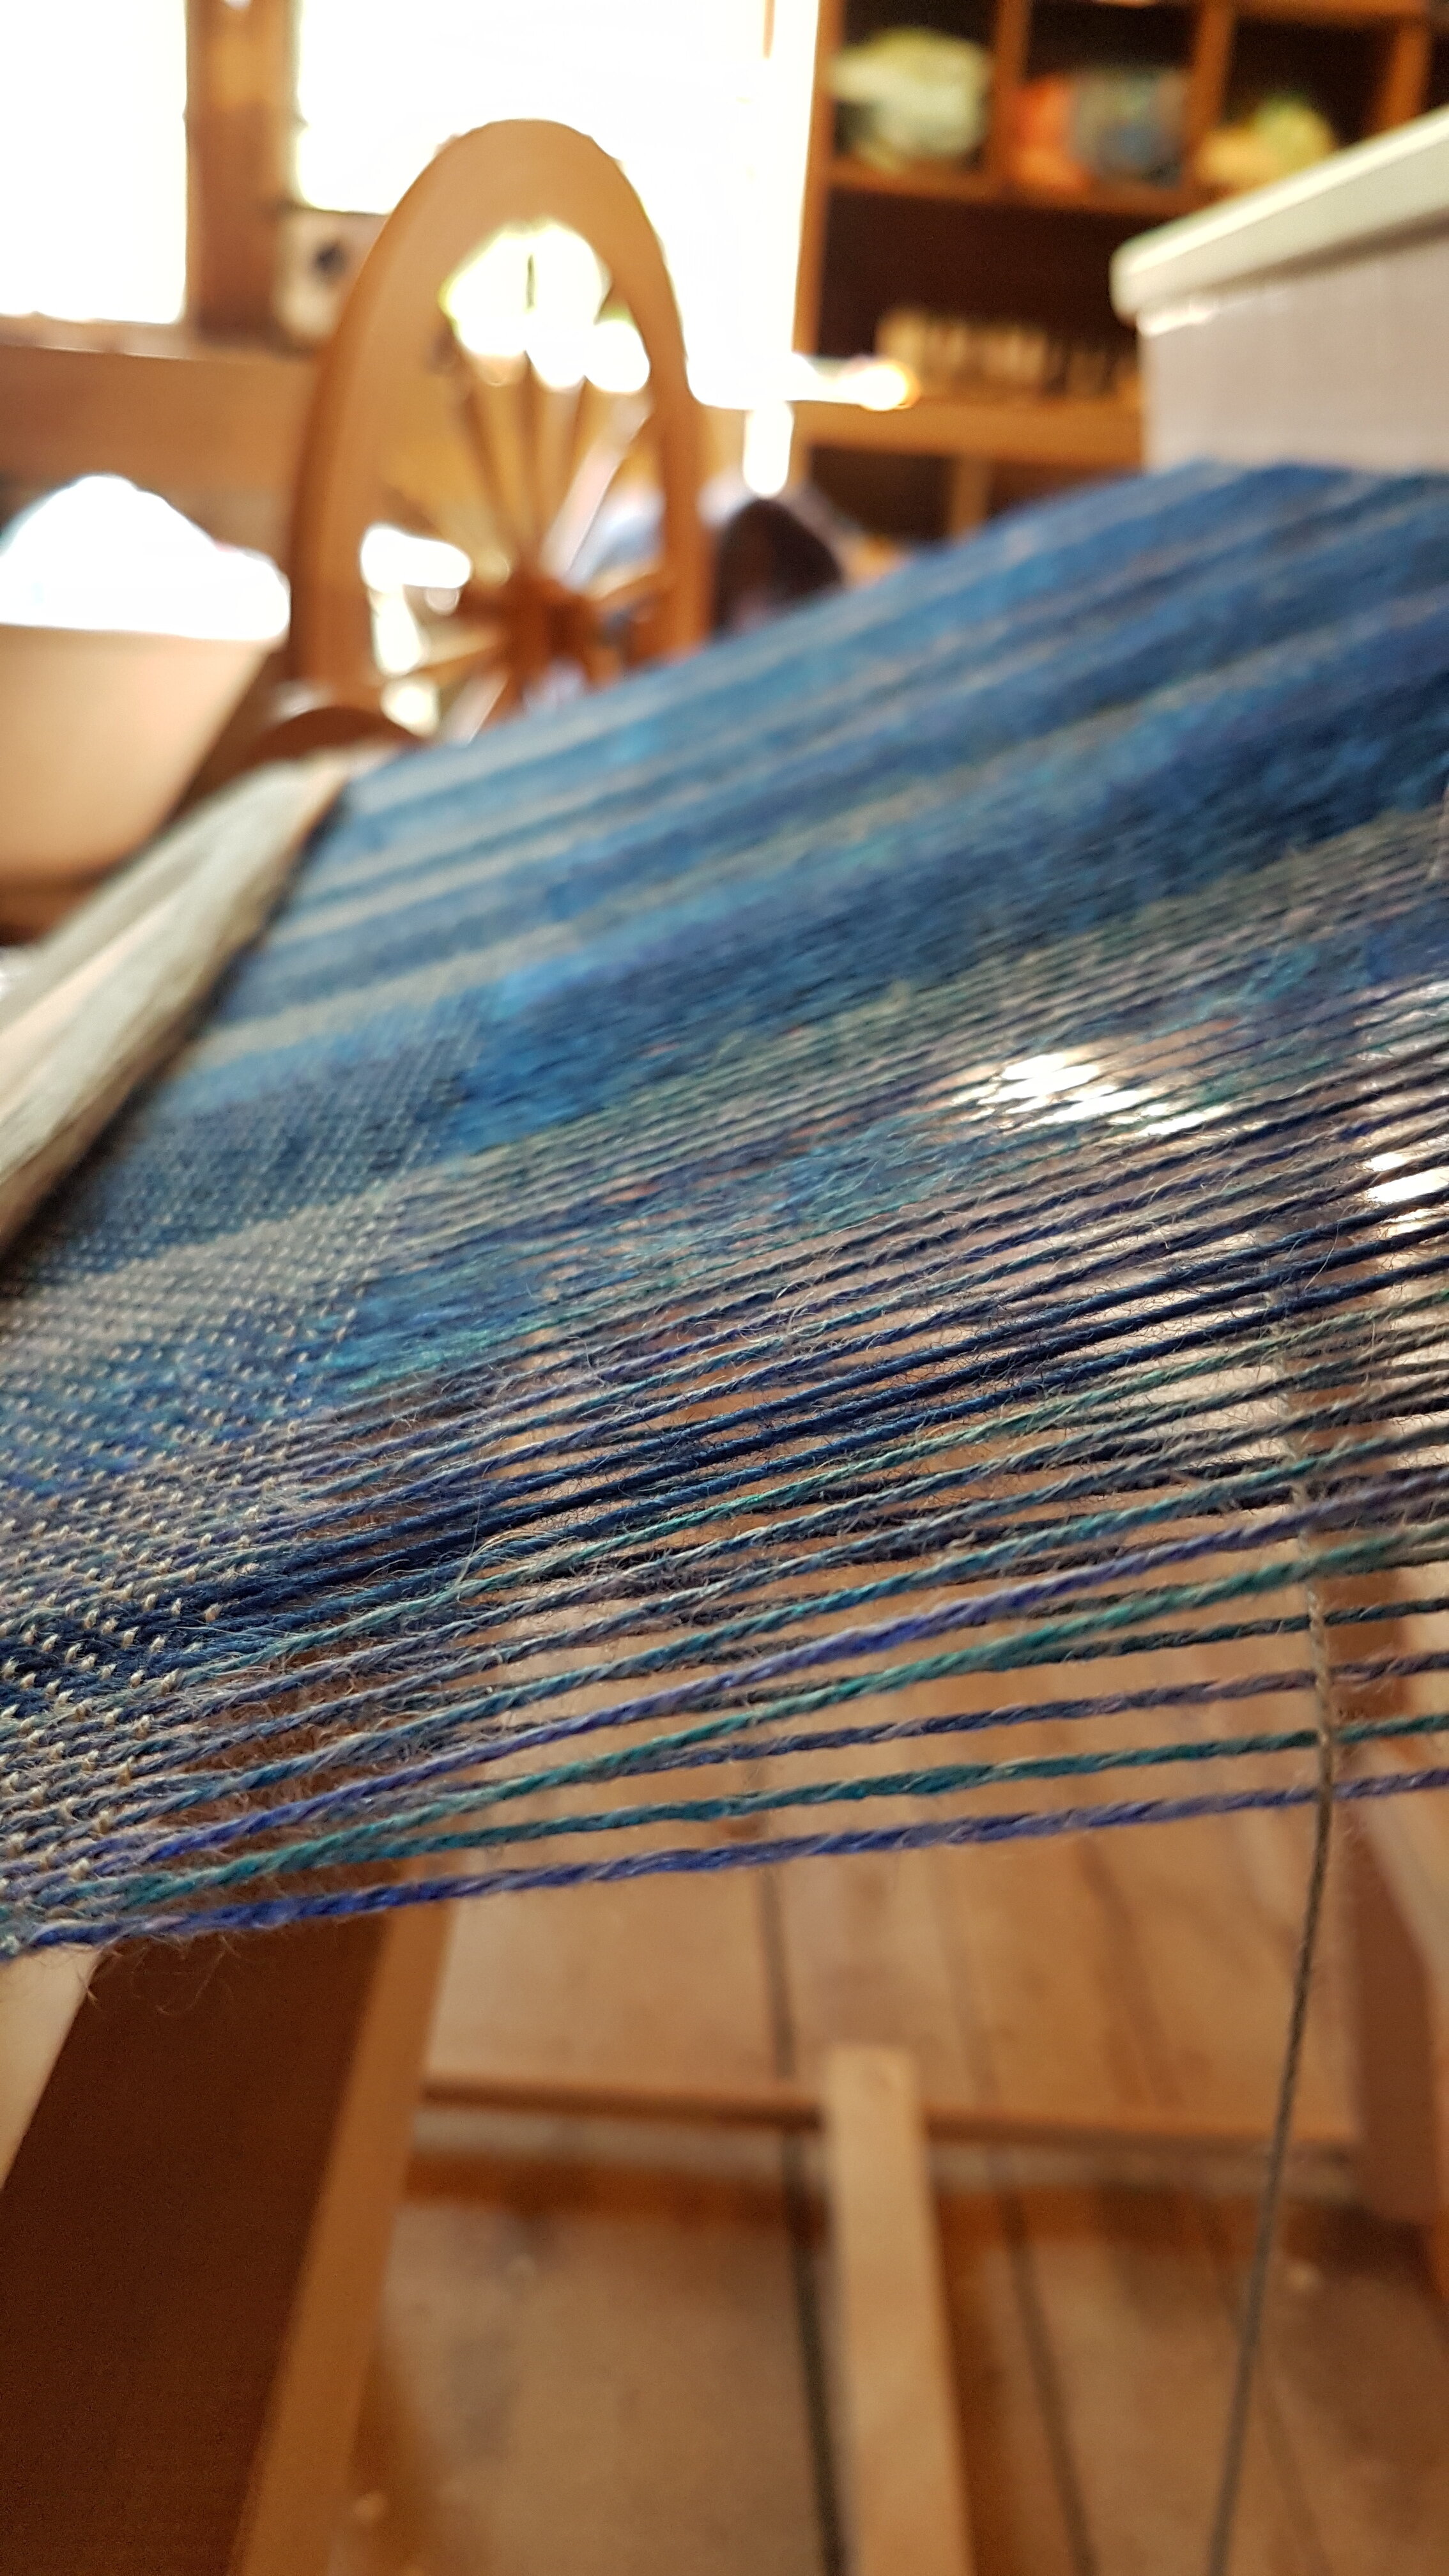
Such an inspiring place to weave!
2. I spent time weaving in public. It takes 4-6 hours to write, edit and publish a blog post, essentially, most of a day. I took that time and wove at Gaspereau Valley Fibres instead. So, on my days off from working at the store, I was at the store weaving, showing people what can be done on a rigid heddle, selling finished items and generally having a great time!
3. I created new patterns. I am not a production weaver and I have no interest in weaving the same thing over and over. I have a few patterns I come back to, but mostly I want to keep trying new things. I did get a couple patterns written, you can find them here: https://www.therogueweaver.com/new-products/summer-lace-shawl-pattern and here: https://www.therogueweaver.com/new-products/multi-purpose-cotton-cloths. I also have a few more to write.

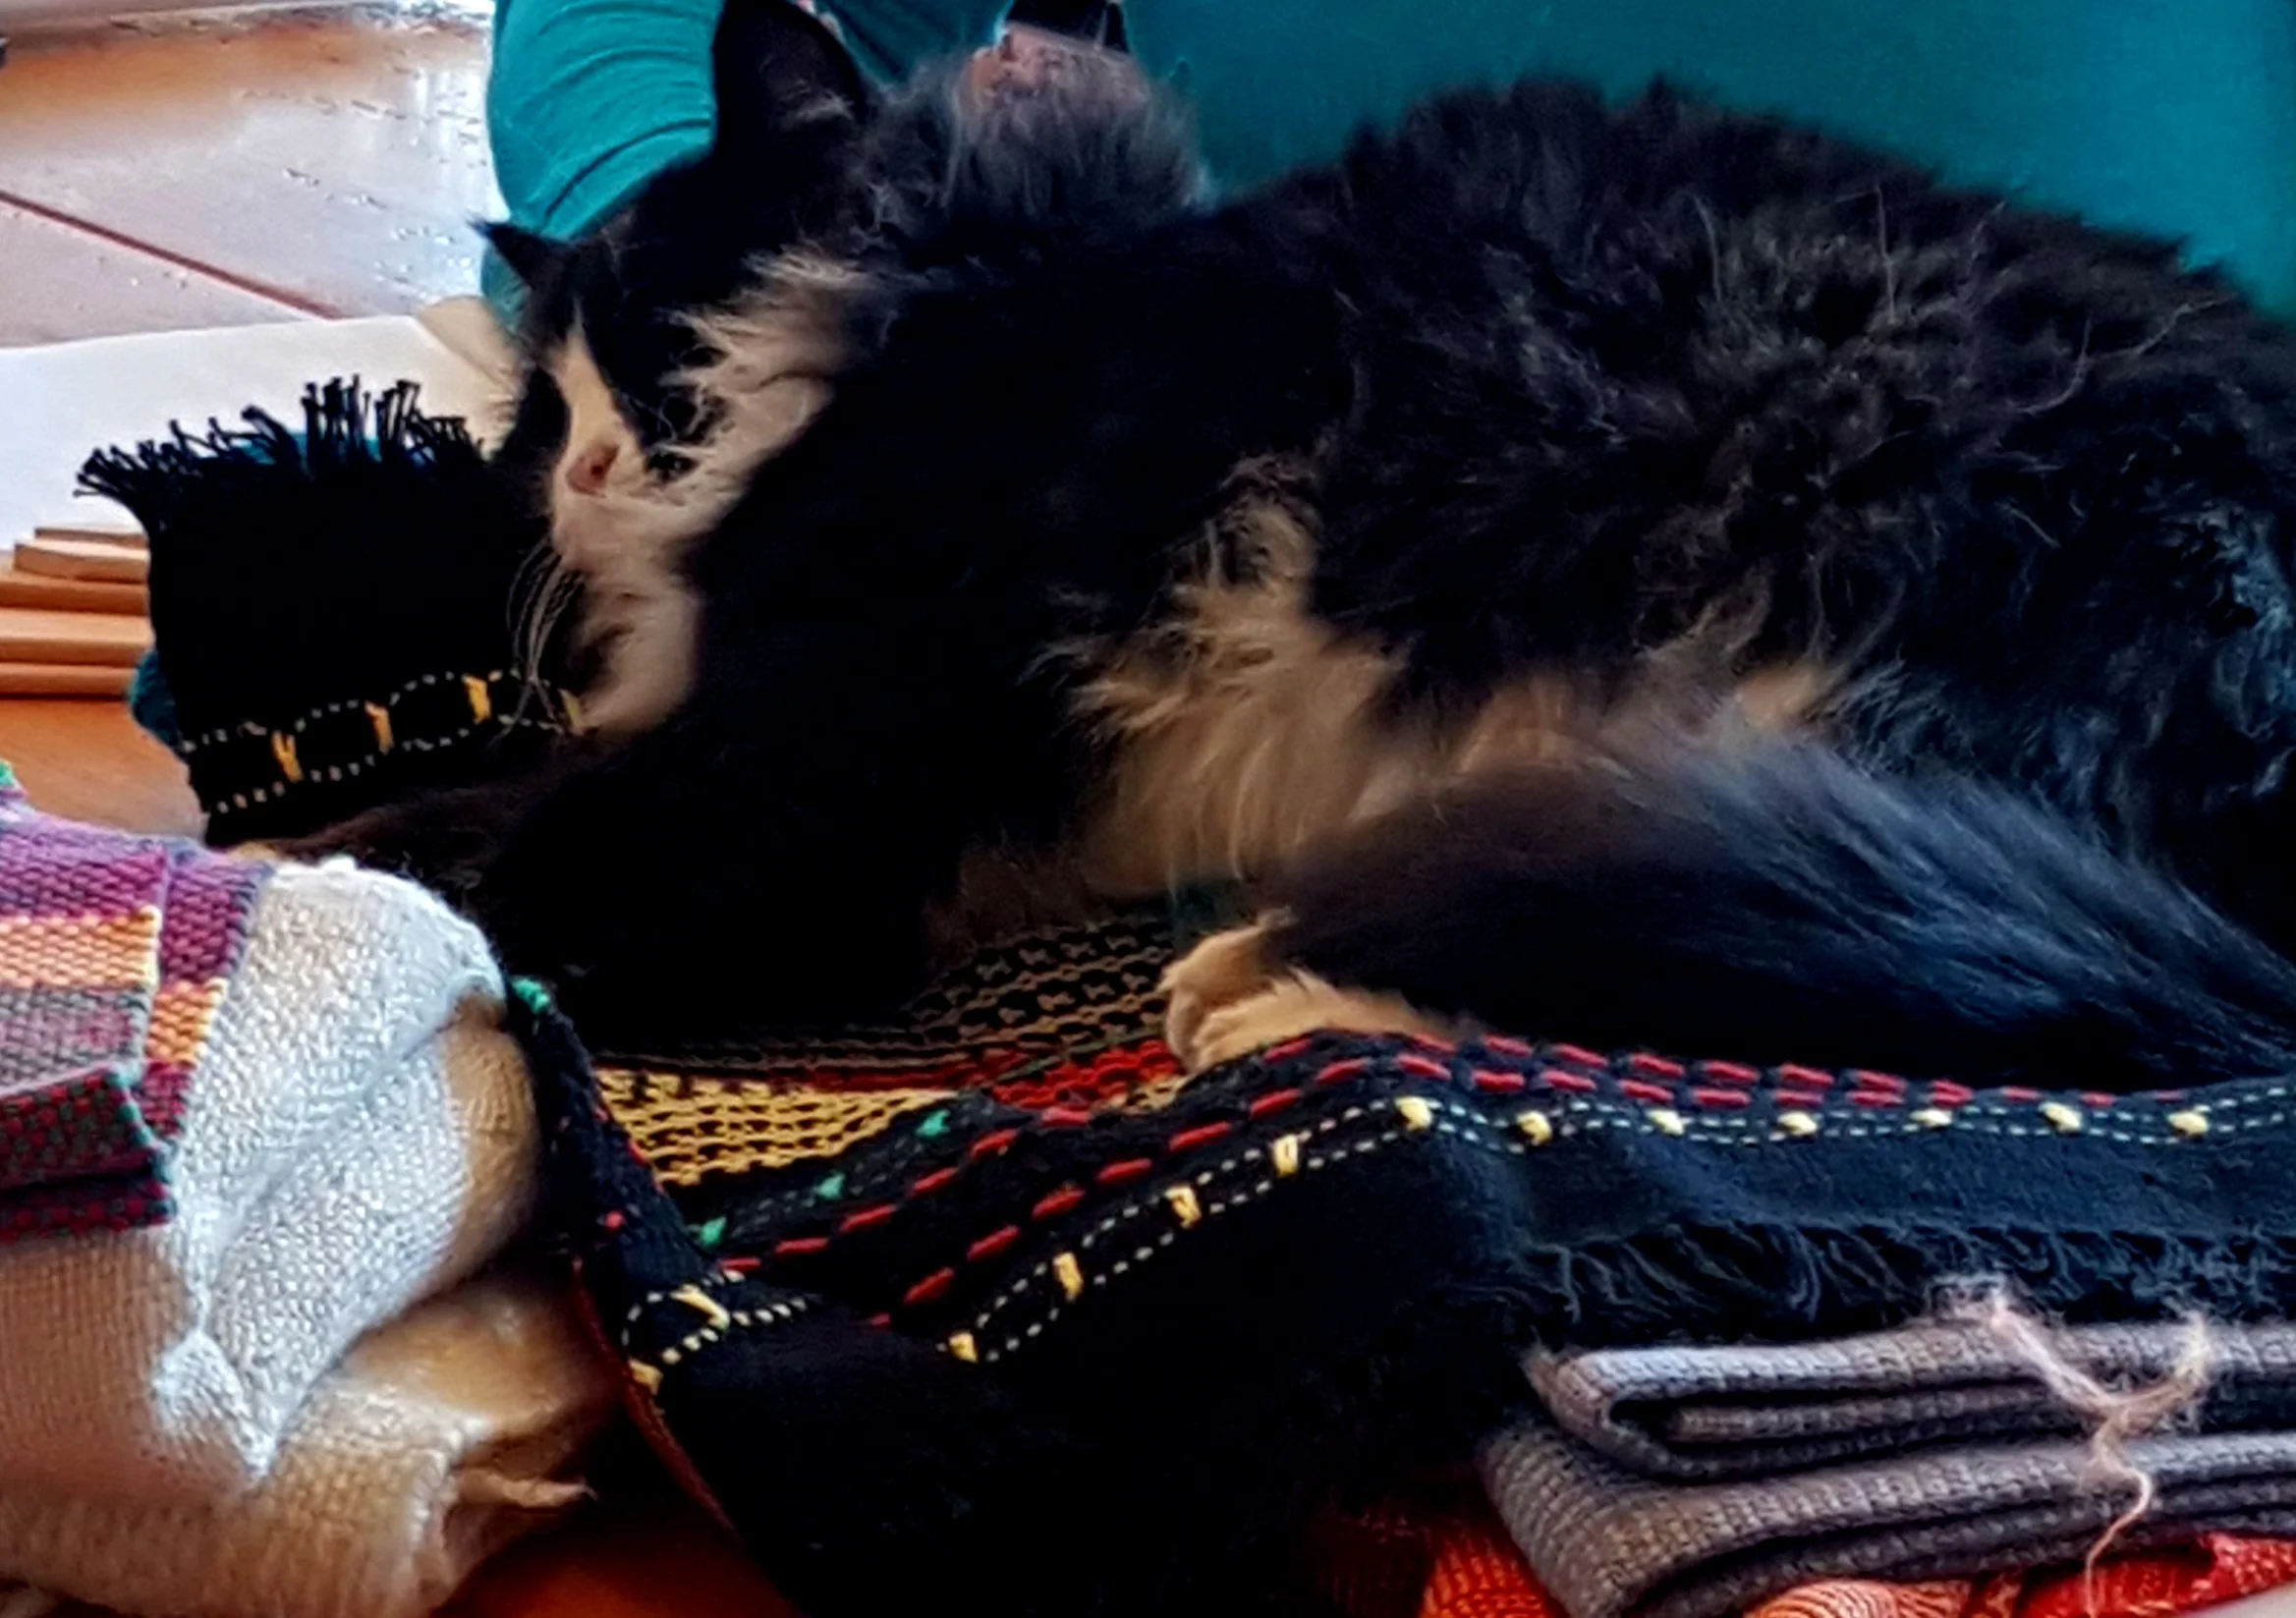
I had some “paws on” help
4. Finally, at heart I am a social person. I like interacting with people. With a blog it can feel one way. Which is ok, I’m good with doing all the giving…if I feel what I’m giving is being received! It’s hard to know on a blog…so if you are out there let me know what you want to read about!
So I'm back. It might not be every week, but I am aiming for at least 1 post a month. I'll let you know what is going on in my weaving life, what I’ve learned, and of course, why weaving is so awesome!
Follow me on Facebook or Instagram to find out when a new post is out or just to see what is on my loom.
Happy Weaving,
The Rogue Weaver

Hobby, Hoarding or Business?
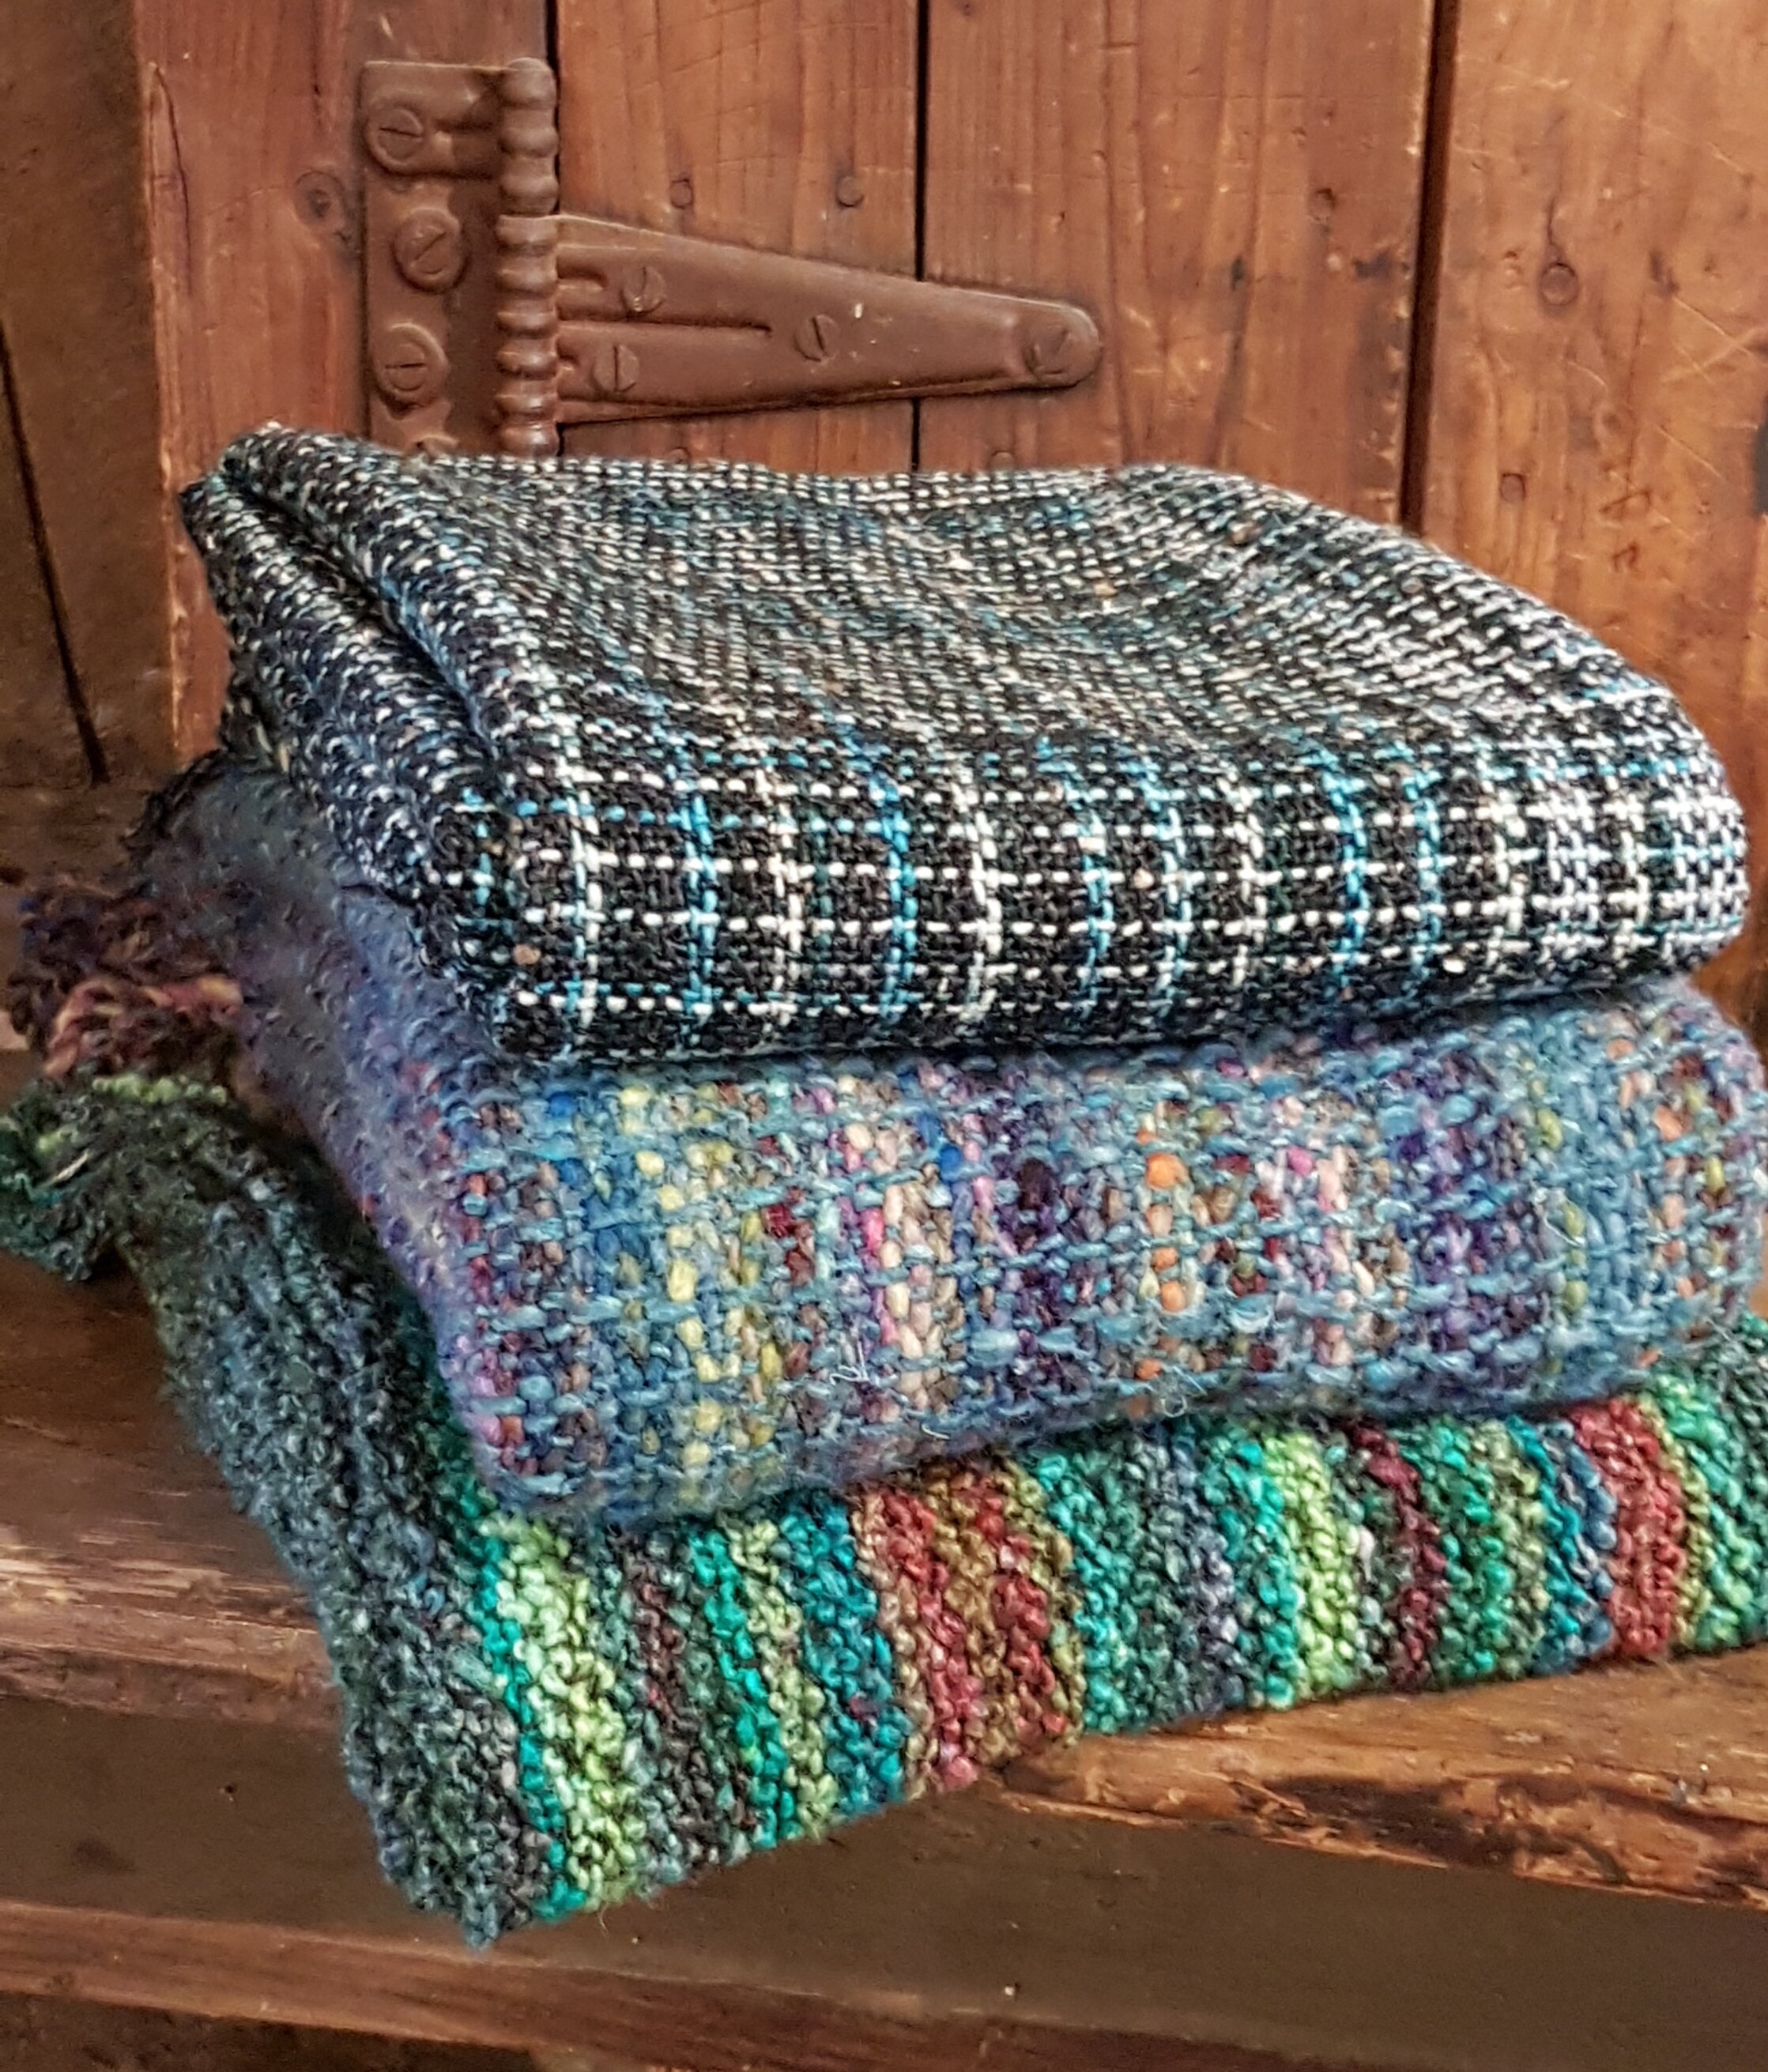
I weave a lot. I mean A LOT. When I’m not working I’m weaving. Which means I have a lot of weaving in my house. My scarf drawer is overflowing, I have enough tea towels to last past forever, I have blankets, curtains, floor mats, pillow covers, and clothing. Really, if it can be woven I’ve got it or am planning to have it. I told my husband a few weeks ago that I either needed to start seriously trying to sell my weaving or quit. I’m getting close to crossing the line from hobbyist to weaving hoarder. Seriously.

I weave a lot. I mean A LOT. When I’m not working I’m weaving. Which means I have a lot of weaving in my house. My scarf drawer is overflowing, I have enough tea towels to last past forever, I have blankets, curtains, floor mats, pillow covers, and clothing. Really, if it can be woven I’ve got it or am planning to have it. I told my husband a few weeks ago that I either needed to start seriously trying to sell my weaving or quit. I’m getting close to crossing the line from hobbyist to weaving hoarder. Seriously.

I can’t see myself quitting so selling it is! I am incredibly lucky to work at a yarn shop part-time (Gaspereau Valley Fibres). But for those of you who know the shop, you will be seeing a lot more of me there …I’ll be hanging out on my days off, weaving! I did my first Friday and Saturday this past week. It was so much fun talking to people about weaving, showing them how it's done and encouraging them to join one of our beginner weave classes. Plus, I had a helper…our shop cat, Mittens, wanted in on the action. And, I even sold a couple of scarves!
I’ll still be writing blog posts, but maybe not quite as regularly over the summer (because I’d rather be weaving!) But you can keep up with what I’m doing by following me on Instagram @therogueweaver, or my Facebook page: The Rogue Weaver. Everything will be for sale at the store but if you see something you like let me know, I can ship.
It's going to be a fun summer!
Here are a few of my favorites currently at the store.

Lessons from the Loom
There is nothing earth shattering about learning life lessons from hobbies but I have been a little surprised by some of the lessons I have learned and am still learning. while weaving. This is the first in a sporadic series of lessons learned at the loom. I wish I’d learned some of these lessons earlier in life!

There is nothing earth shattering about learning life lessons from hobbies but I have been a little surprised by some of the lessons I have learned and am still learning. while weaving. This is the first in a sporadic series of lessons learned at the loom. I wish I’d learned some of these lessons earlier in life!
Mistakes: we all make them. We all hate making them. I hate making mistakes so much that I can be paralyzed. Or, I can be so afraid something might be a mistake that I do nothing at all. I don’t want to offend, I don’t want to hurt and I don’t want to look stupid! So it can be more comfortable to deal with the disappointment of not doing something than taking the risk of making a mistake.
I’ve made mistakes in my weaving. Little mistakes that don’t really matter like colours that didn’t work, beating too hard, poor choice of fibre for personal projects. And I’ve made some bigger mistakes: wrong beat for a piece for publication, forgetting the “checkers” in a checkered scarf, tension issues. Here’s some of what I’ve learned about mistakes.

Change perspective. Sometimes a mistake isn’t really a mistake, it’s learning how not to do something. The long term consequences of these “mistakes” are actually positive so they can hardly be called mistakes. We can’t expect to be perfect when learning new things, so be nice to yourself! A simple change of perspective can have a huge impact on how you feel about yourself. The picture on the right was supposed to be a double weave log cabin. A mistake in threading turned it into houndstooth instead.

This was completely taken apart and rewoven
If you’re walking down a path that is not leading where you want to go, turn around. If you keep walking you *might* get to where you want but it would have been much easier if you had turned back at the first sign of trouble. I am amazed at how far back you can go in your weaving to fix a mistake. I have actually unwoven a completed project, tied it back to the loom and rewoven! The crazy thing is I knew from about the first 6” of weaving that I was in trouble. But I keep going hoping that the finishing would fix the issue. It didn’t (of course). Turning back doesn’t mean giving up, it means recognizing there is a problem, going back to the point it was made, fixing it at the source then moving forward in the right direction.

This might look good in a picture but the tension was a disaster…I cut my losses
Cutting your losses is not failure. Sometimes you can turn a mistake into a positive learning experience, sometimes you can turn back and fix the mistake and sometimes there is nothing to be done but cut the project off the loom. This is not a failure, this is self-care! There may be a sense of sadness over the loss of beautiful yarn, time or money but the sense of relief is greater. In life, cutting something away and tossing it out of your life might be very painful and at the same time the best thing you could ever do for yourself!
Keeping Things Simple
In weaving, as in life, is can be tempting to make things much more complex than they need to be. At least for me. I find keeping things simple can get a little boring. Why do the simple thing when you can do the much more complicated thing? This philosophy has been the primary contributor to numerous unfinished projects in my life. The thing about complicated though, is that as you progress, the complexity can grow exponentially. Especially if you are just working from ideas in your head! It’s taken a long time, but I’m beginning to learn that sometimes, the simplest thing is really the best.

In weaving, as in life, is can be tempting to make things much more complex than they need to be. At least for me. I find keeping things simple can get a little boring. Why do the simple thing when you can do the much more complicated thing? This philosophy has been the primary contributor to numerous unfinished projects in my life. The thing about complicated though, is that as you progress, the complexity can grow exponentially. Especially if you are just working from ideas in your head! It’s taken a long time, but I’m beginning to learn that sometimes, the simplest thing is really the best.

Each summer Interweave puts out a call for submissions for Little Looms, a special edition of Handwoven and a magazine especially for rigid heddle, inkle and pin looms. I’ve submitted a number of pieces and have had three pieces accepted. When I choose which pieces to submit, I think about the complexity of the project. Not because I want to show off but because I want to show what a rigid heddle can do and encourage people push the limits. I was very surprised and pleased to see my Mermaid Wrap on the front cover. Particularly as its’ submission was an after thought.

This past summer I sent in a double weave blanket, a log cabin scarf, a twill poncho and a 3/1 lace checkered scarf. All are rather complex patterns. As I said, submitting the Mermaid Wrap was really an after thought. I love the scarf, it is so beautiful but, I thought, too simple! I didn’t do anything; the yarn did all the work. I was convinced to send it in after seeing the cover of the Handwoven May/June 2018 edition. The front cover features a gorgeous travel wrap by Debra Jarchow…in plain weave. So simple yet so gorgeous. So, I sent it in and was pleasantly surprised when it was chosen (along with my Classy scarf with 3/1 lace).

Quiet Sabri
Lesson: just like people, yarns have voices and personalities. Some yarns want to fade into the background and are happy to let the pattern, texture or another yarn shine. Other yarns have a big personality. They want (or need) to be the centre of attention. This is shown so well in these two patterns. In the classy scarf, the Sabri yarn by Illimani, is lovely. It has an incredible drape but is understated. The texture draws the eye more than the yarn itself. Sabri is a quietly confident yarn, quite content to be the supporting actor to lace. Handmaiden’s Maiden Hair on the other hand, draws every eye as soon as it walks into the room. Trying to pair it with another attention seeker would be disaster!
In a way, a weaver is like a movie director with the yarn as characters. Our job is to cast the right characters and show them to their best advantage so that even complicated looks simple. Sometimes we must be quiet and let the yarn speak.

Maiden Hair steals the show!
A Weaving Do Over
Sometimes the only way to learn is try and see what happens. A favourite phrase from me to my children as they were growing up was, “what is the worst that can happen?” They found it a particularly unhelpful bit of advice. It certainly isn’t advice suitable to every situation, but for the little things it can help keep things in perspective. I know most of us worry a lot. And worry can stop us from trying something that we might really regret later. So, thinking about what the worst thing that can happen can spur us on. If we can cope with the worst-case scenario, we should go for it! (Besides, the worst-case scenario hardly ever happens!)

Sometimes the only way to learn is try and see what happens. A favourite phrase from me to my children as they were growing up was, “what is the worst that can happen?” They found it a particularly unhelpful bit of advice. It certainly isn’t advice suitable to every situation, but for the little things it can help keep things in perspective. I know most of us worry a lot. And worry can stop us from trying something that we might really regret later. So, thinking about what the worst thing that can happen can spur us on. If we can cope with the worst-case scenario, we should go for it! (Besides, the worst-case scenario hardly ever happens!)

The thing about weaving is that if it doesn’t work you have only lost some string and time. And, you can always have a do over. Almost 2 months ago I did a post ab )out Boucle and Chenille. Click here to see post: www.therogueweaver.com/blog/2019/4/5/boucle-and-chenille It was a post about risks and me not liking them. In it I mentioned that chenille tends to worm. Here’s an update on my chenille towels. I have used these 2 towels exclusively as hand towels in the bathroom. We have 4 people living in the house, 2 of whom work from home so are home (obviously) all day. These towels see a lot of use and have each been washed at least once a week, sometimes twice. The plain weave towel is standing up reasonably well. It has no worming, but it seems to feel a little thinner and it is quite stretchy. The waffle weave, well, you can see from the pictures that it hasn’t stood up so well. However, it has only wormed badly at one end…the end I started weaving from and wasn’t beating as hard. The other end has worn quite well. (That was sett at 10 epi and 15 ppi)

Overall however, I think they can be better. I’ve done a little more research and actually found a floor loom pattern that uses chenille. It recommends a sett of 16 epi for a scarf. So, I went back to my loom: I really want chenille bath towels. I could have been patient and waited until I had my current project off the floor loom, but I also really want to do these on the rigid heddle. I have a 15-dent reed but I’m really not sure that the chenille would fit through the holes, so I used my 12.5 instead.

Again, I wove 1 in plain weave and the other with warp floats. As you can see from the picture at the top and bottom, I also alternated my warp floats hoping this would give a little more structure and help reduce worming. Since using pickup sticks would require replacing it every 5 picks, I used string heddles for the first time. At such a tight sett and fuzzy yarn, it was a challenge but so worth it! I’ve washed these and just need to hem them. The plain weave feels like velvet, still a little thin for a bath towel but lovely. The one with warp floats? Oh. My. Goodness. It feels so good: soft and velvety. So much nicer than the purple waffle weave. Which I think is odd. The waffle weave, at a looser sett feels a little stiff, but this new one has no stiffness at all, just velvety softness! Now I just need to hem them and put them to use. If they wear well, I’ll make some bath towels, if not, I guess it will be back to the loom!

Right side and wrong side together
How to Nurture a Relationship that Lasts (with your Rigid Heddle) PT 4
This is my last post on this topic. So far we have looked at choosing the right loom, care and feeding of our looms and our own attitudes. This week is about developing ourselves. Our rigid heddles have so much potential but if we don’t develop ourselves, we will never begin to unlock that potential.

This is my last post on this topic. So far we have looked at choosing the right loom, care and feeding of our looms and our own attitudes. This week is about developing ourselves. Our rigid heddles have so much potential but if we don’t develop ourselves, we will never begin to unlock that potential.
How can we develop ourselves?
1. Read books, magazines and articles.

My favourite rigid heddle weaving books are: The Weaver’s Idea Book by Jane Patrick and Inventive Weaving on a Little Loom by Syne Mitchell. Both contain patterns, but what I like best about them is the number of different types of weaving and the pictures. They cover colour and weave, mixing textures, pick up sticks, string heddles, using 2 and even three heddles and so much more!
Interweave puts out a magazine each year Little Looms (My scarf is on the front cover of this year’s edition!!) and it is filled with patterns for rigid heddles, tapestry looms and pin looms.
I love Pinterest! Search rigid heddle and there are tonnes of ideas, articles, blogs, and pictures that come up.
2. Hang out with other Weavers
Your area may have a weaver’s guild. Or maybe there is an informal group that gets together, maybe at a home or your local yarn shop. You can learn so much from talking to other people or just watching. If you can’t find weavers near you, try hanging out online. There are facebook groups that are just for rigid heddle weavers and they are a fount of information! I belong to a group called “Rigid Heddle Looms” and it has 5.5k members who are scattered all over the world. That means that anytime I have a question someone in the world is awake and can give an answer!
Sometimes you will run across people who are very adamant about “right” and “wrong” ways of doing things. Take all advice with a grain of salt. There are always multiple ways of doing the same thing. Take advice, try lots of different things then do what works for you even if it is absolutely the “wrong” way. If it gives you the end result you want, it is the right way for you. There are no weaving police!

3. Take classes
If you have the opportunity to go and take a class with a real live instructor do it! Even if it is project based and you aren’t in love with the project you will learn something. Live instructors will be able to answer your specific questions, see what you are doing and suggest easier ways, new ways or even tell you when you can skip a step! In addition you will meet other weavers, who may live near you, who will now be your friends! And they will have helpful ideas too. Don’t be afraid to ask your local yarn store if they can have a class on a specific topic (pick up sticks, double weave, colour theory…whatever) Chances are if you want it, others do too. Or if you pull a whole group together the store will (probably) happily oblige if there is an able instructor.
Online classes are excellent too. You get to learn from the best instructors. They will endlessly repeat themselves and remain cheerful. Sometimes in person classes can be overwhelming and you forget half of what you learned by the next morning, online classes can be watched over and over again.
4. Don’t be afraid to try new things
Remember, it is just string. If your project doesn’t work, it isn’t the end of the world. If you aren’t sure and can’t afford the loss try new techniques with less expensive yarn first. This helps you learn the skill, but it won’t finish the same so is only good for technique. I often try new patterns with cotton. It’s inexpensive and regardless of how it looks, I will have a usable tea towel! If you are sure of the technique but not sure how the fibre will finish buy a little extra and weave a sample.

In conclusion, developing a lasting relationship with your rigid heddle isn’t much different from developing lasting relationships with people…Take the time to get to know each other, give them what they need to thrive, don’t expect what they are unable to give, adjust your attitude when needed and work on yourself!
How to Nurture a Relationship that Lasts (with your Rigid Heddle) PT 3
We’re continuing my series on How to Nurture a Relationship that Lasts (with your Rigid Heddle). This week we are going to look at attitude and the first thing I want to say is that weaving on a rigid heddle is real weaving! I hear many people say that they have “just” a rigid heddle, like they are somehow “lesser” weavers. This is absolutely not true! A rigid heddle is a real loom that real weavers use to produce real weaving. Never put yourself or your loom down! Now, let’s look at some truths about rigid heddle looms.
We’re continuing my series on How to Nurture a Relationship that Lasts (with your Rigid Heddle). This week we are going to look at attitude and the first thing I want to say is that weaving on a rigid heddle is real weaving! I hear many people say that they have “just” a rigid heddle, like they are somehow “lesser” weavers. This is absolutely not true! A rigid heddle is a real loom that real weavers use to produce real weaving. Never put yourself or your loom down! Now, let’s look at some truths about rigid heddle looms.
1. A Rigid Heddle loom is not a “beginner” loom (although it is perfect for beginners)
While weaving on a rigid heddle may result in you also acquiring a floor loom, getting a rigid heddle because you can’t afford/don’t have the space/want to try weaving before making the investment in a floor loom/ will leave you with a desire that your rigid heddle will never be able to satisfy. Rigid heddles and shaft looms are as different as knitting and crochet. You may love one and hate the other. If a floor loom is what you really want, get one, there is one for every budget and space constraint.

I use both my 32” rigid heddle and my 36” floor loom in a 9’x8’ space.
2. Expect great things from your rigid heddle and it will deliver
This is a double weave using a pick up on the top layer, plain weave on the bottom
Rigid heddles can do far more than plain weave. Add in pick up sticks, string heddles, multiple heddles and varident reeds and the possibilities are endless. A rigid heddle can do patterning that just can’t be done even with a multi-shaft loom as well as twill, deflected double weave, overshot krokbragd, and even tapestry weaving. Additionally, yarns that aren’t suitable for the high tension of a floor loom can work very well on the rigid heddle. Rigid heddles are perfect for single skeins of hand painted yarns as there is so little waste. And you can weave yardage to sew with! Weaving can sometimes take more time than on a floor loom but the ease and speed of warping more than make up for it.
3. Don’t expect the loom to do what you should be doing

Fixing a threading error
It is rarely the fault of the loom when projects don’t turn out as expected. Warped well a rigid heddle has a good shed (big enough to use a boat shuttle with plain weave, though I don’t always recommend using one). Be sure to use the right reed for the yarn (a floor loom allows for flexibility using the reed substitution chart, but not a rigid heddle). If you want nice selvages you will have to practice. Tension is important. Poor tension results in a less than fun weaving experience. As mentioned in a previous post, use the best fibre you can afford…a bad fibre cannot produce good fabric. I’ve only cut off projects before completion twice. Once because I used yarn with too much stretch to get a good tension (because it was cheap enough to experiment with and I didn’t know better) and the second because I had poor tension due to mistakes I made warping. Nothing that has ever gone wrong (fabric too dense, too loose, ugly etc) has ever been the fault of my loom.
To sum up, love your rigid heddle loom for what it is, not what you wish it was. Don’t overlook its’ potential: challenge it and yourself, experiment, and have fun! Below, from left to right: double weave log cabin, plain weave sewn into a shirt, twill sampler using two heddles and rosepath twill using two heddles


How to Nurture a Relationship that Lasts (with your Rigid Heddle) PT 2
Last week we discussed choosing the right loom. This week is about providing your loom with what it needs to thrive. It might be your loom’s responsibility to please you, but it is your responsibility to provide it, and you, with the proper tools and equipment. A new loom package will give you everything you need, except the yarn, to get started with basic weaving.

Care and Feeding
Last week we discussed choosing the right loom. This week is about providing your loom with what it needs to thrive. It might be your loom’s responsibility to please you, but it is your responsibility to provide it, and you, with the proper tools and equipment. A new loom package will give you everything you need, except the yarn, to get started with basic weaving. You will get a loom, a reed (some let you choose the size, most give a 7.5 or 8 dent reed) 2 shuttles, clamps, warping peg and a threading hook.

It can be tempting when starting new hobby to minimize expenses. After all, you may not like it. But I guarantee you won’t like it if you don’t have the right equipment! Trying to weave on a 32” loom without a stand will cause you physical pain and you’ll start to associate weaving with pain. Not getting the size reed to use the yarn you really want to use will leave you feeling dissatisfied with your finished products. And using poor quality fibres can create so many problems that you dread going to your loom. Skimping can sabotage a potentially beautiful relationship. Besides, for most of us it is psychologically less painful to drop $600 in one fell swoop and have everything we want/need than to be continually spending $100-150 while still feeling there is more we need to be really content.
What else should you get?

32” with stand
1. A stand is a must if you are getting a loom bigger than 24”. If you are getting less than 24” I still recommend a stand because it makes warping so much easier. If you or someone you know is handy go ahead and build your own…but remember that the designers of the stand for your loom have had lots of experience and know what height and angle is best and how to balance it so it isn’t prone to tipping!
2. Extra reeds. Think about the yarns you want to use and the projects you want to weave and get the right reeds. The 7.5 or 8 dent reeds that many looms come with are great for dk and worsted weight yarns. 10 dent for sport and fingering, 4/8 cotton, or 2/8 cotton doubled; 12.5 for fingering; and 15 for lace. At the other end, a 5 dent is good for aran/bulky and a 2.5 for super bulky. You might also consider getting 2 of the same size so you can learn double weave to either weave wider blankets, get the sett you want (2 10 dent reeds allow you to weave at 20 ends per inch) or weave twill.
3. Extra shuttles of various sizes. Just because you have a 32” loom does not mean all your shuttles should be 32”. The shuttles should be just a little longer than your project is wide. It’s just more comfortable. Using a 32” shuttle takes a lot of shoulder energy and can be tiring so if you are working on a 12” scarf, using a 14” shuttle is much more comfortable.

Pick Up Stick and Shuttle
4. Pick Up sticks…these are like shuttles except with points on the end. They make it very easy to create complex looking patterns.
5. A couple good books and classes. I’m a fan of in person classes over online classes simply because a live instructor can personalize to you specifically. S/he can see what you are doing and give tips specific to you. Plus you will learn from the others in the class and perhaps meet new, local, friends! That being said, online classes do have benefits…you can do them at your convenience, repeat as many times as you want and have very experienced teachers.
6. Good quality fibres that you love! Life is too short to use ugly yarn. This is your hobby and you should enjoy every moment spent at your loom. Don’t sabotage a potentially beautiful relationship by using poor quality yarn because it’s cheap. Get the best you can afford, something that feels nice in your hands and gives you pleasure just to look at. Even for beginner projects, maybe especially for beginner projects! Your first projects may not be perfect but if you hate the yarn, can’t stand the feel if it or it's a mess on the loom you will begin to associate weaving with negative emotions. First impressions are important!
Fun and Handy Extras
There are always a few things that you don’t really need, but they definitely add to the ease and enjoyment of weaving.

Varident Reed
1. Varident reed: this is pretty cool. It’s a reed with pieces of reeds of all sizes that you can put together in the order you want to use any weight yarn in one project. Great for using up all those little bits of leftover yarn.

Fringe Twister
2. Fringe twister: another very cool gadget. Just clip, turn and tie and you have a beautiful twisted fringe. Untwisted fringes tend to look a little tattered over time.
3. Extra warping sticks: if you plan to weave lots of yardage, these will come in very handy.
4. A portable light that will clamp onto your loom. It’s always nice to have good light!
Just a quick note about buying used looms. This is a great way to get a fantastic deal. Before you buy, make sure all the pieces are there, that the loom holds tension and that you can get parts if you need them (extra reeds, double heddle kit if it isn’t built in, stand if you want one etc). It’s not a deal if you can’t use it.
I hope if you are considering a loom, or are a beginner weaver, you have found this helpful. If you are not a weaver, and you’ve read this far…wow! Thanks! Here’s my words of wisdom for the week: Life is always easier with the right tools (whether it’s a skill to learn or a physical object). It’s worth learning what they are and acquiring them. So many times we “make do” and struggle, but if we used the right tool (or skill) the job would have been done faster and better, with less grief, and we might have enjoyed it! I don’t believe we need to buy everything, on the contrary I believe we should buy less. Borrow when you can, share what you have. But when you do buy, buy the right tool. You will enjoy life more!
How to Nurture a Relationship that Lasts (with your Rigid Heddle)
It’s hard starting new relationships. They take time and effort. You have to set boundaries and learn the other person’s boundaries. It can be a bit of an uncomfortable shuffle during the first little while, then suddenly it becomes an effortless dance, like you’ve known each other forever.

It’s hard starting new relationships. They take time and effort. You have to set boundaries and learn the other person’s boundaries. It can be a bit of an uncomfortable shuffle during the first little while, then suddenly it becomes an effortless dance, like you’ve known each other forever.

Building a relationship with your rigid heddle is the same. It’s hard work learning a new language, new movements and boundaries. And then, after failures, frustration, maybe even tears, everything falls into place and weaving is second nature. Over the next few weeks I’m going to give some tips and advice about how to develop a relationship with your rigid heddle that will last a life time.
Pick the right loom
When choosing a loom, you should do your homework. Just like you won’t like everyone person you meet, you won’t like every loom. While all rigid heddle looms operate in much the same way, they have distinctions. Some fold, some have permanently attached rods, others are removable. Reed sizes vary with the brand of loom. Some come finished in a choice of gorgeous finishes, others are completely unfinished.
Think about what you want to make before you choose your loom.

If all you ever want to do is weave narrow scarves with dk weight yarn a 10” Cricket by Schacht or the Ashford Samplit might be perfect for you. But if what you really want are tea towels and wraps, these looms will bring more sadness than joy. Think about the width and length of what you want to make. Sure, a 16” loom with a double heddle kit can weave 32”, however if you plan to make a 32” baby blanket for every baby born to anyone remotely connected to you, you would be happier with a 32” loom right from the start.
Talk to other weavers and visit your local yarn store that carries looms.
People who weave are a great resource. We love being invited to talk about our passion (we’re used to being asked to stop talking). Tomorrow, April 27, is LYS day, here’s my plug: Local yarn stores care more about you being happy with your purchase than the amount of money you spent. Your local store might have looms you can try. You can ask about why one loom over another. Describe what you want to make and they can prescribe the right loom. If they don’t have the one you want, ask if they can get it (and ask why they don’t carry it, there might be a really good reason!) Ask about the price of accessories. Ask how easy it is to get parts. And when you buy your loom from a local yarn store you can feel great about going back to them for help and advice. In addition they may offer services such as assembling your loom, patterns, help reading patterns, choosing the right fibre for your project and whatever else you might possibly need (including advice about any life issues you might be experiencing completely unrelated to weaving) all free! And we want to see your finished pieces, honestly! We feel a little like midwives, helping dreams come to life. We love to see the end result. Please, come and brag about your projects so we can celebrate with you. And we’ll genuinely commiserate with your *ahem* not so successful projects.

Dressing the Loom Pt 2
Last blog post I explained how dressing the loom should work. It seems a long process, but pretty straight forward: wind the warp, take the warp to the loom, wind, thread, tie and weave. It’s never that easy for me. Have you seen those videos showing 1 parent trying to dress twin toddlers? That’s me warping my floor loom. The real lessons to be learned in this post are that there is no right way, just easier ways! Mistakes can be fixed and weaving requires persistence, patience and creativity.

Last blog post I explained how dressing the loom should work. It seems a long process, but pretty straight forward: wind the warp, take the warp to the loom, wind, thread, tie and weave. It’s never that easy for me. Have you seen those videos showing 1 parent trying to dress twin toddlers? That’s me warping my floor loom. The real lessons to be learned in this post are that there is no right way, just easier ways! Mistakes can be fixed and weaving requires persistence, patience and creativity.
mini warp!
I’ll be honest with you though: my warping issues are all my own fault! I was getting pretty good at it, then I decided I should try to warp front to back. The books say you should try both ways (back to front and front to back) and find what works best for you. So I did, and did everything wrong!
My first mistake was winding a warp for a tartan starting after 10 pm. Tartans are particular…the colour order and the number of each colour are important. And the Nova Scotian Tartan has 6 colours. With all the repeats of blocks it is really easy to get confused or miscount. I did both! Fortunately these are not very serious mistakes, I just wound a few extra ends to add in before winding.

Winding didn’t take too long so I decided to go ahead and start putting the warp on my loom…and try warping front to back. (I usually wind back to front and am pretty good at that!) I got out my book (Learning to Weave by Deborah Chandler) and was very determined to follow it step by step. Except, after sleying the reed I realized it was really uncomfortable trying to work from behind the loom and there was no way I was going to be able to thread all the heddles from back there. So I wound the warp onto my back beam. It was a very smooth winding onto the back beam. I might keep doing this for narrow warps. Then I went to bed.
When I came back to my loom I had to decide how best to proceed. Since I planned to warp front to back my cross was gone. My threads were all in the right order because they were in the reed, but now they needed to come out of the reed to go through the heddles and back in the reed. It’s much easier to see to thread the heddles if the reed is removed and I can sit closer to the heddles. This time I needed to pull a few threads out of the heddle at a time and thread the heddles. And it was during this process I made and discovered a few more mistakes.

In the heddles

2 Threads make a difference! Also, extra threads in the reed makes wavy lines.
First, I was threading 1,2,3,4. Very simple. Can’t possibly mess that up, right? So I didn’t do any of the things I usually do to prevent and catch errors. Big mistake. After threading all the heddles and then going back to check I found multiple mistakes. All of which would have been caught had I not gotten over confident. Second, I found all the mistakes I made in winding the warp! (note to self: don’t wind a complex warp late at night, ever) You’ll see I’ve got several bunches of warp hanging off the back of the loom and weighted as well as threads crossed in the back so they are in the right order on the front. Finally, I just wanted to get weaving so when I found I had threaded 1,2,1,2,3,4, I just unthreaded and tossed the first 1,2 off the back. 2 threads make a difference! It will be fine for a sample, but I’ll need to add those 2 threads back and rethread the heddles for the next scarf.
Tying on went well…except I forgot to check my reed. (Did I say I just wanted to get weaving?) It’s amazing the difference missing a dent makes in weaving. In a tartan that 45 degree angle is important and having an extra thread in the reed or missing a dent makes a noticeable difference.
So, this is a sample piece! I’ve worked out the kinks, tried a couple different ways of changing colours and learned a lot. The next piece will be a 72” official Nova Scotian tartan scarf. On a side note, did you know that one must be licensed to produce and sell the Nova Scotian Tartan? I’m currently in the process of getting a license so I will have scarves and tea towels for sale soon!
Dressing the Loom
For a non-weaver this may seem a bit technical. I want you to be able to understand the process of weaving for two reasons: 1. So you can appreciate it more when you see it; and 2. So you can shake your head at me and laugh when you read my next blog post! If you are a weaver this is going to sound over simplified but hopefully you can use this to educate your non-weaving friends or customers about the hidden work of weaving.

For a non-weaver this may seem a bit technical. I want you to be able to understand the process of weaving for two reasons: 1. So you can appreciate it more when you see it; and 2. So you can shake your head at me and laugh when you read my next blog post! If you are a weaver this is going to sound over simplified but hopefully you can use this to educate your non-weaving friends or customers about the hidden work of weaving.
Floor looms do take a lot of work to dress (the term used to describe the process of getting the loom ready for weaving). Once the yarn, pattern and draft are picked -this can be a project all by itself- the real work begins.
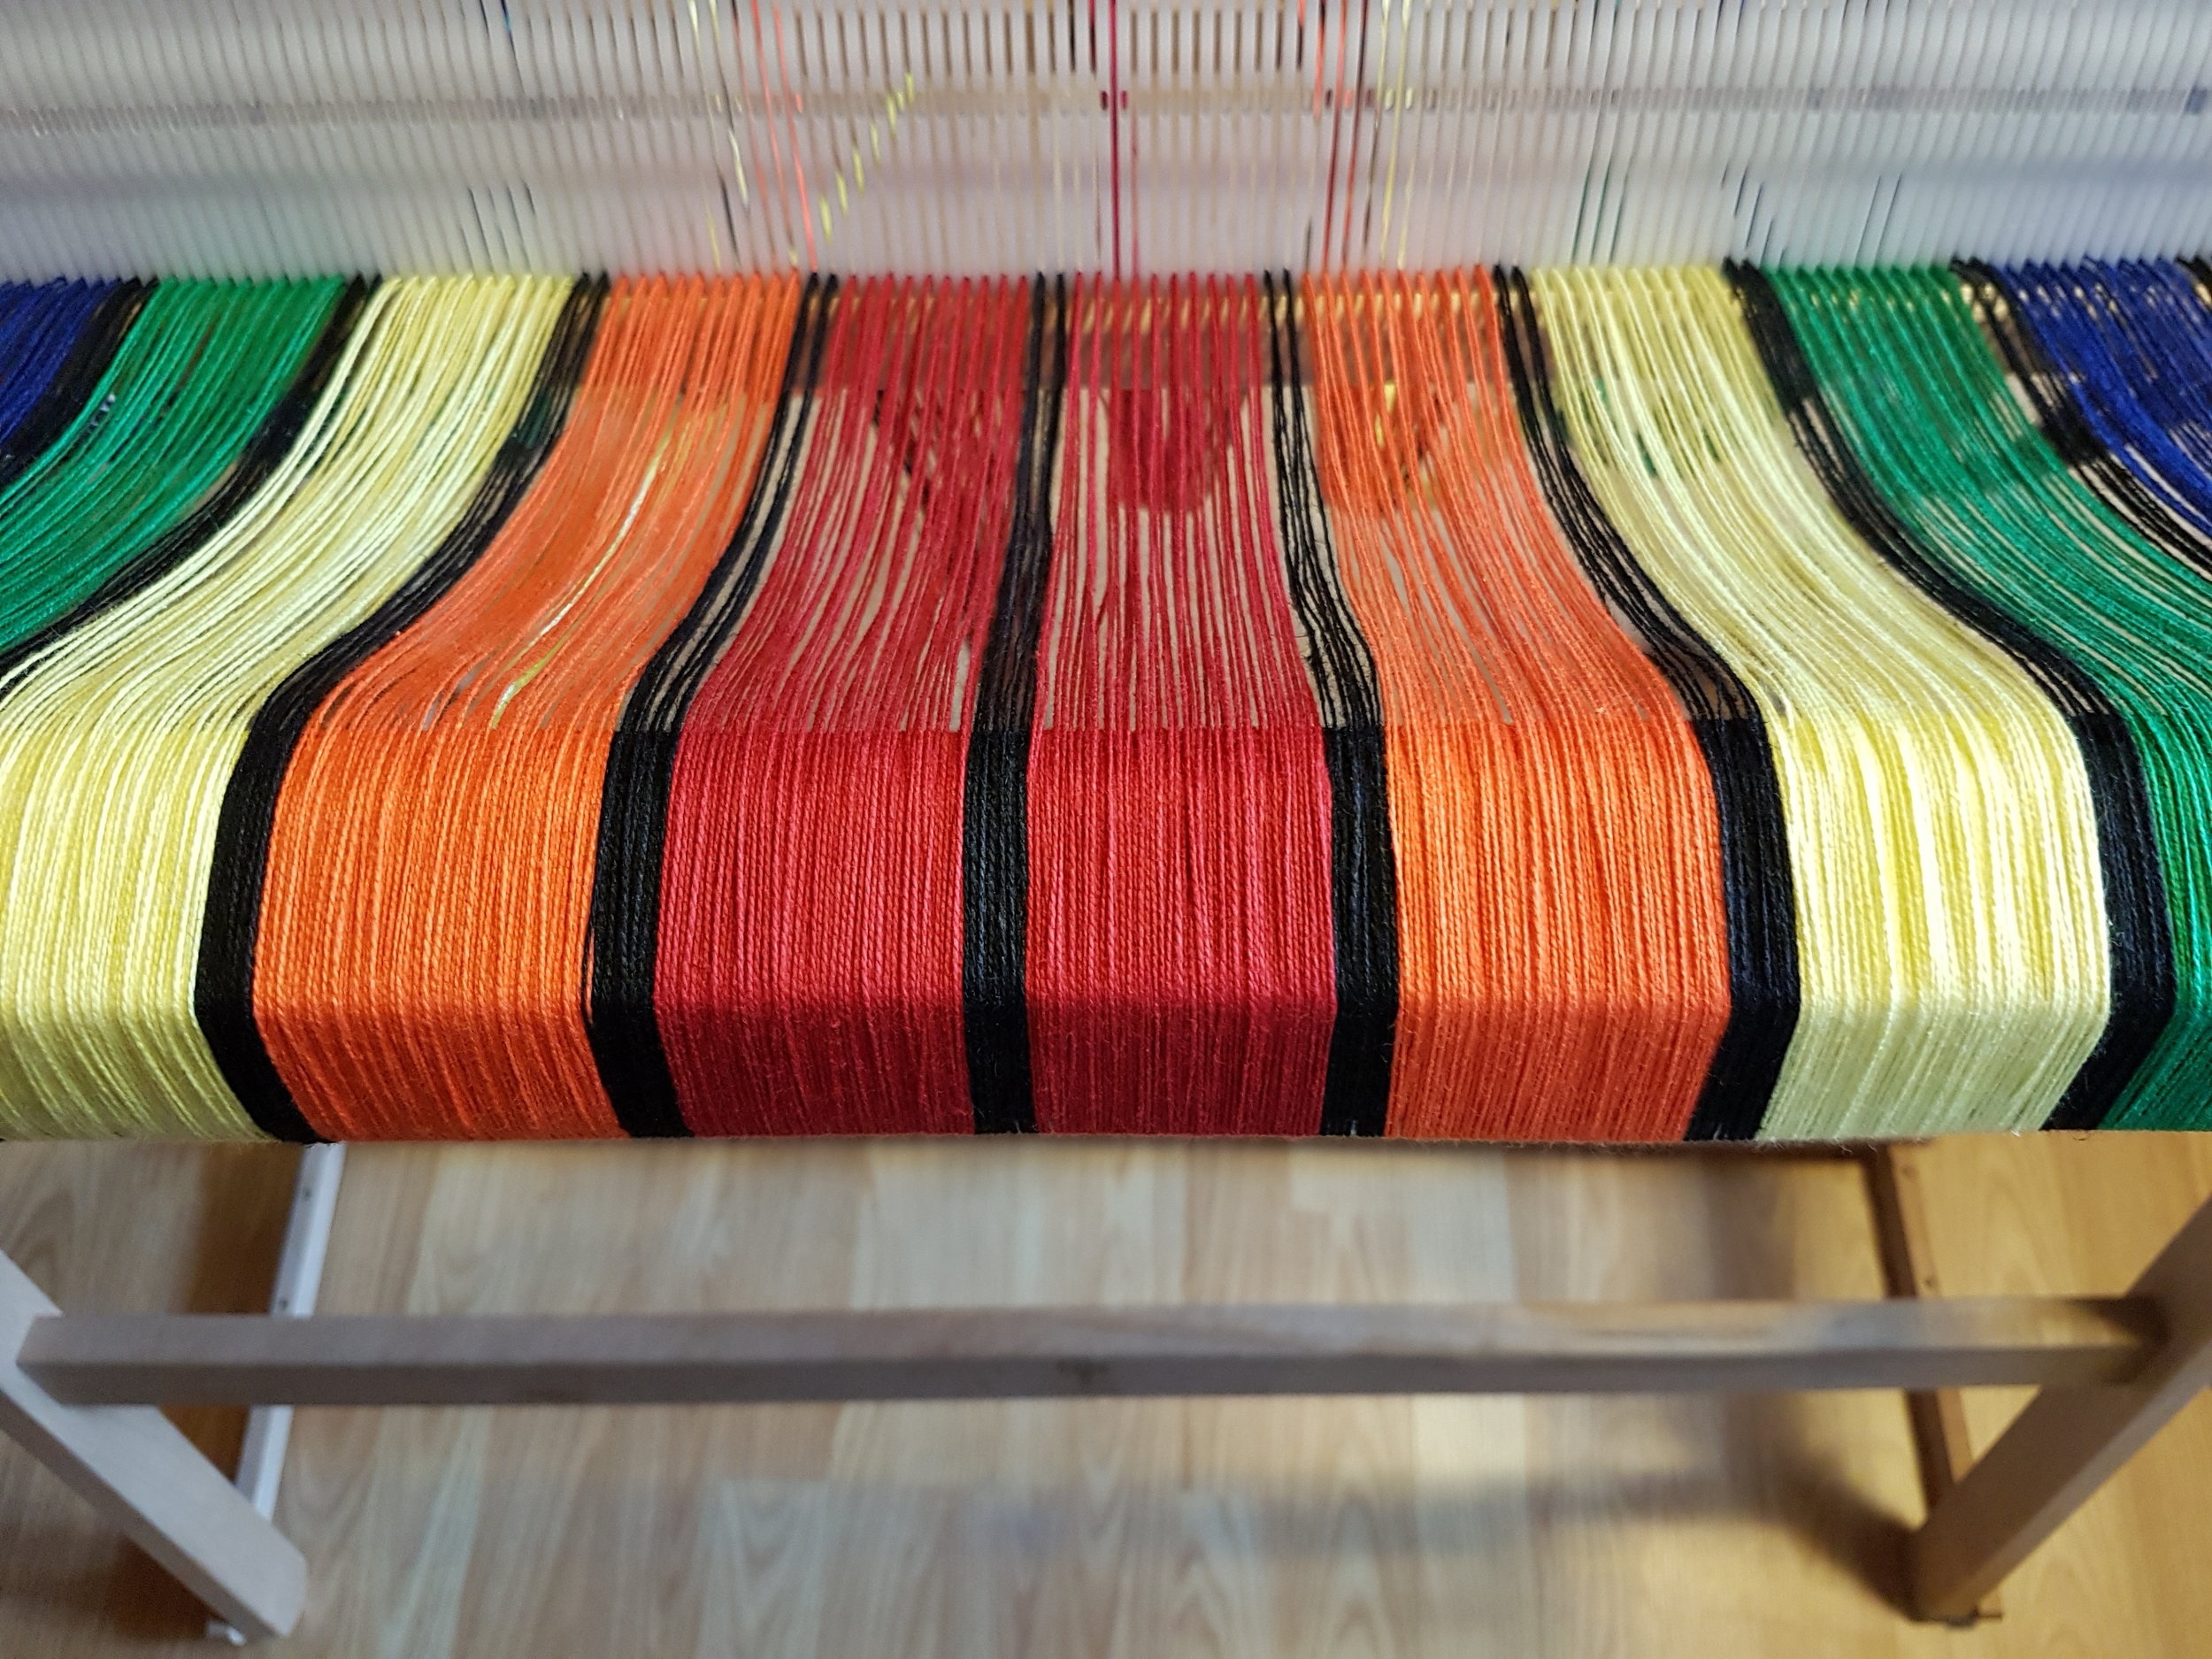
Winding the warp

Winding the warp consists of wrapping the yarn around pegs on a warping board in the right colour pattern. The warping board is used to measure the warp and ensure all the threads will be the same length. Wrapping with a cross allows the weaver to know which is the next thread in the sequence when threading the heddles or reed. It is really important to secure the cross well.

After winding the warp the yarn needs to get from the warping board to the loom without becoming a huge snarly mess. Lots of choke ties get tied, especially at the cross. Then the whole mass can be chained (like a crochet chain).
Winding the warp can take anywhere from an hour to several hours.
Next you can start dressing the loom.
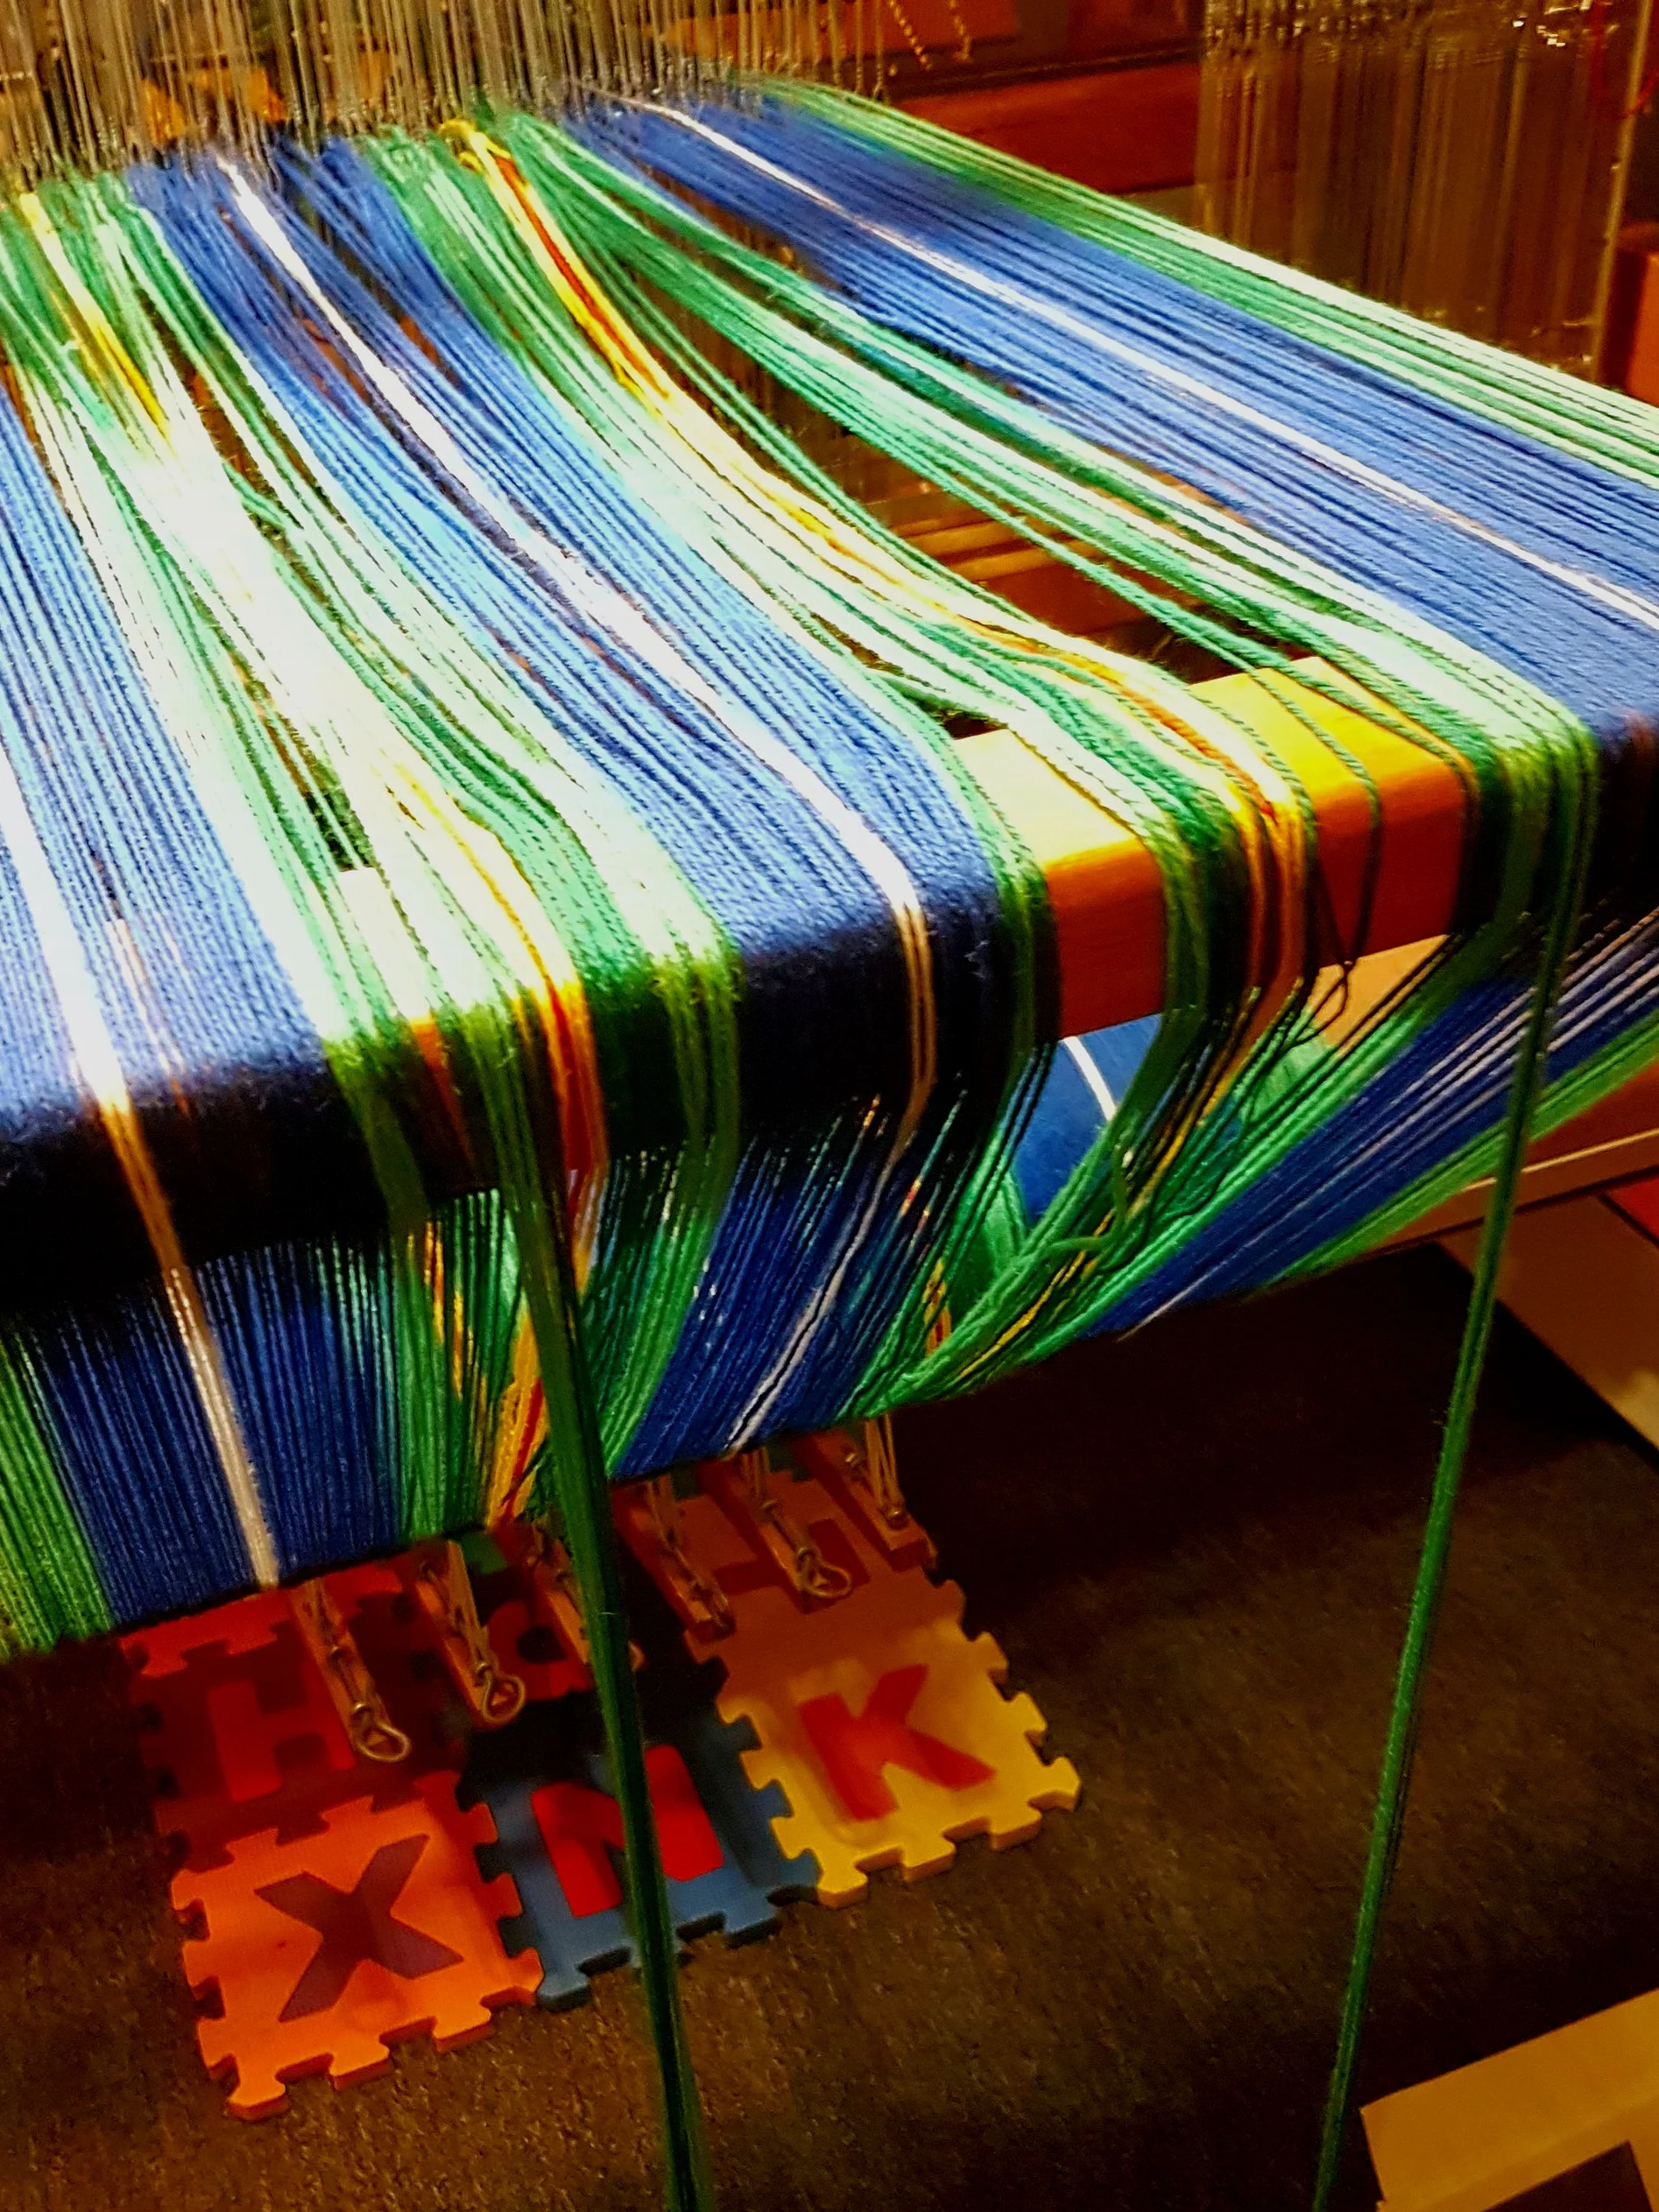
I usually warp back to front. I start by putting sticks in my cross to make sure I don’t lose it and attaching those sticks to my loom. Next I spread my warp in the raddle (my raddle is a piece of wood with nails every inch) and wind the warp onto my back beam. As I wind my warp I undo the chain that stops my warp from tangling. I wind around heavy paper to keep an even tension. (Handy tip: the tubes from wrapping paper unroll to make excellent warp packing material) Winding well is incredibly important. You need the warp to go on with an even tension. I regularly go to the front of the loom and tug on the warp to keep things even. A tension problem here will cause problems through the whole weaving process.
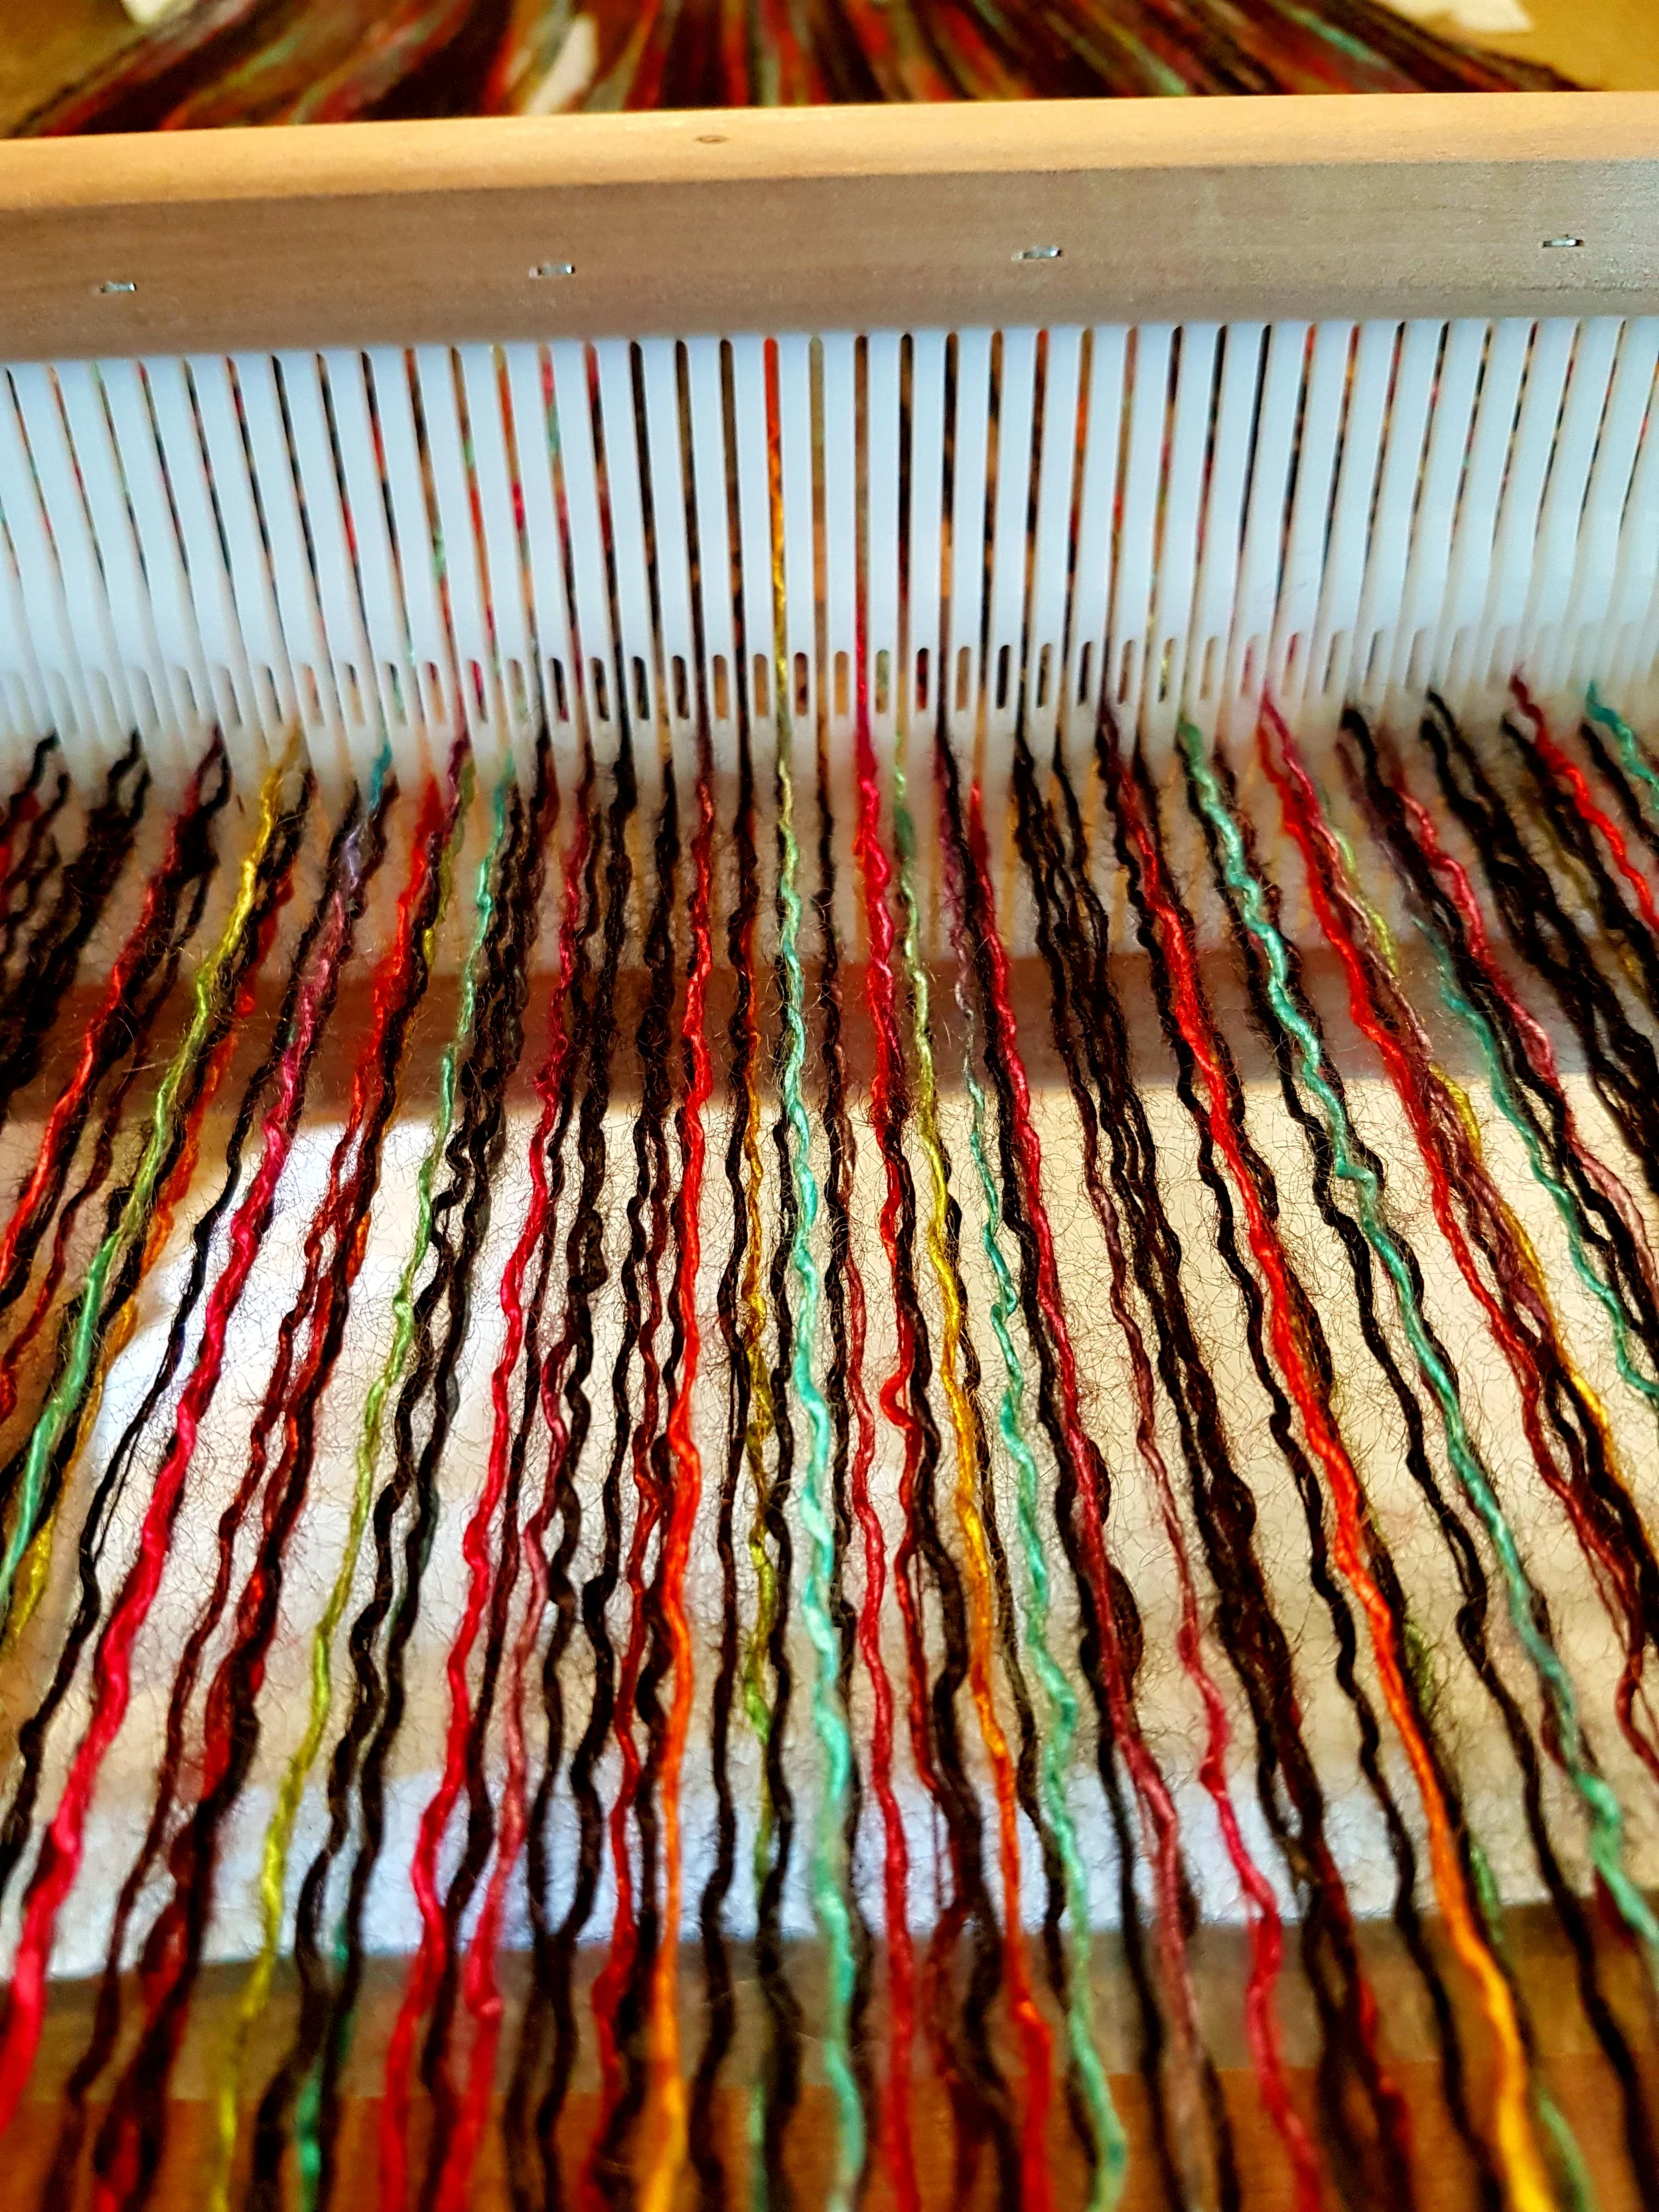
Once the warp is wound on it’s time to thread the heddles. Threads are threaded through the heddles in the order of the draft chosen. Each thread is taken, in order, from the cross and threaded through it’s own heddle. It’s slow, sometimes painful if you don’t stretch enough, and frustrating if you make a mistake. It definitely pays to slow down here and double and triple check. Again, this process can take several hours or for a really fine wide warp, days.

Threading Heddles

Through the heddles, reed and tied on!
Next, each thread needs to go through the reed. This is usually quick and easy. Then it’s time to tie the warp to the front apron rod. Tension is important now too. Finally, the treadles are attached to the shafts in the order prescribed by the draft. On a floor loom this requires getting on the floor half under the loom. It helps if you are a contortionist.
Then comes the first moment of truth. As you press each treadle and the shafts move you can see if you have it right. Are there any crossed threads? Threads through more than one heddle? It’s a pain, but these are easy to fix…but will require going back, retying and checking the tension again.

At last, the real moment of truth. The first few treadles will tell you if you have threaded each end correctly through the heddles. If there is a mistake in the threading there is no way to fix it without going back and rethreading. If the mistake is at an edge it’s not so bad. If it’s in the middle I recommend a box of kleenex and a cup of tea…or something stronger!
After all the mistakes are fixed and the tears are dried, the actual weaving begins. And it’s fast. I usually spend way more time dressing my loom than actually weaving! Of course attention needs to be taken keep the pattern correct, keep neat selvages and change colour when needed. But compared to the pre-weaving tasks, this is easy!
So now you know the behind the scenes of weaving. That’s how woven fabric is made. And it’s everywhere…the jeans you are wearing, the shirts in you closet, the sheets on your bed. Of course, most of it is done on industrial machines but the principle is the same. And someone still has to man those machines!
Boucle and Chenille
I hate Monopoly. For me, Monopoly is a long painful process of losing. I lose every time, and you can’t just quit because then you’re a sore looser. I didn’t realize until I was older that the reason I always lost was because I wasn’t willing to take risks. I needed to keep a safe cushion of money back just in case disaster struck (I didn’t cheat either, maybe that was the real reason I always lost)

I hate Monopoly. For me, Monopoly is a long painful process of losing. I lose every time, and you can’t just quit because then you’re a sore looser. I didn’t realize until I was older that the reason I always lost was because I wasn’t willing to take risks. I needed to keep a safe cushion of money back just in case disaster struck (I didn’t cheat either, maybe that was the real reason I always lost)
I live my life pretty much the same way. I take “safe risks”. Risks that if it doesn’t turn out I really haven’t lost anything. Mostly I’m ok with being like that, but sometimes I wonder what I could I do if I took more risks.
Weaving is ones of those places I can take risks. I’ve got nothing to lose and lots to learn. Every failure is really just learning what doesn’t work. So my risk? I bought things I couldn’t feel before buying and had never seen woven in real life. See what I mean about safe risks?!

Chenille is the French word for caterpillar and it describes the yarn well. I bought cotton chenille but it can be made with rayon or acrylic. Essentially it is created by placing short lengths together between 2 strands of core yarn and plying it all together. It doesn’t feel so soft while using it but after washing it is quite lovely. Think about rag quilts. Before washing the raw edges are just…blah. After washing those edges become all fuzzy and beautiful. That’s what happens with chenille.
My dream for the chenille was bath towels for my husband and I. I decided to start with hand towels. And in an effort to set a good example, I sampled, sort of. Well, not really. What I did do was warp for two hand towels. I wove 1 plain weave (my “sample”) then wove a waffle weave for the second. It would have counted as a proper sample if I had cut the first one off, finished it then, based on my results, decided what to do with the second towel. I seriously thought about it. On the other hand, if these are samples before making a big bath towel, then I guess I really did sample!!

I love my chenille towels. The plain weave is very soft, maybe a little thin for a bath towel. I threaded it at 10 epi and wove at about 8 ppi. I’ve heard that chenille has a tendency to “worm” if it isn’t beaten tightly enough so we’ll see what happens over a number of washes. Worming means that a strand of the chenille works its way loose and causes loops to show in the weaving. The waffle weave is very thick, maybe a little stiff. Again it was 10 epi but closer to 15 ppi. I expect with use it will soften up more.
Boucle is yarn that has loops and twirls in it. Again, mine is cotton but in theory it could be anything. (Sometimes I spin boucle yarn by mistake!) I had heard that cotton boucle can make lovely bath towels but I really didn’t believe it. I like a really thick towel.

Like the chenille, I wove 2 hand towels, 1 plain weave, the other with some weft floats. I used a 12.5 dent reed with 12 ppi for plain weave and 15 ppi for the second. I was right, not thick enough for a bath towel (although my daughter wants a bath towel like the plain weave sample, she obviously likes a really thin towel) However, these are amazing kitchen towels! A tea towel and hand towel set. Or if you travel and need quick(er) drying towels, or towels that take less space in your RV than regular towels these would make a suitable bath towel.
I’m going to hang on to the chenille towels and see if any worming happens and find out how soft they will get. But, the boucle towels are ready for a new home. They would make a fabulous wedding gift, housewarming present or something special for your kitchen. If you are interested, click on Products in the menu at the top of the page.


The Importance Of Play
Today it’s just about fun! I’ve just come off a couple of weeks of working hard at weaving or weaving related stuff. I’ve learned how to make videos and upload them, (check out my video tutorials here https://www.therogueweaver.com/video-tutorials-1 ), I’ve learned how to connect my posts and products to Pinterest, (you can follow my board: The Rogue Weaver), and I’ve finished some challenging projects. I like a challenge so none of it felt like “work” but it took a lot planning, research, organization and focus. Oh, and discipline. Lots of discipline. So this week I wanted to play.

Today it’s just about fun! I’ve just come off a couple of weeks of working hard at weaving or weaving related stuff. I’ve learned how to make videos and upload them, (check out my video tutorials here https://www.therogueweaver.com/video-tutorials-1 ), I’ve learned how to connect my posts and products to Pinterest, (you can follow my board: The Rogue Weaver), and I’ve finished some challenging projects. I like a challenge so none of it felt like “work” but it took a lot planning, research, organization and focus. Oh, and discipline. Lots of discipline. So this week I wanted to play.
I’ve been thinking about the word play this week. Children play. They “just” play. They aren’t thinking “oh, I need to learn gross motor skills so I’m going to climb a tree”. No, they just climb that tree. It’s there, it’s fun, they can, so they do. They get the exercise, learn the skills, grow and develop, all without ever needing to set goals or schedule “learning sessions.” They have fun learning and it’s not a chore. I think that is pretty awesome!

Noro Silk Garden Sock and Solo
I’m not very good at playing. I’m not sure I ever was. I think too much: why am I doing this? What else should I be doing? What if it doesn’t work out? What is the purpose? I can turn play into work too: what did I learn? what will I do different next time? what did I do wrong? I’m so good at turning play into work I can even turn other people’s play into work: like the time my homeschooled daughter had a fascination with the human heart and I turned it into an essay writing lesson. In retrospect, she would have had much more enjoyment and learned far more if I had just let her read for fun.

Broken warps everywhere!
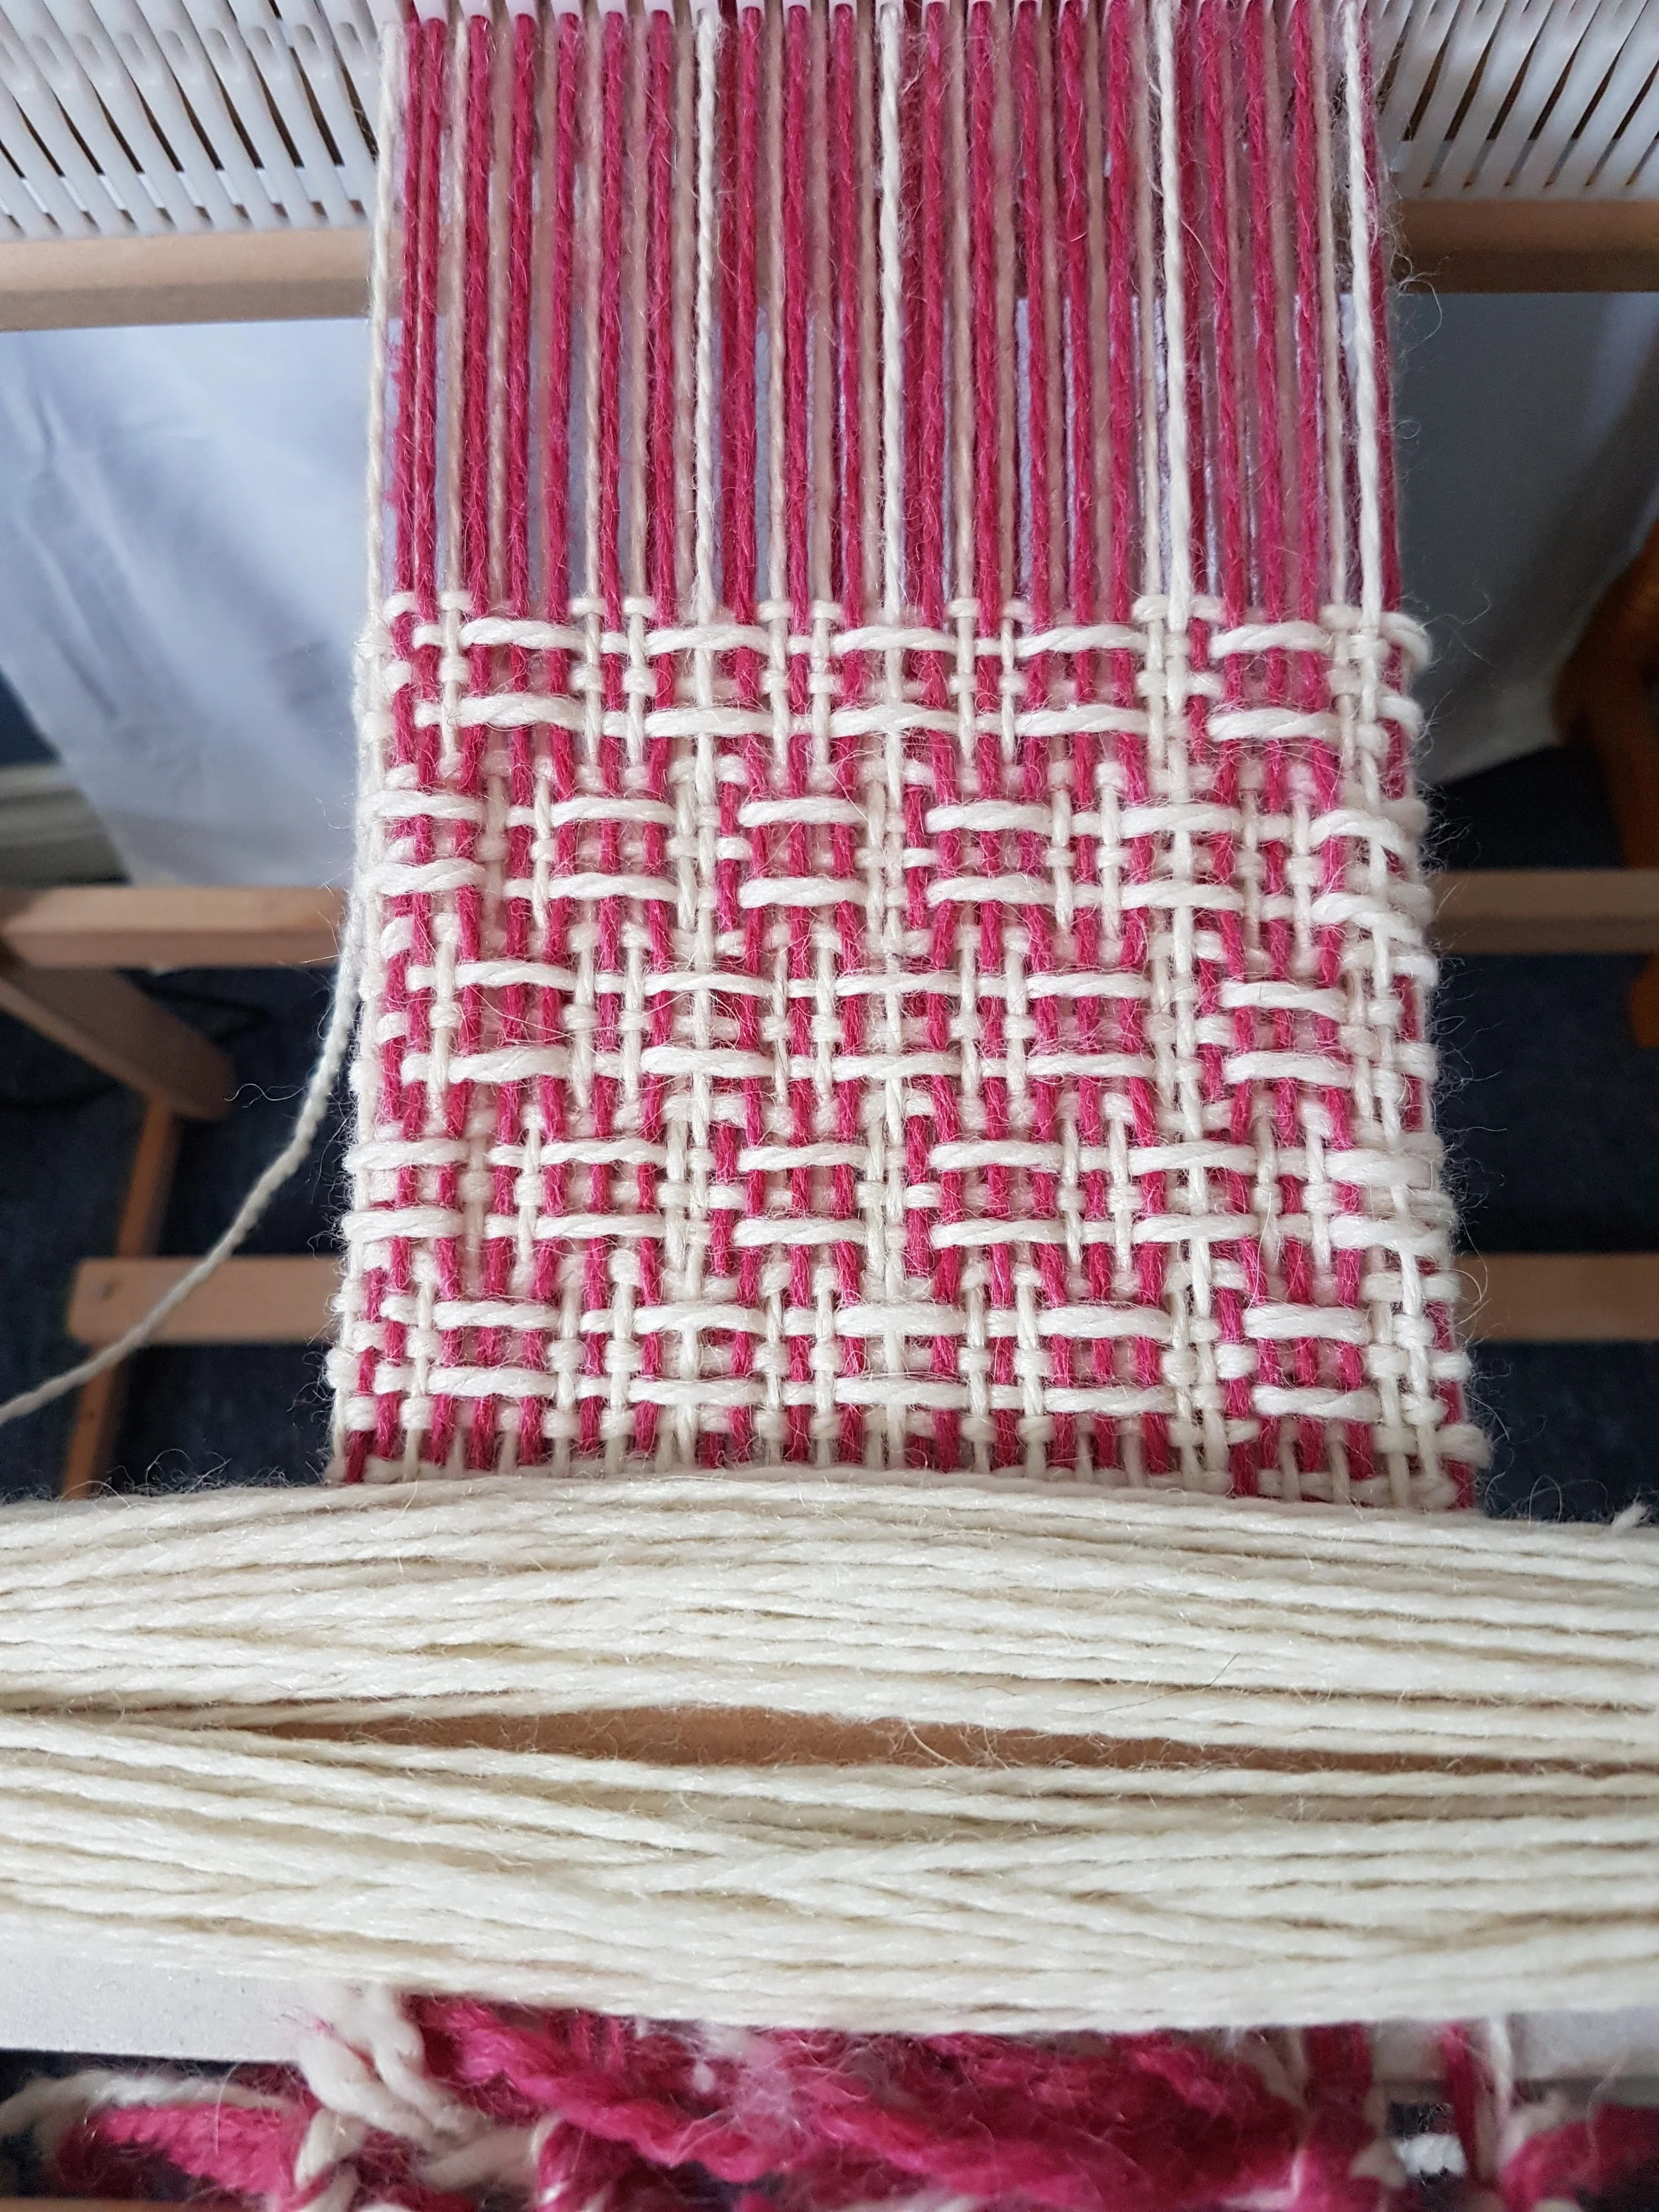
So play becomes work when we impose expectations. I put no expectations on my weaving this week. This week I picked some beautiful Noro yarn and just wove. I planned to plain weave but the yarn told me honey comb. I listened. So beautiful! (I did write a pattern, you can find it here: https://www.therogueweaver.com/new-products/noro-scarf ) Then I put on some cotton slub to try some pick up patterns. I hadn’t used it before, I didn’t know what would happen. If I was trying to produce something to sell, this would not have been a fun project! This slub did not make a good warp! It continually broke. Again and again and again. I don’t know if it was because it was old cotton or if slub just doesn’t make good warp. I’ll try again with new cotton another time. I had fun though. I did 4 little cloths and I love them! Each one has a different pattern and they are sooo soft. Soft enough for baby wash cloths! In my house they are going to be paper towel replacements.
I did learn, but that was a side effect of playing.

Play is important. I’m going to cultivate an attitude of play. I think we all should. Of course there are many things we should do, and some we must do. I know that, and I know that sometimes life is so busy we don’t have time to think about playing. But we should. Play brings joy. And joy fills us and over flows from us. It makes us more tolerant, more accepting, more open to new thoughts and ideas, more aware of when something is wrong and more bold to step forward. So play with your kids with no thought of teaching them, splash in the puddle just because it’s there, climb the tree because you can. Play with no expectations.
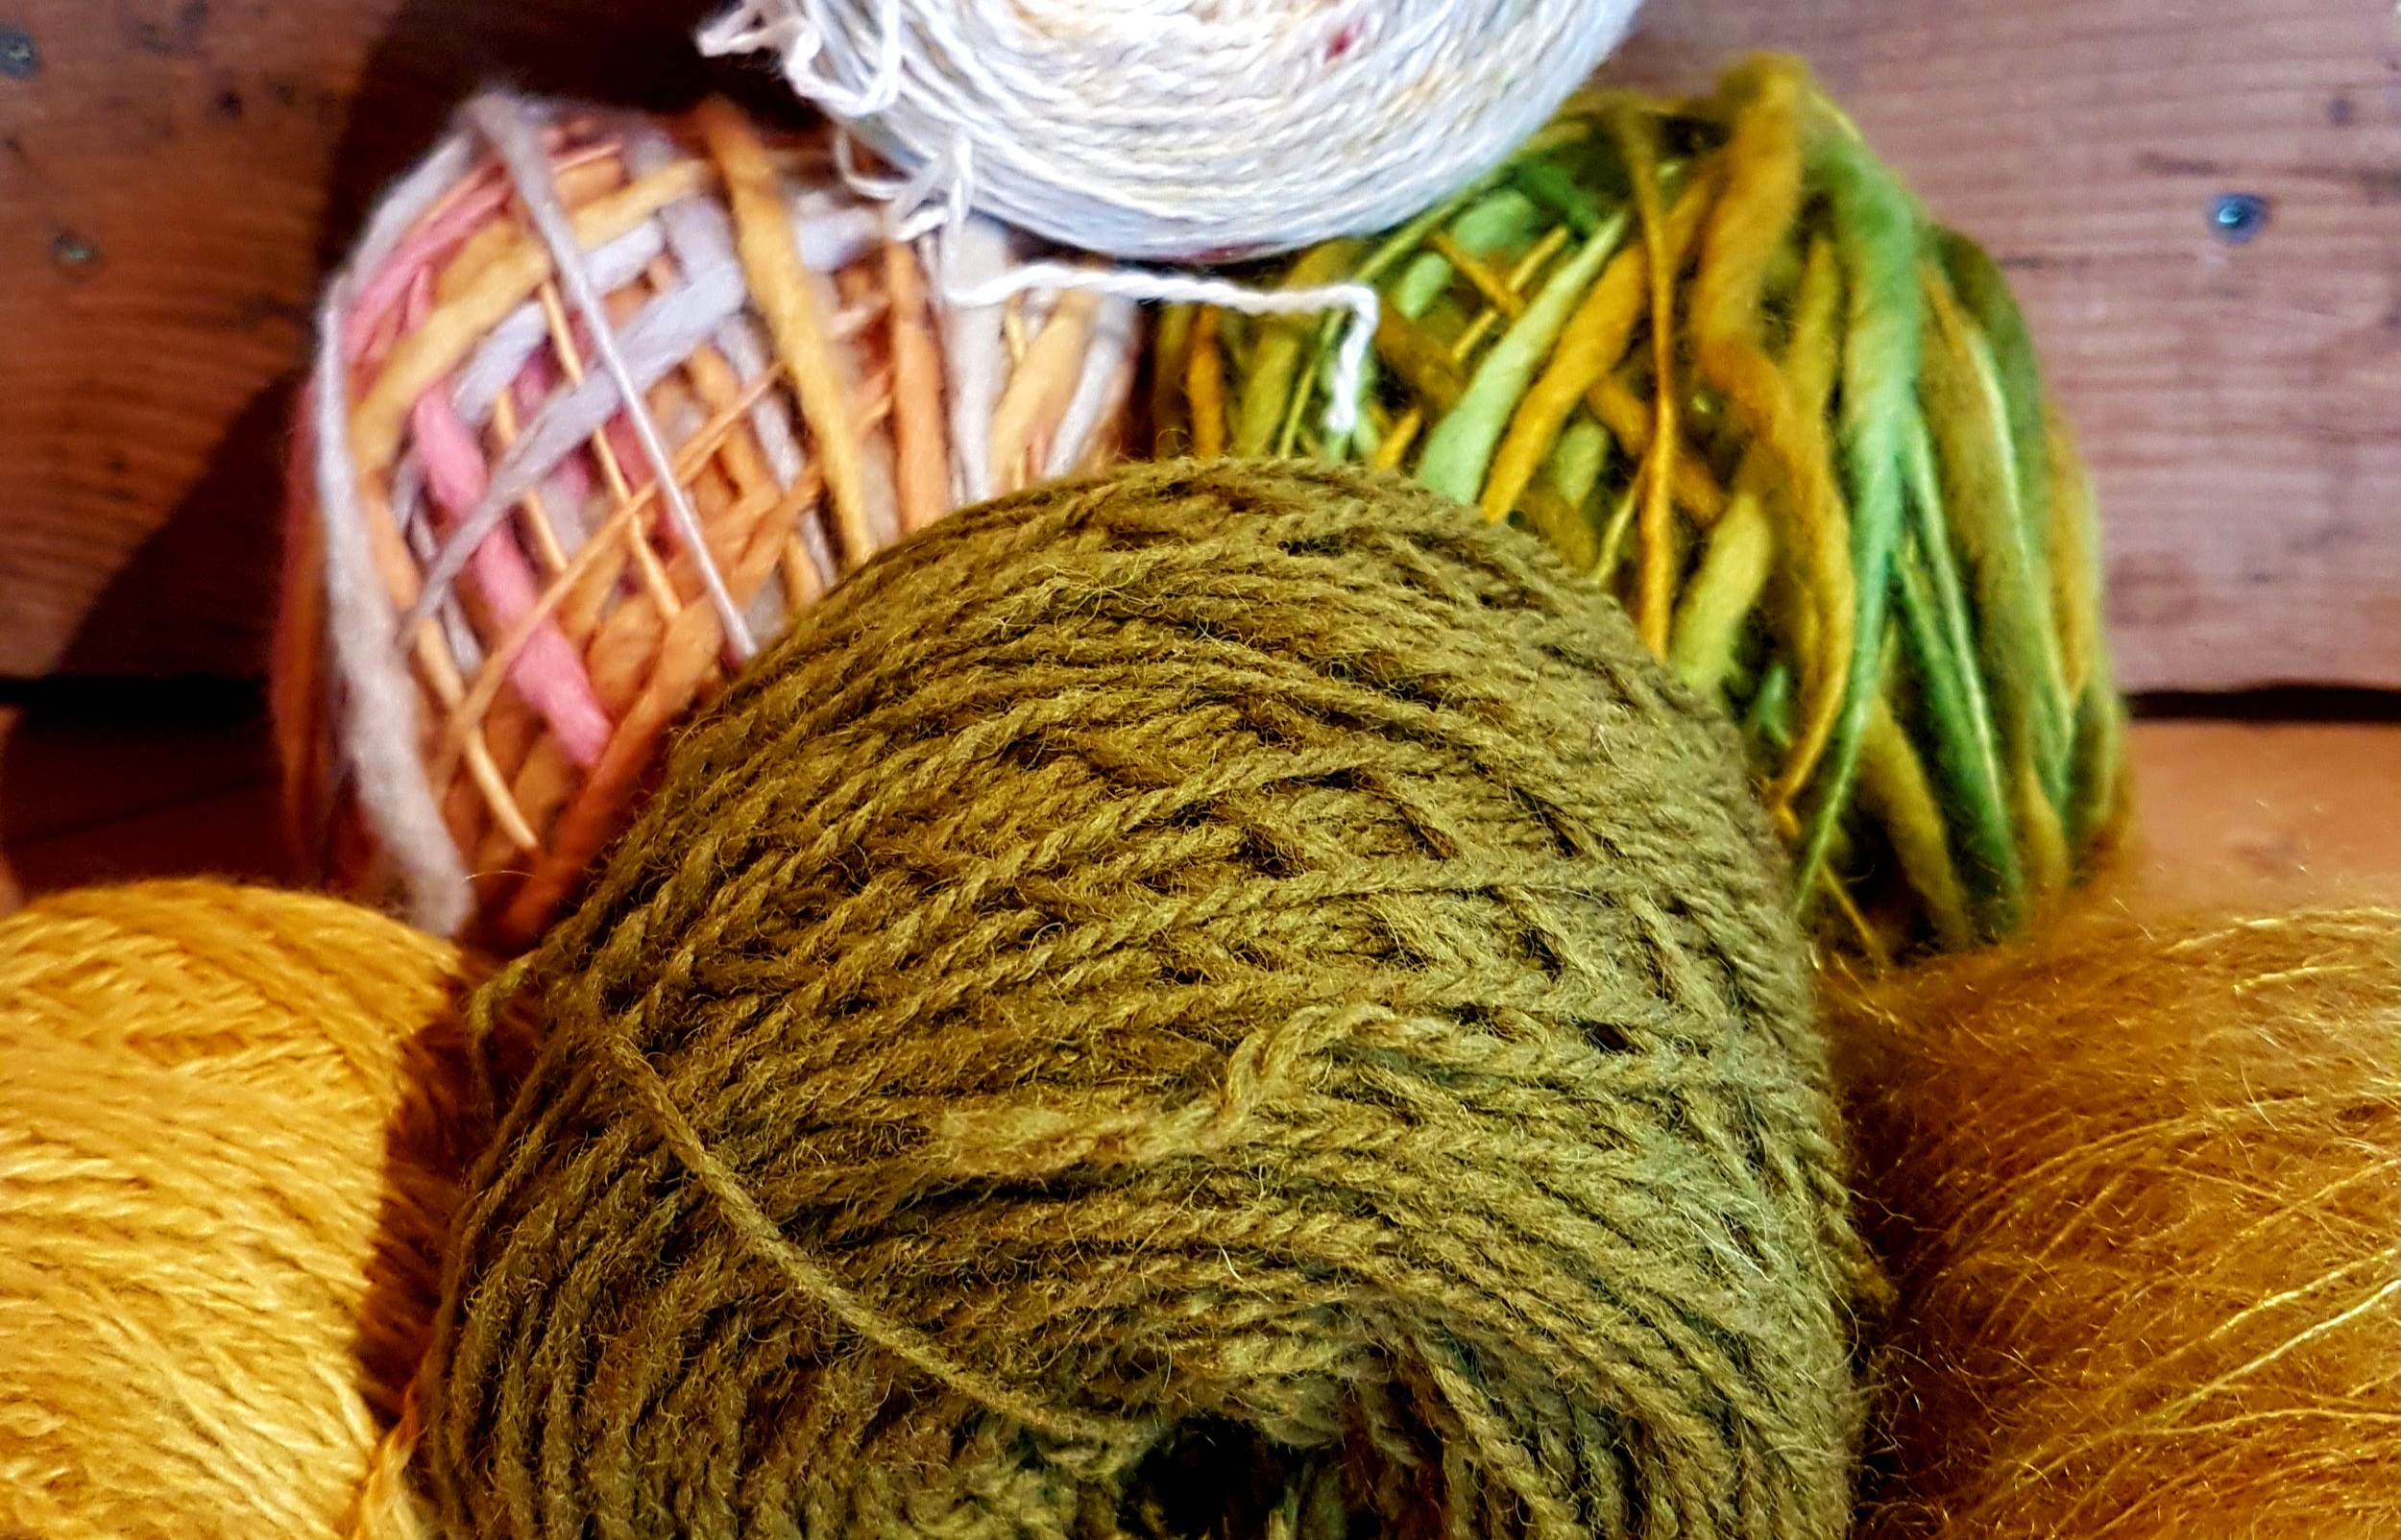
More About Yarn
I love yarn. I love how it looks on the shelf all neat and tidy. I love petting it and feeling the different textures. I love the feel of it running through my fingers, some so soft and smooth you hardly feel it, others can leave a groove in my finger if I wind too fast. Cotton, wool, silk, alpaca, yak, llama, bamboo, linen, cashmere…it’s all beautiful. Each has it’s place in weaving. Nearly anything can be used for weft. Even non yarns like lavender stalks, cloth strips, wood slats or strings of beads. Choosing the right warp yarn takes a little more care.

I love yarn. I love how it looks on the shelf all neat and tidy. I love petting it and feeling the different textures. I love the feel of it running through my fingers, some so soft and smooth you hardly feel it, others can leave a groove in my finger if I wind too fast. Cotton, wool, silk, alpaca, yak, llama, bamboo, linen, cashmere…it’s all beautiful. Each has it’s place in weaving. Nearly anything can be used for weft. Even non yarns like lavender stalks, cloth strips, wood slats or strings of beads. Choosing the right warp yarn takes a little more care.
Warp threads refers to the long end to end fibres that run the length of a scarf, placemat or bolt of fabric. Warping the loom means placing each of those threads on the loom in a neat orderly way with no twists and an even tension. The threads need to be under enough tension to allow them to rise and lower to create a clear shed for the weft to pass through. Even 1 loose thread can cause havoc in a project. It’s the tension that can cause problems when choosing a warp yarn and that’s what we’ll discuss today.
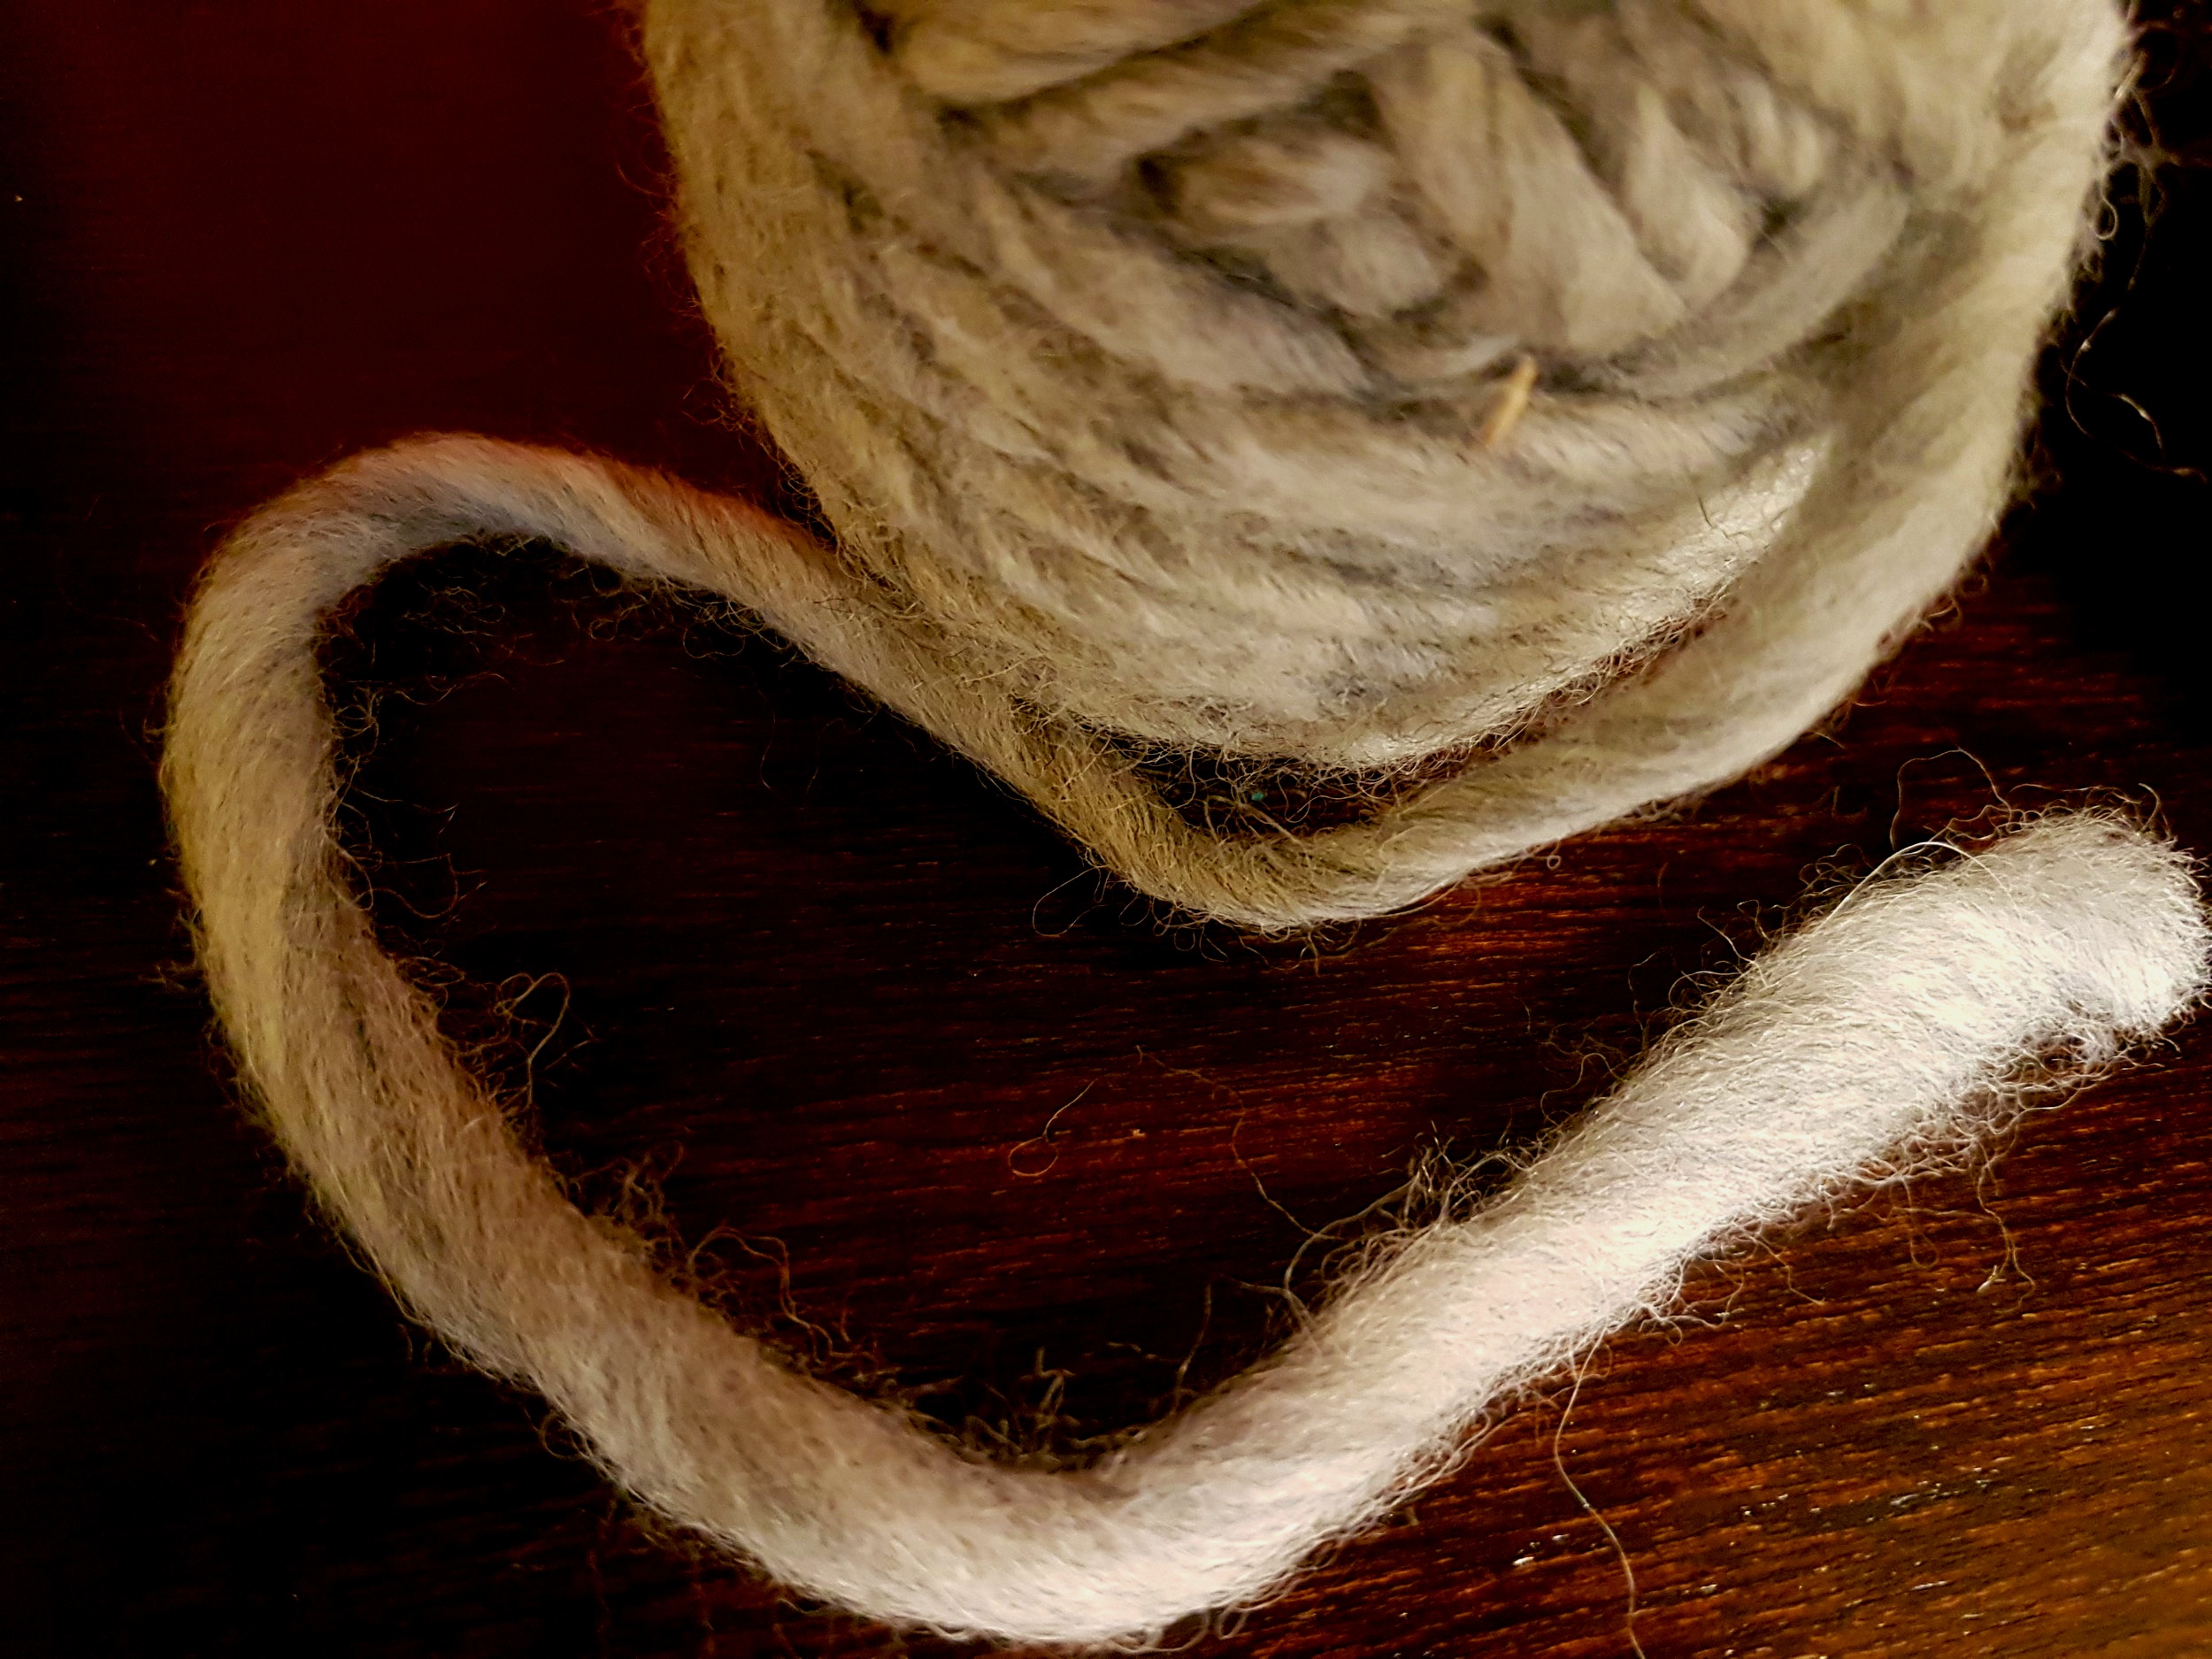
loose 1 ply yarn
If you’re willing, you can warp with almost any yarn on a rigid heddle. A rigid heddle needs less tension than a floor loom and using a stick shuttle rather than a boat shuttle helps with a challenging warp. The one thing to really steer clear of is a loose spun yarn particularly if it is a single ply. How can you tell if it is loose spun? First, take a look, does it look like its been twisted a lot or just a little? Next, pull on it. Hold your hands about a foot apart and gently pull. Does the yarn drift apart? If yes, this will not make a good warp! If it breaks with a snap it’s probably ok.

Top yarn snapped, bottom yarn drifted apart
What about a thick and thin yarn? If you look at a thick and thin yarn you will see that the thin bits have lots of twist and the thick bits have very little (there is a sciency reason for this, but we don’t need to know it to appreciate the yarn!) Do the pull test…the twist in the thin bits *might* be enough to hold the thick bits together if you are willing to fiddle a bit and repair a thread or two. In my experience the trouble is worth the texture created by a thick and thin yarn. The pull test is useful, but don’t eliminate a fibre just because it fails this test. Try 5 or 6 ends together and see what happens. There is strength in numbers and while a single thread may not have the strength to withstand the pull test, many threads working together may.

Left has frayed in the heddle
The second consideration when choosing warp is the abrasion test. A warp end will break because it is pulled too tight or because it shreds. Put a piece of the yarn through a hole in the heddle you want to use and rub it back and forth. Does the yarn start to shred? And if so, how quickly? If it shreds in just a few swipes I’d avoid it. Unless you really love it in which case *maybe* thread a few ends as accents in slots only. If it takes a couple dozen rubs, go for it. If you don’t like the fuzz that is created by the abrasion advance your warp more often. Alternatively, you can reduce the abrasion to almost zero if you use a hair pick to press the weft into place rather than the heddle.

This failed the pull test, I used it anyway and love the result…and did’t break a single thread!
There are people in the weaving world who will say “never use this or that” for warp. They have good reasons for this. I’m sure the rules they follow ensure that they have a successful (and enjoyable) project every time. I’m the Rogue Weaver for a reason. I don’t follow rules well, in fact, I see them as a challenge. It means that not all my projects work out. Or they do but the process wasn’t as smooth as I might desire. But I weave for pleasure not production. When weaving for pleasure, we might be more willing to fiddle to create just the effect we want. And who knows what you might inadvertently discover by trying something different? There are no Weaving Police, so go ahead, break the rules, try something a little risky and have fun!
What Yarn Should I Use?
Asking what yarn you should use is a bit like asking what you should eat. There are no right and wrong answers, it all depends on what you are trying to achieve. Even as I have started to write this, I’ve realized there are just too many answers for one blog. Today then, we will talk about what you want to make and I’ll give some of my favourites. This post will give you some guidelines to consider but will not pretend to know everything, or even very much!
Asking what yarn you should use is a bit like asking what you should eat. There are no right and wrong answers, it all depends on what you are trying to achieve. Even as I have started to write this, I’ve realized there are just too many answers for one blog. Today then, we will talk about what you want to make and I’ll give some of my favourites. This post will give you some guidelines to consider but will not pretend to know everything, or even very much!

A small sample I wove before making a shirt
What do you want to make? This is a key question. A light summer wrap will use very different fibres than something intended to withstand the winter winds! A floor rug needs to be tough and heavy (or be backed with something to stop it from slipping everywhere) but also easy to care for. Tea towels need to be absorbent and washable. Placemats need to be heavy enough to stay put. A shirt needs to have a nice drape but not be see though, but a sweat shirt or hoodie is ok with less drape.
This is where sampling can save you! Take the time to weave and finish a 12” piece. Measure it before and after finishing so you know what the shrinkage is. Handle it. If it’s going to be sewn try sewing a little bit of it. It’s better to know now that the sett needs to be higher or lower or that it feels awful than after you’ve woven 3 meters!
A summer shawl is meant to be light. Just enough to protect from a light breeze or maybe protect your shoulders from the sun. My summer shawl favourites are fingering or lace weights, silk, silk blends, linen, and tencel. Pairing the fingering warp with a lace weight weft is also lovely and a great way to let a special hand dyed warp really shine. Using a sticky yarn (mohair for example) allows you to use a wider sett creating a very airy fabric.


Waffle Weave
Alpaca or wool in a worsted weight make a fabulously warm and quick weave for winter. Using a thick and thin yarn adds a lovely texture without any extra work. Or a simple waffle weave gives a really cushy feel. Long repeats in warp and weft can give a plaid effect without you ever needing to change colour! Since alpaca is so warm, fingering weight is also a good choice for fall and winter. A woven blanket can also double as a cozy wrap.
Unmercerized cotton, cotolin and linen and hemp are great in the kitchen. Tea towels, dish clothes, placemats, or floor rugs. They are all washable and hard wearing…meant to be used! (do not use fabric softeners when washing towels, they will become less absorbent) On my rigid heddle I like to use my 10 dent reed and 2/8 cotton or cotolin doubled for tea towels. For placemats I use a 7.5 heddle and 4/8 cotton doubled. For a rug try warping with 4/8 cotton and using old sheets or t-shirts or jeans for the weft.


Bamboo and Tencel
Weaving for clothing a whole topic on it’s own. But as a general rule, think about drape and thickness. The fabric will be cut and sewn…always finish your fabric before cutting! Think about the thickness of seams. Everything I’ve woven has been much heavier than any store bought fabric. You’ll want to find patterns to suit your fabric and think about the best way to finish the seams with the least bulk. Investing in a walking foot and an overlock foot will make sewing much easier.
Design Your Own Shawl Pt 2--Choosing the Right Reed
There are so many places you can start once you have decided that you want to make a shawl. Today we are going to start with reed size. The reed you choose determines how many ends per inch (epi) the warp has. This in turn determines the density of your final fabric.

There are so many places you can start once you have decided that you want to make a shawl. Today we are going to start with reed size. The reed you choose determines how many ends per inch (epi) the warp has. This in turn determines the density of your final fabric.

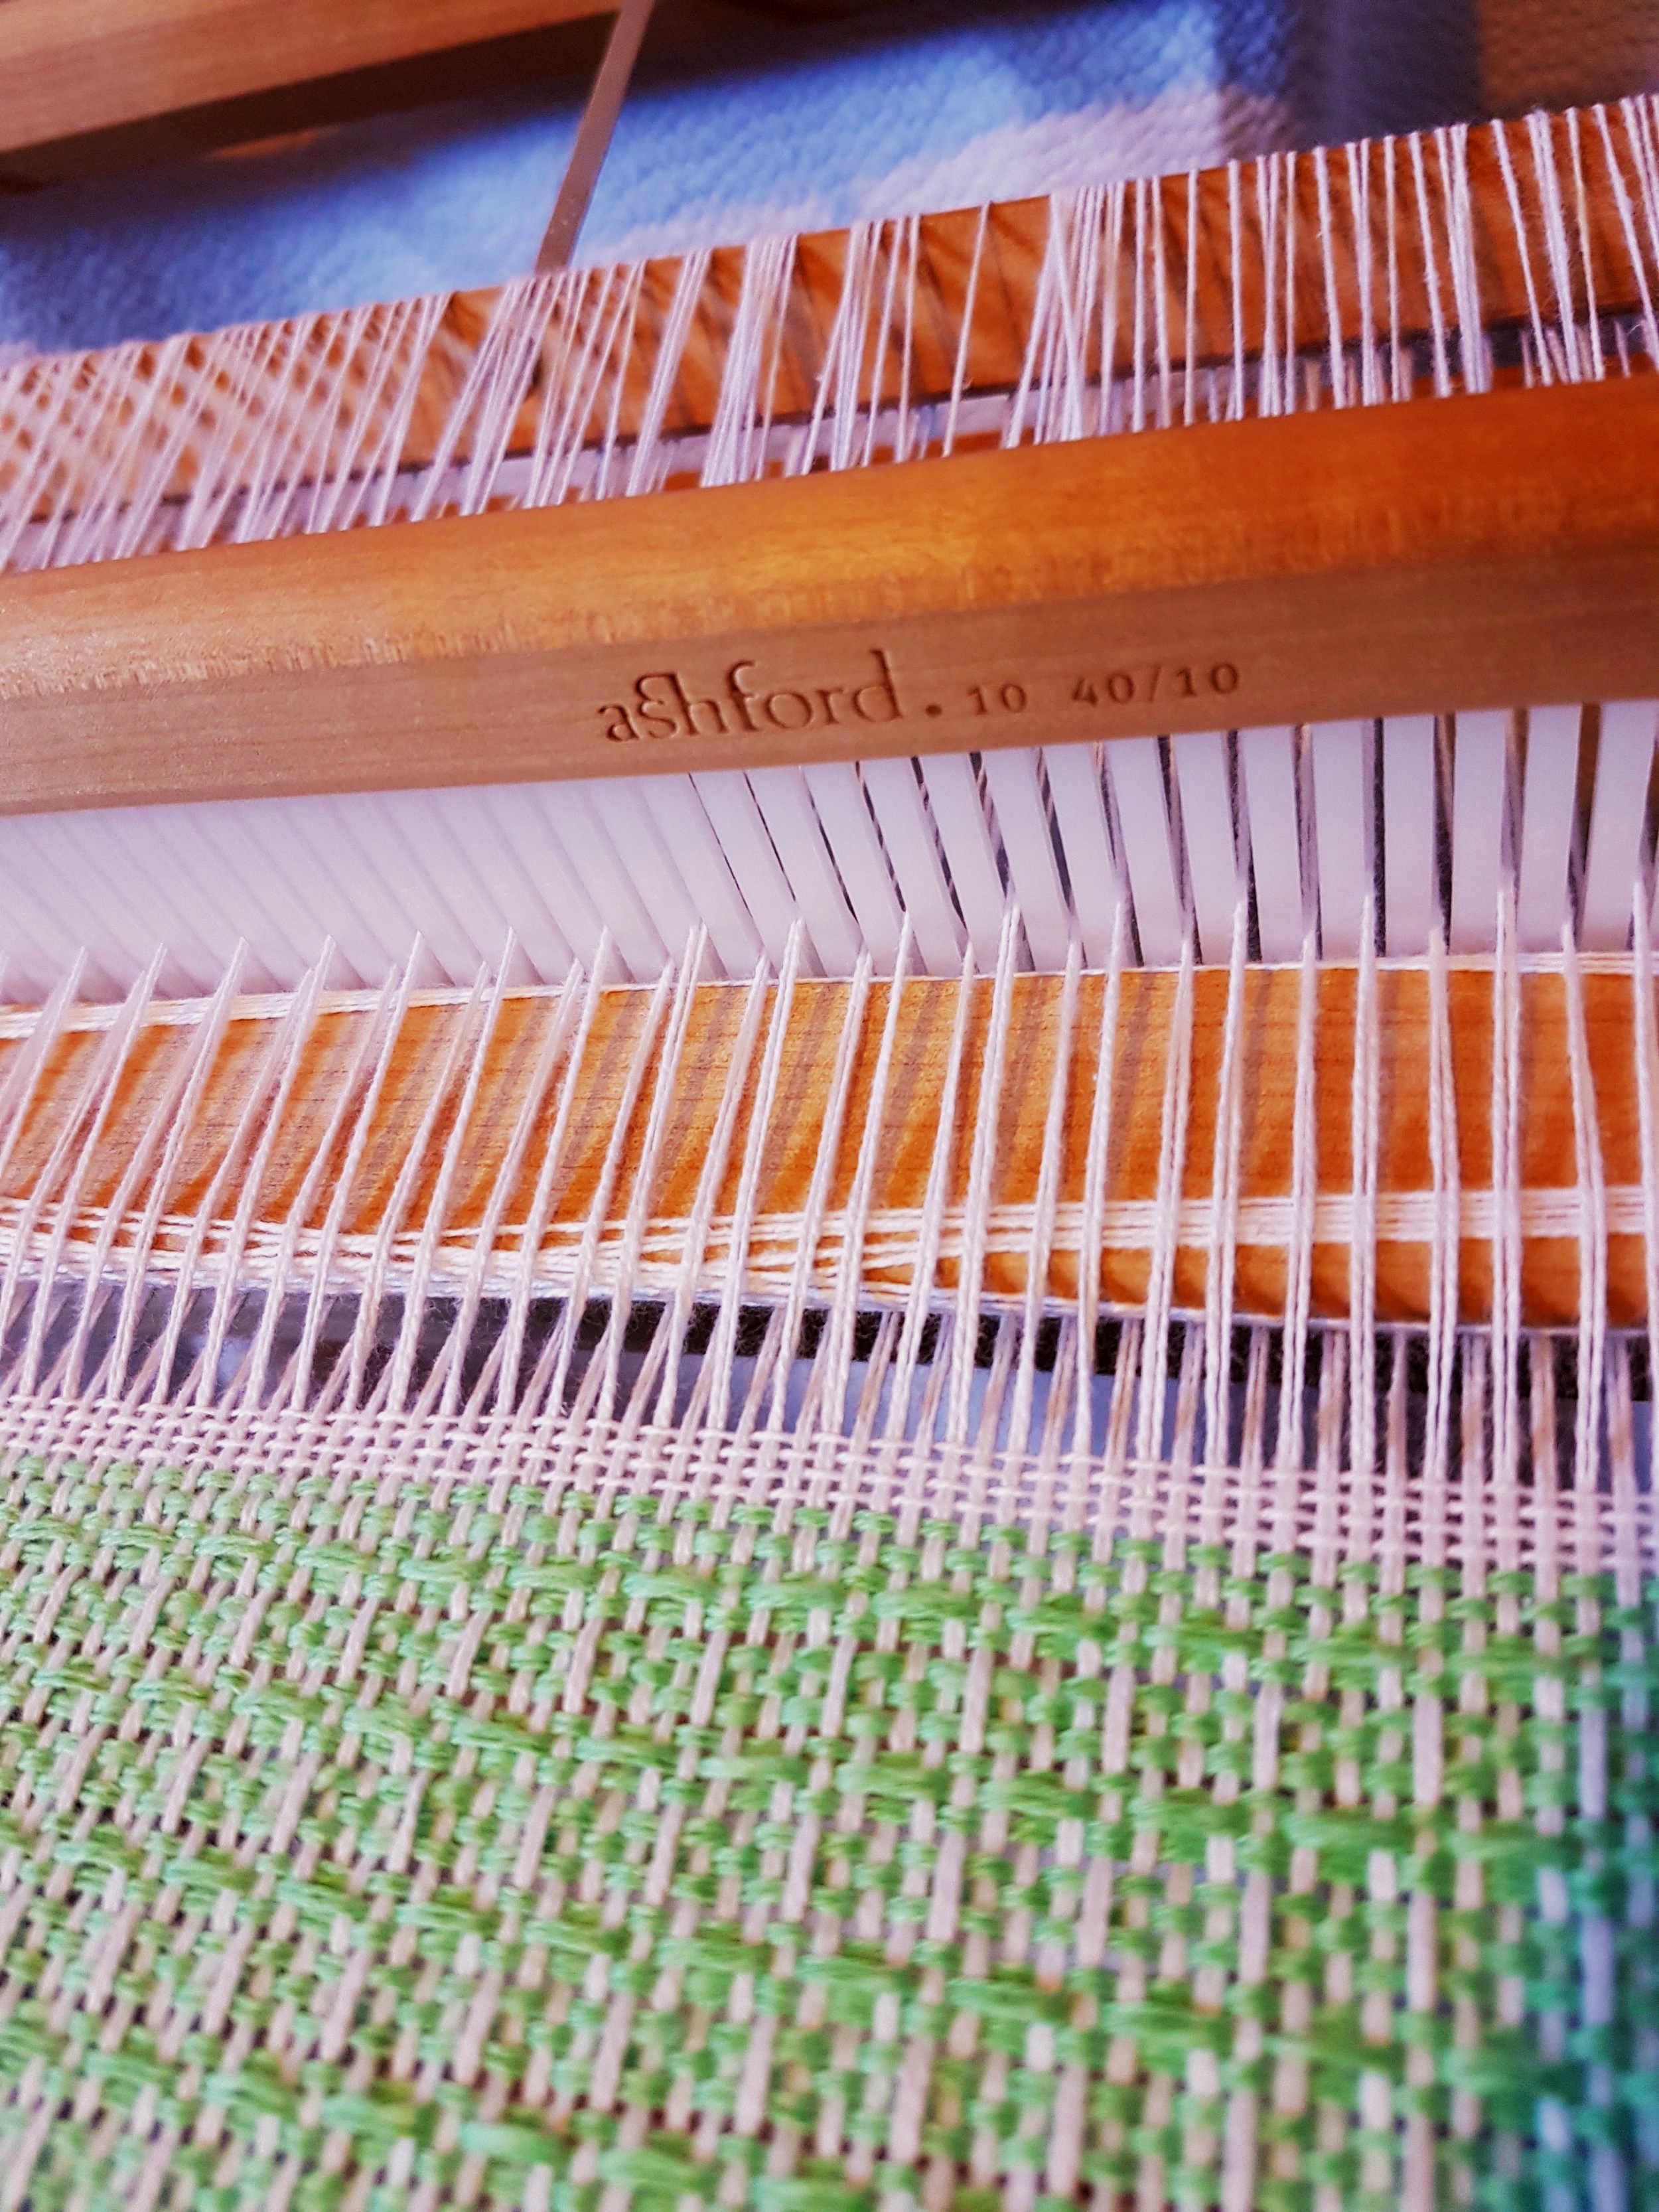
I use an ashford rigid heddle and it currently has the widest selection of reed sizes: 2.5, 5. 7.5, 10, 12.5 and 15. To my knowledge it is the only rigid heddle with 2.5 and 15 dent reeds (I could be wrong, please correct me if I am) When paired with a double heddle option the Ashford looms can achieve 2.5, 5. 7.5, 10, 12.5, 15, 20, 25 and 30 epi when doing plain weave, making it possible to use almost any yarn you could want. When you consider the change in epi when threading for twill there are even more options (2 10 dents threaded for rosepath twill produces 12 epi for example).
But what is the best option for you? How do you choose the right reed? We will stick to simple today. There are two primary methods: 1, if you have already bought the yarn and 2, if you have a specific reed size.

1. You already have a beautiful yarn that you want to use. In this case, use the wrap test to determine the epi. There are some nice tools for this, or you can use a pencil or ruler. Wind the yarn around the tool or ruler for 1 inch and count how many wraps then divide the result by 2. The result will give you a rough idea of which reed to use. In my example, there are 18 wraps per inch (wpi), divide that by 2 and I get 9. The closest size reed is 10. Notice that the yarn isn’t pressed tight together or pulled tightly around the ruler.
2. You only have a 7.5 and a 10 dent reed. In this case, the yarn you choose will depend on the reeds you have available to you. Here is a general guideline. We’ll look at other things to consider next in this post.

bulky and fingering
2.5—super bulky
5—bulky/aran
7.5—aran/worsted/dk
10—sport/heavy fingering/4/8
12.5—fingering/heavy lace
15—lace/2/8
The above methods give you a place to start. Following these guidelines will likely result in a successful plain weave project as well as work for most pick up or finger controlled techniques. But there are other things to consider.
1. Are you using a superwash or non-superwash wool?
A superwash wool is not going to full as much as a non-superwash. So if you do your wrap test and the result is between 2 reed sizes (say 8.5) the wool will determine which reed is best. For superwash choose the 10, for a non superwash the 7.5 might be just fine.
2. What is the fibre?

Bamboo and Tencel—still lots of spaces in the weave
Pure silk, bamboo or tencel for example do not full as much as wool, alpaca, llama or angora. So again, consider how much fulling you can expect from the fibre and choose your reed accordingly.
3. Is the fibre spun worsted or woolen?
Woolen and worsted spun refer to how a wool is spun (not to be confused with worsted weight) Very simply, worsted is smooth and has the air squished out during spinning, while woolen is puffier because the fibres are every which way which holds in lots of air. Woolen will full more than worsted. It will also stick more to its neighbour so a wider sett might be preferable.
4. What is the end result you want?
Again, back to the wrap test. If we get a result of 9, going up to a 10 will give a slightly denser fabric while going down to the 7.5 will give an airier, more drapey fabric. Either can work depending on what you want. If you want placemats you might want a fairly dense material. A sticky yarn, like a mohair blend, will make a lovely stable fabric at a wider sett.
So, there you go, a “few” things to consider when choosing a reed size! Next week we’ll talk about choosing the actual yarn.
Design Your Own Shawl PT 1
I love to teach. I really don’t care what the subject is, just give me a group of people who are interested in learning, tell me what to teach and I’m happy. In fact, I’m on a bit of a high when I teach, I have boundless energy and endless patience. Some, maybe even some in my very own family, might suggest that what I really like about teaching is hearing my own voice. While I freely admit I can, (and do) talk a lot, what I am really interested in is helping my students learn what they want to learn.

*Disclaimer: If you are expecting a technical blog, this isn’t one. This was going to be technical, but it had a mind of its’ own. I *think* the next few blogs will be more technical discussing some of the things to think about when designing a project.
I love to teach. I really don’t care what the subject is, just give me a group of people who are interested in learning, tell me what to teach and I’m happy. In fact, I’m on a bit of a high when I teach, I have boundless energy and endless patience. Some, maybe even some in my very own family, might suggest that what I really like about teaching is hearing my own voice. While I freely admit I can, (and do) talk a lot, what I am really interested in is helping my students learn what they want to learn.

I may not be particularly planned and organized in my daily life, but I’m very organized in my teaching style. I spend a great deal of time thinking about the skills that need to be learned, topics that should be covered and writing a layout that includes time limits. This level of organization then frees me to teach as if I have no schedule. Counter-intuitive I know but it really works. Then there are classes that seem to defy organization. There is no linear way to get from beginning to end, it’s a big circle.

Last weekend I taught a “Design your own Shawl” class for rigid heddle weaving at Gaspereau Valley Fibres. It was one of those “where do I begin?” classes. And to be honest, the first time I have taught such a class. My previous classes have all had very clear steps (how to knit a sock, how to weave a double width blanket, how to weave log-cabin). Continuing with the honesty…I was a smidge anxious about many things the 2 weeks before the class. I had a failed weaving project that absolutely could not fail, a couple knit items on a (self-imposed) deadline and several things added into my normally quiet social life that I deemed important enough that I couldn’t say no. A few times I had to give myself a little lecture, “self, relax, take a deep breath, drink a cup of tea. If everything doesn’t get done, the world will go on.” My other self was a bit like a panicked bunny… “Do this first! No! Not that, this! No no! If you don’t do this first your whole world will end!” The lesson to be learned here is about self-importance. In the grand scheme of things, I’m not that important; if I don’t get things done the world won’t end…in fact it probably won’t even notice! (Don’t get me wrong, I think we are all valuable, myself included, and the things we do do matter, but not everything is a big thing)

But I digress…designing your own shawl. So many things to cover…choosing yarn, choosing the right reed, choosing colours, choosing patterns, calculating warp and weft amounts. And I am far from an expert on any of these topics; fortunately I don’t have to be: there are experts we can and should use. In the case of this class, I had notes and ideas and internet resources for the various topics and simply asked my students what they wanted to learn. In the end we covered all the topics in the morning. We put some of the resources to use over lunch to choose the right yarn and get enough of it and then spent the afternoon warping and beginning to weave.
The class flowed as if I had it perfectly choreographed from beginning to end. And best of all, each student learned exactly what they wanted to learn. I got all my stuff done on time, my failed weaving project is not a failure and I got to practice choosing to be calm!
Mittens had no problem staying calm!
Ps, I’d like to thank my husband and children who took up the slack by cooking, cleaning and not asking for anything while I spent the two weeks weaving and knitting and worrying like a mad-woman! They are awesome and I am so thankful for them!
My Favourite Hoodie
ave wanted a shirt like this my entire life. It’s a South American hoodie, or a Baja, and sometimes called a Drug Rug. I knew when I stared weaving that I would eventually weave one of these. With my resolution to make my own clothes, this year seemed like the right year to give it a try.


I have wanted a shirt like this my entire life. It’s a South American hoodie, or a Baja, and sometimes called a Drug Rug. I knew when I stared weaving that I would eventually weave one of these. With my resolution to make my own clothes, this year seemed like the right year to give it a try.
Usually these shirts are made of cotton. In South America that might make sense, but in Canada, in January, wool is a much better option: Briggs and Little wool.
I really like Briggs and Little. First, the sheep are raised in the Maritimes. Second, the wool is milled in New Brunswick, neighbour to my home in Nova Scotia. It’s a rustic yarn; some people find it a little scratchy. (If that’s you, try rinsing it in your favourite hair conditioner…it really helps.) Finally, I love Briggs and Little because it comes in so many incredible colours! It wasn’t hard to choose my colours.

Winding the warp is rather satisfying. All the threads look so straight and organized and it gives an idea of what the finished fabric will look like. Winding onto the loom went beautifully (only 1 mistake) and threading was straight forward. At 10 ends per inch, it was pretty quick too.

Initially I had planned the fabric as a plain weave but before threading I decided that a twill would be nicer. I was also a little concerned that plain weave might not have as much stability as twill for cutting and sewing.
It may seem like a small change, but changing from plain weave to twill makes for some significant changes. The biggest being how much weft is needed. Plain weave would mean 10 picks per inch, twill meant between 14 and 16…that’s half again as much weft required than I had initially calculated. I had to put the project on pause while I waited for more yarn to arrive. Also, and much less problematic, was the arrangement of the zigzag of the twill. Had I decided on this twill before winding the warp, I could have lined up the grey and black stripes a little better in the zigzag.

I’m getting much braver about cutting my weaving! I’ve also stopped zigzagging the cut edges. It caused the fabric to stretch a little and made the edges wavy. I’m still concerned about the cut edges unravelling after sewing though. I’m also trying to finish seams without too much bulk. Everything I’ve sewn, I’ve tried something different for the seams. I think this shirt is the best yet. It fits with my philosophy of “as pretty on the inside as the outside” and has virtually no bulk. I’m not so great at straight seams yet so this might actually be prettier on the inside than the outside! Each seam is sewn with a straight seam, and finished with an over-locked zigzag. Finally, I bought some ½” black sewing tape and sewed that over the seam.

I made a few changes to the pattern (are you surprised?). The hood was supposed to be lined and the front piece and pocket should be in a contrasting fabric. Not being a sewer I ran into a few problems. The front piece was a challenge to sew on, partly because it was supposed to be 2 pieces and I had only 1. So I made it up! Looks ok, but I will learn for the next time. I love my hoodie though, it’s my new favourite item of clothing. I see many more of these in my future! I also see variations…zippered jacket, a little more tailored, contrasting cuffs, lined with something soft and warm…
If you are wanting to make this hoodie, you can find the sewing pattern from www.interweave.com . The pattern is called “Baja Hoodie”