
Sampling
I’ve been asked to design a pattern for an up coming Interweave publication. I am, needless to say, very excited, a little proud and quite nervous. They have published several of my patterns already but this is different. The previous ones I’ve sent pictures of finished projects and they either say yes or no.


the yarn matches my mug!
I’ve been asked to design a pattern for an up coming Interweave publication. I am, needless to say, very excited, a little proud and quite nervous. They have published several of my patterns already but this is different. The previous ones I’ve sent pictures of finished projects and they either say yes or no. This one they actually contacted me(!) and asked if I would design something to certain measurements with yarn from a company of their choosing (I still got to choose the yarn). I have approximately 2 months to write a brief article, send in three reports (one of which must show the sampling process) weave the project, write the pattern and get the finished item back to Interweave.

The wrap test
I received the yarn this week and began sampling. It’s beautiful yarn! Wool with just a touch of silk, super soft and with lots of spring. I’ve never really sampled before. You know how I feel about sampling…I know its important, I just can’t convince myself to do it. However, that is part of this project, so sample I must! It’s been a valuable learning experience.
I wove a number of samples…if I’m going to do something, I’m going to do it well. Sample #1 was 4 up 4 down honeycomb, 3/1 lace, 3 up 3 down honeycomb, and some waffle weave variations. Sample #2 was on a smaller reed and included a 3 up 3 down honeycomb, a variation on honeycomb, and a variation on waffle weave. Sample #3 was all plain weave with colour patterning and finally, sample #4 was 2 heddles to weave twill.


Here’s what I learned:
1. Weaving without sampling is like cooking without a recipe. It might turn out ok, but you might end up with a disaster!

2. Again, with the cooking analogy, a little spice is good, too much is not! The variegated yarn is beautiful but too much and all patterning is lost (this is supposed to be a log cabin pattern) Using a strong solid helps anchor the busyness of variegated yarn.
3. Just like in life, sometimes the rules change. I did the wrap test and determined that the 10 dent should be just fine. But it’s not for honeycomb; the back floats are much to long and the finished fabric is not what I had anticipated. Switch to a 12.5 dent and the floats are smaller and the fabric so squishy soft! But, use the 12.5 dent for plain weave and the bounce of the yarn is completely eliminated.

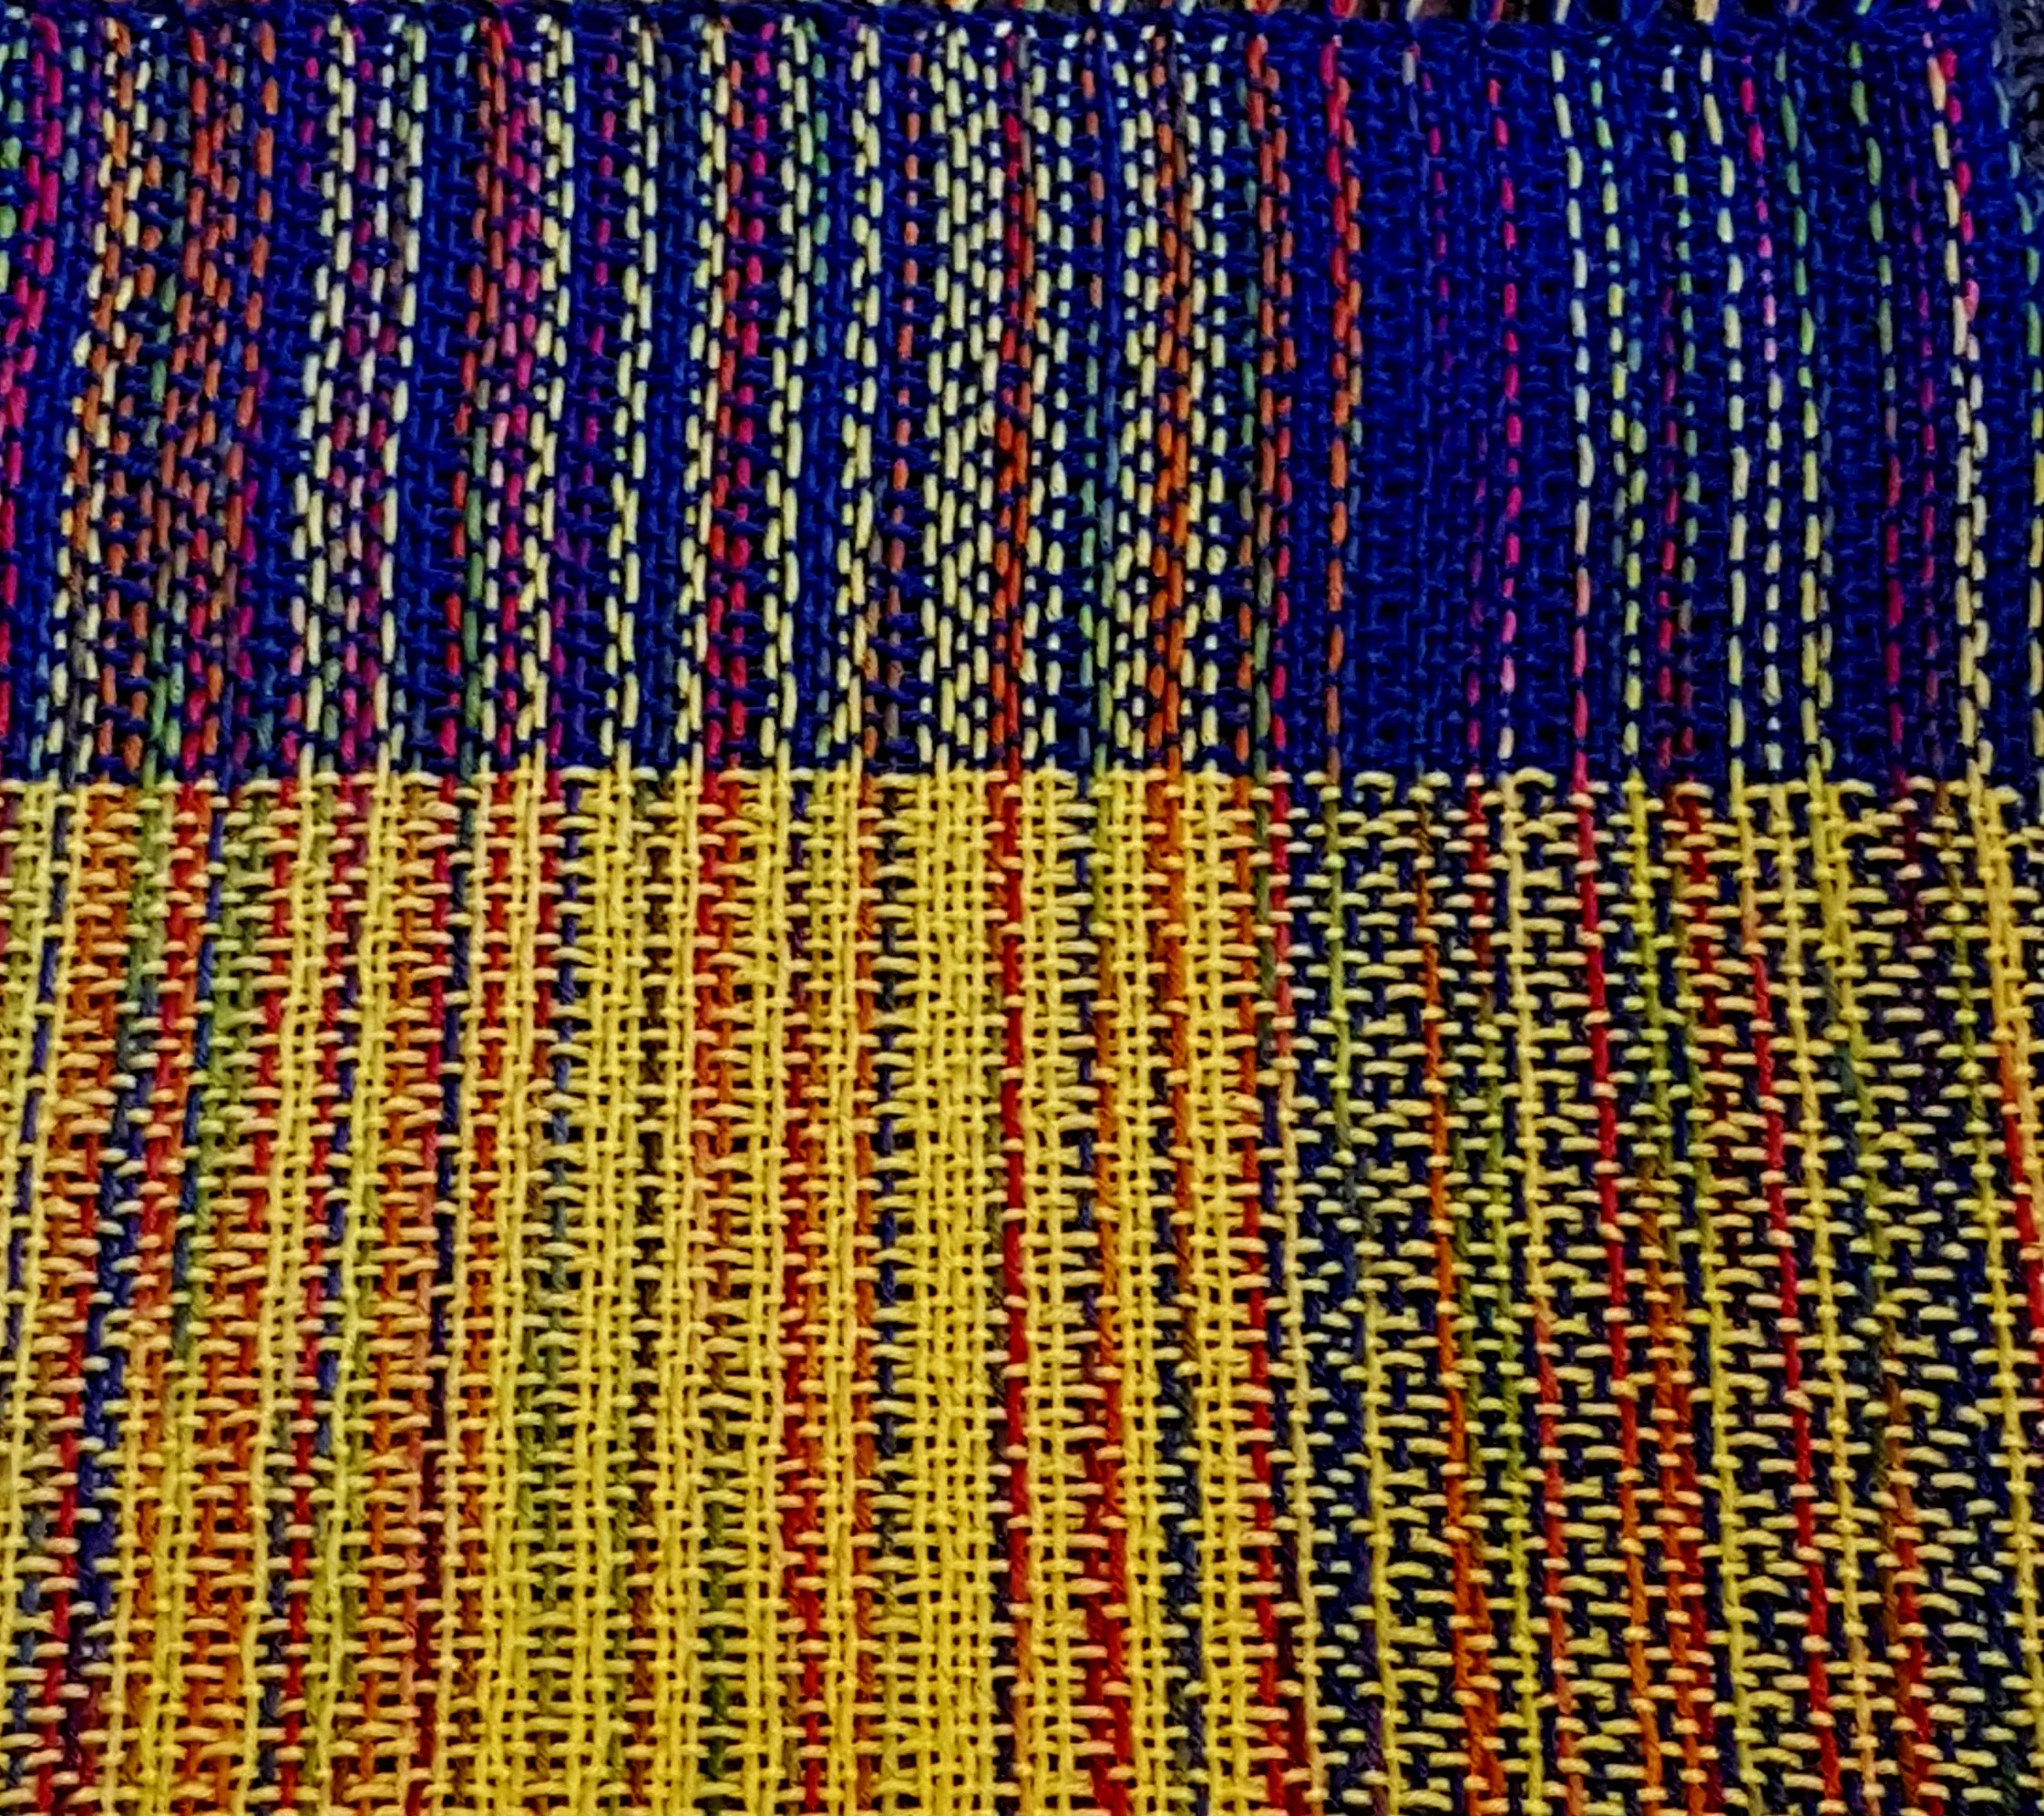
4. Again, just like in life, sometimes things are hidden until the end and we just need to faithfully persevere. Unfortunately I forgot to take a picture of the twill on the loom. But you could not see the pattern at all. Even after soaking and drying the pattern was barely visible (actually, I was a little depressed as this was the most time consuming and I had the highest hopes.) But after pressing the pattern does show! (and you can see lesson 2 in action…see how the pattern shows best with the yellow warp and blue weft. This should be done with a solid warp and variegated weft)
So, am I a sampling convert? Probably not. It has its place and I will certainly consider sampling for large projects or projects that need to meet particular specifications. For the most part though I weave for my own pleasure and if something doesn’t turn out as planned I’m ok with it.
Trying to Create Order
My family likes to tease me. One of their favourite topics is my cooking. Don’t get me wrong, I’m a good cook, they like my food, but they also know they will never ever get the same dish twice! My cooking consists of choosing a couple ingredients I want to use, finding multiple recipes then taking a little from this one and a little from that one and replacing this with that… It drives my kids a bit batty.


My family likes to tease me. One of their favourite topics is my cooking. Don’t get me wrong, I’m a good cook, they like my food, but they also know they will never ever get the same dish twice! My cooking consists of choosing a couple ingredients I want to use, finding multiple recipes then taking a little from this one and a little from that one and replacing this with that… It drives my kids a bit batty. They want to make something I regularly make and ask for a recipe. I can tell them how to make it but I certainly don’t have a recipe or even consistent measurements! They’ve mostly given up asking. (They go to the recipe book my M-I-L put together instead!)
I weave the same way. I’ve only woven someone else’s pattern once (and even then I changed it). One of the things I find myself saying over and over at work is “patterns are just guidelines”. Now, if you want something exactly like the pattern you do need to follow the pattern exactly. But even something as simple as changing the fibre or colour can have a significant impact on the finished project.
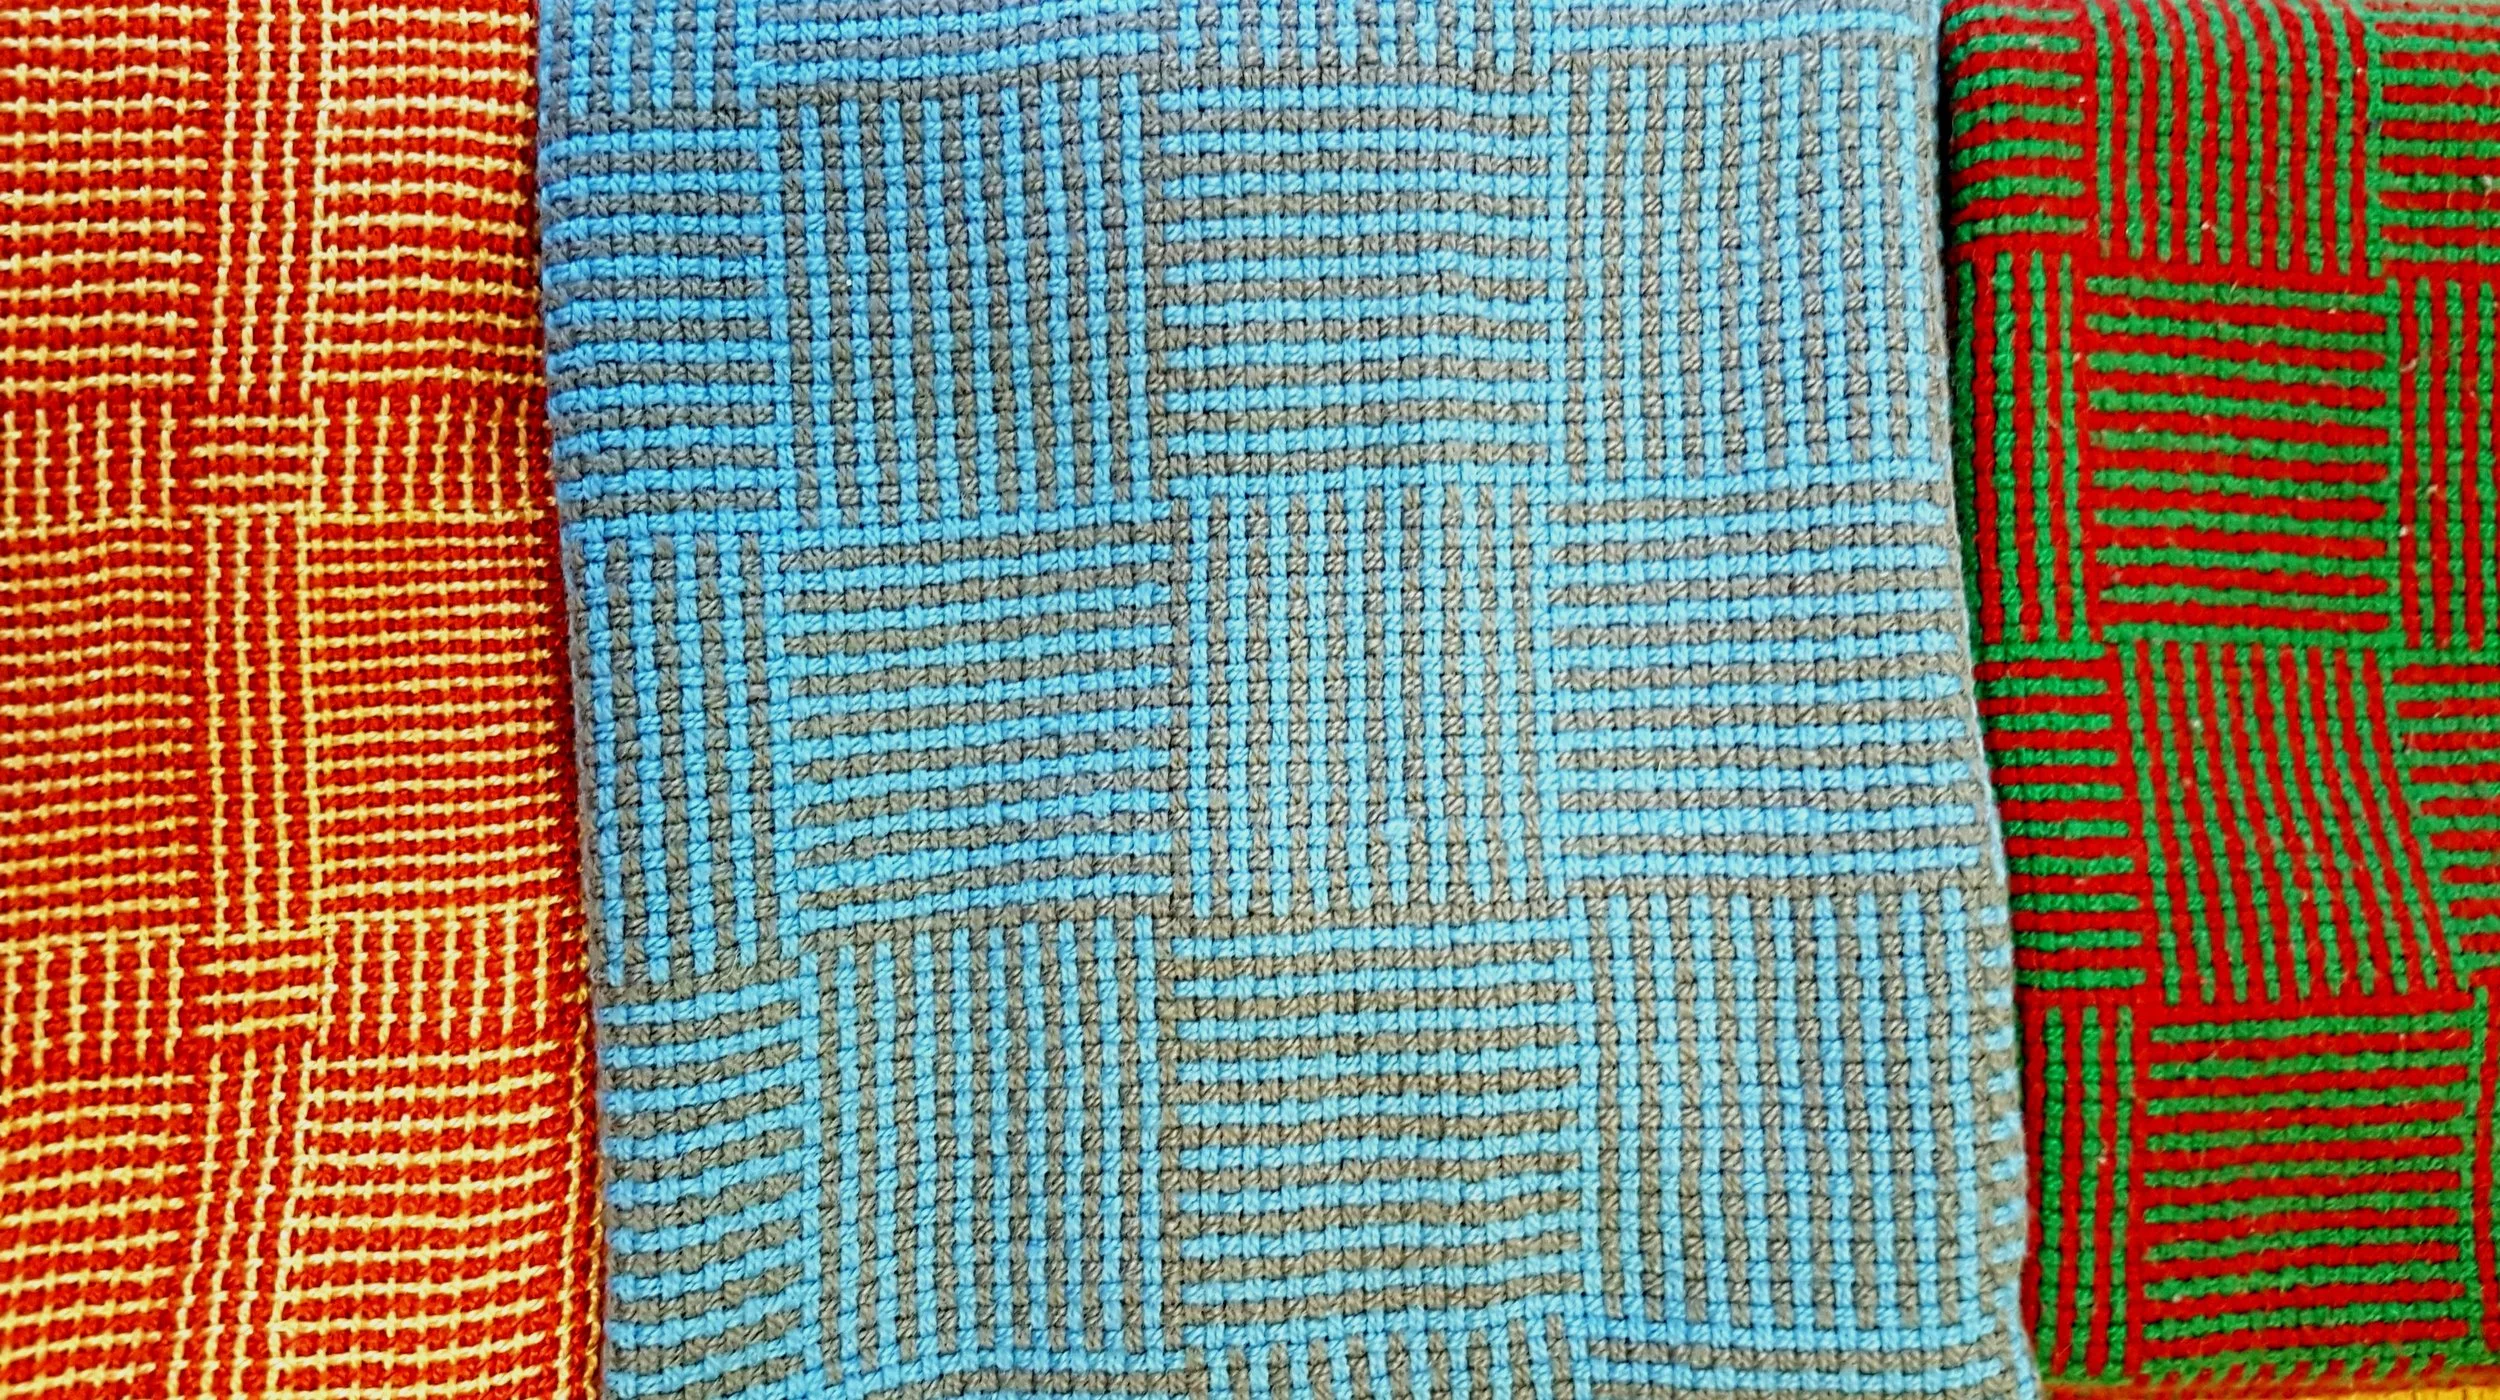
Three very different Log Cabins
There are pros and cons about weaving this way. Not being tied to a pattern gives you freedom to use whatever materials you have on hand…it also means that what you pictured in your head might not be what you get. Too much choice can lead to weaving paralysis (a condition that occurs when you have so many choices you get overwhelmed and quit before you ever get started or alternatively, spend the whole day putting different combinations together, thus accomplishing nothing, it’s a thing!).

I’ve had to pull myself together a bit though, and I’m sure it will be good for me in the long run. In a few weeks I will be teaching a “Design your own Shawl” class. I’m really excited about this; I love to teach, I love to inspire people and I love seeing people who thought they “couldn’t possibly” realize that yes they can!
Teaching requires order. Over the last few weeks I’ve been creating some order in my brain. Thinking through the weaving process from beginning to end. I can clearly see the end, but there are many different ways to get there. Should we start with yarn choice? Or available reeds? Or with what the desired end result is? Each of these is a viable starting point. At the same time, each can also be the wrong starting point. The more I think the more I realize how complicated weaving really is. And I start getting overwhelmed. And then I see all I have woven and I think “just do it, it’s only string!”
And it is only string. A weaving failure isn’t life altering. There are no long term effects. I’m not even sure that weaving failures exist. It’s really just learning what not to do. And if, in the end, your finished project holds together, that is success. You may hate it, but hold onto it because someday a friend will see it and absolutely love it!

Variety is the Spice of Life
I love weaving. I spend as much time as I can weaving. Sometimes I batch cook just so I don’t have to stop to cook. My family thinks I’m a little obsessed (they’ve never actually said it, but I can see it in their eyes). Occasionally though, I take a break…and turn to knitting, with the same obsessive zeal.

I love weaving. I spend as much time as I can weaving. Sometimes I batch cook just so I don’t have to stop to cook. My family thinks I’m a little obsessed (they’ve never actually said it, but I can see it in their eyes). Occasionally though, I take a break…and turn to knitting, with the same obsessive zeal.
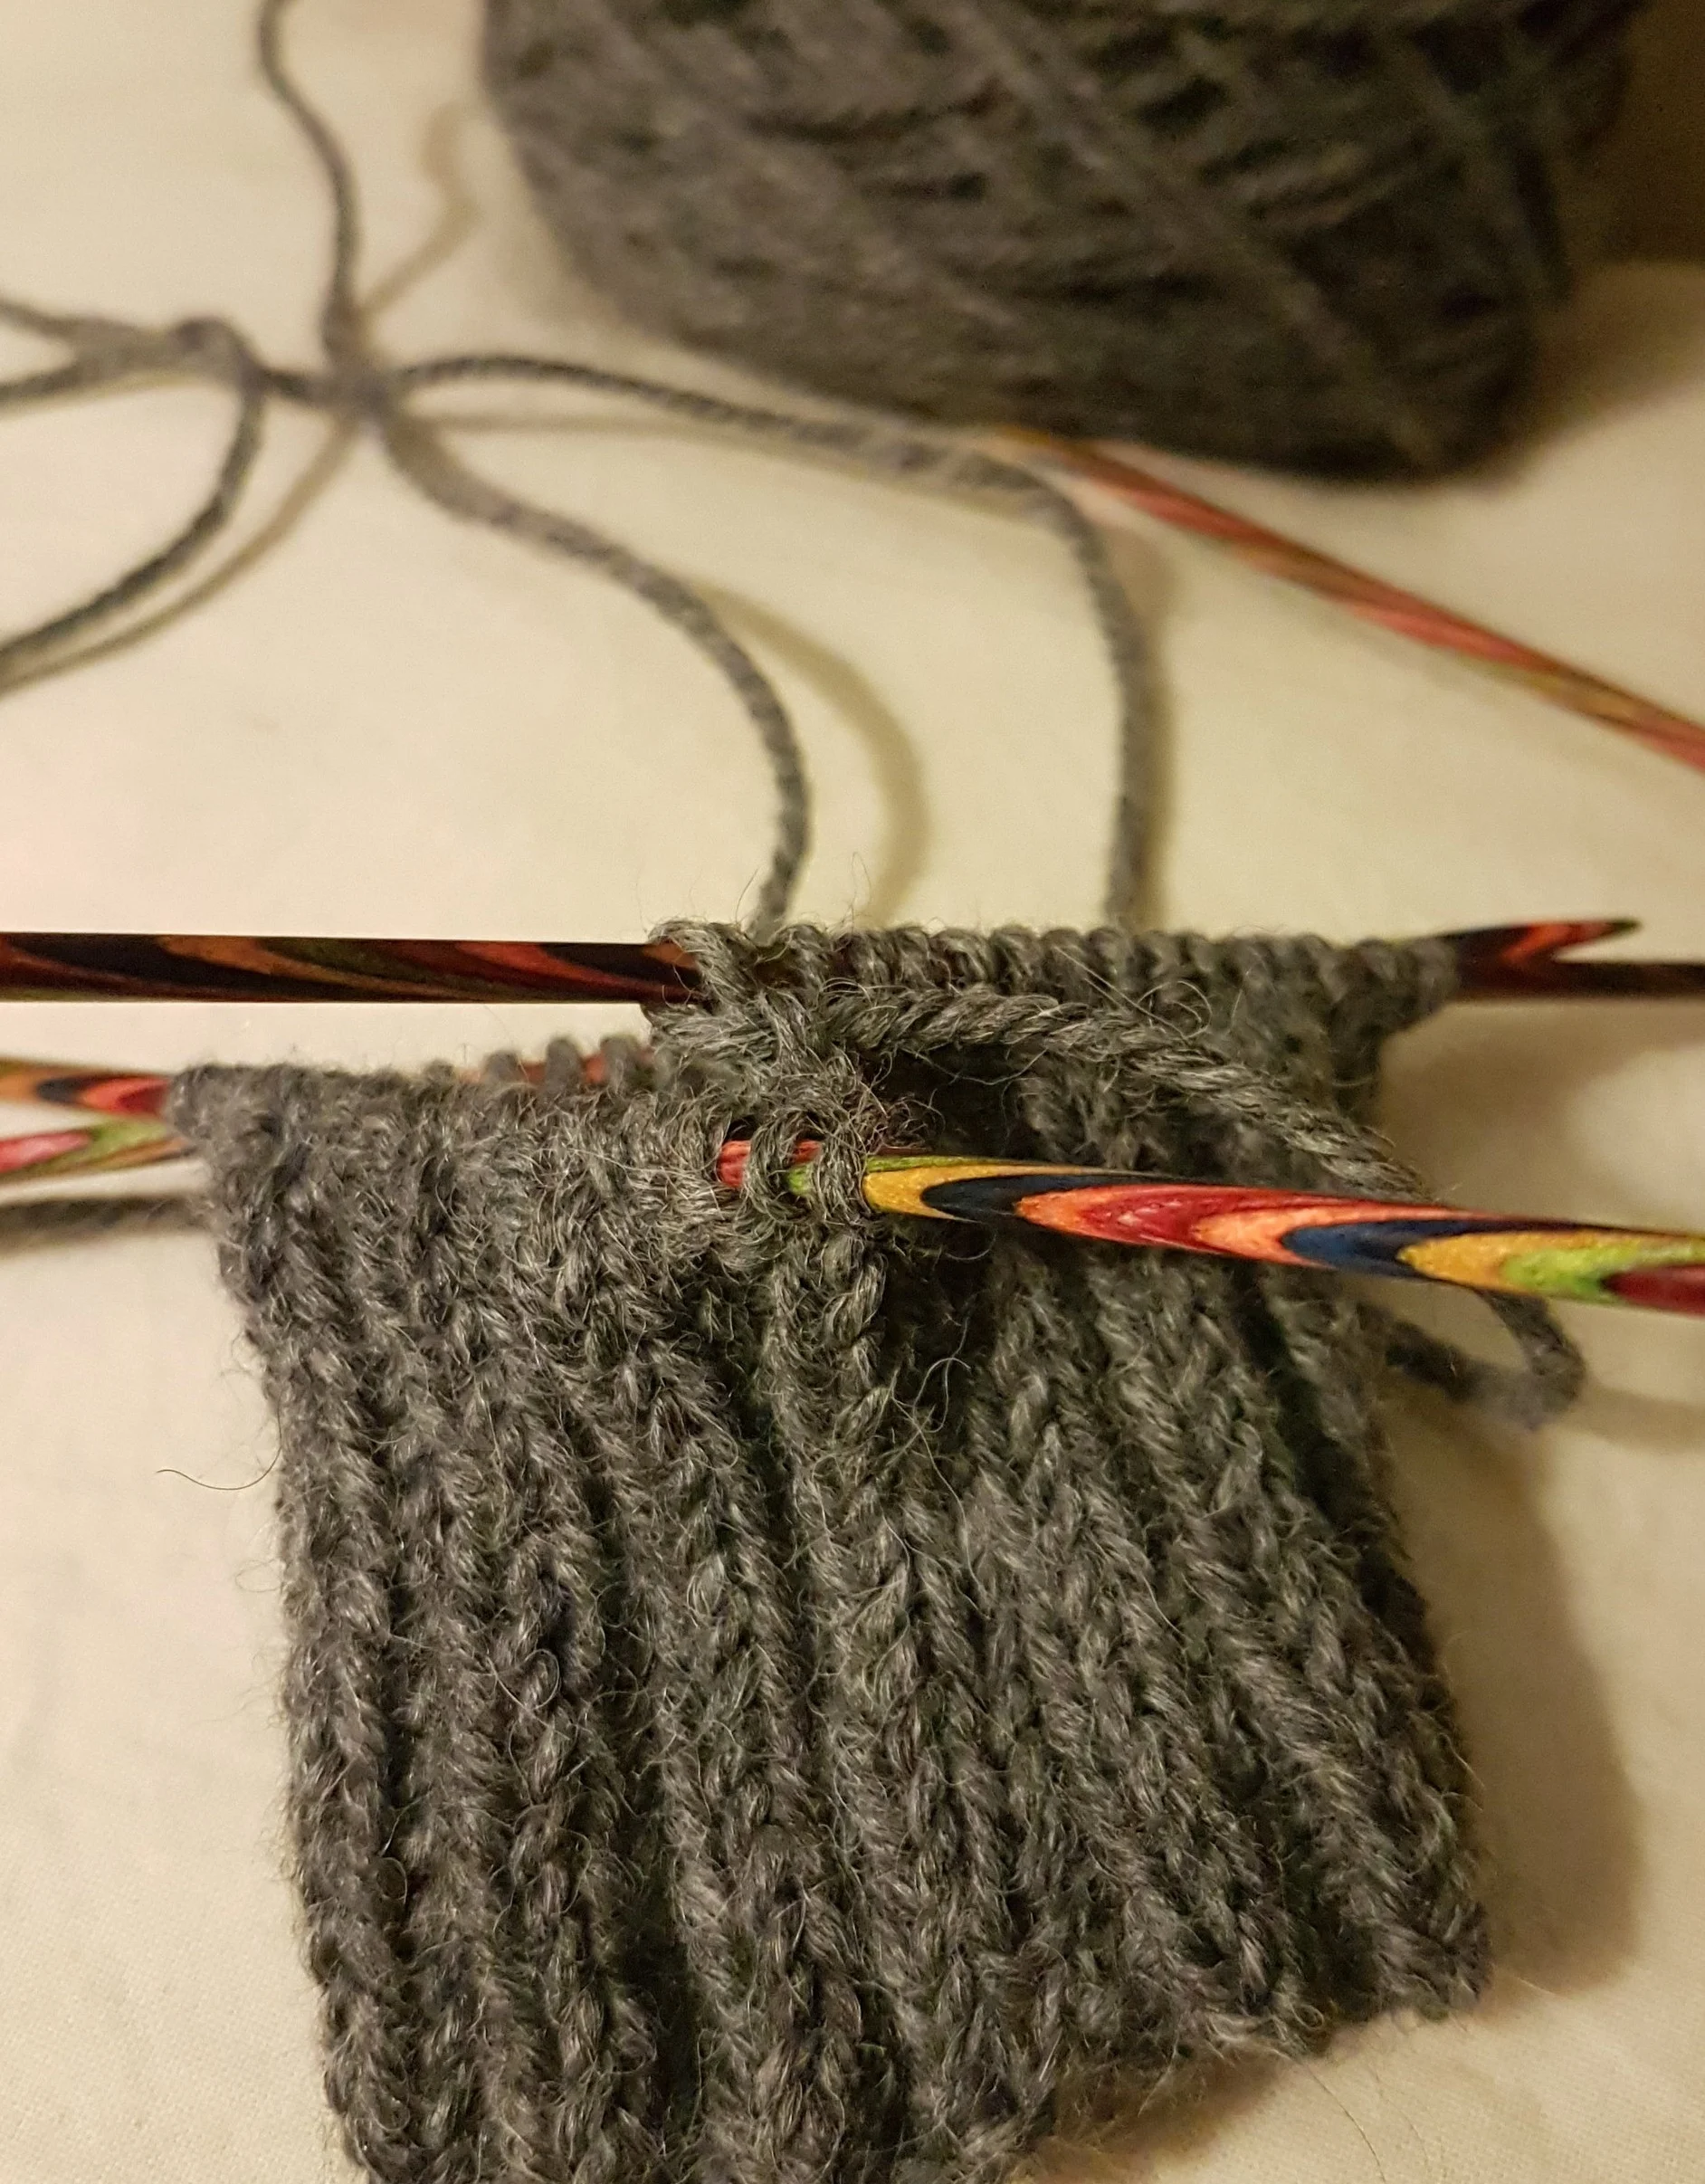
Last week my husband asked me to knit him a pair of mittens. This request is actually epic. I’ve been knitting for over 20 years and in all that time he has never asked me to knit him anything. A few years back I did knit him a pair of socks. But if I remember correctly I rhapsodized over the yarn, (Herriot Fine), said what a great sock yarn it was, how he needed a pair of socks, that I’d never knit him anything and surely that was wrong. He finally, just to hush me, said I could make him a pair of socks. (Yay! He pays for the yarn!) But, back to mitts and him asking, I jumped on it!

I wanted something super warm, but not bulky. That meant probably 2 colours. I also needed a design that looked sophisticated…something a particular accountant type might want to wear (symmetry and clean lines are important). I, of course, decided to design my own. A nice, subtle pinstripe look (sophisticated and clean) and Ultra Alpaca (super warm)
Ultra Alpaca usually uses a 5mm needle, I cast on with 3.75mm. I really wanted a smooth dense mitt. A vertical stripe takes longer to knit than horizontal, but also gives double density as one yarn is always carried behind. It was a bit of a challenge to shape the thumb gusset. The increases are worked over 2 rows, 1 for the main colour, one for the contrasting colour. I think it looks beautiful! My husband good naturedly tried on the mitten many times so I could make sure the fit was just right.

Mitten 1 and Mitten 2
In the end, the first mitt was just a little off. Second mitt is perfect! I’m currently in the process of test knitting the pattern, need to make sure it is perfect before it will be available.

My little corner of the living room
It’s great to have a passion, something that you love to do. It’s also important to take breaks. When I weave I am closed in my weaving room down in the basement. It’s quiet and peaceful and I can really focus on what I’m doing. On the other hand it so easy (maybe too easy) to block out the rest of the world. Knitting brings me back up into the main living area of our house. The place where everyone else hangs out most of the evening. As much as I love weaving, it is good to take a break.
One Goal Achieved!
n my first post this year I said I wanted to make the clothes I needed. Here’s the first! Consistent with my nature, I think I tackled the hardest one first. Not on purpose. I really, truly planned to start easy and work my way up to more and more complicated, but I got impatient! At the very end of December I warped both my looms; my rigid heddle with a lovely wool silk blend ( Rustic Silk by Ella Rae) for a shirt and my floor loom with some Briggs and Little Sock for a hoodie. The hoodie was supposed to be the easy project. But I ran out of yarn (that’s another story, I’ll tell you about it another time!).


In my first post this year I said I wanted to make the clothes I needed. Here’s the first! Consistent with my nature, I think I tackled the hardest one first. Not on purpose. I really, truly planned to start easy and work my way up to more and more complicated, but I got impatient! At the very end of December I warped both my looms; my rigid heddle with a lovely wool silk blend ( Rustic Silk by Ella Rae) for a shirt and my floor loom with some Briggs and Little Sock for a hoodie. The hoodie was supposed to be the easy project. But I ran out of yarn (that’s another story, I’ll tell you about it another time!).
Back to my shirt. I warped 4 yards, wove as much as I possibly could, slightly fulled the fabric (also known as felting on purpose) and ended up with just about 3 yards x 28” of gorgeous fabric. I admired it for a day or two while I wrestled with myself…find a pattern and just do it or be patient and get a little more experience. (The patience battle was lost before it ever began but waiting made it look like I was really trying to be disciplined. I did at least buy a pattern, initially I seriously contemplated making my own, so there is that!)


I scoured Pinterest and found exactly the shirt I was looking for. Flannel style, proper collar, hood option, full button up or half button option, long sleeve, short sleeve…the options are numerous. The pattern is called “Julianne” and I got it from The Do It Better Yourself Club (DIBY Club…they have a facebook group and can be followed on Instagram) Just so you know, buying a pattern online, printing it at home on a home printer and taping it all together is a lot of work. Worth it if you want it right away though! I spent an evening (and maybe early morning) printing, taping and cutting the pattern.

I wanted the full collar but after creatively laying out my pieces had to settle for the half collar. This is where planning and sampling are so important. I did actually weave a sample (!) but finished it differently. My fulling reduced the yardage significantly. Also, had I purchased the pattern before warping I would have known exactly how much fabric I needed instead of guessing. Even so, the cuffs were cut across the grain instead of with the grain and my inside yoke is two pieces not one.

And sewing! Here I really did slow down. My impulse is to sew until I’m done. (Sleep is definitely over-rated). I even sewed a few scraps first to see how the fabric would sew. For Christmas this year I got this fabulous kits with numerous sewing machine feet, one of which was a walking foot. Oh. My. Goodness. What a difference! The seams went together beautifully and the pattern matched. If you are tempted even a little to sew your weaving, get a walking foot. Also, the overcast foot! Amazing! Check out these seams!! Had high hopes for the rolled hem foot but my fabric was too thick. I sewed slowly and carefully. One thing about handwovens, you don’t want to have to pick a seam out. I did have one seam to rip out…sometimes instructions are confusing. I was surprised at how easy the sewing went together. I’m sure it is thanks to a great pattern…I highly recommend it. They even have videos if you need extra help (no, I’m not being paid to advertise).


Choosing buttons was fun! I took my shirt to work and laid out all the possibilities. After thinking I wanted something fancy, I ultimately choose the plain and simple. Square fit with the pattern and fancy was too much. Button holes were hard! I couldn’t use my button hole foot because it wouldn’t slide on the fabric. But if you are close enough to me to see my button holes clearly you are too close!
Over all, I’m really pleased with it! Cuffs need some work…on the next one, these ones are staying put.
Inspiration is All Around
You know you weave too much when you see weaving inspiration everywhere! I was on vacation recently. It was lovely: hot, sunny and chock full of inspiration. Mayan ruins, waves, the silky smoothness of sting rays, the exquisite patterning on the shell of a turtle. I’ve come home with so many new ideas that I hardly know where to begin.

You know you weave too much when you see weaving inspiration everywhere! I was on vacation recently. It was lovely: hot, sunny and chock full of inspiration. Mayan ruins, waves, the silky smoothness of sting rays, the exquisite patterning on the shell of a turtle. I’ve come home with so many new ideas that I hardly know where to begin.
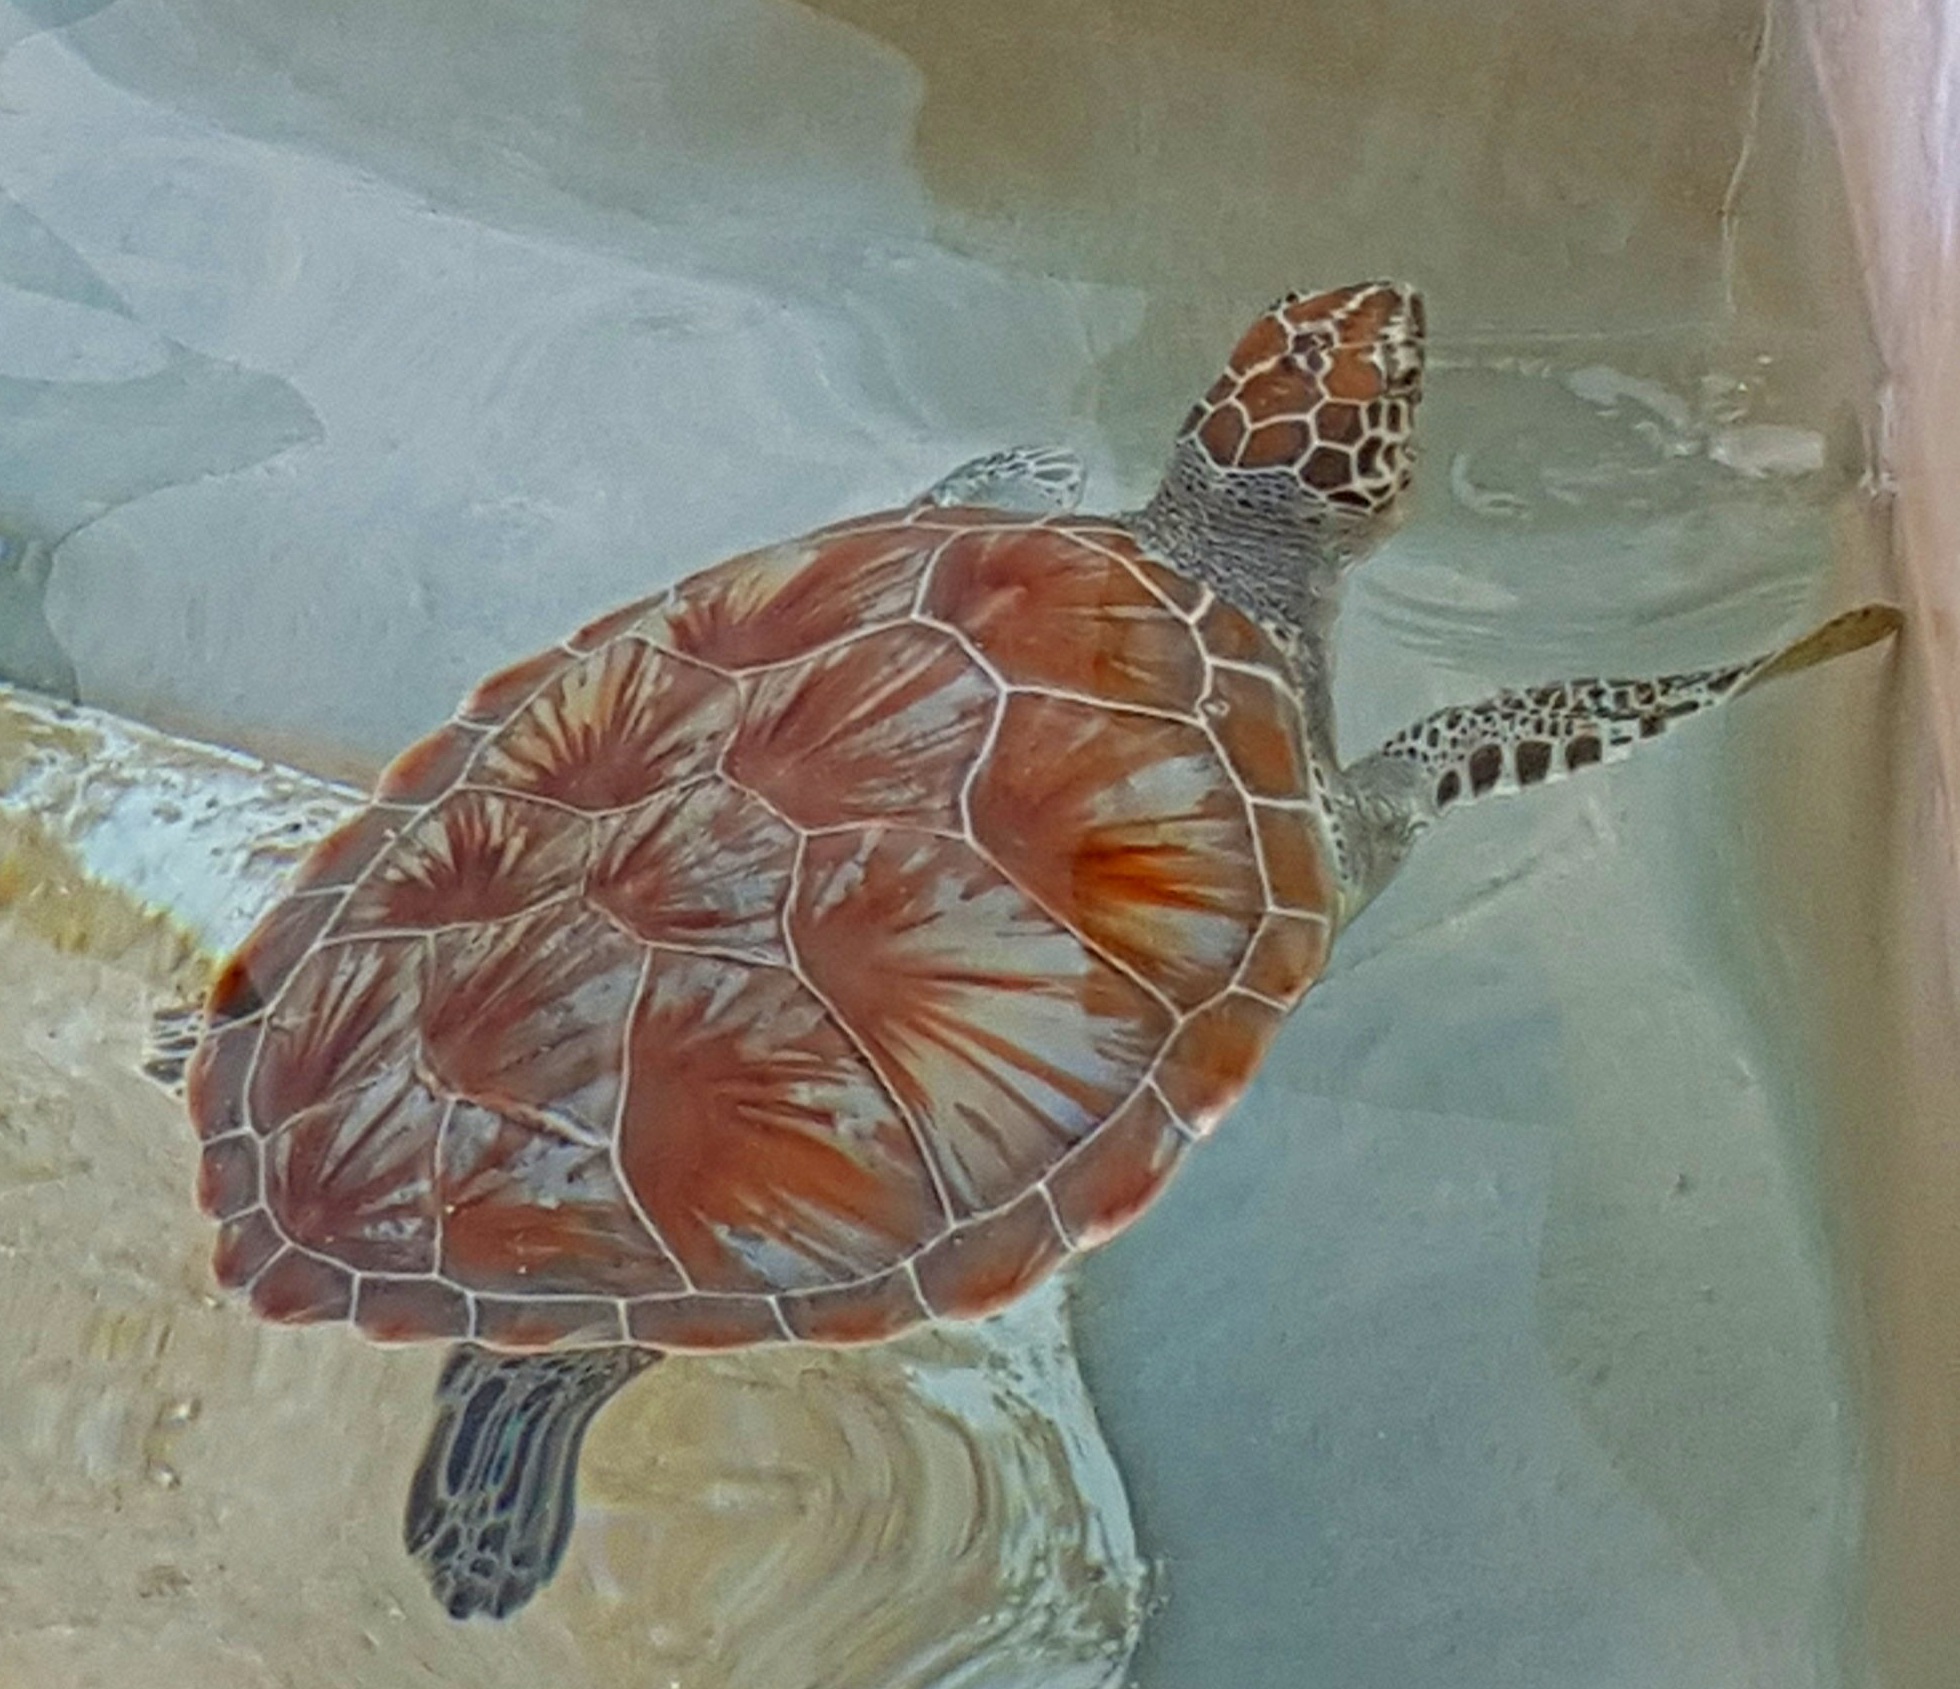
That’s what I love about weaving, and especially rigid heddle weaving. I can look at everyday things and see how the colours and patterns can be worked into weaving patterns. I didn’t have my loom with me (I’m seriously considering a flip loom for future vacations) but I spent happy hours on the beach imagining how to weave a turtle shell pattern and thinking about combining the symmetry of the Mayan temples with lace “vines”. I wonder if chenille would feel as soft as sting rays?
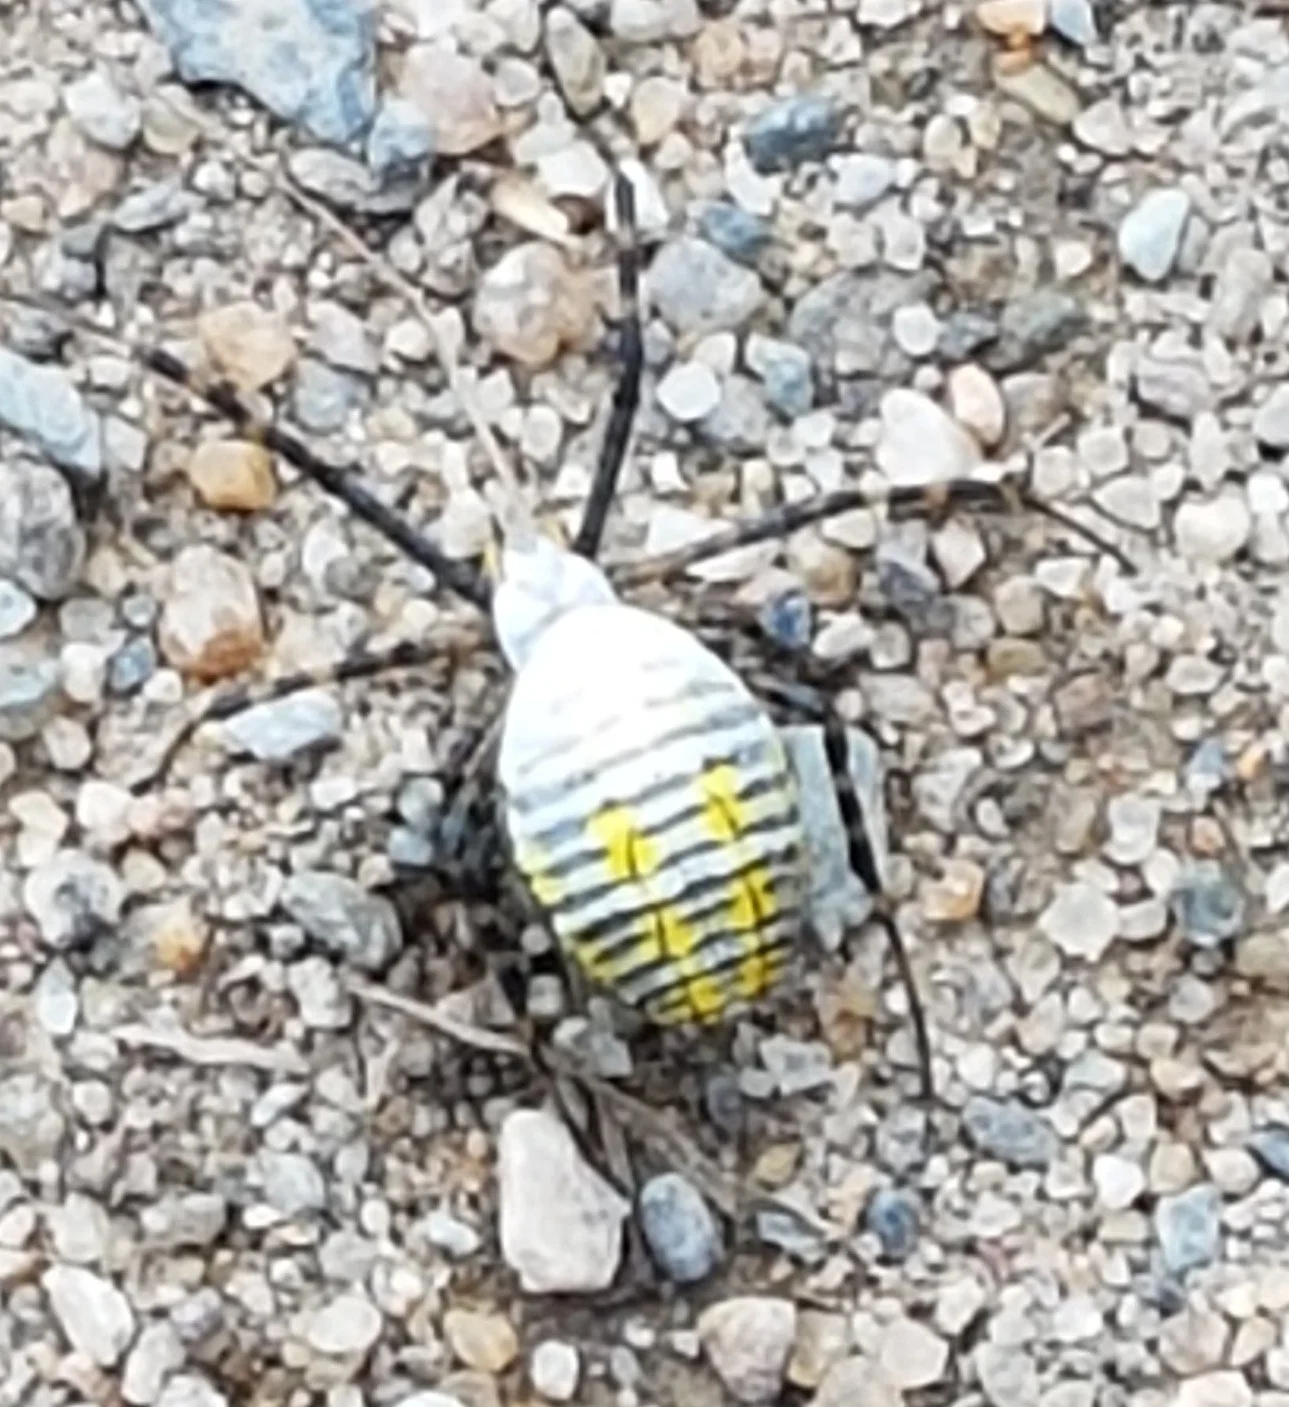
Inspiration is all around us, we just need to look. My camera is my best friend. I see a colour combination I like, I take a picture. I see an interesting pattern I take a picture. A cityscape…take a picture. I have pictures of flowers (how can I weave a Queen Anne's lace?), spiders (check out the pattern on her back) seaweed (what an amazing colour).


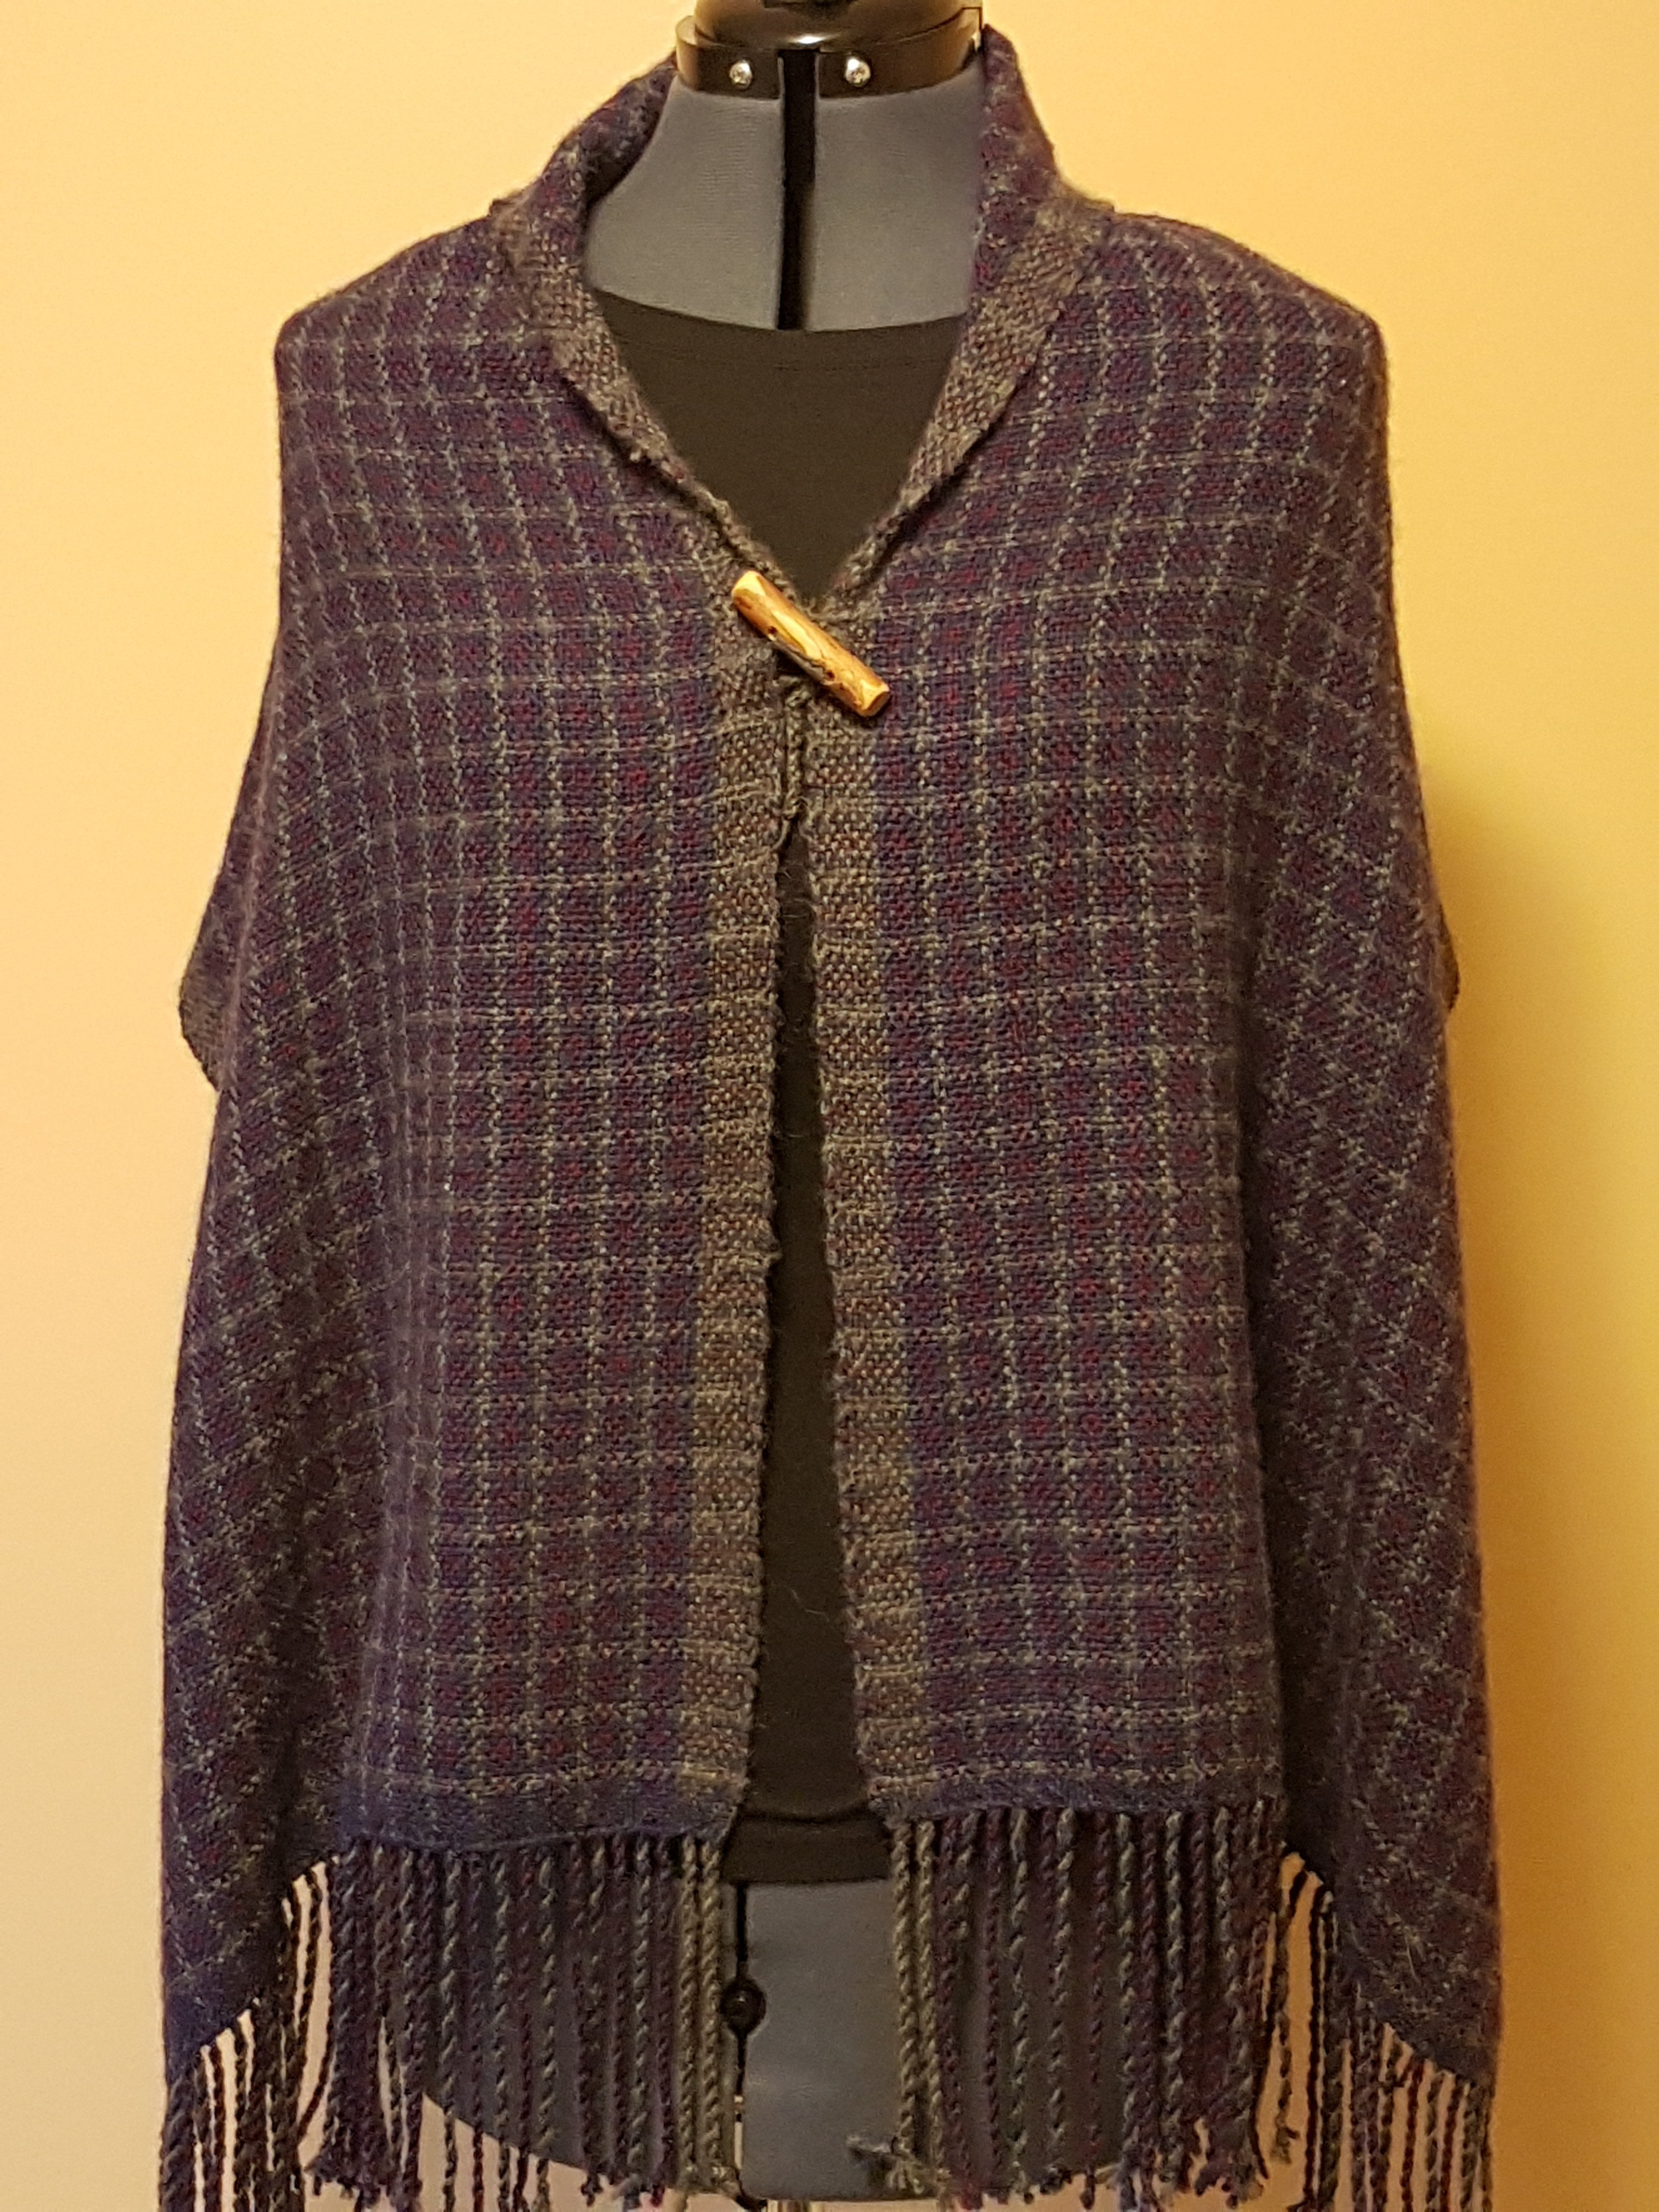
Weaving is about creating something beautiful and useful, but it also about creating art. Taking what we see in nature or man made objects and bringing them into our art. The pictured scarf was made before we left, but it so beautifully shows the Mayan ruins. I’ll make another one…richer in colour and texture, showing the deep greens of the jungle that so quickly over runs anything man can build, combined with the structure and order that man attempts to bring to everything.
New Year, New Goals
One day I looked in my closet and my drawers and realized how many clothes I had. I decided to stop buying clothes. I figured if I couldn’t make it I didn’t really need it. I made a few exceptions…jeans and cashmere sweaters (both from our local second hand shop) and underwear (always new!) This was about three years ago. Last year around Christmas I gave in and bought a few things because they were so soft and warm. I love them, wear them lots but ultimately, I’m disappointed because they were intentionally designed to wear out.
One day I looked in my closet and my drawers and realized how many clothes I had. I decided to stop buying clothes. I figured if I couldn’t make it I didn’t really need it. I made a few exceptions…jeans and cashmere sweaters (both from our local second hand shop) and underwear (always new!) This was about three years ago. Last year around Christmas I gave in and bought a few things because they were so soft and warm. I love them, wear them lots but ultimately, I’m disappointed because they were intentionally designed to wear out. Did you know the fashion industry has invented micro-seasons and bring out a new line of clothing every week?! I don’t believe everything I read on the internet, but you might find this article interesting: http://www.huffpost.com/entry/5-truths-the-fast-fashion_b_5690575

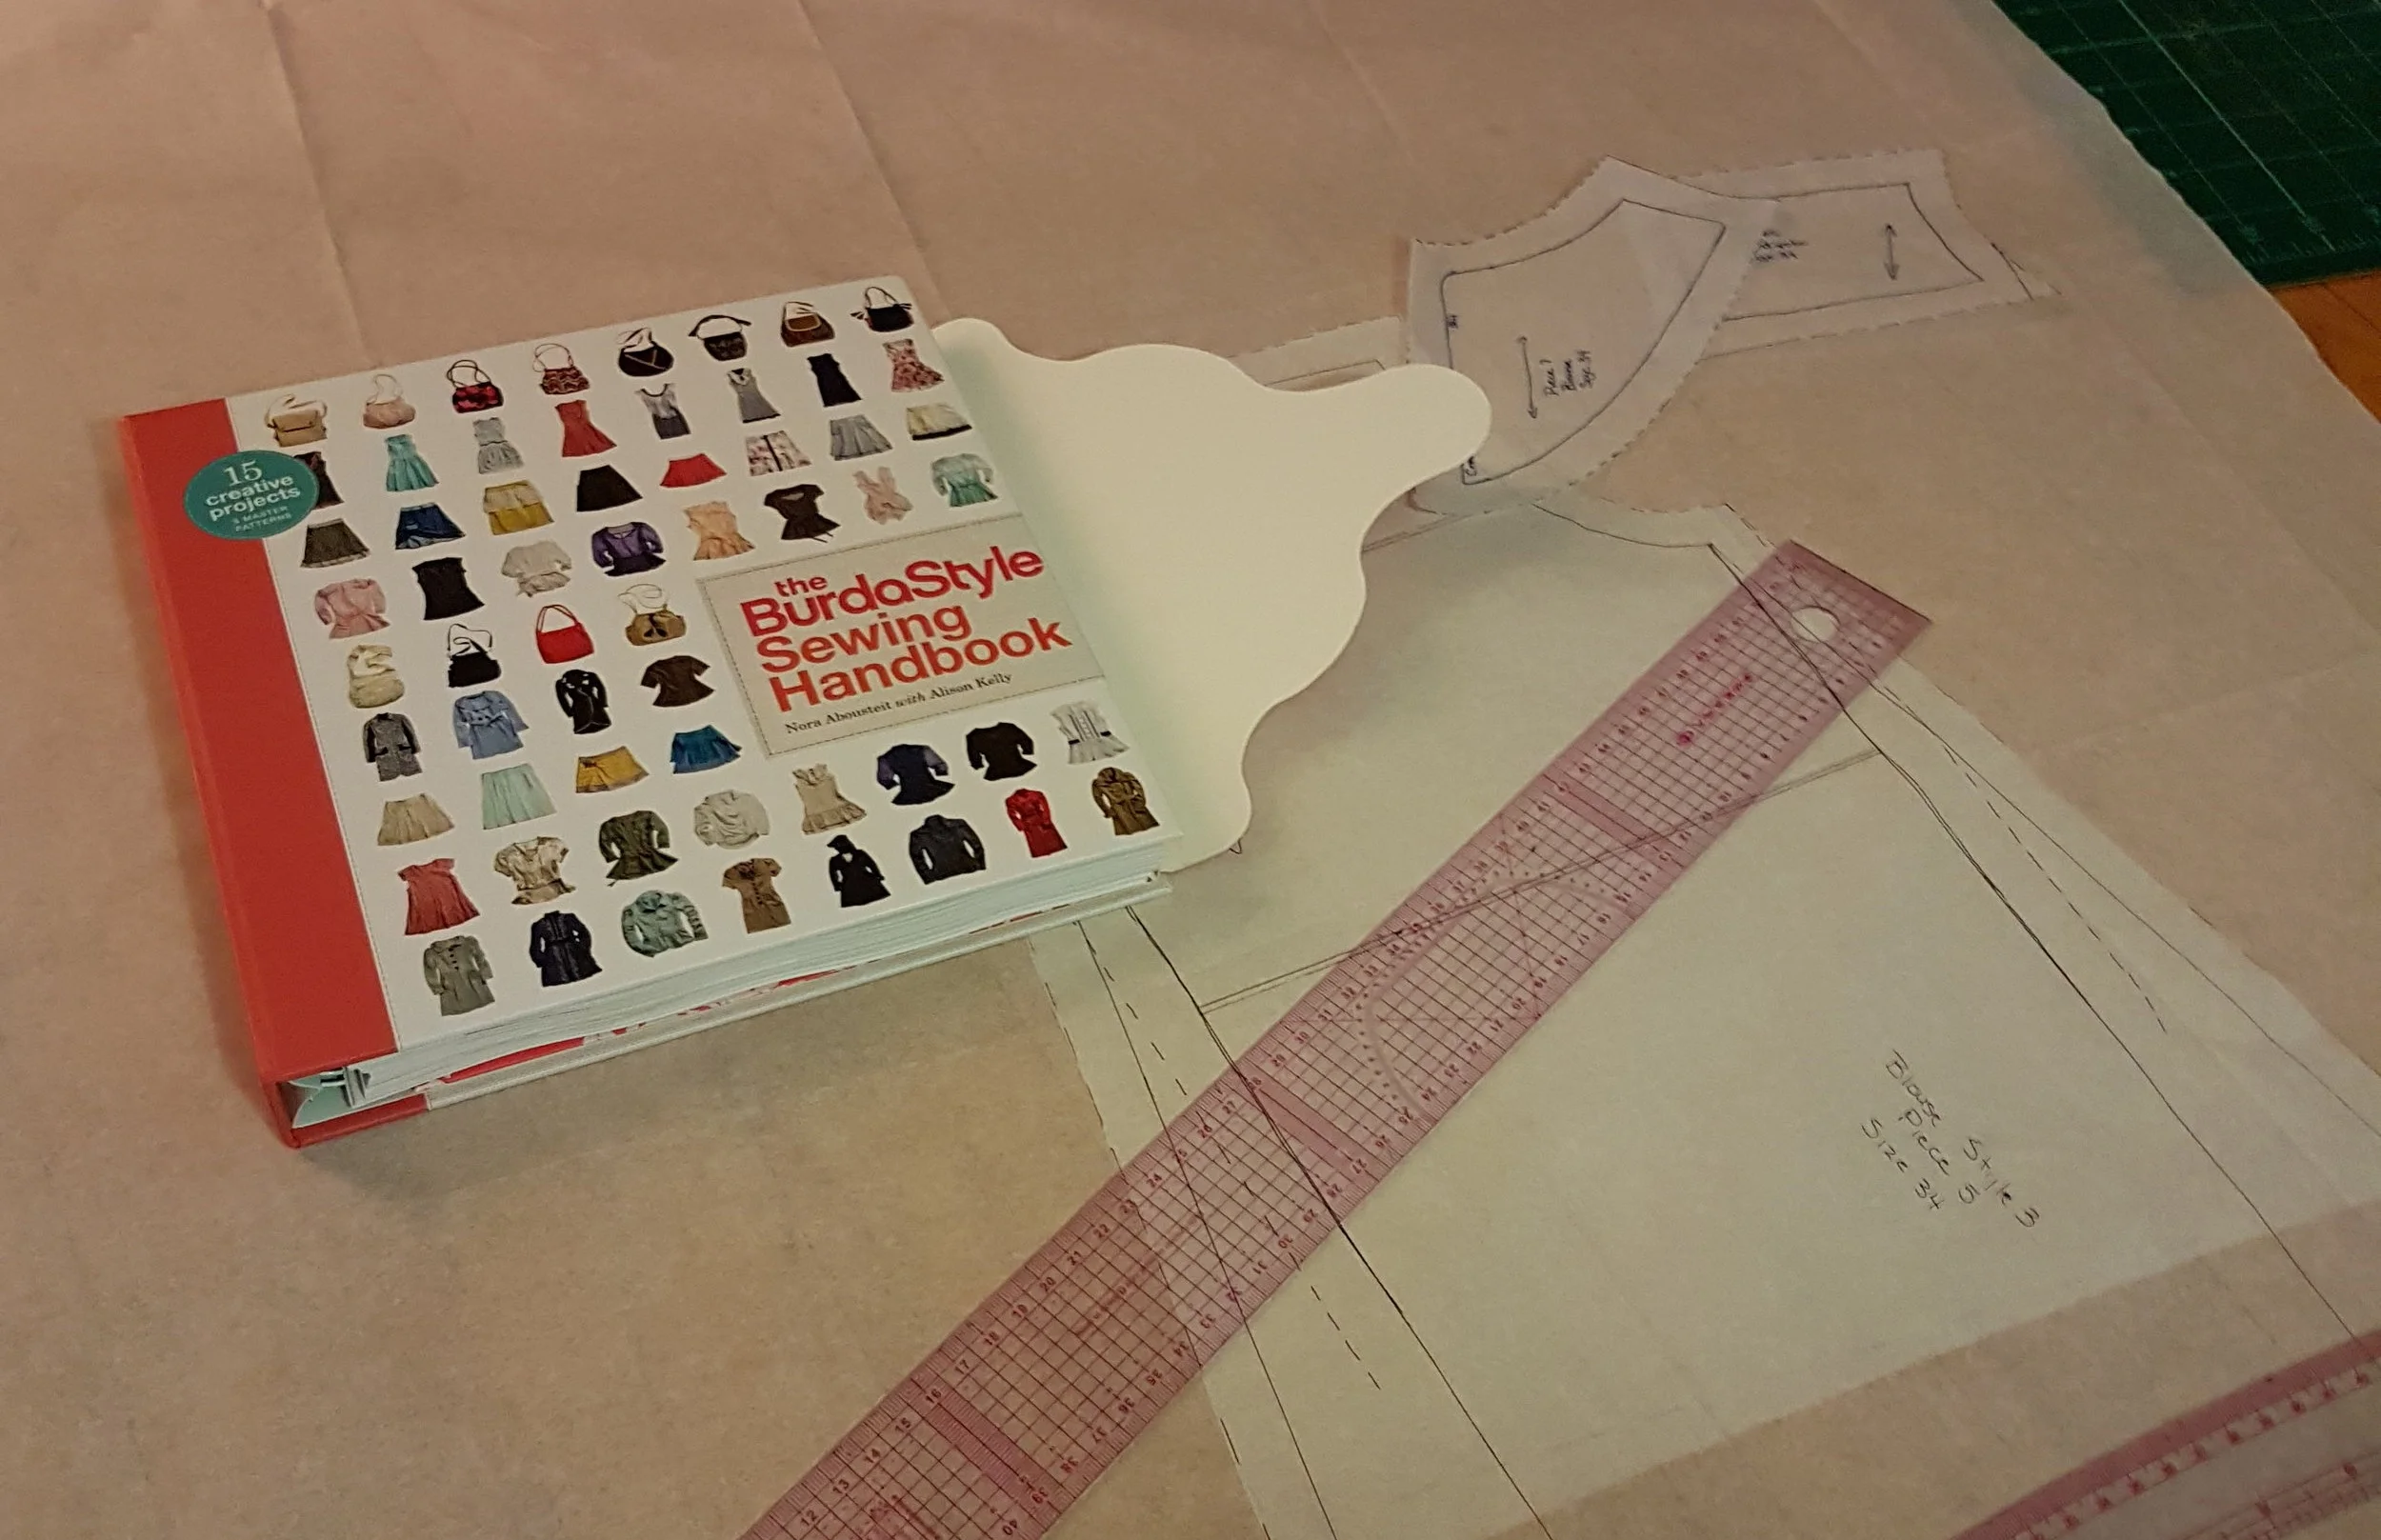
I don’t know about you, but I am tired of clothes that don’t fit, that come with loose buttons or clothing that the seams wear through so very quickly. Also, I really hate shopping for clothes! So, I’ve bought and borrowed some sewing books, dusted off my sewing machine and plan to do some serious sewing this year. With my weaving. My goal is to be able to sew or knit everything I need (except underwear and bathing suits…I’m not that dedicated!) I expect there will be a few other exceptions, but I’ll look to secondhand shops first.
I don’t expect everyone to do this, or even most people. We all do what we are able and what we feel is important. For me, right now, making my own clothing will be fun. I have the time and the over full closet to back me up if it doesn’t work so well! My goals for the year are to make flannel style shirts, a baja style hoodie, casual pants and a wool coat. Big goals for a nearly non-sewer so I’ve got a couple little projects to try too: little project bags, unpaper towels, cute little lunch bags. Perhaps these little projects will encourage me to sample! I’ll keep you posted on my progress and welcome any advice, tips, patterns or websites you might recommend.


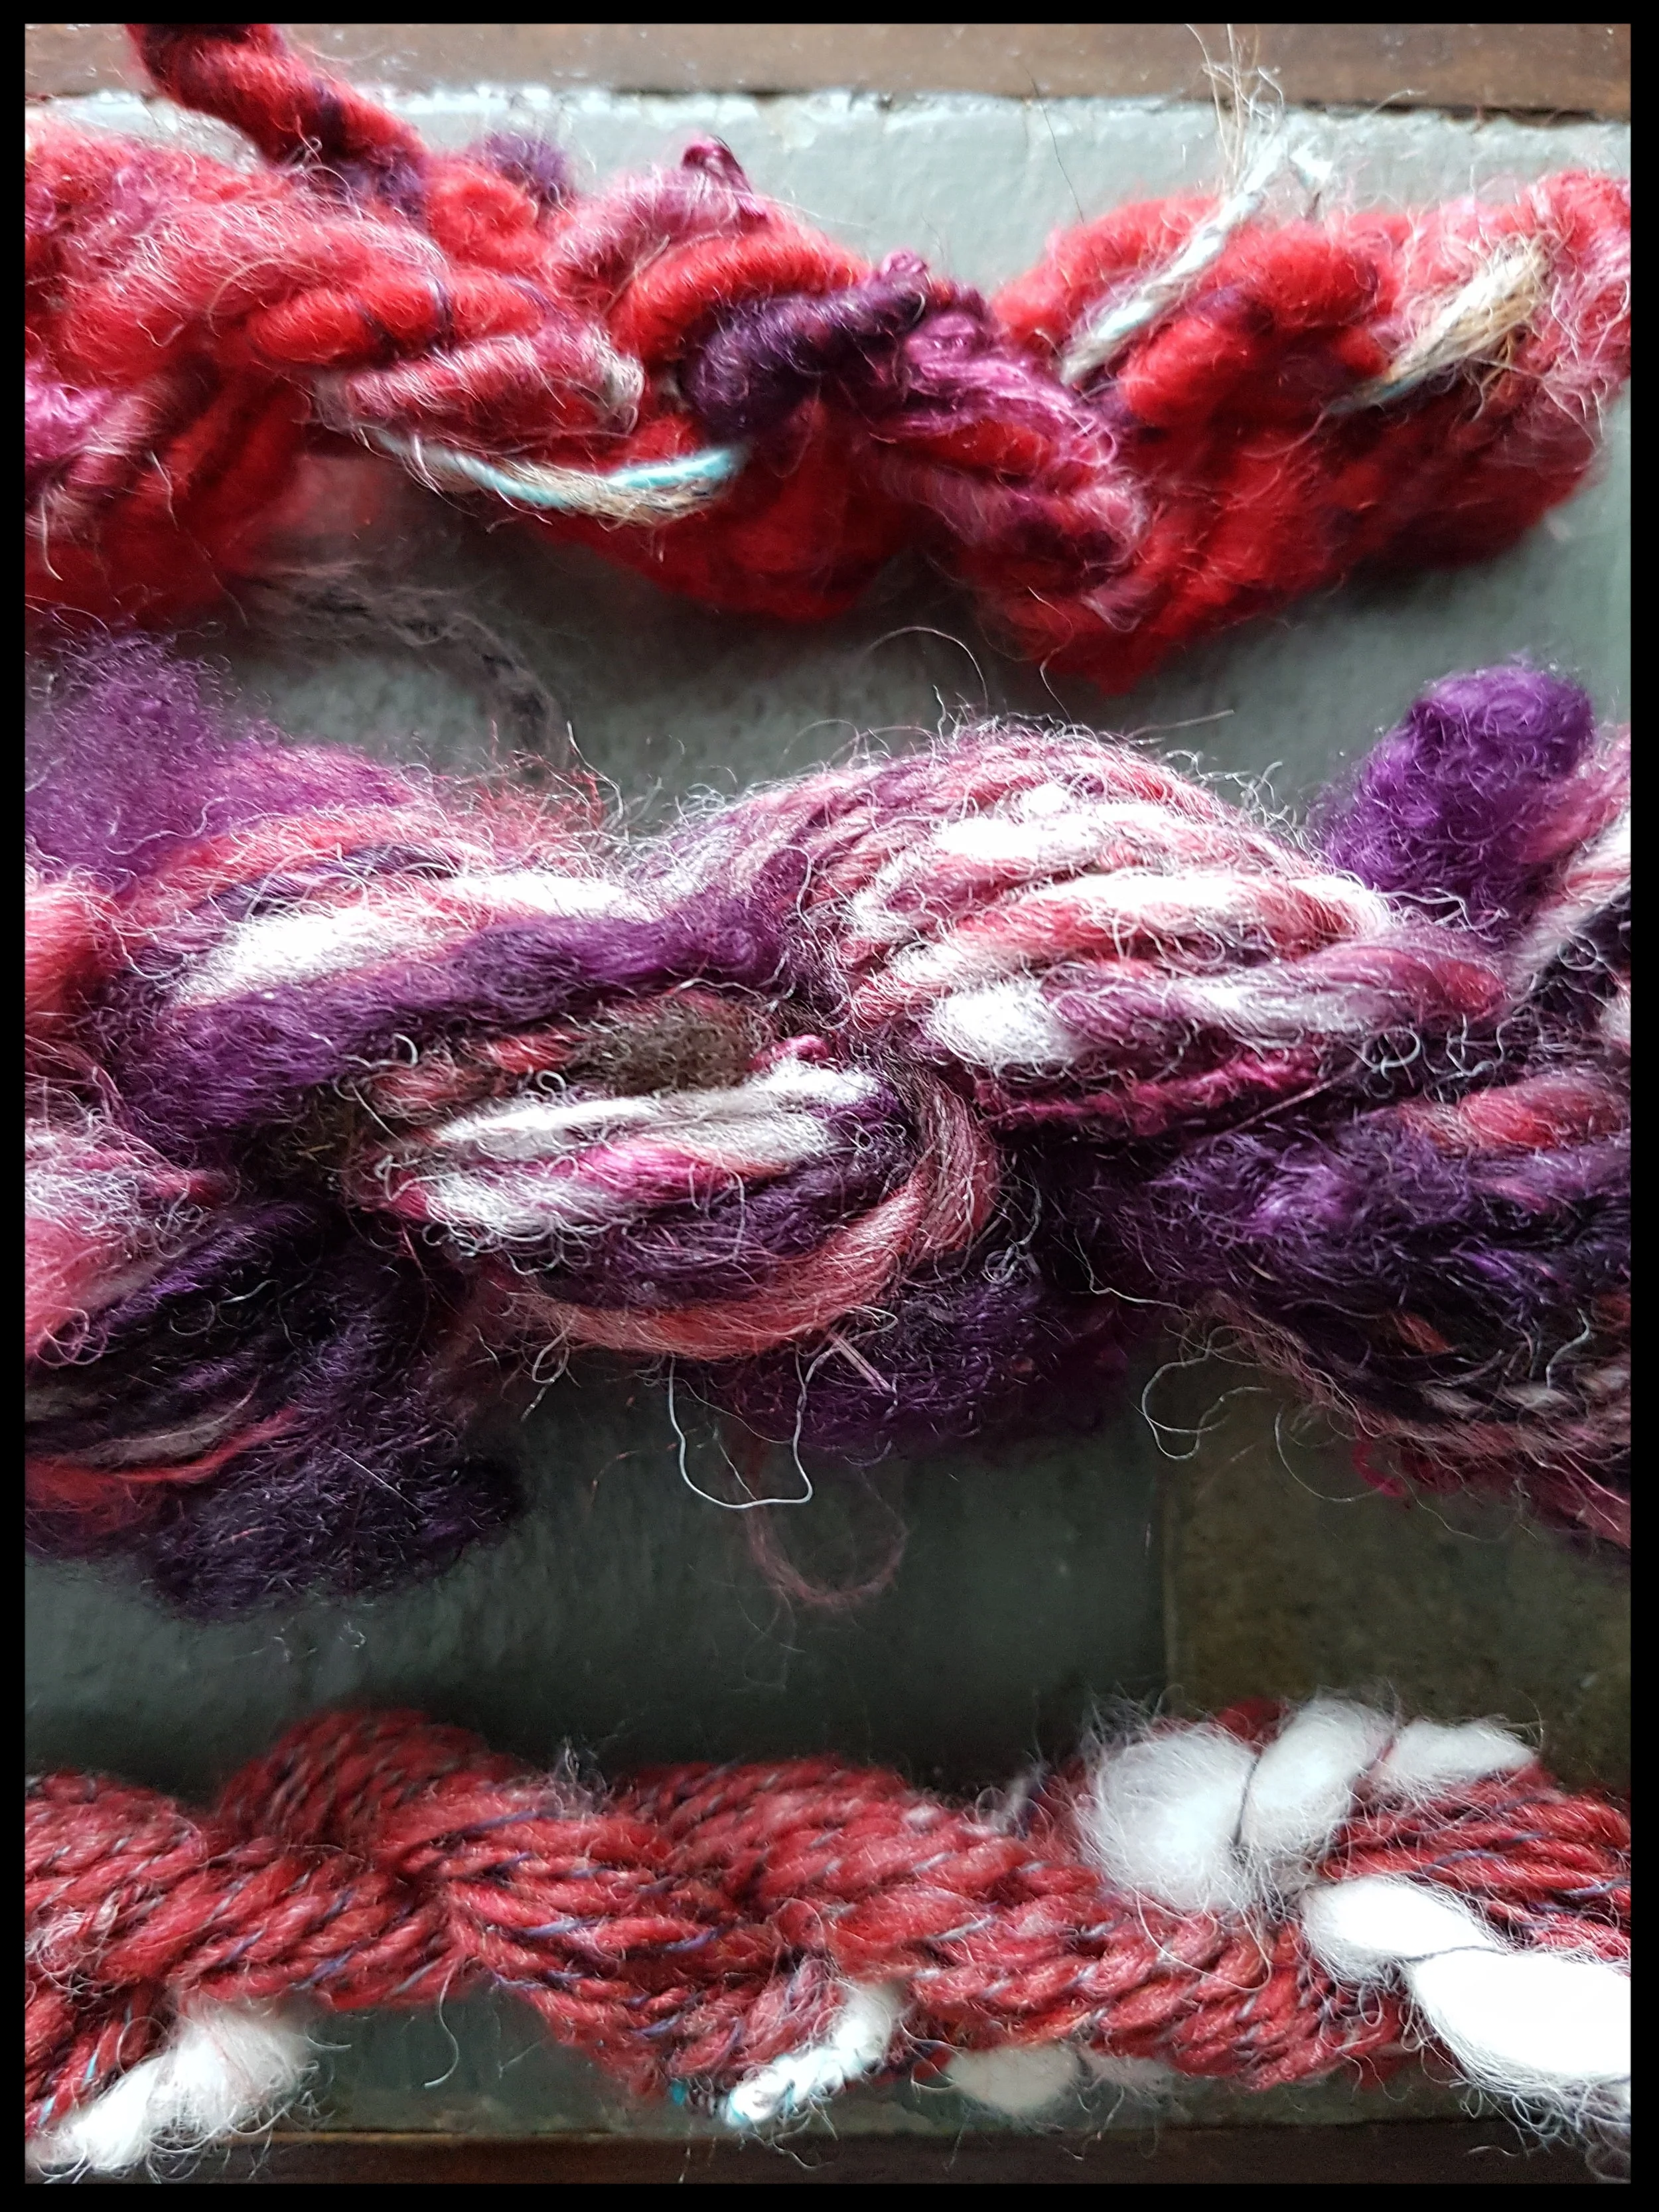
Colour
One of my biggest challenges when it comes to weaving is choosing colours. I know the basics of colour theory. Ok, I know about the colour wheel and how to mix the primaries to create the secondary colours. I even know a tiny bit about putting colours together. Weaving however, adds a whole new element. If my warp is red and my weft is blue, those colours will blend when my eyes see them and it will look purple. My two colours give birth to a new colour. And I’m not always sure how it will look , so I play it safe: I use the same colour way for both warp and weft or pick a variegated and pair it with a solid colour that is in the variegated or I stick to neutrals.

One of my biggest challenges when it comes to weaving is choosing colours. I know the basics of colour theory. Ok, I know about the colour wheel and how to mix the primaries to create the secondary colours. I even know a tiny bit about putting colours together. Weaving however, adds a whole new element. If my warp is red and my weft is blue, those colours will blend when my eyes see them and it will look purple. My two colours give birth to a new colour. And I’m not always sure how it will look , so I play it safe: I use the same colour way for both warp and weft or pick a variegated and pair it with a solid colour that is in the variegated or I stick to neutrals.

I recently tried to be a little more adventurous. Rowan Yarns has a lovely yarn called Felted Tweed. The green, yellow and orange were calling my name. I think it had to do with it being the height of fall and all the trees were yellow and green and orange. If nature can pull off those colours, so can I !
At the same time as getting adventurous with colour I decided to figure out how to use two heddles to create double weave only in certain parts of my weaving. And how to bring different colours to the front. And use an extra pick up stick in double weave to add more pattern. Have I told you I never start easy?
I ended up with fabric that holds together, so I guess that is some success. The rest really didn’t come together well. I'll stick to the colour issue for this post. A few things happened.

First, I used tweed. When a tweed yarn is spun, little bits of other fibers in contrasting colours are added to the wool. So my colours weren’t pure colours, they all had flecks of other colours mixed in. I experienced first hand what it means to have “muddy" colours.
Then, some of my patches have all three colours together. It’s not that using three colours is a bad thing, but add the tweed and it really doesn’t work so well. On the orange, the strongest colour, it works pretty well but using only 1 colour, or 2, works even better.


Proportions are important too. Using 3 colours in equal amounts might be ok for some projects, but using 1 colour sparingly can change ok to fabulous. Note in the first picture the primary colour is green, then yellow, and finally just a little bit of orange. All the colours look more distinct and the orange draws the eye. But use mostly orange (second pic) and it over powers the other colours.
I know that sampling is (part of) the solution to my problem but we all know how I feel about sampling! (Actually, this was a sample! I had no plans for the finished product and was ok if it didn’t work!)
Knowledge is also power. I just received a book about colour. It's not specifically a weaving book, but it tells me about colour, colour theory, gives numerous colour combinations and gives proportions as well as grouping them into families (soothing, neutral, bold, dynamic, powerful etc.). I'm looking forward to experimenting with new colour combinations!

Knitters are Never Alone
Our cruise ship had about 4,200 passengers and 1,733 crew members. The 2nd day at sea we had an informal knit group that met every sea day. One lady was working on a massive crochet blanket…it travelled in it’s own suitcase! She finished it on this cruise. Another had only brought 1 sock project with her…she was knitting slowly so she wouldn’t finished too quickly.

If you knit, you will never be alone.
Our cruise ship had about 4,200 passengers and 1,733 crew members. The 2nd day at sea we had an informal knit group that met every sea day. One lady was working on a massive crochet blanket…it travelled in it’s own suitcase! She finished it on this cruise. Another had only brought 1 sock project with her…she was knitting slowly so she wouldn’t finished too quickly. Still another was a beginner knitter making a cotton scarf because wool was too itchy. On the last day I saw her project…she had ripped it all out and started again because “it had holes”. Another brought a hat kit that she had bought on a previous cruise to Alaska. Still others came to the group thinking they were going to learn how to knit. (note to self, next time take some extra yarn and needles to share). The best part was even though we came from different places with different backgrounds we were instantly friends because we all loved yarn and creating.

Knitting brings people together. Often in the afternoon I would relax in the café with a cup of tea and my knitting. People I had never met before came over and asked about what I was making. Telling me about their mothers and grandmothers who knit. Asking about my wool, telling me about their current project (which they left at home and now regretted). Even the entertainment director shared how he had to learn to knit in school. Turns out it was actually latch hooking, but still, fibre related!

Knitting is a universal language. Not everyone on the ship spoke English, but it wasn’t a barrier to enjoying knitting together. Many women (and a few men) had to come and touch my project. And even if we couldn’t understand the words, we understood that we had a mutual love for fibre and creating. One of the crew members, trying to ask what I was making finally asked “what part of your body does this cover when you are finished?” Another lady in broken English painstakingly told me about the baby sweater she was making for her grandson. I saw her later knitting during a concert. Her sweater was beautiful!
The lesson I learned this cruise? If you want to make new friends, knit in public!

Enjoying Every Moment
I spent many years rushing through life, anticipating the next stage when the current stage had barely begun. Many things got done and accomplished but I don’t ever remember standing back and admiring what I had just completed. Before I had time to catch my breath I was onto the next task. I felt like I was living in fast-forward…some days I even felt like I was eating in fast-forward! And I get it, it was a busy time with 2 young children, a husband and a hobby farm. Life was full and tasks had to be completed.

I spent many years rushing through life, anticipating the next stage when the current stage had barely begun. Many things got done and accomplished but I don’t ever remember standing back and admiring what I had just completed. Before I had time to catch my breath I was onto the next task. I felt like I was living in fast-forward…some days I even felt like I was eating in fast-forward! And I get it, it was a busy time with 2 young children, a husband and a hobby farm. Life was full and tasks had to be completed.

When I started weaving I made a conscious decision to take my time and to enjoy every step…including the learning. This is contrary to my nature. I am impatient, eager to see the finished product, notice every mistake, fear making mistakes and therefore am very cautious. At the same time, I’m too impatient to wait to work up to complicated. I never start simple and I’m not much for slowing down and taking the time to learn slowly. This picture is a double-weave blanket after only 3 months of weaving!
I’ve partially succeeded. I do enjoy every step. I love the feel of yarn running through my hands. Seeing all those orderly lines of yarn and winding them onto the back beam is quite satisfying. Threading the heddle allows me to check for mistakes, think about what will be created and catch issues before they happen. It’s slow and rhythmical. Winding a tightly-packed shuttle. A neat, tidy hemstitch. Then finally, the weaving. Side to side with the shuttle, back and forth with the heddle. Many times, the actual weaving time is dwarfed by the time spent preparing the loom and finishing after the project is removed from the loom. A twisted fringe can take hours. (It’s the one part I haven’t convinced myself to love).


This deliberate decision to enjoy every moment weaving has spilled over into the rest of my life. Life is meant to be lived, enjoyed, savoured. I’ve begun to approach life more slowly, with a deliberate decision to enjoy every moment of it. Even the boring bits…laundry (it’s pretty satisfying to see a pile of neatly-folded laundry, or how about the warmth fresh from the dryer, or the smell when it comes in from the line). Or I look at my coffee table, overflowing with books and appreciated the variety (accounting textbooks, cookbooks, carpentry books, Puritan books, Bibles and philosophy books all mingled together!) I still want things tidied up occasionally but what interesting children I have! Even driving has taken on a new meaning. It’s not just about getting from point A to point B it’s a chance to see the glorious world we live in. (And the speed limit forces me to slow down and enjoy it for jut a little bit longer!)

Even a snowy drive becomes something to exclaim over

Sometimes we need to rush. And some stages will be enjoyed more than others. But your weaving is for you. Enjoy it. Stop every so often and just admire what your hands are creating. Take a deep breath and savour the rhythmic thumps and clicks of your loom. And let that peace and satisfaction permeate your whole life!
Learning is Hard Work!
I attended my first 2 spinning classes this past weekend. I’ve been spinning for about 2 years and, like everything else, I’m self-taught. The first class was a beginner class. I didn’t really need it, but hoped to learn some things I didn’t already know (which I did). It’s been a long time since I’ve been in a room full of people who are all learning something for the first time and it was a reminder to me.

A little diversion this week. While not technically about weaving, the points at the bottom are directly transferable to learning to weave (or anything else).

My first day with my own wheel…concentrating hard!
I attended my first 2 spinning classes this past weekend. I’ve been spinning for about 2 years and, like everything else, I’m self-taught. The first class was a beginner class. I didn’t really need it, but hoped to learn some things I didn’t already know (which I did). It’s been a long time since I’ve been in a room full of people who are all learning something for the first time and it was a reminder to me.
Watching the group learn to spin I got to see a wide range of reactions to challenge. Deep looks of concentration, fumbling hands, whitening of knuckles, muttering (some positive some not so much), exclamations of delight or startled surprise.
My “art” yarn
Friday I watched other people struggle to learn, Saturday it was my turn. Spinning art yarn so it looks good is hard! My hands were clumsy, my feet forgot to treadle, or treadled too fast. I was the one talking to myself, sometimes so deep in concentration that I couldn’t hear what the instructor was saying. I spun a few mini skeins; they look surprisingly like the first few skeins I spun when I just learned to spin!
I learned a lot this weekend:

A cup of tea soothes the frazzled nerves
Learning means making mistakes. Except they aren’t really mistakes, it’s just learning how not to do something. Learning how not to do something is just as important as learning how to do something
Learning is gradual so we need to go easy on ourselves. Cheer when the fingers get it right even if the feet don’t. Cheer when the yarn is so twisted it can’t feed onto the bobbin. Over twisted yarn means you are getting twist!
Learning continues to happen when we take breaks. When the tension was high our instructors suggested we take a break, have a cup of tea or coffee and a treat. While we were resting our bodies, our brains were free to process what we had learned and to file some muscle memory. And it worked! Coming back to our wheels after even a brief break the anxiety in the room was lower and real yarn began to fill bobbins.
Learning takes a lot of energy. We can’t focus on everything all at once. It’s ok to go back to an easier step. It’s ok that we can’t listen and do at the same time or that we mess up every time we try to talk. And if you are a teacher, this is especially important to remember!
I’d love to hear about your learning experiences. What helps? How do you keep a positive outlook?

My 2nd and 3rd skeins plied and knit. Plying hides a multitude of sins!!

Mistakes and What to do about Them
Have you ever been so caught up in the actual doing of a project that you aren’t really paying attention to the details? Everything is flowing smoothly. Than you step back to look at what you’ve done, and BAM! There it is. A glaring mistake and you’re thinking “how in the world did I miss that???” Now you must decide what to do with it.
Sometimes Mistakes Happen

Have you ever been so caught up in the actual doing of a project that you aren’t really paying attention to the details? Everything is flowing smoothly. Than you step back to look at what you’ve done, and BAM! There it is. A glaring mistake and you’re thinking “how in the world did I miss that???” Now you must decide what to do with it.

I was very happily weaving away on a scarf and it was going beautifully! I’d figured out how to place the pickup stick so the selvage threads were always picked up, the beat was even, everything was perfect. Until I stopped for a minute and saw THE MISTAKE. It glared at me. I glared back. I called my daughter over and asked if she could see it. She could. If her lovely (but untrained) eyes could find it, so could everyone else. I glared at it some more. I had to make a decision.
Some people say that mistakes are “design features” or they prove that an item really is handmade. Others say if you want perfect buy machine made. So, what are we to do with mistakes? Sometimes I do leave mistakes. 1 extra pick in a log cabin pattern will never be noticed. Sometimes the fibres involved don’t allow for correcting mistakes unless it is caught immediately. Mohair, for example, is very difficult to unweave. Sometimes unweaving will damage the integrity of the finished project. Sometimes the error will be easier to fix after I’ve removed the project from the loom. But mistakes are mistakes. And it’s okay to make them. It’s also okay to decide to leave them. Sometimes though mistakes need to be fixed.

I glared a little more at mine then got out the scissors. I could have unwoven the work and saved the yarn but in this case, given the fineness of the warp, the stickiness of alpaca, and the length of the mistake, I decided that cutting out the weft was the best option. It hurt a little to snip the weft threads. And I was terrified I would accidentally snip the warp.
It was worth it. Mistakes that look small on the loom tend to grow after finishing. This one would have glared at me every time I looked at that scarf.


The Magic of Finishing
I just finished a project this weekend. The whole time I was weaving I was feeling a little disappointed because it just wasn’t looking the way it ought. I was weaving a traditional hounds tooth pattern for the first time. But the hounds tooth wasn’t looking properly toothy. In my head I knew that once it came off the loom and was properly finished everything would be fine but my eyes were having troubles believing.

Still on the loom…not at all toothy!
I just finished a project this weekend. The whole time I was weaving I was feeling a little disappointed because it just wasn’t looking the way it ought. I was weaving a traditional hounds tooth pattern for the first time. But the hounds tooth wasn’t looking properly toothy. In my head I knew that once it came off the loom and was properly finished everything would be fine but my eyes were having troubles believing.
When a weaver uses the term “finishing” it doesn’t necessarily mean that the project is complete. Finishing (also called fulling) refers to the process of washing/soaking and drying the fabric to allow the fibres to plump up (full) and pull together (this isn’t technically accurate, but a very simple explanation of what it looks like happens). It gives the fabric stability and structural integrity. And it’s a little bit magical. Suddenly a loose weave that your fingers can easily poke through become fabric. A pattern that couldn’t be seen on the loom appears. And reed lines disappear


When I look at my weaving on the loom I can usually see right through the fabric. If the fibres are pressed too tightly in the weaving process then during the finishing process, when the fibres try to move, there is no space and the resulting fabric is very dense and thick. (I discovered this on my very first project). There are times when you want your weaving to be very tight (when making a rug for example) but usually at least a little bit of drape is desired.


When I finish a project I take it off the loom and straight to the washing machine. I fill the tub with hot water, add a little bit of eucalan and agitate just long enough to mix the eucalan. I then very gently add my project and push it under the water to make sure it is fully submerged. Then I leave it alone for about 1/2 hour just to soak. After the 1/2 hour I run the spin cycle. (At no time is the project actually agitated, only soaked and spun—unless I’m using cotton, then I run a regular hot wash cycle) I take it from the washing machine and throw it in the dryer and dry for about 10 minutes. Sometimes it takes a little longer than 10 minutes to get the density I want and I’ll give it a few more minutes.

In the case of my houndstooth scarf, it took 20 minutes in the dryer. Everything pulled together. The teeth are toothy, the scarf is drapy and it was so soft my daughter couldn’t keep her hands off it!


The Making of a Rug
I’m always interested in trying something different. In a previous post I mentioned having a little sitting room. It’s the coziest room in the house. The only thing missing is a rug for the floor.
As soon as I saw this yarn I knew that it was perfect. The colours are exactly the same as the picture on the wall! It even has a tiny bit of purple.

Here’s all my wasted ends!
I’ve said before that sampling is very important, but I never do it. I tell everyone that they should always sample. But I hate it, I just want to weave. I might have learned my lesson with this one though. I wanted a good sturdy rug but also wanted the yarn, not the cotton, to take center stage. I warped the cotton double and very quickly realized it would overwhelm the yarn. I ended up unthreading half the cotton

Plain weave is beautiful, but I wanted some texture for this mat. I thought I would try pulling loops out to create a diamond pattern. Then I needed something to hold the loops in place. In the end I wove one row yarn pulling out individual loops and giving them a little twist, then a row of cotton pressed firmly to hold everything all together.

I’m really pleased with the results. It shrunk more than I had anticipated (I warped for 32” width, finished it is only 24”) and boy it takes a lot of yarn on to make all those loops! But I love the texture! It’s possible I am going to need a bigger loom though; I’d love to make this wider and longer. Longer I think it would make a fabulous hall runner. In my little sitting room though it is perfect!
Double Width Weaving
Some People might think that a rigid heddle loom is just a beginner loom. The loom to get if you can’t get a “real” loom. But a rigid heddle loom, even one that is small, has endless potential. Mine is a 32”. It’s about as big as I think I can comfortably weave on with stick shuttles. But I just recently wove a 48” blanket, in one piece. And the pattern is actually designed for a 24” loom.

What? 48” on a 24” loom? How does that work? It’s really quite simple. All you need are 2 heddles, a double heddle kit and a couple pick up sticks. The trick is to create 2 layers to weave at the same time. On the loom, it looks like one layer, but if you look from the side, you will see 2 layers. One side closed, one side open. When the blanket comes off the loom, you can open it up and voila! A blanket twice the width of the loom! This was actually the first weaving class I taught. The hardest part is setting up the loom. We started at 10 am and finally got to the actual weaving at about 3pm! If that seems a bit daunting, relax, we took breaks and we waited until everyone completed each step before moving on. With practice, it takes just a few hours to get to weaving.


I love working with the Berroco Ultra Wool for double width weaving. It’s 100% superwash wool, it isn’t too stretchy or sticky and it fulls beautifully. Plus there are dozens of colours to choose from. The wash-ability means that it is perfect for baby blankets. But there is no reason to limit this to only a blanket. It makes a great wrap…check out the drape! Or picnic blanket. Take it camping, dress up your living room or carry it in your car for emergencies.
The colours of this blanket were inspired by a trip to Lunenburg, NS. Lunenburg is a beautiful seaside town with the typical brightly painted houses. I was amazed by the number of shades of orange houses. Clementine and orange, orange and purple, orange and green. And they all looked beautiful! I really wanted a tiny bit of yellow/green in this blanket, but we didn’t have it and I was too impatient to wait for it, so orange and rust it is. I took many pictures of the houses though, I’m sure they will inspire other colour combinations in the future.
Want this blanket for yourself? Click here to purchase.

My Craft Room
I dream of a ‘ real’ craft room. I think all crafters do. I dream of a big airy space filled with giant windows and sunshine. And sky lights! My dream room has a big center work table, my 32” rigid heddle, room for a 60” 8 shaft loom, a wall of shelves to keep all my skeins and cones and fibres for spinning in view and easy reach. A corner for spinning and a corner for planning, drinking tea and dreaming.
I dream of a ‘ real’ craft room. I think all crafters do. I dream of a big airy space filled with giant windows and sunshine. And sky lights! My dream room has a big center work table, my 32” rigid heddle, room for a 60” 8 shaft loom, a wall of shelves to keep all my skeins and cones and fibres for spinning in view and easy reach. A corner for spinning and a corner for planning, drinking tea and dreaming.

The Rigid Heddle Corner

I’ll bet you also have a dream craft room. But so much can be done without it. I am fortunate enough to have a craft room. It’s pretty tiny, an 8’ x 9’ basement room. (One small window, no sun) Until recently it held a 36” 4-shaft floor loom, a 32” rigid heddle loom, a dresser that acted as storage and sewing station, a warping station, a spinning wheel and a dressmaker’s dummy. I really couldn’t move in it. Both the spinning wheel and the rigid heddle loom needed to move out to be used. So they moved into the rec room. (Come on, be honest, your craft stuff is quietly taking over your house too!) The rec room worked well until my husband’s office moved into it. I may have shed a tear. Then I pulled myself together and redirected my takeover. My rigid heddle temporarily moved into the living room (along with all my rec room furniture, it was a mess!) I didn’t have room to warp so it moved into the kitchen or to the back deck for the warping process.
In the office moving process, we freed up a room in the house (the old office). I seriously considered just taking over that room (in addition to the one I already have) but decided that wasn’t really fair (my kids think they need space too) so I took over the closet instead. It isn’t very wide but it is quite deep. I moved my dresser/sewing station, dressmaker’s dummy and spinning wheel into it. I can close the door and we have a lovely sitting room. I can open up the closet and have a lovely sewing station or pull out my wheel to spin. And my rigid heddle moved back down to the basement craft room. Except when I’m doing a longer warp, then it moves to the kitchen, or I’m using the full width, then it’s back in the living room.

Warping in the kitchen
So don’t let lack of space stop you from weaving. If it weren’t for the floor loom I could quite easily manage without a room altogether. If my house were more open I wouldn’t need a room even with the floor loom. If you really want to do something you can make it happen in the space you have. You get creative, find solutions and weave on.
Do you have a dream craft room? Or have you found ways to manage in small spaces? I’d love to hear about them!

Introduction to Weaving
I realized, as I was writing another post, that this should have been my very first post. If you are a rigid heddle weaver you might want to skip this one, you know it all already. Or you can read it and correct me in the comments (seriously, I’m ok with constructive criticism). I know that some people are reading this who really don’t know anything about weaving, but you know me and so you graciously read my blog (thank you, please comment so I know who you are). So here’s a crash course on weaving.
I realized, as I was writing another post, that this should have been my very first post. If you are a rigid heddle weaver you might want to skip this one, you know it all already. Or you can read it and correct me in the comments (seriously, I’m ok with constructive criticism). I know that some people are reading this who really don’t know anything about weaving, but you know me and so you graciously read my blog (thank you, please comment so I know who you are). So here’s a crash course on weaving.

If you look at a piece of woven fabric (a cotton dress shirt or a pair of jeans) you will see fibres going from top to bottom and others from side to side. The top to bottom threads are called “warp threads” and the side to side threads are called “weft threads”. If you look carefully, you can see that the weft threads are going over and under the warp threads. This over under is what holds the fabric together. Theoretically you could take the weft thread and manually weave it over and under every weft thread. But that would take forever and be incredibly boring. So, mankind, in a quest for efficiency and a hatred of boredom, invented a very simple machine to lift certain threads up while leaving the rest alone. I might do a blog another time on the history of the loom, but for today, let’s just jump to the simple rigid heddle loom.
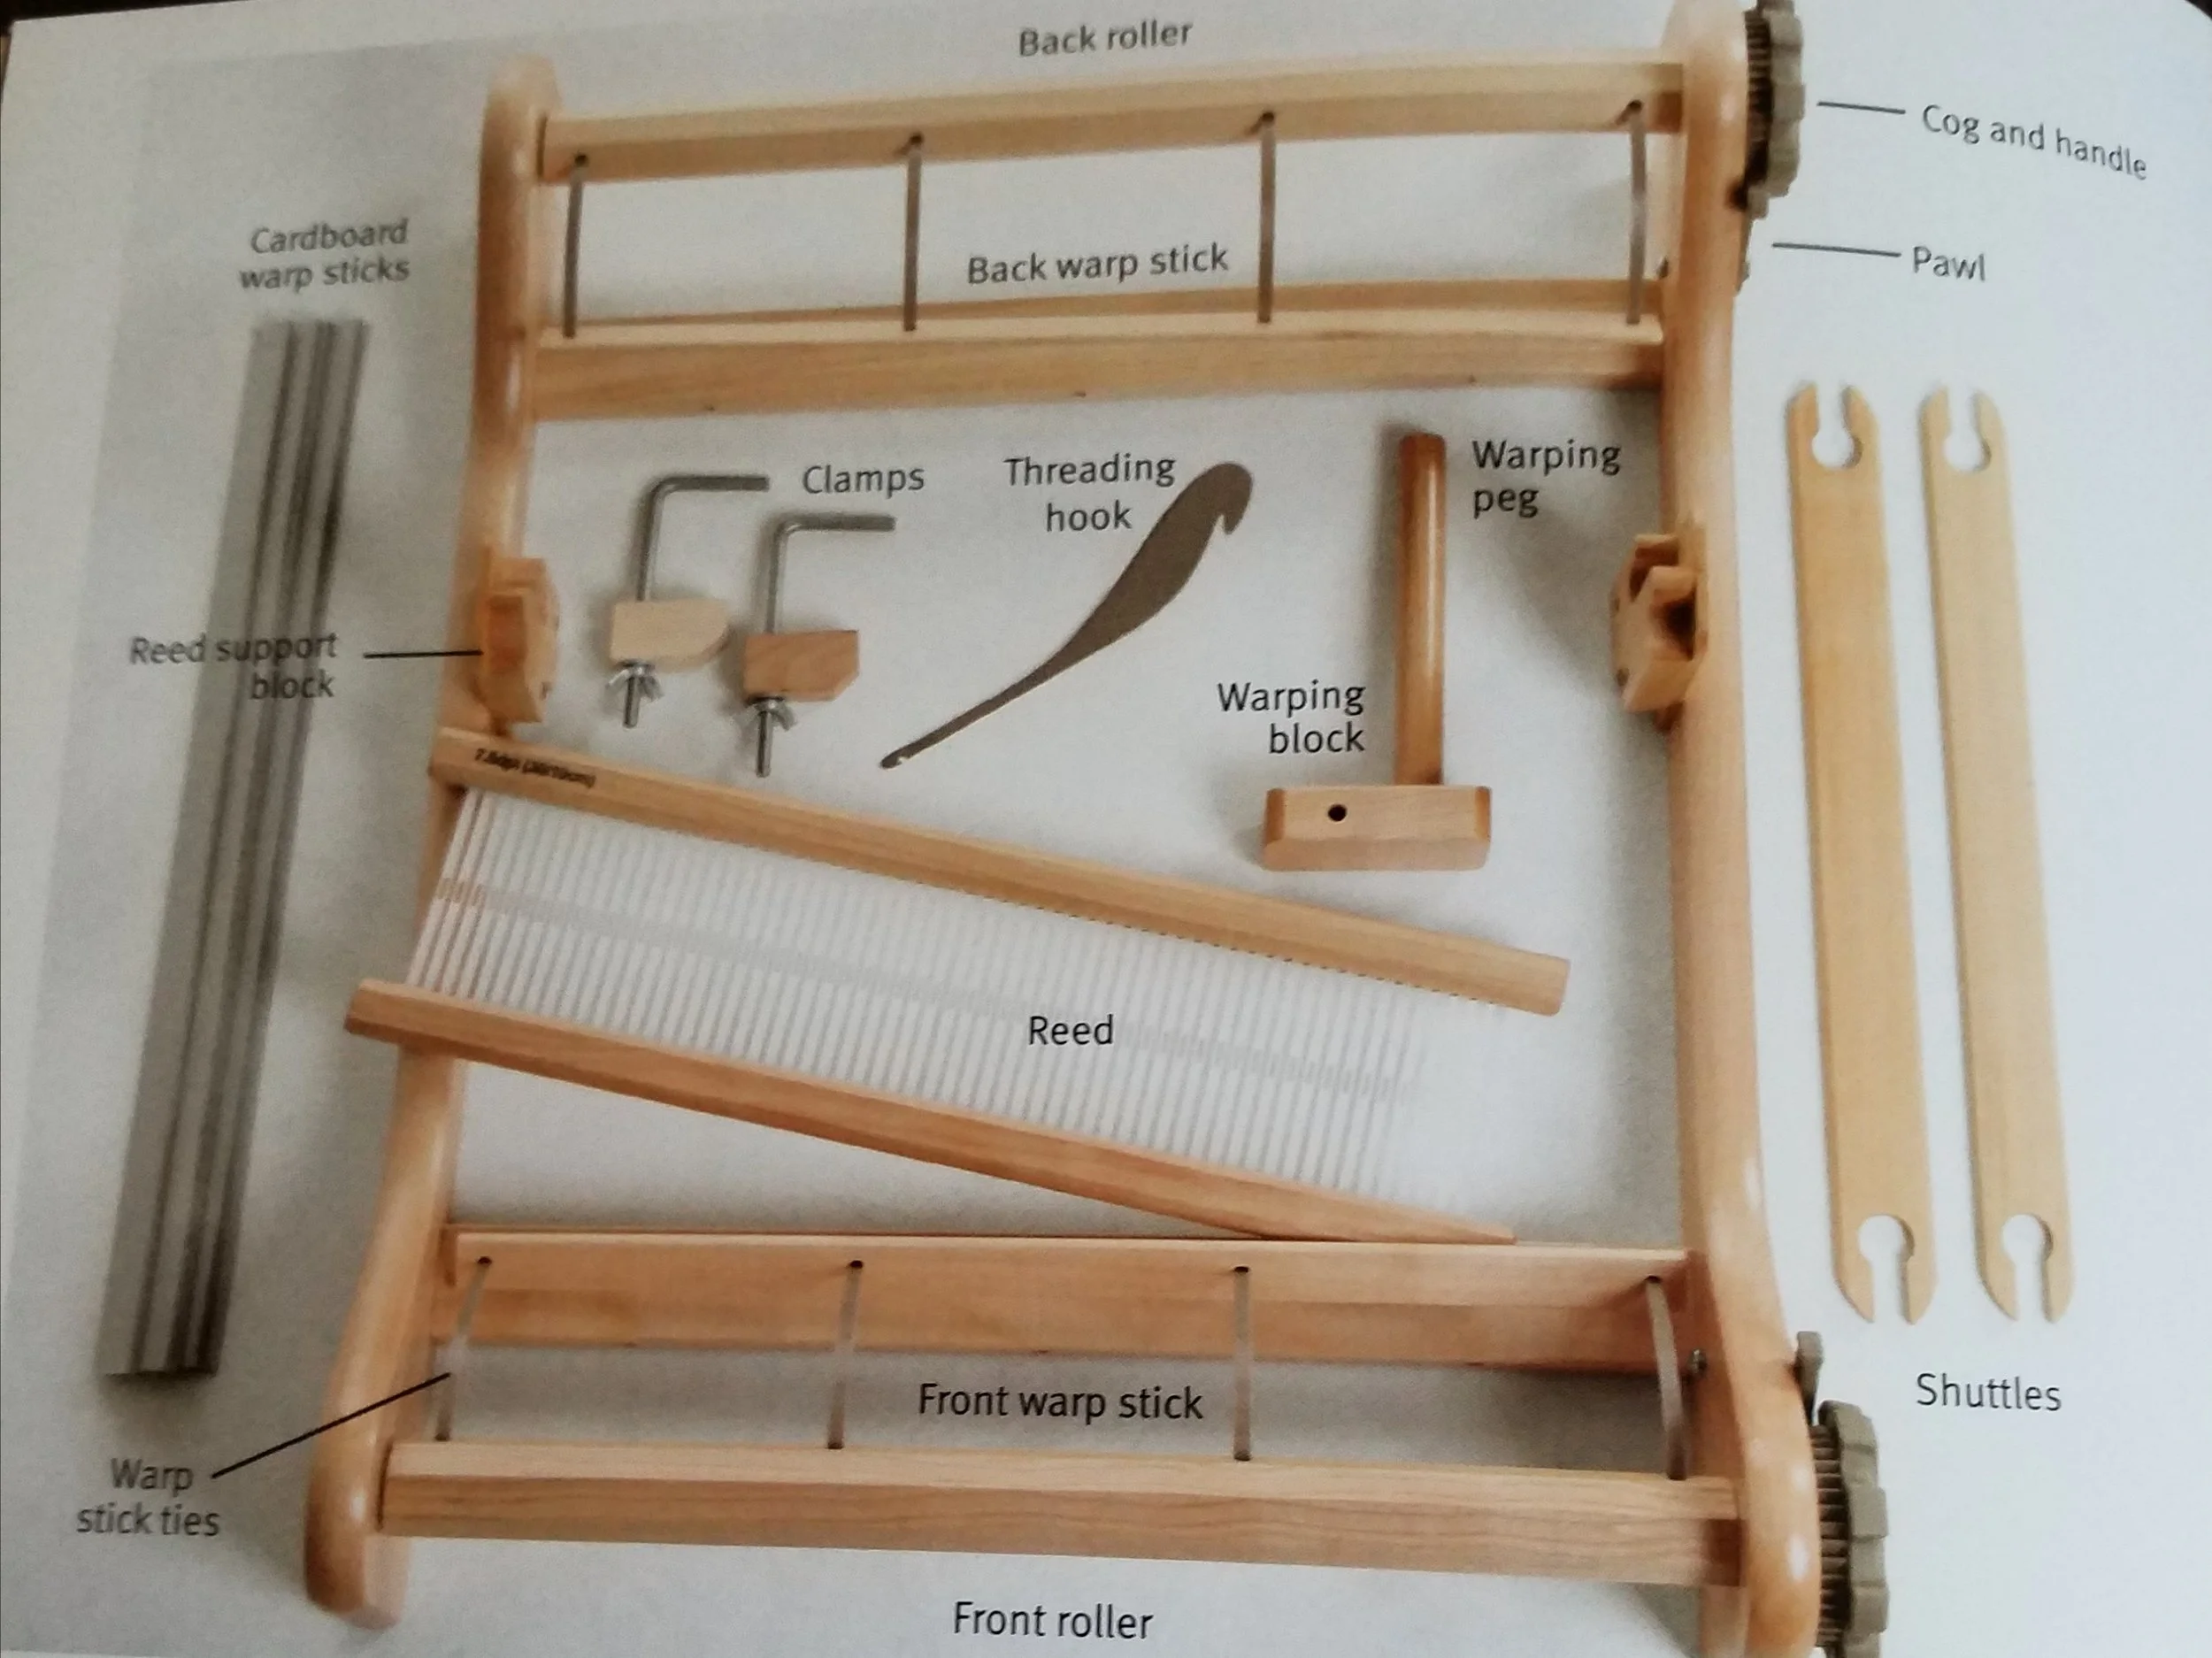
Pic from The Ashford Book of Rigid Heddle Weaving
It’s pretty basic. We have a wooden frame with a front and back roller and we have a heddle. The heddle has slots and holes that the yarn goes through. Yarn in the slots can move up and down with the heddle; when the heddle moves up, the threads move down; when the heddle moves down, the threads go up. Yarn in the holes doesn’t move around. As the heddle moves up and down, a “shed” is created for the weft thread (wound onto a shuttle) to travel though.

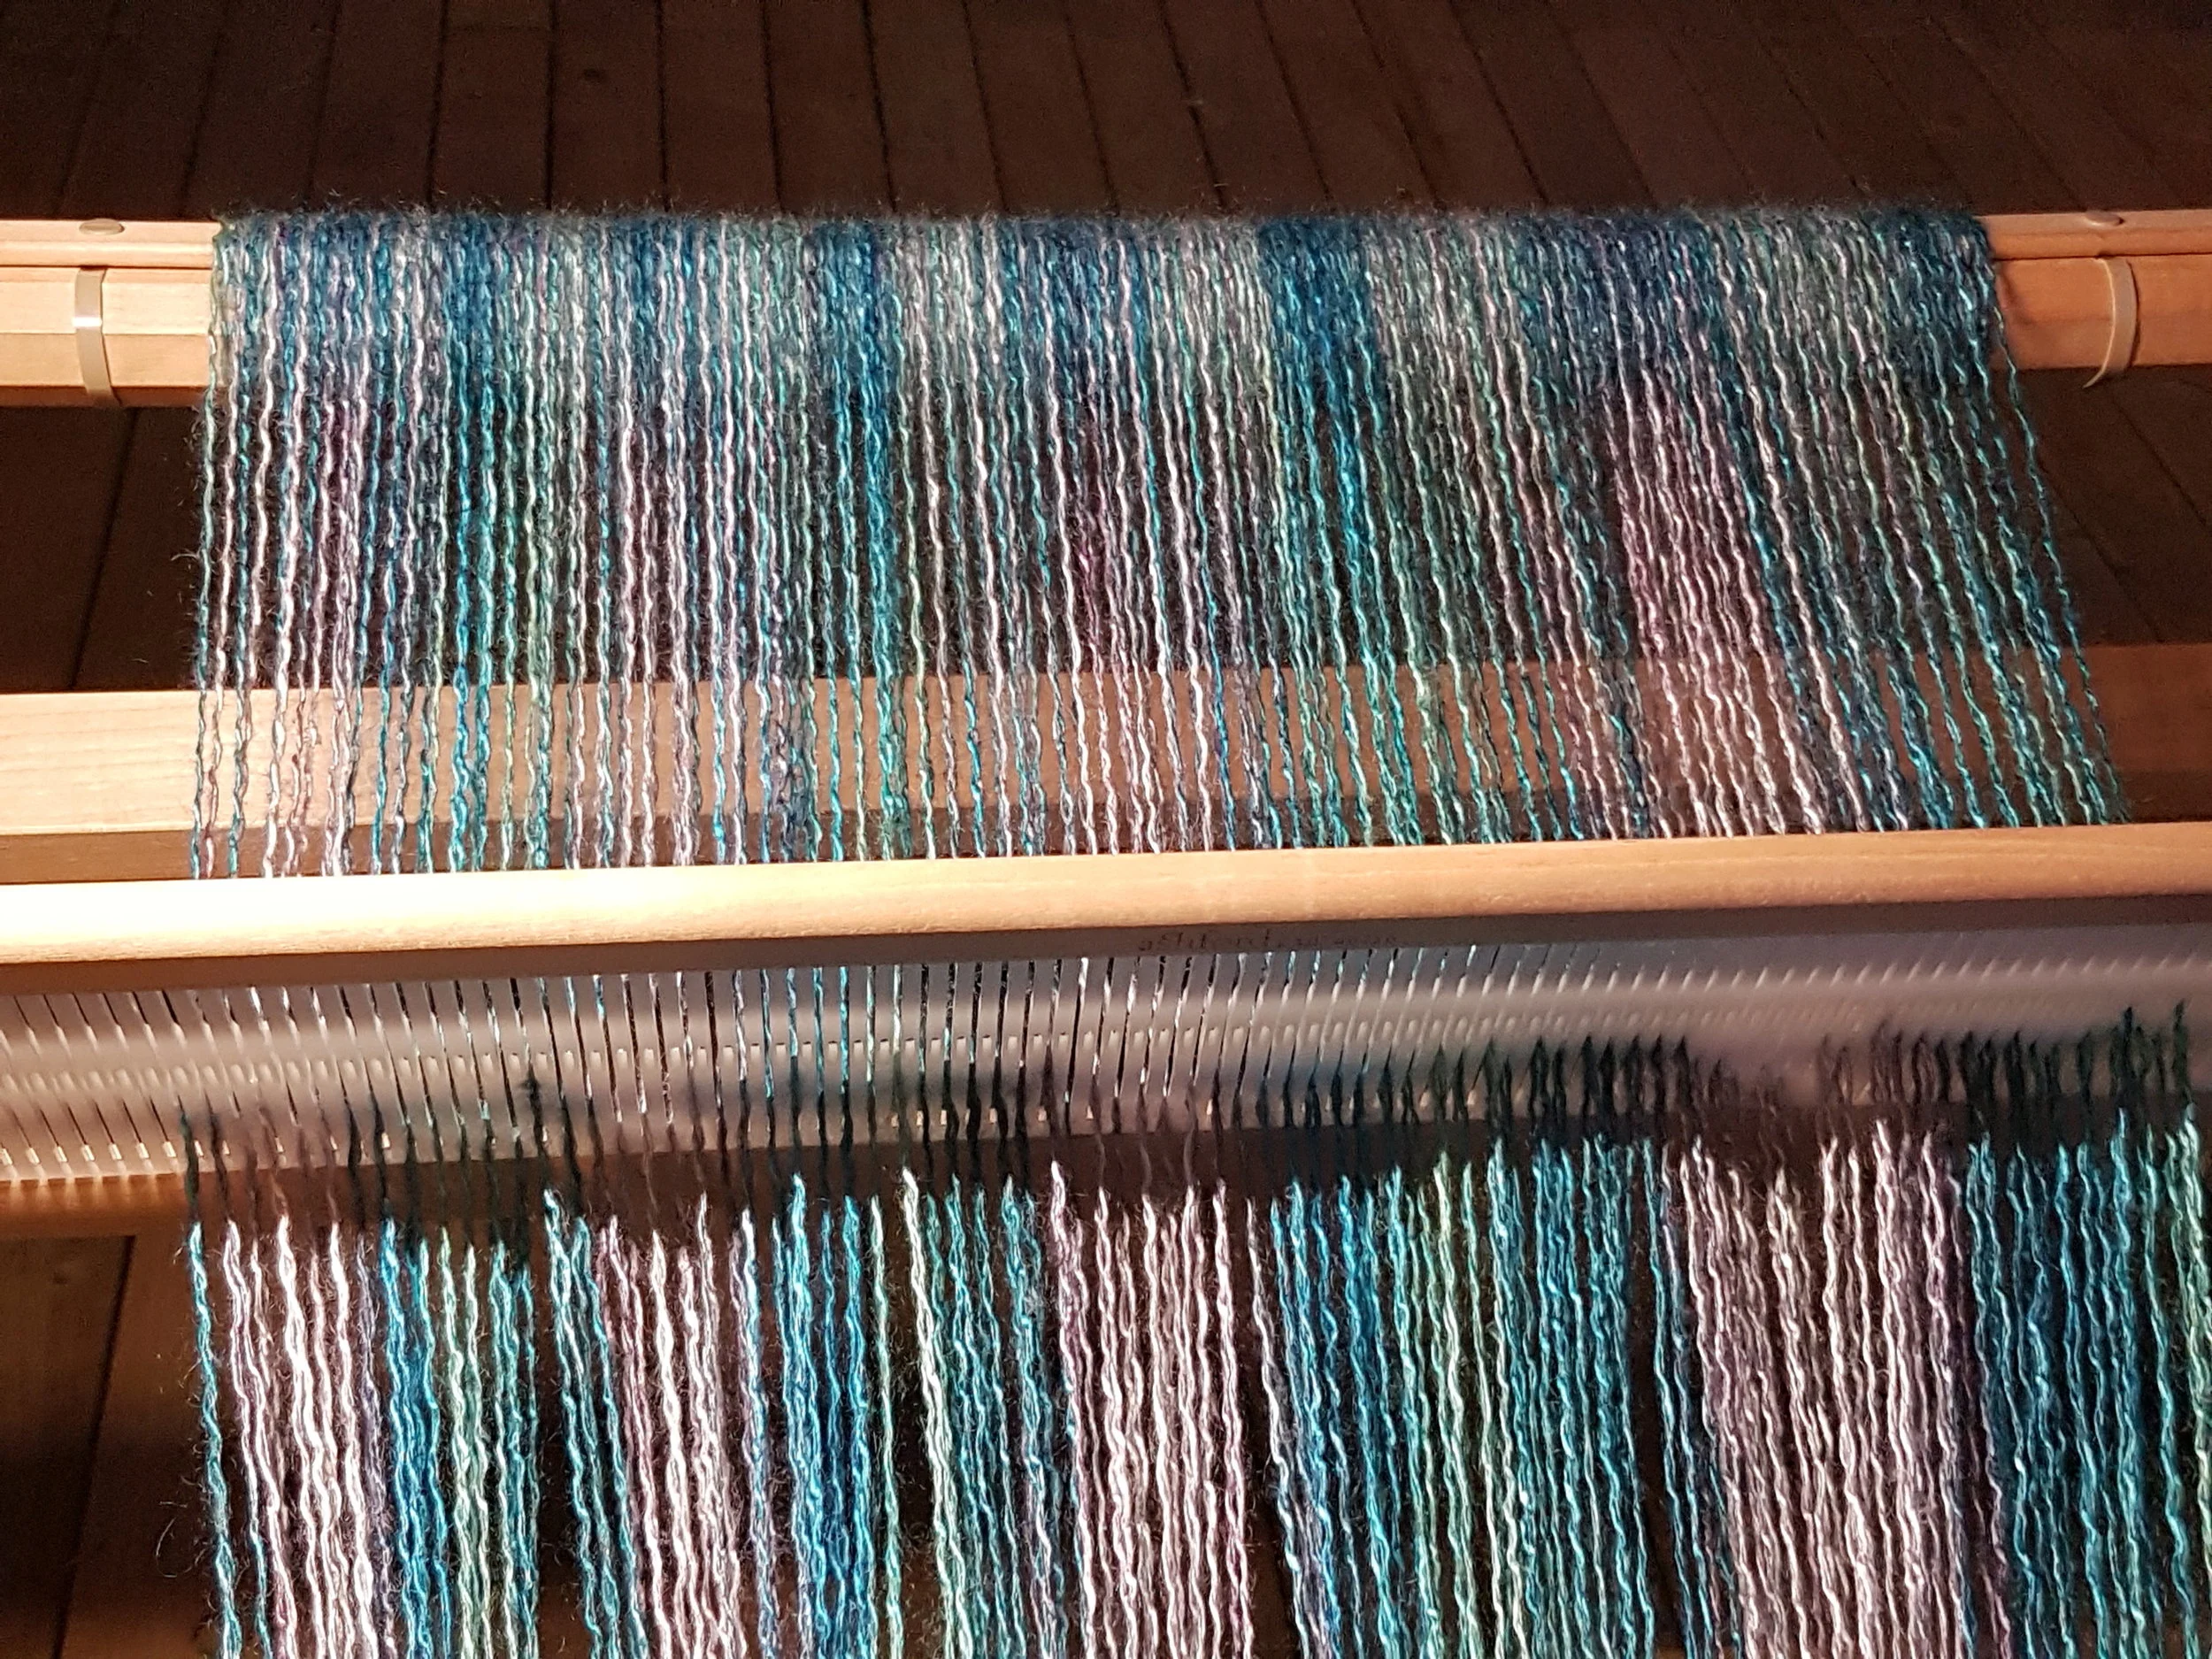
The warp threads are threaded onto the back warp stick, through the slots in the heddle then all the threads are wound onto the back roller. The yarn is threaded though the holes in the heddle, then the yarn is tied to the front warp stick. This is called “warping the loom” and can take any where from an hour to several hours.
Once the loom is warped weaving can (finally) begin. And it’s easy! Heddle up, slide shuttle through, press yarn into place, heddle down, slide shuttle through, press weft into place, repeat until finished. If that sounds boring, the pattern possibilities are endless! You can add pick up sticks, a second (or even a third) heddle, play with colour or texture, even weave tubes!


Clothes from Scratch
Once upon a time I used to cook everything from scratch. And from scratch I mean from seed, or egg or goat. We grew all our own veggies, most of our fruit and meat, all our own milk, made cheese, yogurt and canned dozens of jars of jam, apple sauce, salsa, peaches, pears, pickles... I don't do that anymore. Now I make clothing from scratch. Or at least I try to.

Once upon a time I used to cook everything from scratch. And from scratch I mean from seed, or egg or goat. We grew all our own veggies, most of our fruit and meat, all our own milk, made cheese, yogurt and canned dozens of jars of jam, apple sauce, salsa, peaches, pears, pickles... I don't do that anymore. Now I make clothing from scratch. Or at least I try to.

There is something very satisfying about starting out with a couple cones of cotton and ending up with a blouse, or pair of shorts. I find it a challenge though. It's hard to go back to the beginning to learn how to do something well. I want to just sit at my sewing machine and turn out a perfect blouse. I do not want to practice on something simple, I want to make what I really want and I want to do it first!

This is The Valley Blouse, a pattern I found online by Cali-Faye. I love the look of it, so drapey and beautiful! I wove a lovely huck pattern with bamboo and tencel and it was so beautiful! I spent several nights with this gorgeous fabric laid out on the floor placing the pattern pieces in various ways to minimize waste and simply because I was afraid to cut my handwoven fabric. I painstakingly cut out each piece and immediately took it to the sewing machine and zigzaged the edges.

I started sewing. It was hard! I didn't actually understand the language of the pattern. (It was english, but sewing language is different from weaving english-which I am still only learning.) So I looked at the pictures and tried to fake it. It was pinned and repinned, put on and off my mannequin over and over again. I did at least baste most of my seams first just to make sure I did it right.
In the end the blouse worked out. Well, it looks like a blouse, but it doesn't fit. It fit my mannequin, and she's supposed to be my size.
I'm going to have to practice.
Beginning
Passing the shuttle back and forth and watching the fabric grow is only a tiny part of the weaving process. Before one ever throws the shuttle there has already been hours of prep work, even days if you count the dreaming time. First inspiration strikes. Perhaps it’s the clouds in the sky, the way the grass waves in the wind, a colour combination or the feel of a fibre. It can be anything really. Then comes the gestational time. The idea floats around in my thoughts for a few days, taking shape, changing and developing.

I start planning on my tablet, it's a bit of a mess but it helps me visualize.
Passing the shuttle back and forth and watching the fabric grow is only a tiny part of the weaving process. Before one ever throws the shuttle there has already been hours of prep work, even days if you count the dreaming time. First inspiration strikes. Perhaps it’s the clouds in the sky, the way the grass waves in the wind, a colour combination or the feel of a fibre. It can be anything really. Then comes the gestational time. The idea floats around in my thoughts for a few days, taking shape, changing and developing. At this point I might put pencil to paper (or s-pen to tablet) and start drawing and jotting down finished measurements, warp and weft materials. If colour plays a starring role I’ll start adding colours too.

Sometimes when I start drawing I realize that my idea can’t work as I thought it would. Then I either rework, or sometimes leave that idea for another time. Because I’m a new weaver, and an intuitive weaver, many times I realize I need to learn more before I can achieve the effect I’m looking for. If you are a crafter you know you are supposed to sample sample sample! I hate sampling! I know it is important, but to me it seems a waste. So, I make tea towels. Tea towels act as a productive way to sample and learn new skills. In the end, if my finished project doesn’t match the picture in my head it’s ok. I’ve learned something AND I get a useful tea towel instead of a failed project I’ll never use but can’t bear to throw away.