
Winter Woolies
I have always wanted to sew my weaving. But I get so busy weaving and writing patterns that I don’t always have time (or make time) for this. And I’m not really a very good seamstress, so there’s that…
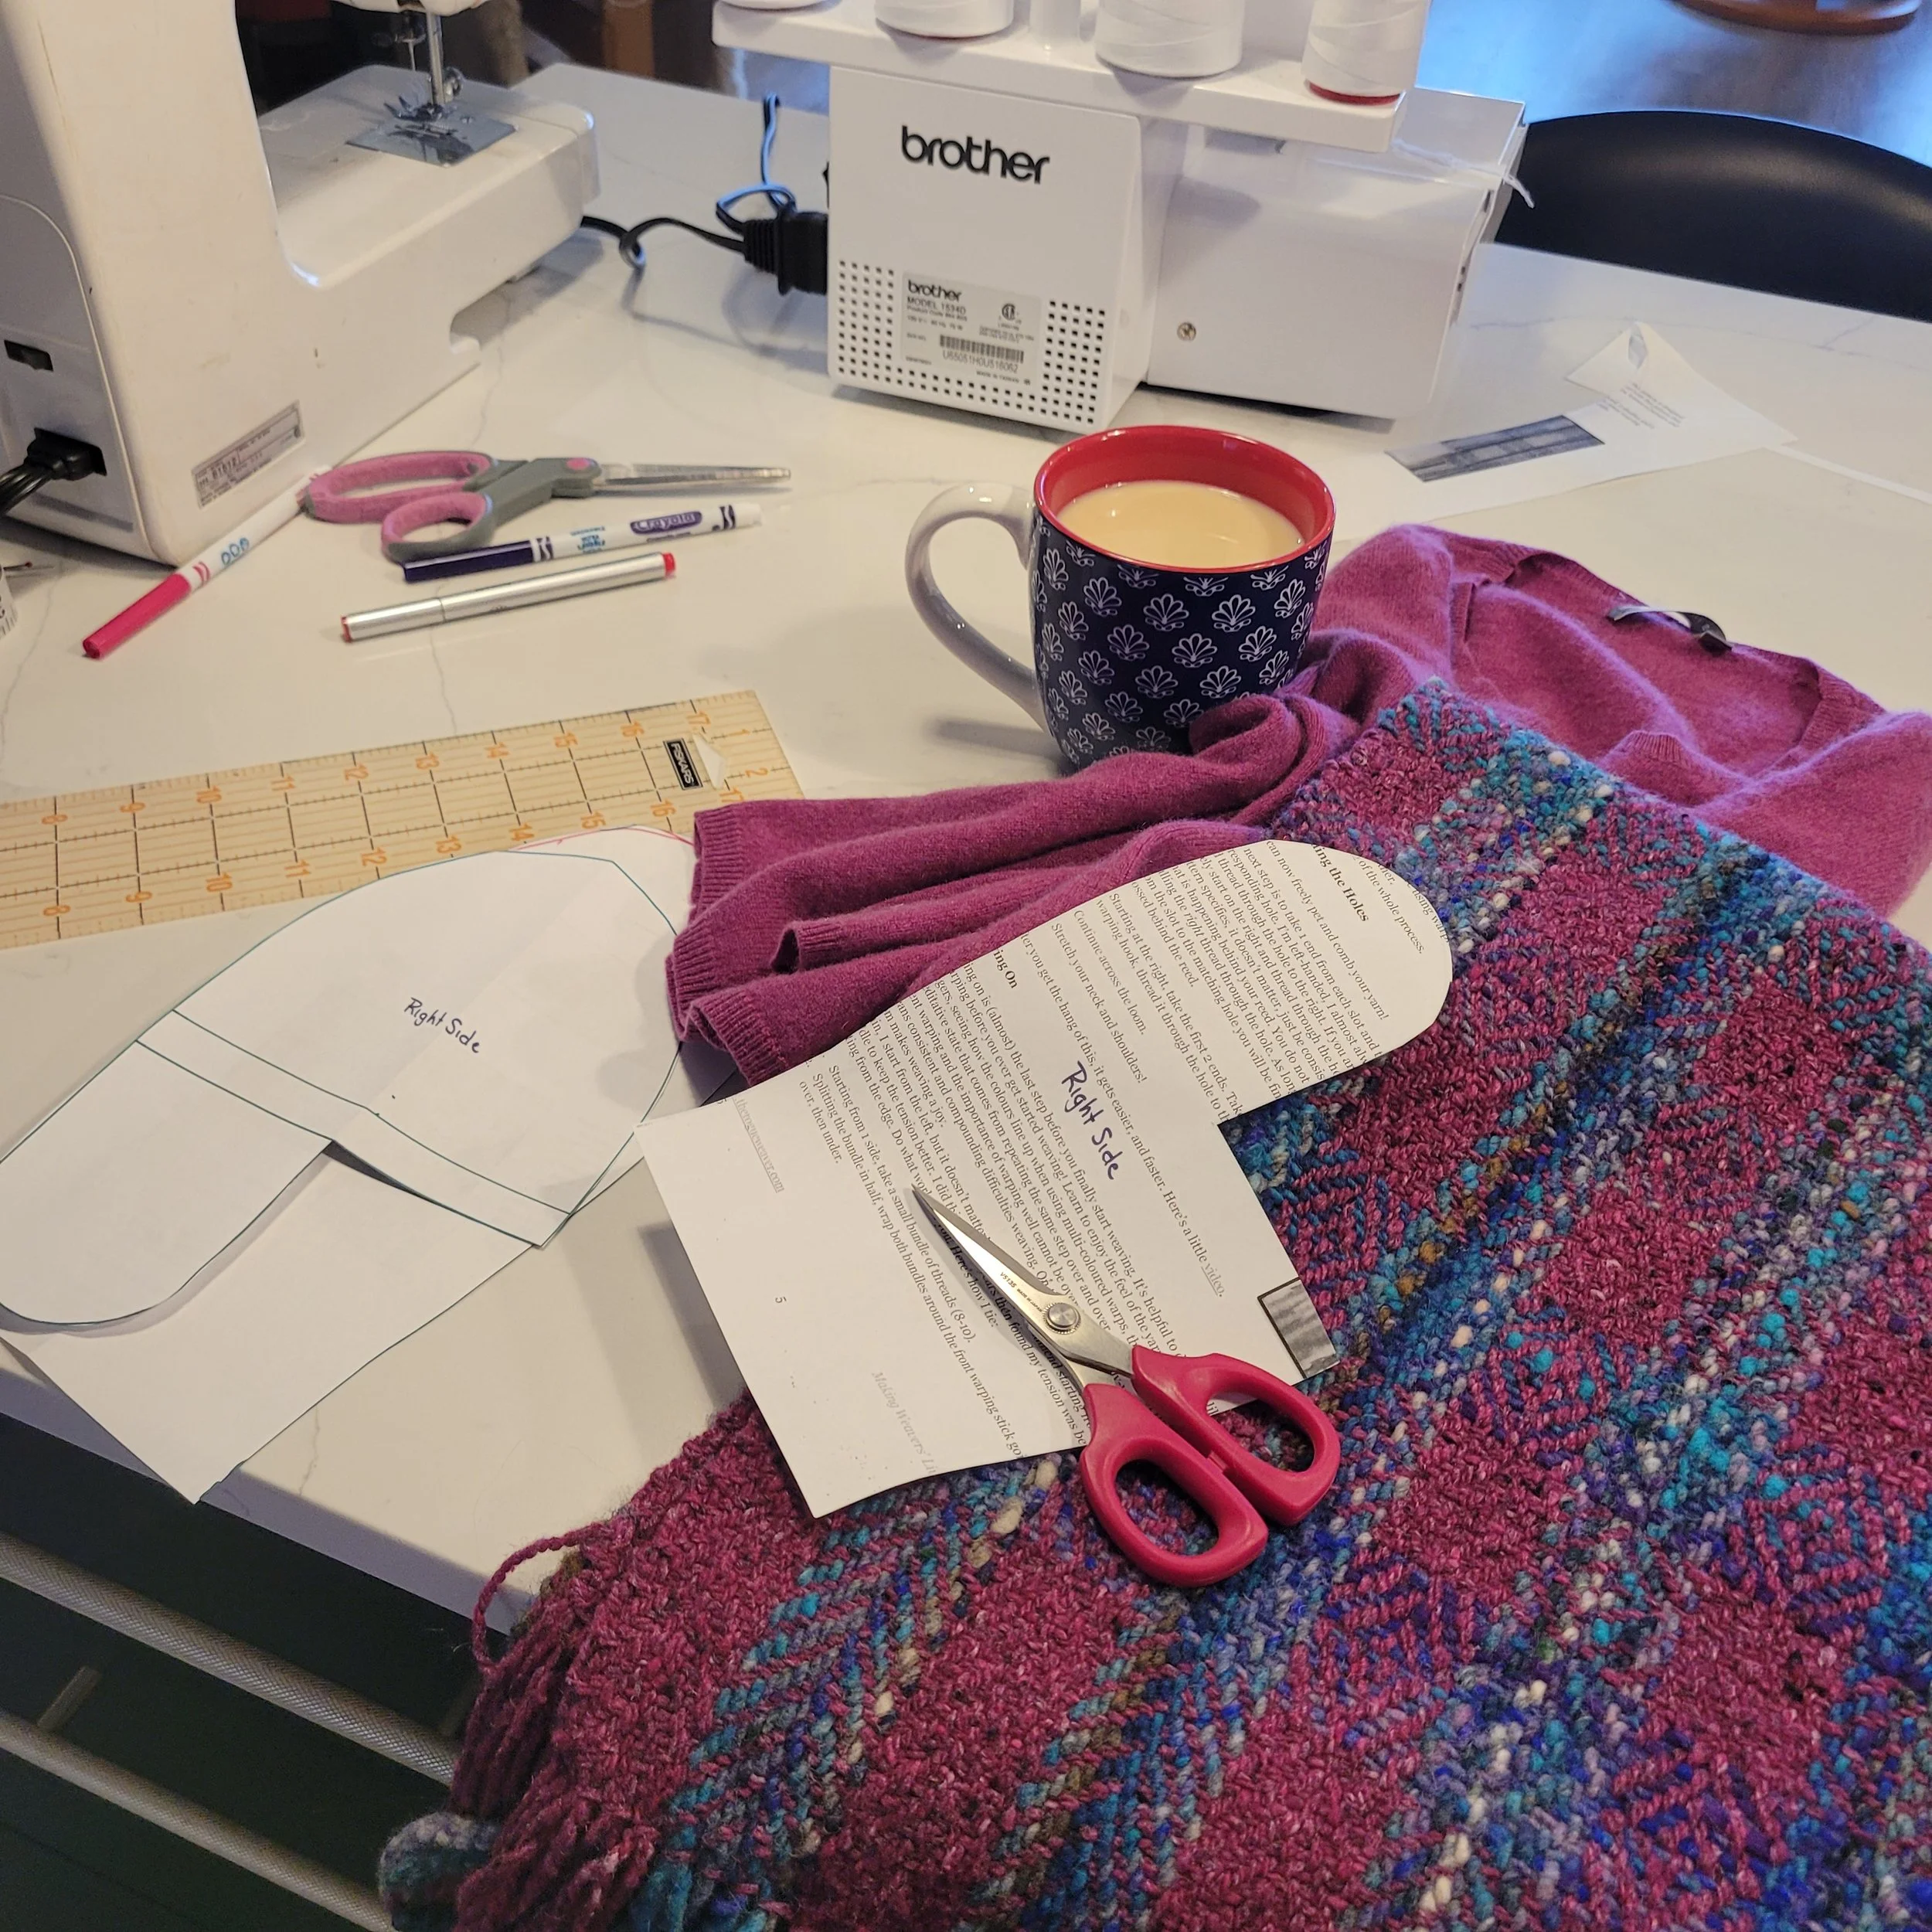
Recently a fellow weaver and friend showed me some mittens she had sewn with her handwoven fabric. They were on my list to make so it was wonderful to see her finished mittens and see that I liked them. I think it gave me the push I needed!
I did not use a pattern, but I did look at a lot of Pinterest posts. If you want a pattern, try this link. (I haven’t bought it, but it looks good and has good reviews). I’ll walk you through how I made my own pattern and sewed my mitts. Remember I am not a sewing expert…I’m sure there are much better, easier ways to do these mitts!
Materials:
scrap paper to make the pattern
handwoven fabric that has been wet finished, preferably wool and plain weave or twill (minimal floats). I needed about 60” x 7” and if possible, for at least the first pair, fabric that is the same on both sides (I’ll tell you why in a bit).
fabric for the lining (I used a felted thin sweater for one pair and jersey knit fabric I had in my stash for the other). Again, the same on both sides is helpful!
a sewing machine (I did use a serger, but a regular sewing machine will work…bonus if you have an overcast foot!)
an iron and ironing board
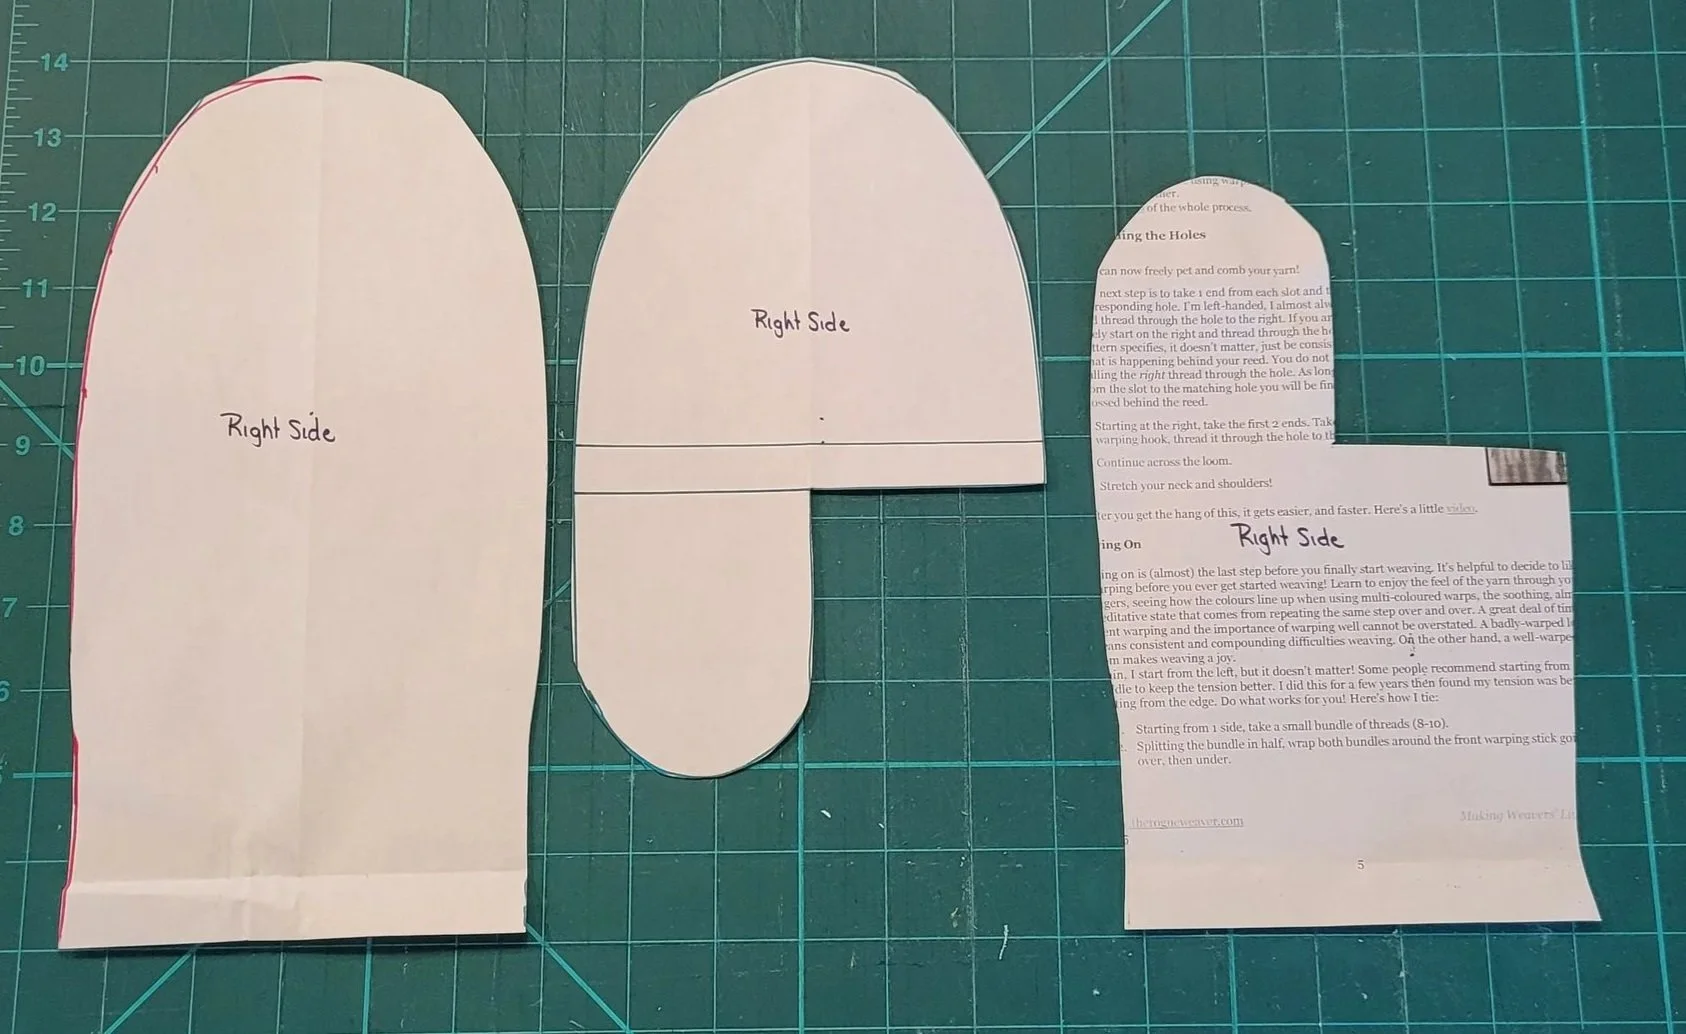
First, I traced around my hand, nice and big and smooth. This is the piece that will be on the back of your hand (Piece 1).
The front is made of 2 pieces, a top with a thumb, and a bottom with a thumb. To make the pieces, I folded the first piece in half, top to bottom. For the top half, I traced the top of the piece, then added a thumb pointing downward (Piece 2). For the bottom half, I traced the bottom of the first piece and added a thumb pointing upwards (Piece 3). The thumbs should both be the same size and about half as wide as Piece 1.
I’ve placed my pieces on a cutting mat so you can get an idea of the size.
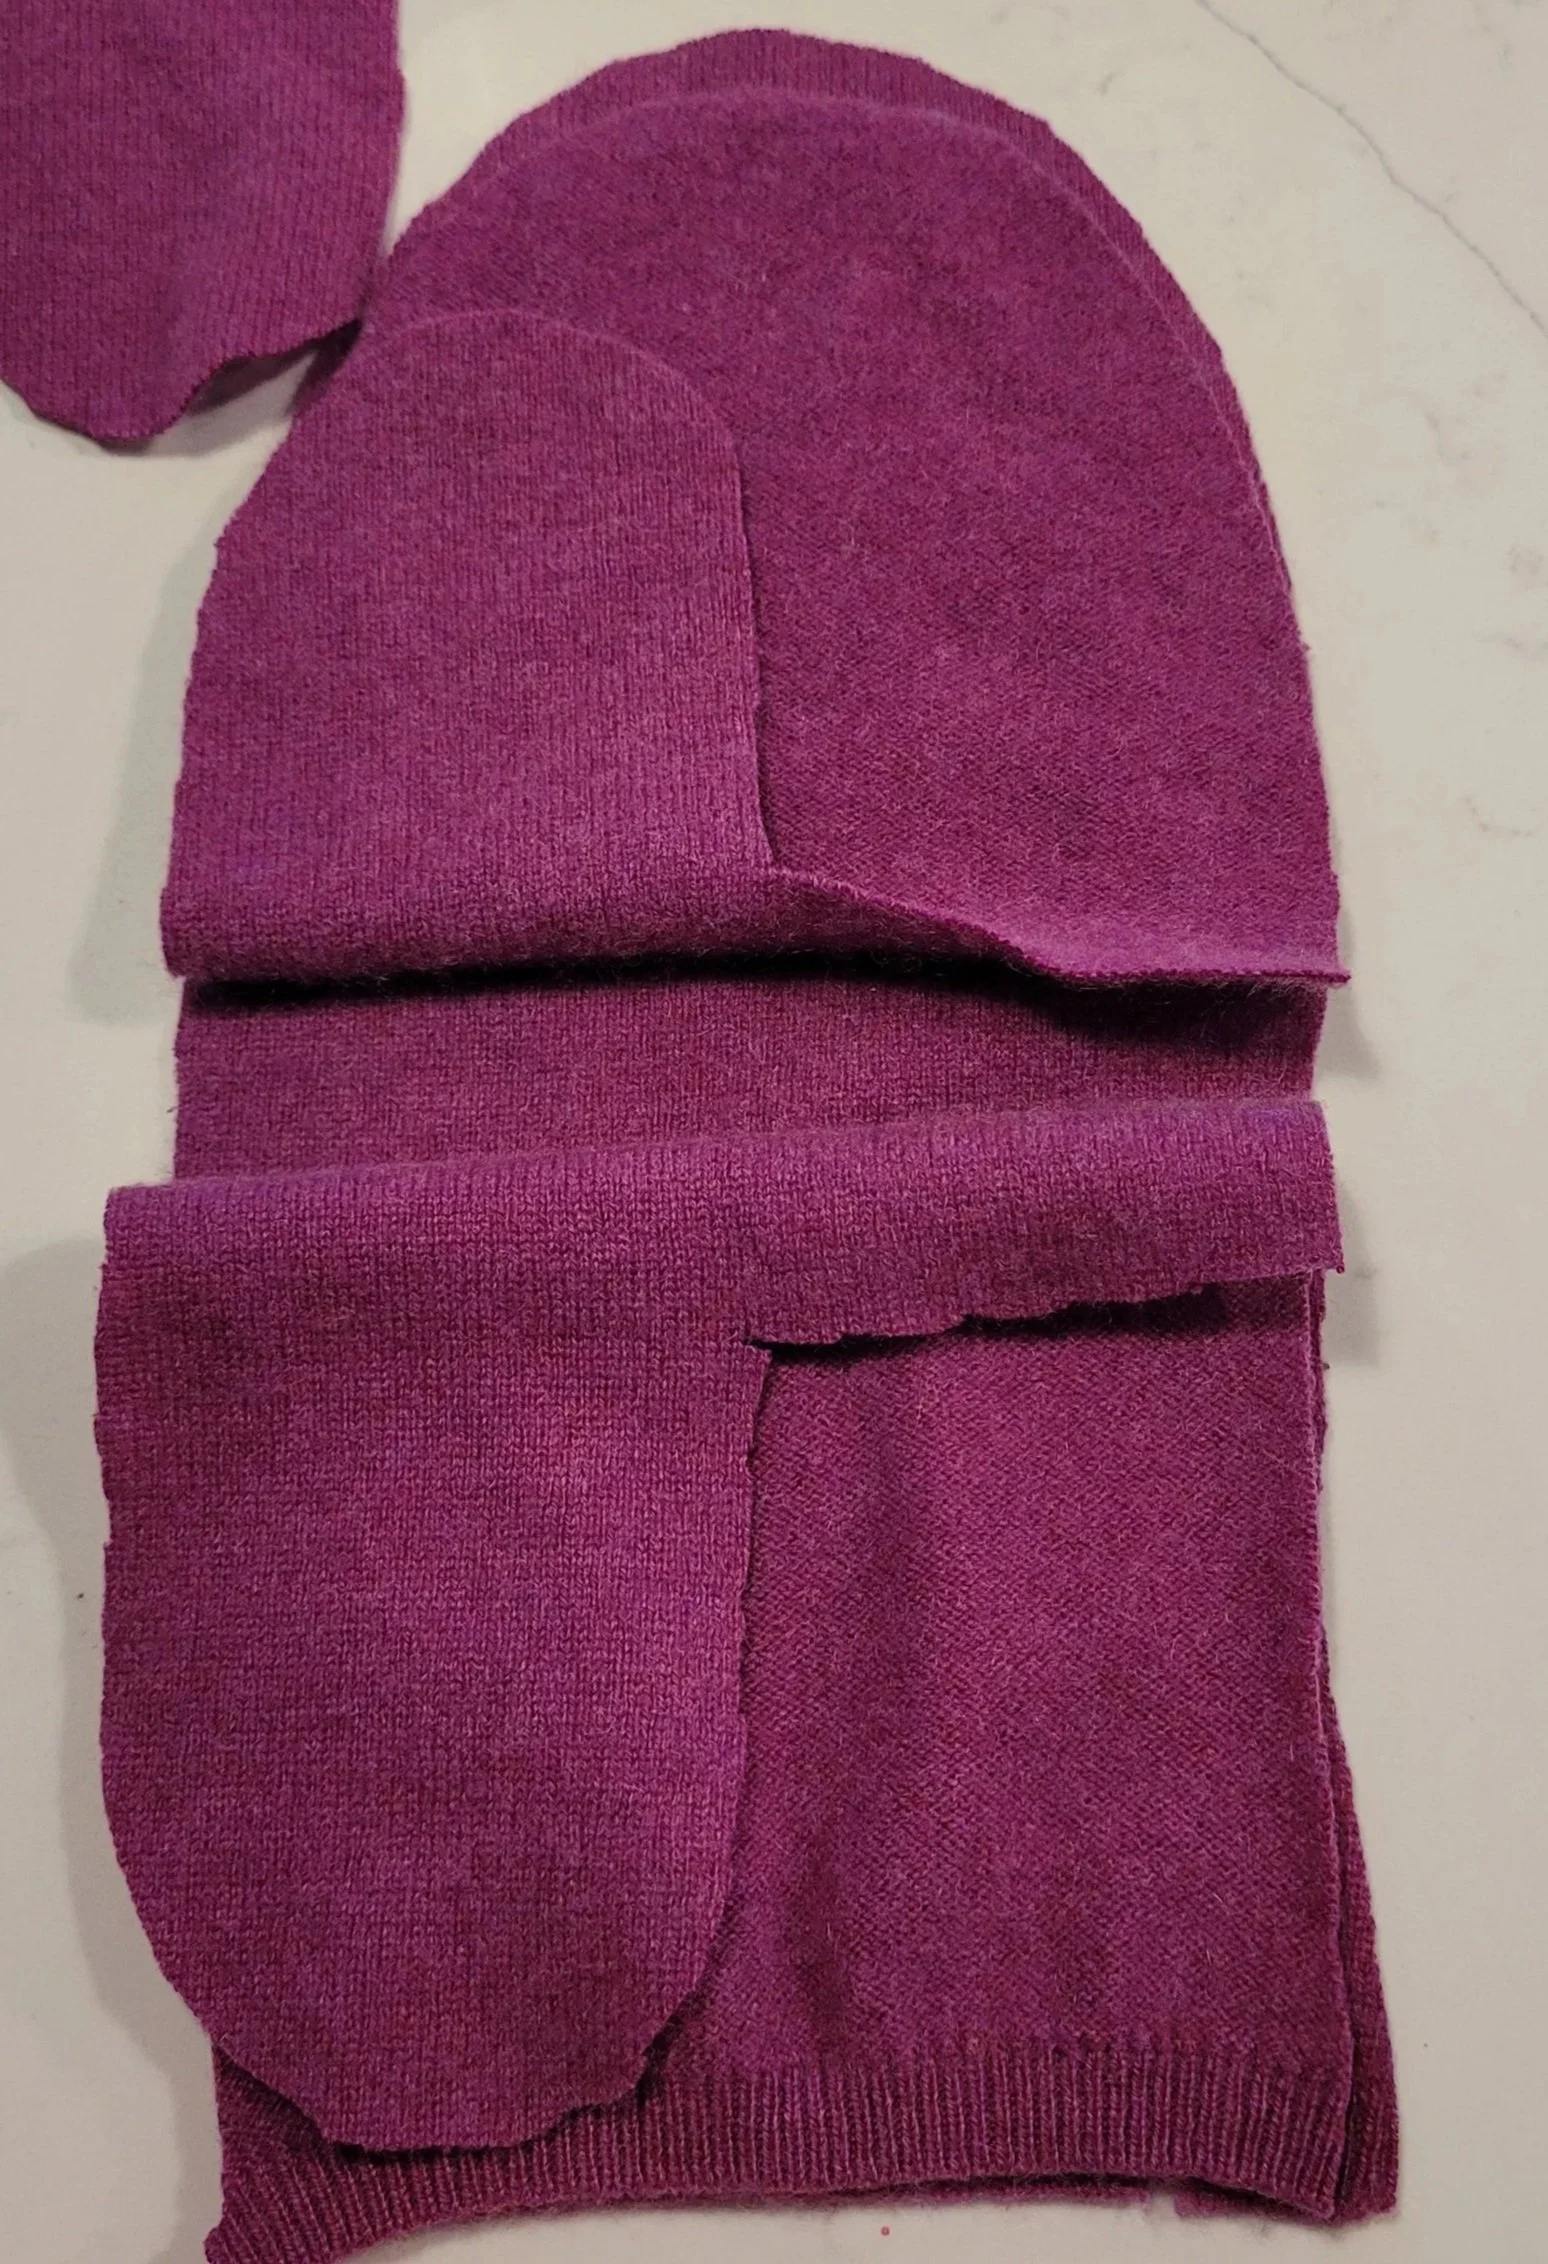
Cut out one set of from each fabric: if I’m correct, this will make a mitt for one hand, and a liner for the other!
Then, flip pattern Pieces 2 and 3 over and cut one set from each fabric. (If you’ve used fabric that is the same on both sides, if you mess this up, it will be ok. Trust me, I know!)
Begin by sewing the lining. This will get you comfortable with the sewing without risking the handwoven just yet!
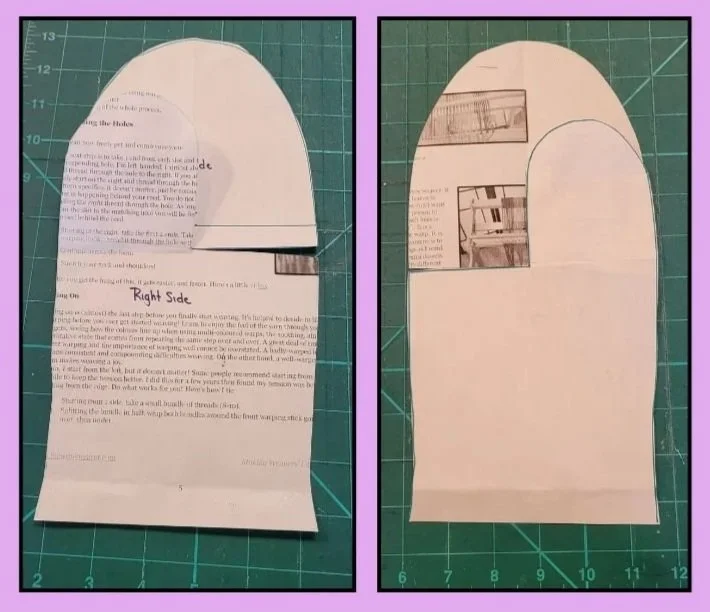
Start with the thumbs. Place Pieces 2 and 3 so that the thumbs are right sides together.
Sew across the palm of the hand, then up and around the thumb.
Still right sides together, lay the palm on top of Piece 1 and sew together…being sure to keep the thumb pushed to the palm so it does not get sewn to the side of the mitt!
When I sewed my pieces I sewed a straight stitch across the palm and thumb, then followed that with my serger. When I sewed the palm to Piece 1, I just used the serger.
This is your liner!
Sew the second liner so the thumb is on the other side. In this picture the thumb is on the left…place the pieces so the thumb will be on the right.
Sew your handwoven fabric the same as the liners. Once you have sewn the first mitten with your handwoven, turn it right side out and check the seams. I noticed a couple of spots where I hadn’t caught quite enough of the fabric, particularly where the thumb met the palm. If you have a serger, you will love it! I recommend not using the blade for the palm and thumb. I also serged the bottom edges of the handwoven pieces.

If you are using a regular sewing machine, using an overcast stitch will help finish your seam…or try a close zigzag stitch.
Before you sew the second mitt, be sure you have the pieces correctly aligned so you do not end up with 2 left mitts!
Press everything. Do your best to press the seams. It is amazing how much better your mitts will feel after pressing (my husband commented - without prompting - how much better the mitten felt the second time I made him try it on and he had no idea I had pressed it). Don’t skip pressing!
Now you can put the pieces together! Slide the liner into the outer mitt with the wrong sides together. Get your hand in there and wiggle things around until the seams line up. I found being sure the side seams were lined up helped.
Now you need to sew the bottoms of your mitten. Here you have options! For the mitts that I used the sweater, the bottom of the liner was the ribbed edge. I simply folded it over the woven mitt to the right side and sewed it in place. For the jersey knit, I folded the woven edge to the inside and sewed in place. If my serger thread had matched the fabric, I could leave it as is. Since it didn’t, I’ll probably sew a contrasting inkle band to hide the edge. Finally, you can turn in both edges of both fabrics and sew in place, followed by a row of top-stitching
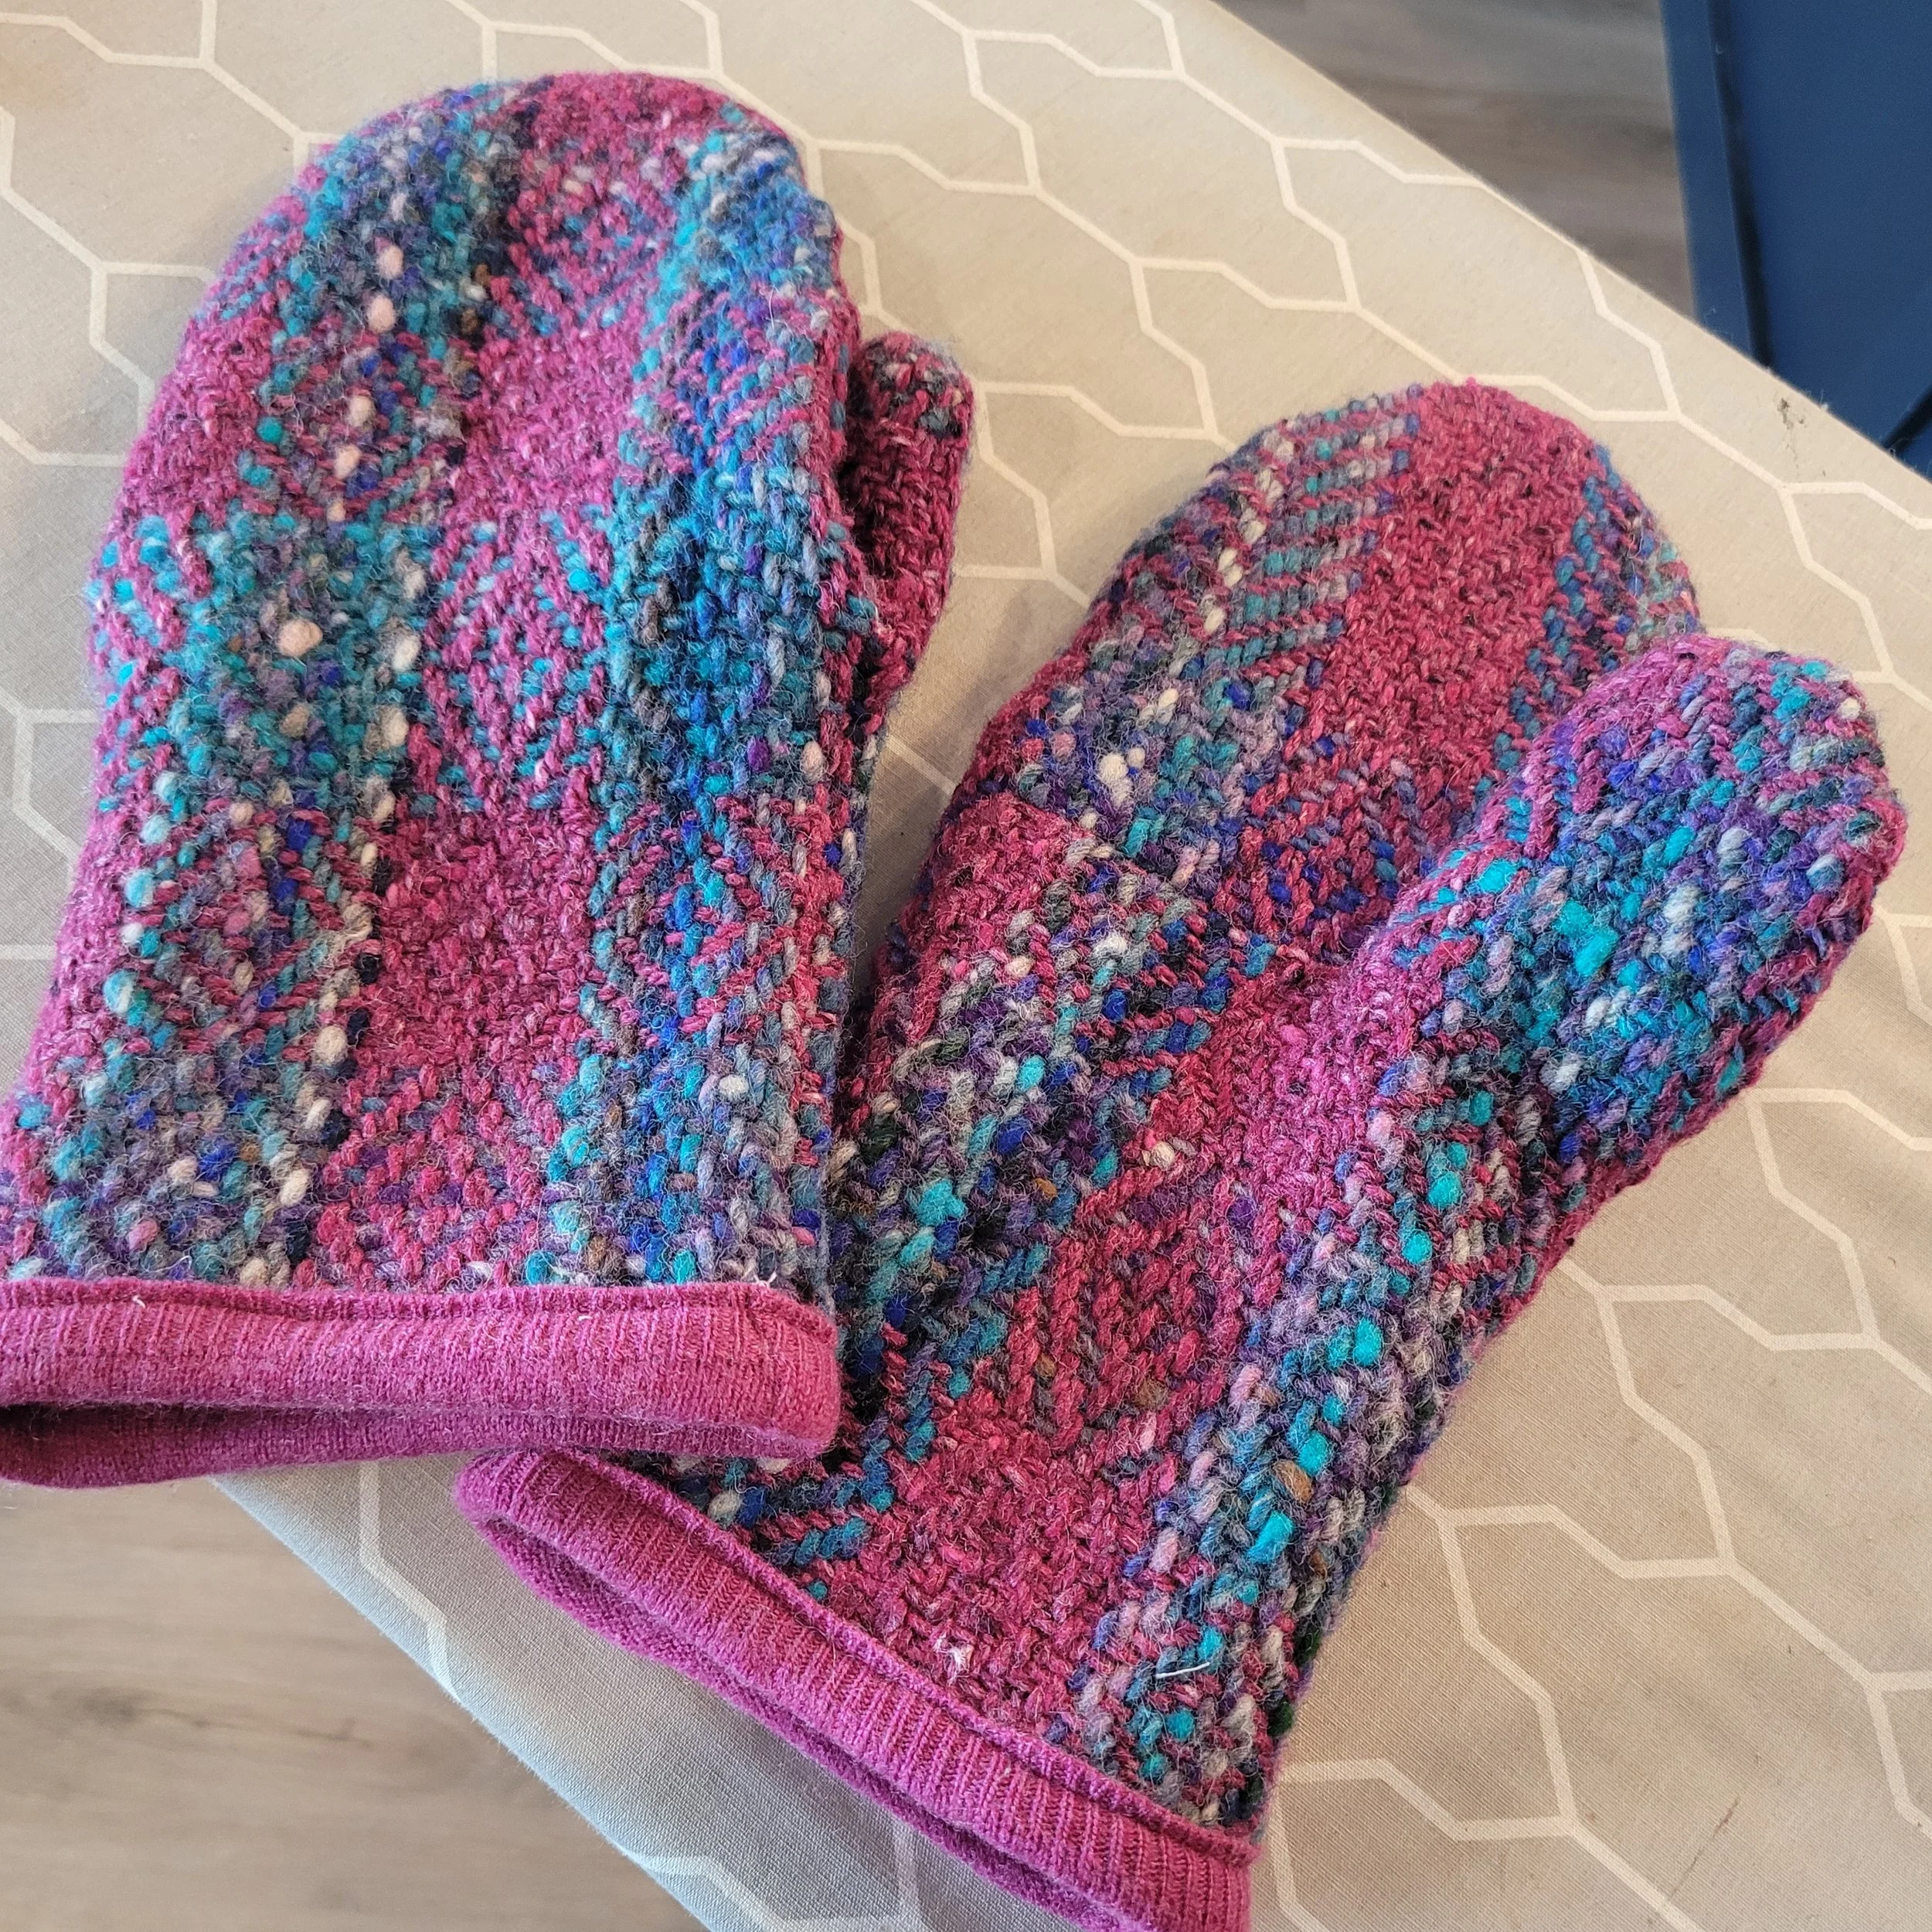
I had fun with these mitts! They are super warm, pretty easy to sew (it took about 2 hours to draft the pattern and sew 1 pair) and was a great way to use up some projects I had woven that were serving no purpose. Plus I had everything I needed without a trip to buy “just one more thing” and I got to practise my sewing skills (sewing smooth curves is harder than you think); and I have a couple of gifts ready for Christmas!
Just a final note…I think I will add a little bit of elastic to the back of the hand running at about wrist level and from side seam to side seam. I like a slightly-fitted cuff…and the mitts will look less like oven mitts!